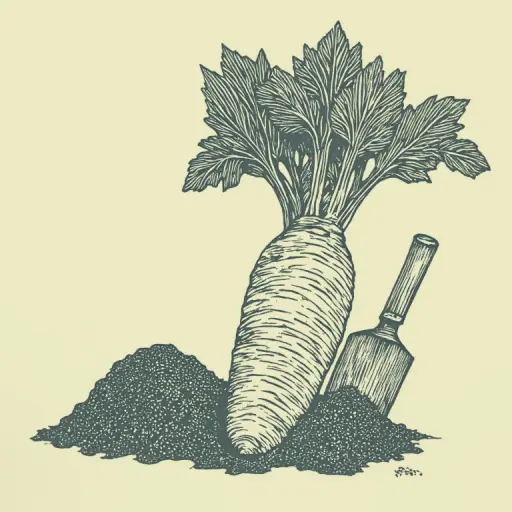
Growing Daikon: From Sowing to Bountiful Harvest
- 15 min read
- 73
Daikon, or Japanese radish, is rapidly gaining popularity in our vegetable gardens, and rightly so. Unlike common black radish, Daikon contains practically no pungent oils. This gives it a surprisingly tender, juicy flavor that is completely free of sharp bitterness. People with sensitive stomachs can incorporate it into their diet without worry.
In addition to its excellent taste properties, this root vegetable is a true superfood:
- Rich in Vitamin C and phytonutrients, which strengthen the immune system and help ward off colds.
- Contains active enzymes that break down starch and improve digestion.
- Low in calories, but rich in potassium, calcium, and fiber, which help cleanse the body.
This unpretentious Asian delicacy can be grown even by beginners in the garden, provided they know the basic agronomic rules.
Section 1. Preparing for Cultivation: Choosing Time, Location, and Seeds
The successful cultivation of juicy and large Daikon begins long before the first seeds go into the soil. This Asian crop has a demanding nature: it is sensitive to day length, soil composition, and seed quality. To avoid annoying mistakes such as premature bolting or the bending of the root vegetables, it is important to organize the starting phase correctly. Thoughtful planning protects you from disappointment and guarantees an excellent germination rate. In this section, we will go through the key preparation steps that lay a solid foundation for a rich harvest on your property.
1.1. Determining the Optimal Planting Time: Spring VS Autumn
Success in growing Daikon depends directly on the day length. Like all cruciferous vegetables, this is a long-day plant: with a light duration of more than 13–14 hours per day, it tends to flower, thus skipping the phase of forming the juicy root vegetable.
- Spring Planting (April – Early May): Occurs immediately after the soil warms up to +8 °C. Suitable for an early summer harvest. It is important to choose ultra-early varieties, as the Daikon would bolt upon the arrival of the June heat and long days. This harvest is not suitable for long-term storage.
- Late Summer/Autumn Planting (Mid-July – Early August): Ideal time for most regions. The day length decreases, which stimulates the active filling of the root vegetable rather than the growth of the foliage. The autumn harvest is characterized by juiciness and stores excellently throughout the winter.
For a guaranteed result and winter provisions, you should focus on the second half of summer as the main planting season.
1.2. Ideal Bed: Soil Preparation and Crop Rotation (Fertilizer, Structure)
Daikon is demanding regarding soil structure, as its long roots penetrate deep into the earth. The ideal variant is light, loose loamy soil or sandy soil with a neutral pH (pH 6.0–7.0). If the soil is heavy, you must incorporate sand and peat underneath.
Crop Rotation Rules:
- Best Successors: Potatoes, tomatoes, cucumbers, pumpkins, legumes.
- Worst Successors: Cabbage, radishes, beets, and other cruciferous vegetables.
Bed Preparation and Fertilization:
Dig the soil to a depth of at least 35–40 cm. Sprinkle 3–5 kg of compost or manure per square meter, 30–40 g of triple superphosphate, and 20 g of potassium sulfate. The use of fresh stable manure is strictly forbidden—this causes the root vegetables to branch and degrades their flavor.
1.3. Variety Selection and Calculation of Planting Material (Seeds vs. Seedlings)
Success in growing Japanese radish depends directly on the correct variety selection and planting method.
Seeds or Seedlings?
Daikon is extremely sensitive to any damage to the root structure. For this reason, the optimal choice is direct sowing of seeds into the open field soil. Growing from seedlings is only justified in regions with a short summer to achieve an early harvest. In this case, the seeds are sown exclusively in individual peat pots or trays to avoid damaging the main root during transplanting.
Popular Daikon Varieties for the Garden:
- Early Maturing (40–50 days): “Sasha” (round, resistant to bolting), “Minowasi” (long, very juicy).
- Medium Maturing (50–70 days): “Dubinushka,” “Dragon” (high yields and excellent flavor).
- Late Maturing (over 70 days): “Elephant Tooth” (best choice for long winter storage).
Calculation of Planting Material:
For a standard bed with a planting pattern of 30x60 cm, you need about 1.5–2 grams of seeds per square meter. 2–3 seeds should be sown in each mulch hole to ensure germination, and then the strongest seedling is left.
Section 2. Growth Phase: Sowing and Care of Seedlings
Once the high-quality seeds are selected, the most important phase begins—the realization of the plans. The correct start determines not only the freshness of the sprouts but also the future shape, juiciness, and size of the root vegetables. Daikon is a sensitive crop that reacts to any errors at the beginning of the growing season.
In this section, we will go through the practical steps to transform the seeds into vigorous seedlings. You will learn how to sow correctly, create optimal conditions for young plants, and gently care for the plants in the bed during their first weeks of life.
2.1. Rules for Sowing and Planting Daikon Seedlings (Depth, Pattern, Spacing)
The correct sowing is the foundation for forming uniform and large root vegetables. Daikon is most often sown directly into the open field soil because its stable root system is extremely sensitive to damage. If you use the seedling method, you cultivate the sprouts exclusively in individual peat pots or trays to transplant them into the bed without damaging the root ball.
Sowing Pattern and Depth:
- Seed Depth: 2–3 cm. Sowing too deep delays germination; sowing too shallow leads to seed desiccation.
- Spacing Between Plants in the Row: 20–25 cm (up to 30 cm for giant varieties).
- Between-Row Width: 40–60 cm. This ensures sufficient nutrient area and facilitates subsequent mulching.
When direct sowing, 2–3 seeds are placed in each mulch hole. Before covering, the soil must definitely be sprayed with water and the soil surface lightly compacted so that the seeds do not sink too deep. After sowing, the bed is covered with a thin layer of peat or compost to retain moisture.
2.2. Care of Seedlings: Thinning and Hardening Off (Maintaining Health)
After germination, it is important to thin (remove) them in time. If several seedlings grow in a pot or cell, leave the strongest one and carefully cut the others off near the ground with scissors. Do not pull them out, so as not to damage the sensitive root structure of the remaining seedling.
10–14 days before transplanting outdoors, one begins to harden off the young plants. For this, the containers are placed on a glazed balcony or veranda. Start with 1–2 hours per day at a temperature of about +12…+15 °C and gradually increase the time outdoors to full days. This protects the plants from a temperature shock during transplanting.
2.3. Care Outdoors: Watering, Loosening, and Mounding the Root Vegetable
After the Daikon has been transplanted into the bed area, care is based on three most important rules:
- Regular Watering. Daikon requires consistent moisture. Water the beds 1–2 times per week (Calculation: 8–10 l of water per 1 m²). In drought, increase the frequency, as water deficits make the root vegetable bitter and fibrous, and strong moisture changes lead to cracking.
- Aeration and Loosening. After every watering or rain, gently loosen the inter-rows. To avoid damaging the sensitive skin of the growing Daikon, instead of deep weeding, you can gently poke the soil around the plants with normal garden forks.
- Mounding. As the growth begins, the long root vegetable starts to protrude above the soil surface (sometimes up to one-third of its length). You must mound the plants: In the sun, the exposed part turns green, hard, and loses its flavor quality.
Section 3. Systemic Protection: Protecting Daikon from Pests and Diseases
Even with ideal watering and regular mounding, the juicy leaves and delicate root vegetables of the Daikon remain a rich target for pathogens and insects. The mustard family, to which the Japanese radish belongs, attracts many specific pests that can destroy young shoots within a few days or impair the commercial quality of the ripening harvest.
To avoid losing the results of your work, the gardener needs a well-thought-out prevention system. The timely detection of threats and the combination of gentle home remedies with modern biopreparations help to reliably protect the beds without endangering the ecological purity of the future harvest.
3.1. Typical Problems: Pests (Mustard Fly) and Diseases
The biggest threat to young Daikon shoots is the mustard fly. These small jumping beetles can turn juicy leaves into a sieve within a few days, leading to the death of the still weak seedling. Other dangerous pests include cabbage flies, snails, aphids, and swallowtail larvae.
The most common diseases that affect Daikon are:
- Bacterial diseases (slimy and vascular) (Root rot, discoloration of leaf veins);
- Kila (Growths on the roots, wilting);
- Black stem (Discoloration of the stem near the soil in young plants);
- Mosaic (Incurable viral disease that manifests as spotting on the leaves).
The timely discovery of the first signs of infestation is the key to saving the entire harvest.
3.2. Prevention No. 1: Organic and Home Remedies (Infusions, Tobacco Dust)
Proven home remedies are excellent for protecting the delicate Daikon shoots from mustard fly and snails. They are harmless to health and allow for an ecologically pure harvest.
- Dusting with a mixture of ash and tobacco dust. Mix these in a 1:1 ratio and sprinkle them on the beds every 10–14 days and after every rain. This reliably repels the fly.
- Infusion of hot pepper. Pour 5 hot chili peppers into 1 liter of hot water, let it steep for 12 hours, dilute it in 10 liters of water, and spray the plants against swallowtail larvae.
- Protective barriers. Surround the bed with shallow trenches sprinkled with wood ash or crushed eggshells to block the path of snails.
- Companion plants. Sowing marigolds at the edge of the bed repels cabbage flies and aphids.
3.3. Prevention No. 2: When and How to Use Complex Fertilizers and Preparations
If home remedies are not sufficient in the case of a mass infestation of pests or the first signs of diseases (such as bacterial diseases or black stem), specialized preparations are used.
For protection against diseases in early stages, biofungicides (“Planriz,” “Fytosporin,” or “Binoram”) are effective. They are environmentally friendly and strengthen the immunity of the plants. If mustard fly or cabbage fly threaten to destroy the shoots, the use of insecticides (“Actara,” “Decis Profi”) is justified, but this must be strictly before the start of active root formation.
In parallel, complex fertilizers are used (e.g., “Ideal” or balanced NPK mixtures). A strong, well-nourished plant defends itself much more successfully against all pathogens and climatic stress factors.
Section 4. Harvest Use: Nutrition and Optimal Growing Conditions
After the plants have been protected from diseases and pests, it is important to focus on the essentials: creating conditions for the active filling of the root vegetables. Daikon is known for its juiciness and tender texture, but it is impossible to achieve the ideal flavor without the right balance of nutrients and moisture. Even the best varieties can become hard or bitter if the plant suffers from nutrient deficiency or the whims of the weather.
In this section, we examine how to correctly create the fertilization plan in different growth phases, which temperature and moisture parameters are crucial for the Japanese radish, and how to minimize the consequences of weather stress to maintain the commercial quality of the harvest.
4.1. When and With What to Fertilize Daikon (Fertilization According to Growth Phase)
Daikon does not require excessive feeding, but timely fertilizer application guarantees the formation of large and juicy root vegetables. The fertilization schedule is divided into two key phases:
- First Fertilization (Phase with 2–3 true leaves, immediately after thinning). During this time, the plant requires a moderate stimulus for leaf mass. An application of fermented grass (1:10 dilution) or a weak ammonium nitrate solution (10–15 g per 10 l of water) is optimal.
- Second Fertilization (Root development phase, 3–4 weeks after the first). In this phase, nitrogen is completely omitted to prevent cavities in the roots and excessive leaf growth. Potassium-phosphate fertilizers are applied: ash leachate (2 cups of ash per bucket of water) or potassium sulfate (15–20 g per 10 l of water).
Important: Never apply fresh manure under the Daikon – this leads to root branching, degrades flavor, and impairs storage life.
4.2. Optimal Conditions for Maximum Juiciness of the Root Vegetable (Temperature, Humidity)
The juiciness and tender texture of the Daikon depend directly on the water balance and air temperature. The optimal temperature range for forming a high-quality root vegetable is between +15 °C and +20 °C. At temperatures above +25 °C combined with dry air (humidity below 60 %), growth slows down, the flesh becomes tough, the fibers woody, and an unpleasant bitterness develops.
To maintain ideal juiciness, follow two rules:
- Stable Soil Moisture: The soil must be evenly moist to a depth of 30 cm. Sudden fluctuations from dryness to heavy watering inevitably cause cracking in the root vegetables.
- Regular Watering: In moderate weather, water the beds every 4–5 days (calculation: 10 l per 1 m²); in heat, water every 2–3 days, preferably in the evening.
4.3. What to Do in Climatic Stress (Temperature Fluctuations, Drought)
Climatic rollercoasters are the biggest enemy of juicy root vegetables. To protect the Daikon from stress, use proven agronomic methods:
- In Drought and Heat: Absolutely mulch the bed with straw or mown grass, applying a layer of 5–7 cm. This retains moisture in the soil and protects the roots from overheating. During the peak heat, install light shade nets to prevent premature flowering.
- In Sudden Cooling: Although mature plants can withstand short frost periods down to -6 °C, sudden temperature fluctuations degrade the flavor. Cover the bed with fleece (spunbond fabric). This smooths out daily temperature swings and maintains the tenderness of the flesh.
Section 5. From Harvest to Storage: Harvesting and Reuse
Growing a juicy and large Daikon is only half the battle. Now the gardener faces an equally important task: harvesting in time and correctly, and preserving its freshness over long winter months. Mistakes in this phase can negate all previous agronomic efforts, as the tender flesh of the Japanese radish is extremely sensitive to mechanical damage and strong temperature fluctuations.
In this final part of our guide, we cover the key steps that will help you successfully conclude the season, minimize losses during digging, and ensure an ideal microclimate for the root vegetables during storage.
5.1. Determining the Harvest Time: How to Know When the Daikon is Ready to Harvest?
Determining the ideal time to harvest the Daikon is the key to its juiciness and storage life. Look for three main characteristics:
- Vegetation Period. For early varieties, this is 40–50 days after germination; for mid-season and late varieties, it is 60–80 days. Always compare with the characteristics of the planted variety.
- Appearance. The top of the mature root vegetable protrudes clearly above the soil surface (sometimes one-third of the length), and the lower leaves of the rosette begin to yellow and dry out.
- Weather Factor. The harvest must be completed before the first frosts. The above-ground part of the Daikon that freezes loses its flavor quality and is no longer storable.
5.2. Harvesting Technique (Preparing the Bed Before Harvest)
The correct preparation of the bed and careful extraction are crucial for the long-term storage life of the Daikon. Completely stop watering 2–3 days before the planned harvest: dry soil separates more easily from the casing, reducing the risk of mechanical damage and subsequent rot.
Since the Daikon root vegetables are very long and fragile, they must not be simply pulled from dry or heavy soil—they break easily. Use a gentle technique:
- Loosening: Gently loosen the soil with garden forks (not a shovel, to avoid accidentally cutting the vegetable) in a distance of 10–15 cm from the root vegetable.
- Removing: Gently lift the soil layer with the fork to release the pressure, and pull the Daikon gently from the base of the foliage straight up.
- Initial Drying: Let the dug-up vegetables lie directly on the bed for 2–3 hours. The soil dries off, and it can be easily wiped off with your hands. Washing the root vegetables before storage is strictly forbidden.
5.3. Storage Rules and Long-Term Storage of Daikon (Containers, Conditions)
After careful extraction, it is important to prepare the root vegetables correctly for storage. First, carefully cut off the foliage and leave the stems 1–1.5 cm long—this prevents the growth point from rotting. Do not wash the Daikon before storing; only lightly clean it of dry soil.
For the long-term storage of the Japanese radish, cellars or vaults with the following conditions are ideal:
- Temperature: 0 to +5 °C (optimal +1...+2 °C).
- Humidity: 85–90 %. If humidity is lower, the root vegetables wilt quickly and lose their juiciness.
- Storage Method: In wooden crates or plastic containers, with the layers filled with moist sand or sawdust.
In the house, Daikon can be stored in a vegetable basket in the refrigerator, wrapped in plastic bags with ventilation holes.
Table: Quick Checklist for the Ideal Daikon Cultivation Cycle
This visual checklist helps you systematize all phases of Japanese radish care and avoid common mistakes throughout the season.
| Cultivation Phase | Optimal Timelines and Conditions | Gardener's Key Actions |
|---|---|---|
| 1. Soil Preparation | 2 weeks before planting | Deep loosening, incorporating compost and ash. Avoid fresh manure. |
| 2. Sowing | July – Early August (Daylight < 12 hrs.) | Sow at a depth of 2–3 cm, spacing 30x60 cm. Thoroughly moisten the seeds. |
| 3. Care and Watering | Vegetative phase (30–40 days) | Water every 4–5 days, thin seedlings, mandatory hilling. |
| 4. Protection and Nutrition | Phase with 3–4 leaves | Dust with ash against aphids, fertilize with a complete fertilizer. |
| 5. Harvest and Storage | September – October (before frost) | Dig up with a hoe, trim foliage to 1.5 cm, store in boxes with sand. |