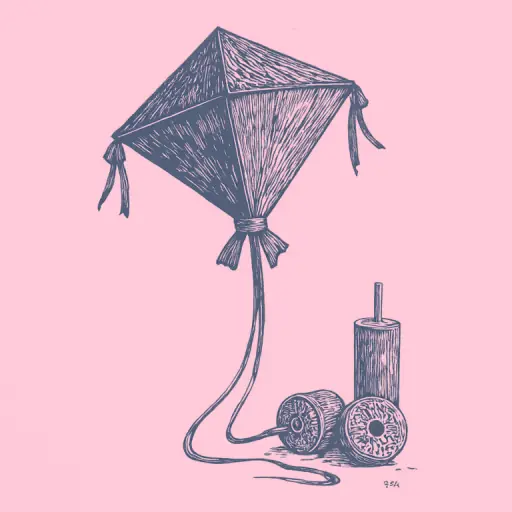
How to Assemble a Kite According to Instructions and Tie the Line Correctly
- 14 min read
- 61
Kite launching is one of the most vibrant and accessible family entertainments in the fresh air. However, the joy of buying a colorful kite is often overshadowed when it comes to preparing it for flight. Upon opening the package, many encounter a lack of clear assembly instructions, finding only a scattering of parts: flexible spars, synthetic fabric, the kite tail, and a spool with line.
How to correctly assemble the kite frame so it doesn't break in the first gust of wind? Where to insert the sticks and how to tie the line so that the structure soars high in the sky instead of spinning chaotically and falling to the ground? The secret to stable flight lies in the details—from the correct tensioning of the sail to the precise adjustment of the bridle attachment.
In this practical guide, we will thoroughly cover the entire process of preparing the flying apparatus. You will learn how to quickly assemble a purchased model and launch it in an open area on the first try.
Preparation for Assembly and Kite Structure
After determining that a kite is not just a toy but an engineering object requiring an understanding of its structure, it is time to delve into the details. To successfully assemble and launch a kite, you need to know what elements it consists of and how these parts interact. It is not enough to simply buy a ready-made set—you must understand the purpose of every component, from the frame to the line. This knowledge will help you not only avoid assembly errors but also understand why the kite behaves the way it does in flight. In this section, we will examine all the main parts you will find in the kit and learn about their functions.
What a Kite Consists Of: Main Parts and Kit Contents
Before starting the assembly, it is important to understand the key elements that make up a kite. Modern purchased models, whether children's toys or more complex sports constructions, usually have a standardized set of parts. Knowing these components will help you not only assemble the kite but also understand how it will fly.
Main parts and their purpose:
- Frame (or spars): This is the skeleton of the kite. It is usually made of bamboo sticks, thin wooden, or plastic rods. The frame defines the shape and provides the necessary rigidity so that the sail does not sag in the air. Correct frame assembly is the key to stable flight.
- Sail (fabric): This is the "skin" of the kite. The sail can be made of synthetic fabric (nylon, polyester) or, in the case of homemade models, of light paper or plastic. It must be as light as possible so as not to add unnecessary weight, but strong enough to withstand tension.
- Tail (or stabilizer): The tail is not just decoration. It performs a critically important stabilizing function. The longer and better balanced the tail, the less likely the kite is to "dance" or enter a spin.
- Bridle (or attachment): This is a special element that connects the kite itself to the line. The bridle must be positioned at a point that ensures perfect balance so that the pull from the line does not shift the kite's center of gravity to one side.
- Line (string): This is the main thread that keeps the kite in the air. For flight, a strong but not too heavy line is necessary. Often, a special spool is attached to the line for ease of launching.
Understanding these five elements is the first step toward a successful flight. Each one plays a role: the frame holds the shape, the sail catches the wind, the tail stabilizes, the bridle ensures balance, and the line keeps it in the sky.
Material Overview: Frame, Sail, Line, and Spool
The choice of materials determines how easily your kite will take off and whether it will survive inevitable crashes. Modern purchased models use light and durable polymers, while for homemade constructions, accessible household items are chosen.
| Element | Material in Purchased Models | Material for DIY Projects | Properties |
| :--- | :--- | :--- |
| Frame | Fiberglass, carbon fiber | Bamboo rods, pine splints | Lightness, elasticity, breaking strength |
| Sail | Ripstop nylon, polyester | Dense polyethylene, canvas, paper | Impermeability, moisture resistance, strength |
| Line (string) | Nylon, polyester braid | Strong canvas threads, fishing line | Tear resistance, non-stretch |
| Spool | Plastic (ring or launcher spool) | Wooden plank, cardboard bobbin | Ease of winding, preventing tangles |
When choosing a purchased kite, prefer a sail made of reinforced nylon (ripstop)—it is easily recognizable by its characteristic fine checkered texture, which prevents the fabric from tearing when accidentally cut. The line spool also plays an important role: a quality line should not stretch under load, and a convenient plastic spool will prevent knots when quickly unwinding the line.
Step-by-Step Guide to Assembling a Purchased Kite
So, we have covered the materials and understood what an ideal kite consists of. But theory is only half the battle. The real magic begins with practice. In this section, we will turn a set of parts into a complete flying marvel. We will go through all the assembly stages, starting from creating a strong frame and ending with securing all necessary elements for flight. Don't worry, even if you have never assembled a kite before—our step-by-step instructions are maximally clear and will help you assemble a model that corresponds to any instruction, whether purchased or more complex, requiring modification.
We will learn not just to assemble the kite, but to assemble it so that it is ready for a stable and beautiful flight. Therefore, pay attention to the details: correct insertion of the sticks, secure attachment of the tail, and final checking of the fabric tension—all of this is critical for success. By following our advice, you will get not just a beautiful toy, but a reliable flying apparatus that will delight you and your friends in the sky.
Where to Insert the Sticks: Frame Assembly and Securing Spars in Slots
Lay the kite fabric on a flat surface with the wrong side up—this is usually the side without a pattern, where the attachment points are located. The kite frame consists of strong and flexible rods that provide rigidity to the entire structure.
Our step-by-step assembly guide will help you connect all the parts quickly and correctly:
- Installing the longitudinal spar. Take the longest guide strip and carefully thread it through the central fabric sleeve along the body of the kite. Secure its ends in the upper and lower stop pockets.
- Mounting the transverse spar. The transverse spar is responsible for the lateral tension of the wings. Insert one end of it into the special plastic groove (or tight pocket) on the left edge of the wing.
- Creating tension. Gently bend the spar into an arc and guide its second end into the right plastic groove. Do not be afraid of moderate bending—modern fiberglass spars are designed for such elastic deformation. It is this bend that gives the canopy its correct aerodynamic shape.
Ensure that all spars are fully seated in the grooves and that the fabric is stretched evenly, without distortion.
Attaching the Tail and Checking Fabric Tension
Once the frame is securely fixed in the grooves, we move on to installing the tail and performing a final check of the structure. The kite's tail is not just a decorative element but a crucial flight stabilizer. Without it, the toy will spin chaotically in the air and quickly fall.
How to properly attach the tail:
- Locate the attachment loop, Velcro, or plastic carabiner on the bottom of the kite (at the top of the canopy, pointing down).
- Thread the tail ribbon through the loop and secure it. In models bought from discount stores or sporting goods shops, a loop-to-loop fastening or a strong Velcro strap is most often used.
- Fully straighten the ribbon so that it is not twisted at the base.
Checking fabric tension:
- Gently pull on the edges of the sail. The fabric should be stretched evenly, without deep folds or sagging.
- Ensure that the transverse spar slightly bends the sail, creating the correct aerodynamic profile.
- Check that the corners of the sail fit snugly into the plastic grooves and do not slip in strong wind.
If the fabric is stretched symmetrically and the tail is secured strictly in the center, your kite is ready for line attachment.
How to Properly Tie the Line (Bridle) to the Kite
Once the frame is assembled and the stabilizing tail is securely attached, the most critical stage begins—connecting the kite to the bridle (control line). It is the correct attachment that determines whether your kite can catch the airflow or will helplessly plummet to the ground. An error at this stage is the main reason why even high-quality store-bought models refuse to fly.
The bridle is the link between the canopy and the reel. Proper load distribution and strong connections ensure that the structure can withstand strong gusts of wind, and that control remains obedient and predictable. Below, we will examine the subtleties of setting up this system and master the most reliable knots.
Setting Up and Adjusting the Bridle for Stable Flight
The bridle is the "steering wheel" of the kite. It determines the angle of attack (the angle of the canopy relative to the airflow), which dictates whether the structure will take off or fall like a stone.
In store-bought models (such as triangular ones), a ready-made two-point or three-point bridle with a metal ring or loop in the center is most often used. If you are building the kite yourself or adjusting a purchased one, follow these key adjustment rules:
- Symmetry: The left and right arms of the bridle must be exactly the same length. Even a minimal imbalance of a few millimeters will cause the kite to bank to one side and circle in place.
- Finding the Attachment Point (Angle of Attack): Hold the kite by the bridle connection point and lift it. Ideally, the plane of the kite should be at an angle of approximately 30–45 degrees to the horizon.
- Adjusting for Wind:
- In light wind, shift the bridle attachment point slightly closer to the kite's "nose" (by 1–2 cm). This reduces drag and facilitates takeoff.
- In strong wind, move the attachment point closer to the tail. This increases the angle of attack, making the flight more stable and preventing the wind from breaking the frame.
A correctly adjusted bridle ensures smooth pull without sudden jerks.
Reliable Knots for Attaching the Line to the Bridle and Reel
To prevent the line from coming undone in a strong gust of wind, a standard household knot will not suffice—under load, it will either slip or tighten rigidly. For reliable mounting, use two simple and effective knots.
1. Attaching the line to the bridle: Lark's Head Knot
This is the most popular method in kite flying. It allows for quick connection and disconnection of the line from the bridle without deforming the thread:
- Fold the end of the line in half and tie a standard figure-eight or simple knot to create a strong, fixed loop of 5–7 cm.
- Thread your fingers inside this loop, grasp the main line, and pull it out—you will form a sliding double loop.
- Drape this loop over the kite's bridle attachment point and tighten. The harder the wind pulls the kite, the more securely this connection holds.
2. Attaching to the reel: Self-Locking Knot
To prevent the line from spinning on the smooth plastic of the reel during full unwinding, secure it at the base:
- Wrap the free end of the line around the reel axis.
- Tie the working end around the main line with a simple slip knot.
- At the very tip of the line, make a small stopper knot that prevents the loop from loosening under tension. Tighten the loop onto the spool.
First Launch and Troubleshooting Common Issues
Once the frame is assembled and the line is securely attached to the bridle, the most exciting moment arrives—launching the kite. However, even when following instructions precisely, beginners often encounter situations where the seemingly obedient structure refuses to fly, banks sideways, or begins to spin chaotically in the air.
Do not get discouraged: in most cases, the problem is not a defect in the toy, but a subtle imbalance adjustment or an incorrectly chosen spot. Before sending your kite on its first high flight, it is important to understand its behavior and prepare for potential wind whims.
Why the Kite Spins and Falls: Correcting Assembly Errors
If your kite stubbornly refuses to fly straight, circles in place, and dives downward, do not despair. Most often, the cause lies in minor assembly inaccuracies that can be easily fixed right at the launch site.
Here is a checklist for quick error correction:
- Frame Asymmetry. Check whether the crossbar is installed straight and whether it has fully entered the side plastic slots. If the kite frame is skewed by even half a centimeter, the aerodynamics will be compromised, and the toy will tip to one side.
- Bridle Center Shift. Incorrect bridle attachment is the main cause of uncontrolled spinning. The point to which the line from the spool is tied must be strictly on the central axis of symmetry. If the knot has shifted left or right, carefully move it and secure it.
- Insufficient Stabilization. If the kite takes off but performs chaotic loops, it lacks balance. The kite tail is responsible for this. Try lengthening it or adding a small weight to the tip (for example, tying an extra knot or attaching a ribbon). The tail works like a ship's keel, leveling the flight during wind gusts.
By correcting these minor assembly flaws, you will restore stability to the structure in the air.
Safety Rules for Launching in Open Areas
Once the structure is checked and tuned, it is important to choose the right location and observe safety precautions. Launching in an open area is not just a recommendation for catching good wind, but also a guarantee of the safety of those around you and the preservation of your equipment.
Here are the key rules that will protect you from trouble during flight:
- Stay away from power lines (PLs). This is the most important safety rule. If the kite gets caught on the wires, under no circumstances should you try to remove it yourself. Wet thread or line can act as an electrical conductor.
- Choose spacious areas. Beaches, fields, clearings, or recreation areas without trees or poles are ideal. Trees are the main "eaters" of kites; a kite tangled in branches is practically impossible to retrieve without damage.
- Avoid roads and crowds. Do not launch the kite near busy highways, railways, or playgrounds. A sudden fall of the structure can cause an accident or injure passersby.
- Protect your hands. In strong winds, the spool can rotate at tremendous speed. Never catch the taut line with bare hands while the line is rapidly unwinding—this is prone to serious cuts and burns. For controlling large models, it is better to use protective gloves.
- Do not launch the kite during a thunderstorm. Wet line during thunderstorm activity turns into a lightning rod, which is deadly for the pilot.
Adhering to these simple recommendations guarantees that your launch will go smoothly and bring only positive emotions.
Conclusion
Kite flying is not just a fun pastime, but a true applied craft that unites generations. Now that you have thoroughly studied how to assemble the frame, correctly secure the crossbar in the plastic slots, and reliably tie the line to the bridle, your first flight is sure to be a success. Assembling a store-bought model or building a kite yourself is the first step toward mastering the aerial element.
Do not be discouraged if the toy does not fly perfectly from the first second. Controlling air currents requires a little practice and patience. The main thing is to catch the right wind, follow the safety rules in open areas, and not be afraid to experiment with bridle adjustments.
Final checklist before launch:
- Structural Strength: Check if the bamboo spars are tightly seated in the slots and if the canopy is taut.
- Joint Reliability: Ensure the spool is securely connected to the bridle.
- Balance: Check whether the kite tail is fastened straight, as it is responsible for stability in the air.
We wish you clear skies, favorable winds, and bright emotions from the flight!