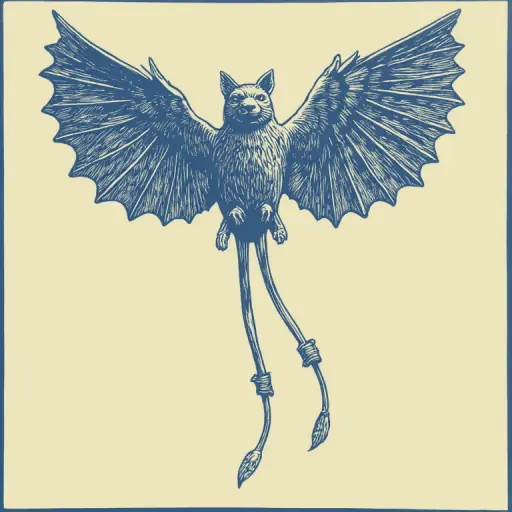
How to Assemble a Bat Kite and Prepare It for First Flight
- 10 min read
- 66
For a successful start, you will need not only the kite itself but also a complete set of auxiliary equipment. If you purchased a ready-made set, carefully study the included instructions. If you are making the kite yourself, ensure you have all the necessary components: a light but sturdy frame (spars), covering material (fabric or film), threads of various thicknesses, a bridle, and, of course, line with a reel.
What to check before assembly:
- Frame: All spars must be intact and correctly shaped like a bat. Check the connection points—they must be securely fastened to withstand wind tension.
- Straps and Bridle: Ensure that the straps (threads running from the frame to the bridle) are the correct length and are attached to the frame at the specified points. This is critically important for flight stability.
- Tail: The tail must be attached to the rear of the kite and have sufficient mass and length to correct the trajectory. It often functions as a rudder.
Remember that the quality and correct attachment of these elements directly affect how the kite will behave in flight.
1. Preparation and Materials: Choosing the Shape and Components
So, we understand that creating our "Bat" kite requires not only imagination but also the right set of tools. Before starting the assembly, it is important to figure out exactly what materials we will need and to consider the options: should we buy a ready-made model or is it better to make it ourselves? This stage will lay the foundation for stable flight, so study all the details carefully.
We will look at both a basic list of necessary components and various approaches to manufacturing so that you can choose the optimal path for your first flight.
1.1. What is needed for assembly (Materials and Tools)
To make the assembly of the "Bat" kite easy and quick, prepare all necessary components in advance. Depending on whether you are assembling a ready-made store-bought set or creating the kite yourself, you will need a basic set of materials and tools.
Main Materials:
- Sailcloth — durable, lightweight nylon (ripstop), polyester, or thick polyethylene film.
- Frame — thin wooden spars (bamboo, pine) or modern carbon fiber tubes with a diameter of 3–4 mm.
- Bridle and Straps — strong nylon thread, line, or special braided tow line.
- Reel — a convenient winding mechanism for holding the kite and adjusting flight altitude.
- Tail — polyethylene strips or light fabric, 2 to 5 meters long, for in-air stabilization.
Tools for Work:
- Scissors and a utility knife.
- Strong tape (reinforced or double-sided) for securing parts.
- Ruler and marker for precise frame marking.
1.2. Kite Types: From Buying to DIY
The choice between a purchased and a homemade kite depends on your experience, time, and desired level of detail. Both options have their advantages, and we will examine them so you can choose the perfect one for yourself.
🪁 Purchased Models: Simplicity and Reliability
If you are a beginner or want to quickly achieve a ready, stable result, it is best to purchase a kite from a specialized store. Modern commercial models, including bats, have already gone through testing and guarantee basic maneuverability. The main thing to look for when buying is the completeness of the set: all necessary straps, bridles, and, preferably, a detailed assembly instruction should be included. This will save you time and minimize the risk of errors at the start.
- Pros: Ready-made construction, tested aerodynamics, minimal risk of errors.
- Cons: Less creative freedom, potentially higher cost.
🛠️ DIY Constructions: Creativity and Individuality
Creating a kite yourself is an exciting creative process that allows you to fully realize your imagination. You can experiment with sizes, materials, and even add unique decorative elements, turning the kite into a true work of art. For a bat, this can be an ideal opportunity for modelers.
Tips for DIY Projects:
- Frame: Use light but strong materials (such as bamboo spars or thin plastic rods) to create the skeleton. The memory of the bat's shape must be as accurate as possible to ensure the correct flight profile.
- Sailcloth: Choose light but durable fabrics (such as special aerogrip or thin chiffon). Avoid heavy materials that will reduce lift.
- Control: Do not skimp on control elements (straps and bridle). These determine how stable and maneuverable your kite will be. Always follow the principle: the more complex and precise the construction, the more carefully the control system must be thought out.
Conclusion: If your goal is simply to enjoy the flight, buy a pre-made one. If, however, you want to go from idea to realization and master modeling skills, feel free to base your project on a DIY approach.
2. Step-by-Step Body Assembly: From Kit to Finished Product
So, we have determined the materials and chosen the approach: purchased or homemade. Now comes the most interesting part—turning a set of parts into a complete, flight-ready apparatus. Assembly requires attention to detail, because it is the correct connection of the frame and control elements that determines how stably and beautifully your kite will soar. We will go from the basic shape to the installation of all critical nodes.
2.1. Creating the Frame and Basic Bat Shape
Lay the "bat" sailcloth on a flat surface, wrong side up.
- Longitudinal Axis: Insert the central guiding spar into the top and bottom slots until it stops.
- Wings: Thread the flexible side spars through the wing pockets.
- Stiffener: Connect them in the central plastic connector so that the fabric is pulled taut, forming the silhouette of a bat.
2.2. Installing Control Elements (Straps and Bridle)
To correctly attach the control elements, find the attachment points on the central spar and the wings:
- Attach the Bridle: Tie the threads so that the apex of the resulting triangle (the connection point) is exactly in the center and at the level of the upper third of the body. This will ensure the correct angle of attack for the wind.
- Attach the Tow Line: Secure the main line from the reel to the bridle loop with a strong knot (such as a bowline) or a carabiner.
Precise centering of the bridle will prevent the "Bat" from tipping sideways during takeoff.
3. Final Tuning: Critical Details for Stable Flight
Once the frame is assembled and the straps are securely attached, the finest stage of work begins—final tuning. It is the correct balancing that determines whether your "Bat" will fly high into the sky or pitch chaotically at the first gust of wind. Now we will transform the assembled structure into an obedient and stable flying apparatus.
3.1. Correct Tail Adjustment (Rudder Function)
Proper tail adjustment is a key element that ensures the kite's stability and maneuverability. The tail is not just decoration; it functions as a stabilizer and, most importantly, acts as a directional rudder. If the kite is tilting too much or starting to wobble, the first thing to check is its tail section.
How to adjust the tail:
- Balance Check: Take the kite and hold it in your hands, simulating flight. If it constantly drifts to one side or swings wildly, the balance is off. This may be related to the length or weight of the tail.
- Length Adjustment: If the kite is too 'twitchy' and unstable, try lengthening the tail. Adding extra weight or volume to the end of the structure will give it inertia and help smooth out the flight.
- Weighting/Lightening: If the kite is too 'floaty' and losing direction, you can slightly weight the tip of the tail (for example, by tying on a small bag of sand or granules). Conversely, if it is too heavy, you can use lighter materials.
Remember that the ideal tail should be long enough to create air resistance but not so long that it hinders maneuvering. Tail adjustment is a process of trial and error that requires attention to detail and observation of the kite's behavior in different winds.
3.2. Protection and Decoration: How to Improve Appearance and Stability
To ensure your "Bat" lasts long and looks impressive in the sky, pay attention to the final touches:
- Structural Reinforcement: Glue the nose section and the points where the spars meet the fabric with reinforced tape or fabric patches. This will protect the kite from damage during inevitable falls.
- Aerodynamic Decoration: Attach thin ribbons made of lightweight polyester to the wingtips. They will flutter beautifully, mimicking wing beats, and simultaneously act as additional stabilizers.
- Visibility: Affix reflective elements or neon stickers to the wings—this will simplify flight control during twilight and make the bat silhouette truly mystical.
4. Launch Readiness: Preparing for the First Flight
Once the "Bat" is fully assembled and decorated, the most exciting moment arrives—preparation for launch. To ensure the first flight doesn't end in a crash, it is important to conduct a final inspection. Let's look at how to properly check the structure's readiness and choose an ideal, safe launch location.
4.1. Equipment Check: Testing Connections and Joint Reliability
Before sending the "Bat" into the sky, perform a final test of the connections:
- Check the Frame: Ensure that the spars fit snugly into the slots and do not pop out when the wings are bent.
- Test the Joints: Gently pull on the bridle and lines. All connections must be tightly secured, and the line on the reel must unwind smoothly and without jerking.
This inspection will prevent the structure from breaking during the first strong gust of wind.
4.2. Safety Precautions: How and Where to Safely Launch the Kite
Safety comes first, especially when flying in the sky. Before releasing your bat kite, it is necessary to follow several key rules to ensure the comfort and safety of everyone around you.
1. Choosing a Flight Location:
- Open Space: The ideal place is a large park, field, or open lawn, free from trees, power lines, buildings, or other obstacles. The flight should take place away from urban development.
- Terrain Check: Inspect the launch area. Ensure there are no wires, billboards, or other objects that the kite or line might accidentally hit.
- Group Flight: If you are flying with friends, agree on a "flight zone" to avoid collisions between kites and lines.
2. Weather Conditions:
- Wind: Choose days with a steady, moderate wind. Too strong a gust can carry the kite too far or damage it. Too weak a wind will not allow it to gain altitude.
- Visibility: Flights are not recommended in fog, heavy rain, or thunderstorms. Always monitor the weather forecast.
3. Flight Behavior Rules:
- Maintain Distance: Keep the line at a safe distance from people, animals, and property. Do not allow the line to wrap around anyone.
- Caution with Others: If you see your kite approaching someone, immediately lower its altitude or change direction to avoid contact.
- Child Safety: If you are flying with children, always keep them in sight and monitor their safety. Teach them outdoor behavior rules.
Remember that a responsible approach to flying not only protects you but also those around you. Enjoy the flight by following these simple rules, and may your bat kite soar high and beautifully!