How to properly attach a crimp bead to a jewelry wire
- 8 min read
- 62
Jewelry creation is an art where the durability and aesthetics of the piece depend directly on small details. One of the key phases in assembling jewelry is the secure fastening of the clasp. To attach the clasp neatly to a jewelry wire, masters use special findings – crimp beads (Crimps).
The longevity and security of the entire piece depend on how you secure the crimp. In this practical guide, we will go through in detail how to professionally tighten a crimp with a special crimper or regular pliers and how to conceal the connection point so that your work looks flawless.
Preparing the Work: Selecting Tools and Materials
The reliability and aesthetics of the finished jewelry piece depend directly on proper preparation. Before you begin assembling, it is important to select high-quality findings and suitable tools. A mistake at this stage can cause the clasp to break or the beads to scatter. Let's examine what materials form the basis of your work and what aids will help you achieve professional results without unnecessary effort.
How to Choose the Size of the Crimp and the Wire
The correct selection of the "Crimp – Wire" pair determines the strength of the entire jewelry piece. The main rule is: The inner diameter of the crimp bead must be able to loosely accommodate the jewelry wire when it is doubled over, as this forms the loop for the clasp.
Refer to the following standards:
- Wire 0.3–0.38 mm: Use crimps with a diameter of 1.5–2 mm. This is ideal for light beads and bracelets.
- Wire 0.45–0.5 mm: Choose crimps in the size 2–2.5 mm.
- Wire 0.6 mm and thicker: Crimps with a diameter of 3 mm are required.
If you use a crimp that is too loose, the wire itself will slip even after being tightly compressed. A crimp that is too tight simply will not allow you to push the end piece of the ring back.
Crimper or Regular Pliers: What to Choose for the Job
The choice of tool directly influences the strength and appearance of the finished item.
- Regular pliers (or needle-nose pliers) simply crush the crimp. The result is a flat piece of metal with sharp edges that can scratch skin, snag on clothing, and look unsightly. Furthermore, the brittle metal body of the bead often bursts under strong pressure.
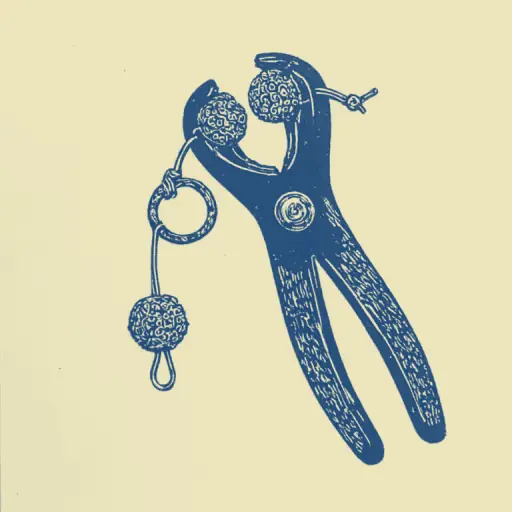
- A special crimper is a professional tool with special indentations on its jaws. It works in two steps: First, it folds the crimp in the middle (into a half-moon shape), securely fixing the jewelry wire in two separate channels, and then gently rounds it off.
For high-quality jewelry making, the crimper is indispensable, whereas regular pliers are only suitable for initial simple experiments.
Step-by-Step Guide: How to Tighten a Crimp with a Professional Crimper
Using a professional crimper is the key to ensuring that your jewelry piece does not fall apart at the worst possible moment and that the fastening point looks neat and aesthetic. Unlike regular tools, the crimper allows the crimp bead to take on a perfect round shape similar to a normal metal bead.
Let's get practical and examine how to properly prepare the jewelry wire, form a secure loop for the clasp, and perform a flawless two-step fastening.
Attaching the Clasp to the Jewelry Wire and Shaping the Loop
For a secure attachment of the clasp, follow these steps:
- Place the crimp bead onto the jewelry wire.
- Thread the free end of the wire through the protector (guard) or directly through the clasp's connecting ring.
- Thread the wire end back into the crimp opening in the opposite direction to form a neat loop.
- Pull the wire tight so that the loop firmly encloses the clasp, but leaves a minimal play (about 1 mm) for the clasp's free movement.
- Leave the free wire end with a length of 1.5–2 cm – it can later be hidden in the first beads of the jewelry piece.
Important Note: Ensure that the two wire ends lie strictly parallel within the crimp and do not cross. This guarantees even pressure distribution when compressing.
Two-Step Crimping Technique for a Perfect Fastening
The two-step method allows the crimp to be secured safely while preventing its deformation and damage to the wire.
- First Step (Forming the Half-Moon Shape): Place the crimp bead in the rear (towards the handle side) groove of the crimper, which is half-moon shaped. Ensure that the two wire ends are parallel and do not cross within the part. Gently but firmly press the tool together. The bead is folded in the middle and takes on a U-shape.
- Second Step (Rounding): Move the folded crimp into the front round groove of the tool. Rotate it 90 degrees and press the handles together again. The halves of the crimp fold together like a book, firmly securing the jewelry wire.
This method guarantees that the jewelry finding will not slip and that the fastening point will look neat.
Alternative Approach and Aesthetic Design
Although using a professional crimper guarantees a perfect result, the absence of this tool is not a reason to forgo jewelry making. In the master's toolbox, there are always alternative solutions to achieve a secure fastening and a flawless appearance of the piece.
In this part of the guide, we examine how to neatly secure a crimp with regular pliers, and we also look at the secrets of the professional finish – the use of concealing accent beads that transform the technical knot into an elegant decorative element.
How to Neatly Tighten a Crimp with Pliers Without Special Tools
If you do not have a special crimper on hand, the crimp can be secured with regular pliers or needle-nose pliers. The most important thing is to choose tools with smooth jaws without grooves so as not to damage the delicate jewelry finding.
- Preparation: Thread the jewelry wire through the crimp bead, form a loop around the clasp, and thread the free end back through the crimp.
- Fixing: Place the bead centrally between the jaws of the pliers. Gently and symmetrically squeeze the tool to crush the crimp into a neat, flat plate. Avoid jerky movements so that the metal does not break.
- Inspection: Gently pull on the wire to check the firmness of the fastening.
Since the piece becomes flat after crushing, it is recommended to decorate it for a flawless appearance.
Using Overbeads for Professional Crimp Concealment
To hide the crushed crimp and give the piece a professional look, a special jewelry finding is used—the overbead (concealing cap). It looks like a crescent moon placed over the fixed crimp.
How to cover a crimp bead with a concealing bead:
- Place the overbead over the deformed crimp so that it is contained within it.
- Gently squeeze the edges of the crescent with needle-nose pliers or regular pliers, slowly rotating the tool around the element while doing so.
- Squeeze gently to form a smooth metal sphere that fits harmoniously next to the regular beads in the jewelry construction.
Common Beginner Mistakes in Jewelry Making
Even when using high-quality findings and concealing beads, beginners often encounter technical difficulties. Incorrect force distribution or choosing the wrong crimp size can ruin all efforts and make the jewelry fragile.
Understanding common assembly errors helps you avoid frustrating mistakes, conserve materials, and ensure the longevity of your pieces. Let's examine the main problems in assembly that you might encounter while working.
What to do if the crimp bead breaks or slips on the wire
If the crimp bead breaks while being compressed, the cause is usually excessive pressure from the pliers or low metal quality (too stiff an alloy). For the work, it is better to choose soft crimps made of brass or silver and use a special crimper that distributes the load evenly.
However, if the crimp slips on the jewelry wire, you either did not press firmly enough or you chose the wrong size. Remember: The diameter of the opening must match the thickness of the double-folded wire. If there is any play, gently re-squeeze the crimp or insert an additional element for extra security.
How to correct assembly errors and securely fix the clasp
If you notice that the crimp is crooked, slipped, or broken, do not try to repair it by re-squeezing—this only weakens the metal. The only reliable solution is to carefully cut the defective section with side cutters and reassemble the knot.
For a secure clasp fixation, follow these rules:
- Use doubling: For heavy or multi-strand pieces, use two crimps in succession with a small gap.
- Allow for play: Do not tighten the loop directly onto the clasp or protector. Leave a micro-gap of 1 mm so that the wire can move freely and not fray.
- Check tension: Pull on the free wire end before final fixation to ensure that the loop is straight and tight.
Conclusion
The correct fastening of crimp beads is the foundation for the durability and aesthetics of every handmade piece of jewelry. By mastering the technique of working with a professional crimper and learning to neatly conceal technical knots with overbeads, you elevate your pieces to a whole new level.
Do not hesitate to experiment and practice on design pieces. With time, your movements will become confident and your fastenings flawless and reliable. May the process of jewelry making bring you only joy and inspiration!