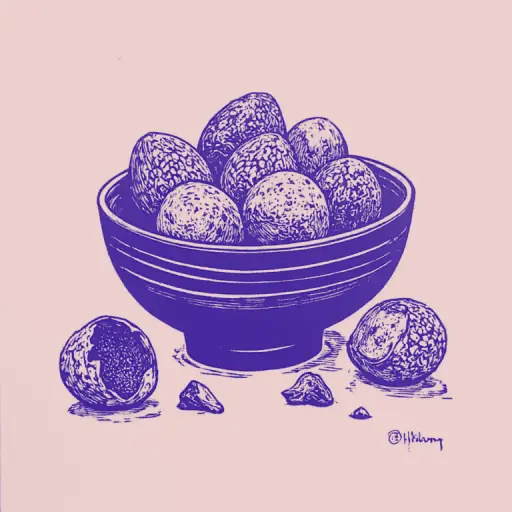
How to Boil Quail Eggs with a Simple Instruction and Exact Timing
- 8 min read
- 84
Quail eggs are a true delicacy, valued for their tender taste, nutritional benefits, and aesthetic appearance. They are indispensable in festive salads, children's menus, and healthy diets. However, due to their miniature size, they are easily overcooked, turning the yolk into a dry clump, and the fragile shell is often peeled off along with the white.
In this practical guide, we will cover how to properly boil quail eggs to the perfect consistency—soft-boiled, medium, or hard-boiled. You will learn the exact cooking time after boiling starts and the secrets that allow the shell to come off with just one movement.
Preparation for Boiling: Choosing Water, Salt, and Temperature Settings
Proper preparation is half the battle in making perfect quail eggs. Despite their small size, they require a delicate approach even before the stove burner heats up. To prevent the shell from cracking and the white from leaking, it is important to consider several key factors: the initial water temperature, the correct use of salt, and pre-warming the eggs themselves. Let's look at these basic culinary nuances that guarantee a flawless result.
Which Water to Put the Eggs In: Cold or Hot
The choice of water temperature depends on your experience and culinary goal:
- Cold water. This is the ideal option for novice cooks. Place the quail eggs in a pot and cover them with cold water. Gradual heating minimizes the risk of cracking the delicate shell. In this case, the cooking time starts strictly after the water boils.
- Hot water (boiling). This method is chosen when achieving a perfect soft-boiled or medium consistency is important, as the exact timing is easier to control. However, the eggs must be at room temperature; otherwise, the shell will instantly burst from the sudden temperature change. Gently lower them using a spoon.
Why Add Salt and How to Prepare the Shell for Boiling
Adding salt is the main secret to shell integrity. It is enough to sprinkle 1 teaspoon of salt per liter of water. If a micro-crack occurs during heating, the salty environment will cause the leaking white to instantly coagulate, securely "sealing" the damage.
Before boiling, be sure to prepare the delicate shell of the quail eggs:
- Warm the product: Take the eggs out of the refrigerator 20–30 minutes before starting to cook. This neutralizes the temperature shock.
- Wash: Gently rinse them in warm water to remove any dirt.
- Inspect: Ensure there are no chips through which the white might leak out.
Step-by-Step Instructions and Exact Boiling Time After Boiling Starts
Once the preparatory stages are complete, the most critical moment arrives—the boiling itself. Unlike chicken eggs, quail eggs cook lightning-fast, so every second counts here. To achieve the perfect texture, you only need a pot, water, and a precise timer. The time is counted strictly from the moment the water reaches a rolling boil. Depending on the yolk consistency you prefer—liquid, creamy, or completely solid—we will cover three classic cooking modes.
How Many Minutes to Boil for Soft-Boiled and Medium
To achieve the perfect texture of a tender yolk, it is important to control the cooking time down to the second.
- Soft-boiled. If you want a completely liquid, warm yolk and a barely set, delicate white, boil the quail eggs for exactly 1–1.5 minutes after the water reaches a rolling boil.
- Medium. For this consistency, where the white has become sufficiently firm and the yolk has acquired a stunning creamy, runny texture, keep them in the boiling water for exactly 2–3 minutes.
Immediately after the timer signals, carefully remove the eggs with a slotted spoon to instantly stop the cooking process.
Correct Time for Hard-Boiled
To achieve a perfect hard-boiled egg with a firm white and a fully cooked but not overdone yolk, the boiling time after the water reaches a rolling boil should be exactly 4–5 minutes.
If you leave them on the heat for longer than 6 minutes, the yolk will take on an unpleasant grayish tint and become crumbly, and the white will turn "rubbery."
Step-by-Step Timing:
- Bring the water in the pot to a rolling boil.
- Reduce the heat to medium so the eggs do not bump into each other.
- Set a timer for exactly 4 minutes for a tender yolk or 5 minutes for maximum firmness.
- Immediately remove the pot from the heat.
Secrets for Quick and Easy Shell Removal
Boiling miniature eggs is only half the battle. The real test for the cook is often peeling them: the thin shell adheres tightly to the delicate white, and one clumsy movement can easily ruin the delicacy's presentable appearance. To save precious time and keep every egg's shape perfect, it is enough to apply a few simple physical laws and tricks proven by chefs.
Thermal Shock in Ice Water
The main secret to easily peeling miniature quail eggs is the sharp temperature contrast. As soon as the cooking time is up, immediately transfer the eggs from the boiling pot into a pre-prepared bowl of ice water. For maximum effect, it is recommended to add several ice cubes to the water.
This process, called thermal shock, solves two important problems at once:
- Stops cooking. The yolk will not overheat from residual heat and will maintain its perfect texture (especially if you boiled the eggs soft-boiled or medium).
- Eases peeling. Due to the sharp temperature change, the white slightly contracts, creating a microscopic gap between it and the shell.
Leave the eggs in the ice water for 5–10 minutes. After this contrasting shower, the shell will come off much more easily without damaging the delicate white.
Peeling Methods: Rolling on the Table and Shaking
After the ice bath, the shell becomes pliable. To peel the eggs in seconds, use two proven methods:
- Rolling on the table. Gently press the egg with your palm onto a hard surface and roll it back and forth. The shell will develop a fine network of cracks, while the membrane under the shell will remain intact. You just need to pull it, and the shell will come off in one strip.
- Shaking in a jar. Place several boiled eggs in a small jar or glass, pour in a little cold water, close the lid, and shake vigorously for a few seconds. The shell will crack on its own, and the water will seep under the membrane, making peeling easier.
Both methods guarantee that the delicate white remains perfectly smooth.
Storage Rules and Culinary Uses for Boiled Quail Eggs
When miniature quail eggs are perfectly boiled and easily peeled from their patterned shells, it is time to think about their next culinary journey. These tiny delicacies can instantly transform even the simplest home-cooked meal, giving it a restaurant-quality flair. However, to fully unlock their tender flavor and preserve maximum nutrition, it is important to follow basic rules for handling the finished product. Let's look at how to properly store boiled eggs and in which festive dishes they shine brightest.
How Long Do Boiled Quail Eggs Last in the Refrigerator
The storage time for boiled quail eggs in the refrigerator depends directly on the integrity of the shell and the degree of cooking:
- Hard-boiled (in shell): They maintain freshness in the refrigerator for up to 5–7 days. The intact shell protects the product from bacterial contamination.
- Peeled eggs: It is best to use them within 12–24 hours. Be sure to keep them in an airtight container to prevent them from absorbing odors.
- Soft-boiled and medium: Due to the semi-liquid consistency of the yolk, they are recommended to be eaten immediately. In the refrigerator, they can be safely stored for no more than 24 hours.
Tip: Never leave cooked eggs at room temperature for more than two hours.
Ideas for Use in Popular Festive Salads and Appetizers
Thanks to their miniature size and elegant appearance, boiled quail eggs are ideal decoration and an important component of festive dishes. Here are several foolproof ideas for your table:
- Caesar and Niçoise Salads: Eggs cut in half, boiled medium or hard-boiled, add a touch of restaurant chic to the dishes. The tender yolk pairs perfectly with anchovy or mustard dressing.
- Mini Appetizers and Canapés: Skewer half an egg, a cherry tomato, and a cube of feta cheese. Stuffed halves are also popular: use pâté, red caviar, or cream cheese with herbs as filling.
- Bird's Nest Salad: A classic recipe where whole boiled eggs are placed in the center of an improvised nest made of crispy potato straws.
Using these small eggs instantly transforms the presentation of even the simplest home treats.
Conclusion
Preparing quail eggs is a simple process that only requires a little attention to detail. The main thing is to strictly adhere to the exact boiling time after the water boils: from 1–2 minutes for soft-boiled to 3–5 minutes for a perfect hard-boiled yolk.
Do not forget the mandatory thermal shock in ice water, which guarantees easy removal of the delicate shell without damaging the white. Use these simple culinary tricks so that your everyday breakfasts and exquisite festive appetizers always look flawless and appetizing!