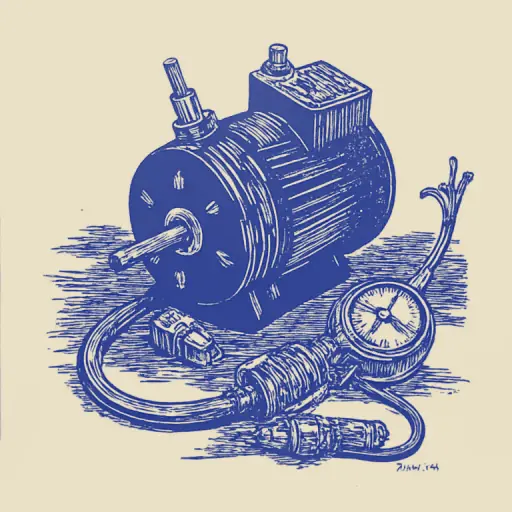
How to Check an Old Refrigerator Start Relay at Home for the First Time
- 15 min read
- 72
When the beloved old refrigerator—whether it's a reliable Soviet "Minsk," a "Biryusa," or an early "Atlant"—suddenly stops working or merely clicks impotently, do not rush to call a technician or throw it away. Very often, the cause is not the failure of an expensive motor, but the malfunction of a small but important component: the starting protection relay (RPA).
The starting protection relay is responsible for starting the refrigerator's compressor and protecting it from overloads. Over time, its contacts can burn out, the movable plunger can seize, and the bimetallic strip can lose its properties.
In this practical guide, we will analyze in detail how to check the starting relay at home, even if it is the first time you are doing it. With simple visual methods and a common multimeter, you can accurately identify the location of the fault and save on repair costs with your own hands.
Preparation and locating the starting relay on the old refrigerator
Before proceeding to the direct test of the starting protection relay (RPA) with the multimeter, it is necessary to properly prepare the workspace and gently dismantle the component. In old Soviet refrigerators and early Russian models, such as "Biryusa," "Minsk," or "Atlant," this assembly has specific construction characteristics. Negligence during removal can easily damage the compressor's fragile switching contacts, which will significantly increase subsequent repair costs.
The success of all diagnostics depends directly on care in the initial phase. We must understand how to protect ourselves when working with electrical components of Soviet appliances and where exactly to look for the precious starting protection device box to remove it without unnecessary effort or damage.
Electrical safety when working on appliances
Before touching the refrigerator components, you must ensure complete safety. Old appliances hide dangers: from worn insulation on the wiring to residual voltage on capacitors.
Follow these rules:
- Total power disconnection. Unplug the appliance from the outlet. It is not enough to just disconnect the thermostat. Ensure the power cord is physically disconnected from the mains.
- Dry workspace. There must be no moisture on the floor, and your hands must be absolutely dry. It is strictly forbidden to work in humid environments (e.g., in a basement or a damp garage).
- Insulated tools. Use screwdrivers and pliers with dielectric handles (marked up to 1000 V).
- Capacitor discharge. If your refrigerator's diagram shows a running or starting capacitor, it must be safely discharged before starting work.
Remember: neglecting these rules can lead to severe electric shocks.
Where and how to safely remove the relay (RPA)
To find the starting protection relay (RPA), look behind the back panel of the refrigerator. At the bottom is the compressor, a large black metal "barrel." The RPA is attached directly to its body, covering three pin contacts of the compressor. In old Soviet models (such as "Biryusa," "Minsk," "Atlant"), the relay is often hidden under a protective metal bracket or a plastic cover.
Step-by-step process for safe disassembly:
- Photograph the connection. Before starting, take a picture of the arrangement of all the wires with your phone. This will prevent errors during reassembly.
- Remove the clip. If the relay is held by a metal snap bracket, gently lift it with a flat-head screwdriver and move it aside.
- Remove the relay from the contacts. Pull the RPA body towards you (away from the compressor) with a smooth but decisive movement. Do not swing it too much from side to side to avoid bending or breaking the compressor's copper conductors.
- Disconnect the wires. Gently remove the terminals from the relay contacts, using pliers if necessary.
Preliminary diagnosis: failure symptoms and visual inspection
After gently dismantling the starting protection relay (RPA), do not immediately grab the multimeter. Experienced technicians know that more than half of all failures in old refrigerators (such as "Minsk," "Biryusa," or "Atlant") can be identified in the preliminary quick diagnostic phase alone. Careful observation of the appliance's behavior before shutdown and a simple examination of the component itself often provide a comprehensive answer.
Before moving on to detailed electrical measurements, we must compare the characteristic symptoms of the refrigerator's "behavior" with the physical state of the removed component. We will analyze what the typical sounds coming from the motor housing indicate and how a simple visual check combined with an auditory test helps locate the fault without complex tools.
Why the relay trips but the compressor does not start
The characteristic click, after which the old refrigerator's compressor hums for a few seconds and then shuts off (or shows no sign of life), is a classic symptom of emergency mode. This sound is emitted by the thermal relay (bimetallic strip), which protects the network and the windings from overheating.
The main causes of this behavior are:
- Sticking or burnt starting contacts. If the contacts inside the RPA are burnt or covered in soot, the compressor's starting winding does not receive power. The motor cannot start, the running winding overloads, and the thermal protection interrupts the circuit with a trip.
- Compressor blockage. If the motor's mechanical part is worn or jammed, the rotor cannot turn. The current drawn increases drastically, instantly activating the relay's protection plate.
- Short circuit between windings. Damage to the insulation of the compressor windings leads to a critical increase in current and the activation of protection.
- Voltage drop in the network. Old appliances require a stable 220 V. With low voltage, the starting torque is insufficient for startup.
Understanding these causes helps narrow down the search field: is the problem in the starting protection device itself or in the motor-compressor failure?
After dismantling the starting protection relay (RPA), first perform a visual inspection and a simple acoustic test. This will allow you to detect obvious mechanical and thermal damage even before using measuring instruments.
Visual Inspection:
- Soot and oxidation. Carefully inspect the metal contacts and terminals. The presence of black soot, signs of plastic body melting, or heavy oxidation indicates poor contact and critical overheating. Oxides can be gently cleaned with fine sandpaper or wiped with alcohol.
- Body integrity. Cracks in the old relay body (especially if made of carbolite or plastic) can lead to distortion of the internal component geometry and jamming of the movable plunger.
Acoustic Test (Shaking):
Hold the relay in your hand and shake it gently near your ear:
- In electromagnetic relays (such as Soviet RTK-Khs) a slight, dull click of the movable core (pin) during rotation is normal. But if you hear a sharp metallic squeal or a buzzing sound of broken parts inside, the relay is defective (broken spring or damaged pin).
- In positronic (puck) relays, there should be no sound inside. If you hear a characteristic rustling or tinkling of small fragments when shaking it, it means the internal ceramic puck (thermistor) has cracked due to overheating. Such a relay is only subject to replacement.
Step-by-Step Starting Relay Verification with a Multimeter
When the visual inspection and acoustic test do not provide a definitive answer, the most reliable DIY tool comes into play: the multimeter. Even if the protection relay of an old refrigerator appears intact and emits no noise when shaken, its internal electrical contacts might be oxidized, and the winding might be broken.
Using the tester allows you to determine with absolute precision whether current passes through the electromagnetic winding and whether the thermal protection (bimetallic strip) is functioning. For this, the device is set to the resistance measurement mode (ohmmeter) or the audible continuity mode. Below, we will analyze the step-by-step algorithm that will help you locate the fault in the PRZ circuit without errors, also examining the nuances of checking specific Soviet components.
How to Test Contacts and Measure Resistance
To check the protection relay, set the multimeter to resistance measurement mode (setting the limit to 200 Ohms) or to 'continuity' mode with an audible signal.
Perform three main diagnostic steps:
- Winding Check (Electromagnet Coil). Apply the multimeter probes to the winding terminals. The correct resistance of the coil is usually between 10 and 30 Ohms. If the device shows '1', 'OL' (open circuit), or infinity, the winding is damaged.
- Starting Contact Check. In the normal vertical position, the electromagnetic relay contacts are open (infinity on the screen). Turn the relay upside down: under its own weight, the movable pin should drop, closing the contacts. The multimeter should show approximately 0 Ohms or emit a beep.
- Thermal Relay Check. Measure the resistance across the contacts of the thermal protection bimetallic strip. When cold, the circuit must be closed (the values must be close to zero).
Any deviation from these parameters indicates the need to replace the component.
Characteristics of Soviet Relays RTK-Kh, RPZ, and RTP
Soviet protection relays (PRZ) of types RTK-Kh, RPZ, and RTP have unique construction characteristics that are important to consider during diagnosis. Unlike modern positronic elements, these devices operate on electromagnetic and thermal principles and are extremely sensitive to their spatial orientation.
- RTK-Kh (often found in old "Minsk" and "Biryusa" refrigerators): This relay works using a solenoid and a movable core. In the normal vertical position, its starting contacts are open. To check them with a multimeter, connect the probes to the contacts and turn the relay body upside down. Under the action of gravity, the core should drop, closing the circuit (the resistance will drop to zero). If the device shows an open circuit when inverted, the pin is stuck or the internal contacts are burnt.
- RTP and RPZ: These models often suffer from oxidation of the open contacts. During multimeter verification, it is mandatory to test not only the winding but also the spiral of the thermal fuse (bimetallic strip). Its resistance must be close to zero. Any deviation or infinite resistance indicates the burning of the spiral.
Compressor Diagnosis and Direct Start Possibility Check
Even if the protection relay has successfully passed all previous tests, it is too early to celebrate: the motor of an old refrigerator might still remain silent or hum without starting. In this situation, suspicion falls on the compressor itself. Before discarding the appliance or buying a new PRZ, it is necessary to ensure that the motor's electrical part is intact and that there are no mechanical blockages.
To do this, we must look under the protective casing and test the motor terminals directly. In this section, we will analyze how to correctly assess the condition of the refrigerator's "heart" using a multimeter and in which exceptional cases technicians resort to test starting by bypassing the protection systems.
Checking the Resistance of the Compressor Windings Itself
Before blaming the protection relay, it is necessary to ensure that the compressor itself is functional. On its body, you will find three contacts (pass-through terminals), usually arranged in a triangle. These are the winding terminals: running (R), starting (S), and common (C).
For verification, set the multimeter to resistance measurement mode (limit 200 Ohm) and perform the following steps:
- Measure the resistance between all pairs of contacts. You should obtain three values.
- Check the ratio. The highest resistance will be between the start and run terminals. It should equal the sum of the other two measurements (for example, if C-R is 15 Ohm and C-S is 25 Ohm, R-S should be approximately 40 Ohm). The run winding always has lower resistance than the start winding.
- Check for a short circuit to the body. Place one multimeter probe on a section of the compressor's metal body free of paint and alternately touch each of the three contacts with the other probe. The device should show infinity (symbol '1' or 'OL'). If the device shows a specific resistance value, the winding is shorted to the body: this compressor is dangerous to use.
If the windings are open or shorted, the compressor must be replaced. If they are intact, you can proceed to evaluate the possibility of a test start.
Dangers and Nuances of Direct Compressor Start Without a Relay
Starting the compressor directly (bypassing the protection relay) is a last-resort diagnostic measure, often used by technicians to definitively ensure the motor is functional. However, for a beginner, this method carries serious risks.
The main risks of direct connection:
- Electric shock. You will be working with exposed contacts under 220 V. Any negligence can lead to serious injury.
- Start winding burnout. The start winding is designed to receive current for only a fraction of a second. If the contact is maintained for more than 1-2 seconds, the winding will overheat and the compressor will be permanently damaged.
- Short circuit. An error in the connection diagram will immediately cause the circuit breakers to trip and the wires to fuse.
For a safe check, it is better to avoid improvised connections and use a special diagnostic cable with a start button. But the most sensible solution for a beginner technician is to purchase and install a PRZ that is already known to be functional.
Replacement of the Protection Device and Fault Prevention
If the diagnosis confirms the failure of the starting relay, the only reliable solution is to replace it. For old refrigerators like "Biryusa," "Minsk," or "Atlant," this is a standard procedure that any DIY enthusiast can perform. Purchasing a new spare part will not be expensive, and the assembly process will bring the appliance back to life without needing to call an expensive specialist.
However, simply installing a new starting relay is not enough. For the repaired refrigerator to last many more years, it is crucial to wire correctly and protect the sensitive Soviet electronics from external threats. Let's see how to complete the repair safely and protect the compressor from further failures.
How to Correctly Connect the New Relay According to the Diagram
The installation of a new starting relay (PZR) requires extreme care, as an error in the diagram can cause the compressor coils of the refrigerator to burn out.
Step-by-step connection algorithm:
- Respect the orientation. Old Soviet electromagnetic relays (e.g., RTK-Kh or RTP) operate using gravity. There is an "UP" indicator or an arrow on their body. Install the device strictly in the indicated direction; otherwise, the start contacts will not open after startup.
- Match the terminals. The compressor has three contact terminals forming a triangle: the common terminal (C), the run coil (R), and the start coil (S). The new starting relay must fit securely onto these contacts.
- Connect the wiring. Connect the power cables and the wire from the thermostat to the relay's input terminals according to the connection diagram, which is usually printed on the inside of the PZR cover or on the back panel of the refrigerator.
After securing the device, ensure that the contacts are firmly insulated and do not come into contact with the compressor's metal body.
Recommendations for Protecting Old Appliances from Voltage Fluctuations
Old Soviet and Russian refrigerators ("Minsk," "Biryusa," "Atlant") are extremely sensitive to the quality of the electrical supply. Voltage spikes are the main cause of compressor coil burnout and starting relay (PZR) failure. To protect the repaired appliance, follow these recommendations:
- Install a voltage regulator. For an old compressor, a device with a power reserve (3-4 times the nominal power of the refrigerator) is necessary, as the starting currents of old motors are very high. The optimal choice is a 1.5 to 2 kW power regulator.
- Use a voltage control contactor relay. This accessible device will instantly disconnect the refrigerator from the grid if the voltage goes outside the safety limits (e.g., below 190 V or above 240 V). It will only restore power after 5-10 minutes. This delay is vital for the compressor to level the refrigerant pressure before restarting.
- Ensure a secure connection. Avoid using cheap power strips and worn-out sockets. A poor connection causes voltage drop and sparks, leading to the continuous tripping of the thermal relay and its rapid failure.
These simple measures will protect the new starting relay from contact burnout and the compressor from critical overheating.
Conclusion
The self-diagnosis and replacement of the starting relay (PZR) of an old refrigerator is a completely achievable task even for a first-timer. The key element in this process is strictly adhering to safety standards, always disconnecting the appliance from the mains before any manipulation, and using a functioning multimeter.
The simple, sequential steps we analyzed in detail in this guide are:
- initial visual inspection and acoustic test (shaking the relay);
- accurate verification of contacts and resistance measurement with the multimeter;
- checking the integrity of the compressor windings itself.
These actions will help you determine the cause of the failure without error and avoid unnecessary expenses for costly repairs or the purchase of new appliances. If the diagnosis has confirmed the relay failure, replacing it with an equivalent model will bring your refrigerator back to life. Careful maintenance, timely cleaning of the contacts, and protecting the appliance from voltage fluctuations will ensure that your reliable "old helper" lasts many more years.