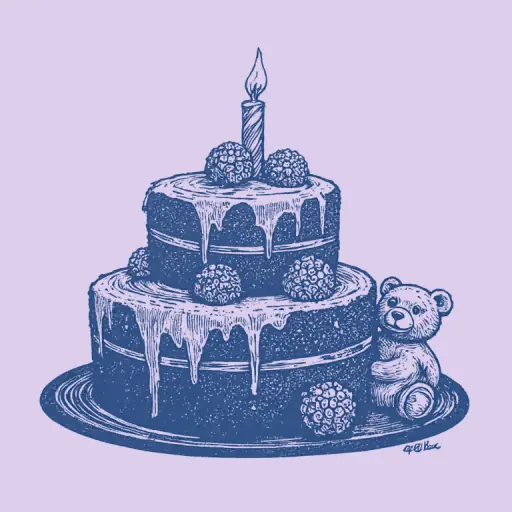
How to decorate a first birthday cake for a boy yourself to surprise all guests at the party?
- 15 min read
- 63
A baby's first birthday is a special celebration filled with anticipation and joy. Traditionally, the cake is the main decoration on the festive table. Every mother wants it to be not just delicious, but also incredibly beautiful, memorable, and, most importantly, safe for the birthday child.
Creating a confectionery masterpiece at home is quite achievable, even if you are not a professional pastry chef. Today's trend is a stylish cake without fondant, decorated with delicate cream cheese, elegant chocolate drips, airy cake pops, and bright isomalt lollipops.
In this practical guide, we will thoroughly cover how to safely and impressively decorate a first birthday cake for a boy. You will learn the secrets of working with popular decorations, how to create the festive number "1," and how to use gingerbread cookies with a baby's milestone marker or a cute Teddy bear to surprise guests and give the little one their first unforgettable celebration.
Preparation and Safety: Rules for Choosing Decorations for a One-Year-Old
A baby's first birthday is a touching moment when you want to create a real fairy tale. However, when thinking about how to decorate a first birthday cake for a boy yourself, aesthetics must take a backseat to safety. The one-year-old birthday child will definitely want to touch the dessert with his hands, and possibly taste his first celebratory bite of his life.
To ensure the celebration leaves only pleasant memories, the decoration of a one-year-old's cake must be impeccable from a health perspective. Before starting your confectionery creation, it is necessary to understand which materials and colorings are permissible at a children's party, and which elements should be strictly avoided for the safety of the little guests.
Safe and Hypoallergenic Ingredients Without Excess Chemicals
The first birthday is a special event, but the digestive system of a one-year-old is still very sensitive. To ensure the celebration leaves only pleasant memories, when choosing decorations, it is important to completely avoid artificial colorings, preservatives, and strong allergens.
Here are several safe alternatives for the celebration cake:
- Natural colorings: Instead of synthetic gel colorings, use freeze-dried berries and powders. Beetroot provides a soft pink color, spinach provides green, turmeric provides yellow, and blue matcha or spirulina can help achieve a beautiful blue cake without a drop of chemicals.
- Berries and fruits: Choose seasonal, hypoallergenic fruits. Blueberries, bananas, or pears are excellent for decoration. Avoid bright red strawberries or raspberries if the baby is prone to dietary sensitivities.
- Children's sweets: High-quality children's cookies can be used for decoration (they soften quickly and are safe for teething) and freeze-dried apple pieces.
- Avoiding honey and chocolate: Decorative elements that the birthday child might taste must not contain honey (a strong allergen) or excessive cocoa.
This approach guarantees that even if the guest of honor decides to put his hand in the cake and lick his fingers, it will be absolutely safe for his health.
Main Rules for Choosing a Color Palette and Avoiding Small Details
When choosing a color palette for a one-year-old boy's cake, it is best to avoid loud neon shades. Bright blue, green, or ultramarine colors require a heavy dose of colorings, which is undesirable for the baby's digestion. Prefer a delicate pastel palette:
- Classic soft blue and white — a foolproof, calm option;
- Mint, pistachio, and cream — look fresh, stylish, and very appetizing;
- Sand, beige, and muted yellow — create a warm, cozy atmosphere.
The main taboo in first birthday cake decoration is small, hard elements. Sugar beads (pearl sprinkles), small fondant flowers, inedible plastic decorations, and unsecured skewers pose a serious danger. A one-year-old child will definitely reach for a bright element on the cake and might put it in his mouth.
Use only large, securely fixed details that are easy to remove before serving the dessert on the table.
Creating the Perfect Base: Smoothing with Cream Cheese and Chocolate Drips
Once the issues of safety and ingredient selection are resolved, it is time to move on to the most creative stage—creating a flawless "canvas" for the future decoration. A perfectly smooth surface not only gives the dessert a professional look but also ensures that all subsequent decorative elements will hold securely.
For a first birthday cake for a boy, the most traditional and best choice remains stable and delicate cream cheese frosting. It holds its shape well, can be easily colored in delicate blue or pastel tones, and serves as an ideal background for contrasting chocolate drips. Let's look at how to prepare the cake for decoration and create that flawless base that will delight the guests.
Step-by-Step Frosting the Cake with Cream Cheese at Home
To create a flawless base for decoration, you will need a turntable, a piping bag, and a metal spatula. The process of smoothing with cream cheese frosting consists of four simple steps:
- Base coat. Apply a very thin layer of frosting to the assembled and chilled cake. This will "glue" all the biscuit crumbs and prevent them from getting into the final decoration. Place the cake in the refrigerator for 30–40 minutes.
- Applying the final coat. Transfer the cream cheese frosting to a piping bag. After snipping the tip, apply the frosting in even stripes all over the height of the cake, as well as a dense layer on top.
- Smoothing with a spatula. Hold the metal spatula perpendicular to the base at a 45-degree angle to the side of the cake. Gently rotate the turntable with one hand, and hold the spatula still with the other. Regularly scrape off excess frosting from the spatula.
- Finishing the top. Gently smooth the formed edge of the frosting with a palette knife, moving from the edges toward the center.
After this, place the cake in the refrigerator for at least 2 hours. On a well-chilled surface, any subsequent decoration will adhere perfectly.
Secrets to Creating Neat Chocolate Drips at Home
Neat chocolate drips are a classic of confectionery decoration that makes the cake incredibly appetizing. To ensure they are textured and do not run into a puddle on the base, follow three main rules:
- Temperature contrast. The cake covered in cream cheese must be very cold—keep it in the refrigerator for at least 2–3 hours before decorating. Warm chocolate sets quickly on cold cream, forming beautiful drops.
- Correct ganache proportions. For classic dark drips, mix dark chocolate and heavy cream (33%) in a 1:1 ratio. If you are decorating a soft blue cake for a boy, use white chocolate and cream in a 3:1 (or 2.5:1) ratio, adding a drop of fat-soluble coloring.
- Working temperature. The ganache must cool to 30–33 °C. It should be pourable, but not liquid.
Practical Tip: Always make a test drip on the back of the cake. If the drip runs too fast, chill the glaze; if it sets in a lump, gently warm it. It is easiest to apply drips using a piping bag or a regular teaspoon.
Trendy Decoration Without Fondant: Candies, Meringues, and Gingerbread Cookies
Once the snow-white cream cheese base is ready and decorated with appetizing chocolate drips, it is time to move on to creating a voluminous composition. Today, heavy fondant coverings have given way to light, airy, and modern decoration. Decorating a cake without fondant using crunchy meringue, transparent candies, and aromatic gingerbread cookies is the main trend for children's parties. This decoration looks incredibly stylish, does not overload the dessert with unnecessary weight, and is very popular with both young and adult guests.
Let's explore how to turn ordinary sweets into striking toppers that will securely fasten to the cake and create that magical height and volume.
How to Secure Marshmallow Sticks and Isomalt Candies
Isomalt candies and airy meringue sticks are ideal contactless decorations for a children's cake. To ensure these elements stay firmly in place and do not soften from moisture, follow these simple fixing rules:
- Meringue Sticks. Bake the meringue directly onto wooden skewers or sturdy paper straws. Before inserting the skewer into the cake, insulate the part of the meringue that will touch the moist cream cheese. This can be done by dipping the base of the meringue into melted white chocolate or cocoa butter. This will protect the delicate treat from softening.
- Isomalt Candies. When pouring hot isomalt onto a silicone mat, immediately place the wooden stick, slightly twisting it so it is completely covered in caramel. Insert the finished candies deep into the sponge, not just into the cream layer, so they do not lean under their own weight.
Arrange the toppers at different heights to create a beautiful, voluminous cascade. Before serving the dessert, be sure to warn the birthday child's parents about the wooden skewers in the decoration.
Using Gingerbread Toppers and the Birthday Metrics
Gingerbread toppers are an ideal way to make a fondant-free cake truly personal. For a one-year-old boy, classic choices include painted cookies shaped like a Teddy bear, clouds, stars, and, of course, a large number one.
The child's metrics always evoke special feelings among guests. Dedicate several small round or shaped cookies for this, on which the main figures will be written with icing:
- weight at birth (e.g., 3500 g);
- baby's height (e.g., 53 cm);
- exact time and date of birth.
Baker's Secret: To prevent the gingerbread cookies from softening in the moist cream cheese, be sure to insulate their back side. To do this, melt a little white chocolate and apply it in a thin layer with a brush to the part of the cookie that will touch the cream. After the glaze sets, carefully insert wooden skewers into the cake. Distribute the toppers by height: place the largest elements (metrics and the main character) in the background, and the smaller stars slightly in front, creating a beautiful voluminous effect.
Step-by-Step Masterclass: Creating a Festive Cake in the Shape of the Number "1"
A cake in the shape of the number "1" is perhaps the most symbolic and striking dessert for a boy's first birthday. It not only decorates the festive table but also becomes the main focus of memorable photographs. Unlike classic round shapes, a figure-eight cake always brings genuine delight to guests and looks professional, even if you made it at home. Creating such a masterpiece is a very achievable task if you know a few baking tricks. You won't need complex cutters or expensive equipment. Accuracy, a good mood, and a proven technique are enough. In this practical masterclass, we will cover the entire process of creating the festive number: from the correct preparation of the base to the final touch of delicate cream and juicy berries.
How to Properly Cut and Assemble Layers in the Shape of a One
Creating a cake in the shape of the number "1" is a simple and effective way to surprise guests. To ensure the figure cake is neat and does not crumble during assembly, follow this proven algorithm:
- Sponge Preparation. Bake one large rectangular sponge. Before cutting, be sure to wrap it in plastic wrap and let it rest in the refrigerator for at least 4–6 hours. The chilled dough becomes denser and hardly crumbles.
- Template Creation. Draw the number "1" of the desired size on thick paper or cardboard in A4 format and cut it out. Standard proportions: height of about 28 cm, base width of 15 cm, body width of the one—8–9 cm.
- Shape Cutting. Place the paper template on the sponge. Carefully cut the contour vertically with a sharp long saw knife (bread knife). Do not throw away the scraps—they can be used for cake pops.
- Slicing into Layers. Cut the resulting sponge unit lengthwise into 2 or 3 thin layers using a pastry string or a long knife.
- Assembly. Place the layers on a presentation board, fixing the bottom layer with a dollop of cream. Soak it in syrup, apply cream cheese from a piping bag in even dots or a solid layer, and assemble the cake.
Tip: To ensure the number cake holds its shape well, use a stable cream and let the assembled structure rest in the refrigerator before final decoration.
Decorating the Figure Cake with Cream Drops and Fresh Berries
To create neat cream drops, you will need a piping bag with a round smooth tip (10–12 mm in diameter) or an open star tip. Fill it with chilled, firm cream cheese. Hold the bag strictly vertical at a distance of 1 cm from the surface of the layer. Gently squeeze the cream, forming a smooth ball, then stop the pressure and pull the tip up with a short movement. Cover the entire surface of the "one" with these drop-like peaks.
Fresh berries are an ideal, safe, and bright decoration for a one-year-old. It is best to use:
- Blueberries—they are hypoallergenic, do not release excess juice, and are suitable for a boy's cake in terms of color palette.
- Raspberries or strawberries—it is better to cut the strawberries in half and place them cut-side up so that moisture does not spoil the cream.
Carefully arrange the berries in a random pattern among the cream drops. For a burst of color, you can add tiny leaves of fresh mint. This decoration looks fresh, professional, and absolutely safe for the little birthday child.
Quick Ways to Decorate with Ready-Made Sweets and Common Mistakes
Even if there are only a few hours before the guests arrive, this is no reason to skip an impressive decoration. Modern confectionery decor is great because it doesn't always have to be created from scratch—high-quality ready-made sweets can transform a simple homemade cake into a true masterpiece in minutes. The main thing is to know how to correctly combine purchased elements and securely fix them to the surface so that the festive surprise is not damaged before serving.
In this section, we will discuss how to save precious time using simple and safe treats, and we will also cover critical mistakes when assembling and transporting the dessert that could spoil all your efforts at the most crucial moment.
How to beautifully decorate a cake with store-bought marshmallows and gumdrops in 15 minutes
When there is absolutely no time for complex decoration, ready-made sweets come to the rescue. Airy marshmallows and soft, shaped gumdrops in delicate pastel shades (blue, white, light yellow) are perfect for a one-year-old boy. This decoration is safe because it contains no hard elements.
Step-by-step express method in 15 minutes:
- Create "clouds" from marshmallows. Scatter mini marshmallows randomly over the top of the cake, forming voluminous, fluffy clouds. They hold up perfectly on fresh cream cheese without extra fasteners.
- Add bright accents. Place the shaped gumdrops between the "clouds"—for example, soft bears or stars. If the gumdrops are large, they can be cut in half and placed cut-side down on the cream.
- Decorate the edges. Run a neat row of small marshmallows along the bottom edge of the cake. This instantly hides minor leveling imperfections and gives the dessert a finished look.
This dessert looks very cute, sweetly childlike, and absolutely does not require professional pastry skills.
Mistakes when transporting and fixing heavy figures on a cake
Even the most beautiful decoration can be damaged if the rules of assembly and transport are ignored. The main mistake when working with heavy figures (such as a fondant teddy bear or large chocolate spheres) is placing them directly on soft cream cheese without additional support. Under its own weight, the figure can press into the cream and deform the cake.
How to properly secure heavy decor:
- Use skewers: Be sure to insert every large figure onto a wooden skewer that passes through the entire cake down to the base.
- Chocolate "glue": Smear the point where the figure meets the cream with melted chocolate—this will create a reliable insulating barrier.
Typical transportation errors:
- Transporting in a car seat. Seats always have an incline. The cake must only travel on a perfectly flat surface—on the floor of the front seat or in the trunk, secured with a non-slip mat.
- Poor cooling. Before traveling, the dessert must rest in the refrigerator for at least 4–6 hours so that the cream and filling are fully stabilized.
- Transporting with installed decor. The heaviest elements and tall toppers are best transported in a separate box and carefully placed on the cake only at the party venue.
Conclusion
Creating a cake for a son's first birthday is not just a culinary process; it is a warm expression of parental love and care. Even if you are doing it for the first time, careful leveling with cream cheese, elegant chocolate drips, bright isomalt candies, or fragrant gingerbread cookies will help you create a true masterpiece. The main thing is always to remember the safety of the little birthday boy, choose high-quality natural ingredients, and securely fix the decorative elements.
Do not be afraid to be creative, whether it is a classic soft blue cake with a teddy bear or an impressive number "1" decorated with fresh berries. May this festive dessert, created by your own hands, become the centerpiece of the table, evoke sincere delight from the guests, and remain in the warmest memories of your family album. We wish you creative inspiration, an easy baking process, and an unforgettable, joyful first birthday for your little one!