How to Drill a Well Yourself: Detailed Manual Drilling Instructions
- 15 min read
- 72
Having a private water source on a dacha or homestead provides complete independence from the whims of utility services, ensuring a great harvest and comfortable country living. However, the cost of professional drilling crews is often prohibitive. The good news is that you can solve your water supply problem yourself, saving a significant amount of money.
Manual drilling is a time-tested and quite accessible way to set up a water intake point without heavy specialized equipment. By using a simple manual auger, a casing, or mastering the percussion-rope method, you can reach a clean water-bearing horizon up to 20–30 meters deep on your own. In this practical guide, we will break down the entire process step-by-step: from analyzing depth maps to installing the casing pipe and flushing the finished well. You will learn how to bypass contaminated shallow groundwater, build a reliable filter yourself, and sink an Abyssinian well without unnecessary costs.
Preparation for Work: Site Selection and Aquifer Search
Before picking up tools and making the first pass, thorough engineering reconnaissance is necessary. The success of the entire venture depends directly on the correct selection of the point on the plot and the accurate determination of the moisture depth. An error at this stage risks a complete waste of effort, the loss of expensive casing pipes, or obtaining contaminated shallow groundwater instead of a clean water-bearing horizon.
The preparatory stage involves two key tasks: locating the aquifer on the ground and choosing the optimal source design. A rational approach to these issues will save you time and budget, eliminating 'blind' drilling and guaranteeing a stable yield.
How to Find the Aquifer and Use Depth Maps Independently
Before starting manual drilling, you must determine the depth of the groundwater. The main tool for this is a depth map. You can compile one yourself by surveying neighbors with wells or by studying open hydrogeological maps of your area. Pay attention to the type of source: shallow groundwater usually lies at a depth of up to 3–5 meters (the water is technical), while a quality sandy aquifer is found at a level between 8 and 25 meters.
For accurate searching on the site, use a comprehensive approach:
- Topography analysis: In low-lying areas and near natural water bodies, water is always closer to the surface.
- Vegetation observation: Moisture-loving plants (reeds, sedges, alder) indicate the close presence of moisture.
- Test drilling: The most reliable method. A small-diameter exploratory well is made using a manual auger.
Correctly determining the depth will help you pre-calculate the required length of the casing pipe and understand whether an Abyssinian well or a deeper shaft will be suitable for your plot.
Choosing the Source Type: Abyssinian Needle Well or Standard Deep Well
The choice between an Abyssinian well (needle) and a classic deep sand well depends on the depth of the aquifer and your technical capabilities.
Abyssinian Needle Well (depth 5–12 m):
This is the simplest and most budget-friendly option for manual drilling. The structure consists of a thin pipe with a diameter of 1–1.5 inches, a sharp tip, and a built-in filter (needle filter), which is driven or sealed into the ground until the first water source is reached.
Pros: Minimal cost, possibility of installation directly in a basement, high installation speed.
Cons: Water extraction is possible only with a surface pump (lift height limit up to 8–9 meters), there is a risk of shallow groundwater entering if sealing is poor.Standard Deep Sand Well (depth 15–40 m):
Requires full drilling using a larger diameter casing pipe (from 90–125 mm), which allows a productive submersible pump to be lowered inside.
Pros: Stable yield, clean water from deep layers, protection from surface contamination.
Cons: High labor intensity, necessity of using a casing or auger, more expensive materials.
If the water table on your plot is above 8 meters, confidently choose an Abyssinian well. If the water is deeper, you will have to build a full deep well for a submersible pump.
Tools and Materials for Self-Drilling
The success of self-drilling is 90% dependent on the correct preparation of equipment and materials. Unlike professional crews with heavy machinery, the home craftsman must rely on simple but effective devices, many of which can be made from scrap metal. Choosing the right gear will not only save your strength but also prevent accidents, such as wall collapse or tool jamming in the shaft.
Before starting earthworks, you need to assemble a reliable working set. We will need both specific drilling tools for breaking up and lifting soil, and quality consumables that will form the durable shaft of the future well and protect drinking water from shallow groundwater.
Overview of Manual Tools: Auger, Casing, and Percussion-Rope Device
For successful manual drilling, it is critically important to select the right tool for the soil type on your plot. Using inappropriate tools will lead to rapid fatigue and may result in equipment failure.
Let's look at the three main tools for manual drilling:
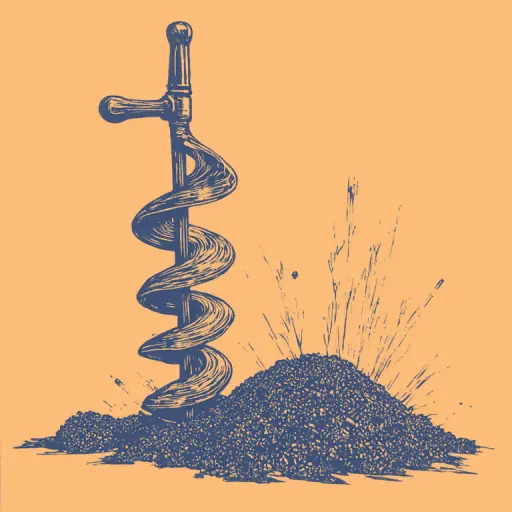
- Auger. This is a shaft with screw blades (Archimedes screw). It is ideal for soft, clayey, and loamy soils. When rotated, it penetrates the ground and brings the rock to the surface. As the depth increases, the drilling column is built up with shafts.
- Casing. This is a section of steel pipe with a check valve (ball or leaf) at the bottom. It is indispensable when passing through loose sands, running sand, and water-bearing layers where a regular manual auger is useless because the material collapses.
- Percussion-Rope Device (Driving Can). This is a heavy metal cylinder with a pointed bottom edge. It is dropped into the borehole from a height via a rope using a tripod. It effectively crushes hard rock and compacts clay, collecting the soil inside the cavity.
| Tool | Optimal Soil | Application Features |
|---|---|---|
| Auger | Clay, loam | Requires regular lifting to clear blades |
| Casing | Sand, running sand, gravel | Used inside the casing pipe to prevent collapse |
| Percussion-Rope Device | Dense clay, rocky soil | Requires construction of a tripod with a block and winch |
Material Preparation: How to Choose Casing Pipes and Make a Filter Yourself
For successful DIY drilling, it is critically important to correctly select the casing pipes and build a reliable bottom filter that protects the system from silting.
Choosing Casing Pipes
The best choice for manual drilling is NPVCH (unplasticized polyvinyl chloride) pipes with threaded connections. They possess high compressive strength, are chemically neutral, and are easy to assemble manually. The optimal outer diameter for a domestic well with a submersible pump is 113–125 mm with a wall thickness of at least 5 mm. Using standard gray or orange sewage pipes is strongly discouraged: they are easily crushed by soil pressure at depth.
DIY Filter Construction
The filter section is installed directly into the aquifer. A reliable filter can be made from a standard section of casing pipe measuring 1.5–2 meters:
- Perforation: Mark and drill holes with a diameter of 8–10 mm in a staggered pattern with a spacing of 2–3 cm (or make transverse cuts with an angle grinder 1.5–2 mm wide). The perforation zone should cover about 25–30% of the pipe's working surface area.
- Wrapping: Tightly wrap the pipe with stainless steel or copper wire with a diameter of 1–1.5 mm and a spacing of 10–15 mm. This creates the necessary gap between the pipe and the screen, increasing the filtration area.
- Filter Screen: Wrap the pipe with a woven stainless steel mesh (grades P-48, P-52, or P-56 depending on the sand fraction in your region) or a special polymer mesh.
- Fixing: Secure the mesh with stainless steel self-tapping screws with a washer or clamps. The bottom end of the pipe must be sealed with a conical plug to prevent sand ingress from below.
Step-by-Step Manual Well Drilling Process
Once the casing pipes are prepared and the homemade filter awaits its time, the most critical stage begins—the direct penetration of the soil. Self-drilling requires not only physical endurance but also a clear understanding of the physics of the process. Depending on the soil type on your site and the planned depth of the source, you must choose the optimal tactic for breaking up and extracting the rock to the surface.
In practice, manual drilling boils down to two of the most effective and time-tested technologies. Each has its nuances, requires a specific working pace, and handles complex soil layers differently, such as dense clay or saturated sand. Let's examine the step-by-step algorithms for each method in detail so you can successfully lay the shaft of your future well without heavy machinery.
Percussion Drilling Method and Abyssinian Well Installation
Start by preparing a guide pit about 0.5 m deep. Install the manual auger strictly vertically. Rotate the tool clockwise, deepening by 30–40 cm per pass. Do not try to drive the auger completely—a projectile packed with wet soil will be extremely difficult to lift to the surface. Extract the auger, clean the blades of dirt, and repeat the cycle. Upon reaching a depth of 1–1.5 m, increase the column height with the next rod using a threaded or pin connection.
To set up the abyssinian well, first drill the guide shaft with the auger to a depth of 2–3 meters. Then, lower the first section of pipe with a conical tip and needle filter into it. Drive the pipe using a heavy metal 'head' (weighing from 30 kg) or a sledgehammer through a special base plate to avoid deforming the threads. As you descend, screw on new pipe segments, sealing the joints with plumbing hemp and paste. Periodically pour water into the pipe: as soon as it rushes out with a whistle—you have reached the aquifer.
Features of the Impact-Rope Method Using a Casing Pipe
The impact-rope method is one of the most reliable methods for penetrating loose, sandy, and water-saturated soils where a standard auger proves ineffective. The main working tool here is the casing pipe—a heavy section of steel pipe with a pointed lower end and a built-in check valve (ball or flap).
The step-by-step drilling process is as follows:
- Tripod Setup: A sturdy wooden or metal tripod with a block and winch is mounted above the mouth of the future well.
- Projectile Drop: The casing pipe is dropped into the borehole on a strong rope from a height of 1.5–2 meters. Upon hitting the bottom, the valve opens, and the rock fills the pipe cavity.
- Lifting and Cleaning: When the rope is pulled, the valve closes, retaining the soil inside. The projectile is lifted to the surface, turned over, and cleaned of sludge.
- Casing Pipe Settlement: To prevent the shaft walls from collapsing, drilling is conducted directly inside the casing column, gradually settling it downwards by its own weight or with the help of heavy hammer blows through a wooden spacer.
Practical Tip: If you are drilling through a dry clay layer, be sure to pour water into the well—this will soften the rock and simplify its extraction with the casing pipe.
Well Construction, Casing, and Flushing
When drilling is successfully completed and the auger reaches the aquifer, it is too early to relax. The shaft in the ground is not durable on its own: without proper wall reinforcement, it will quickly collapse, and the incoming water will be silty and unusable. The critically important stage of construction begins here, which directly determines the source's yield and service life.
To transform a simple hole in the ground into a full-fledged, durable source of clean drinking water, you must solve two main problems: securely fixing the shaft column and cleaning the water intake zone of drilling sludge and surface water. Let's examine how to perform these final steps correctly by yourself.
Casing Column Installation and Creation of a Reliable Bottom Filter
Immediately after drilling is finished, proceed to casing to prevent the shaft walls from collapsing. The optimal choice for a manual well is NPVCH plastic pipes with threaded connections, 110–125 mm in diameter. They are assembled sequentially and carefully lowered into the shaft.
At the bottom end of the first (bottom) pipe, the filter section with perforation and woven mesh must be installed. To prevent fine sand from entering through the bottom end, a reliable bottom filter is created:
- Lower the casing column until it rests firmly on the impermeable layer.
- Fill the inside of the pipe with a layer of clean, washed quartz gravel of fine fraction (2–5 mm) 15–20 cm thick.
- If the bottom remains open, seal the end with a bag of bentonite clay, which will swell and create a reliable plug.
Flushing the Well from Surface Water and Initial Pumping to Clean Water
After installing the casing pipe and bottom filter, drilling fluid, clay, and fine suspension inevitably remain in the shaft. To start water intake, flushing and initial pumping of the well are necessary.
Step 1: Backwashing
Lower the garden hose to the very bottom of the casing and supply clean water under pressure. The water will begin to wash clay sediment up the pipe or through the annulus. Continue the process until relatively clean water flows from the outlet without clay clumps.
Step 2: Initial Pumping (Agitation)
It is strictly forbidden to use an expensive centrifugal pump for this procedure—abrasive sand will instantly destroy it.
- Use a budget vibratory pump (e.g., "Malysh" or "Rucheek").
- Lower the pump into the well so that it is 50–70 cm from the bottom filter level. If lowered further, it will quickly silt up with sand; if raised higher, it will not draw up all the turbidity.
- Turn on the pump and pump the water. Periodically (every 1–2 hours), lift and shake the pump to agitate the settled sand and remove it.
The agitation process can take from 3–5 hours to several days. Stop pumping only when the water becomes visually clear and free of sediment.
Drilling Difficulties and How to Overcome Them
Even with the most careful preparation, manual drilling rarely goes perfectly smoothly. Encountering heterogeneous soils, hidden obstacles, and unpredictable aquifer behavior is a natural part of the process that you must be prepared for in advance. Without heavy machinery, any obstruction at depth requires the master to react instantly, remain calm, and understand the physics of the processes occurring.
In this section, we will examine critical situations that can completely halt work or lead to equipment loss, and we will also look at proven practical methods for resolving them. Knowing these nuances will help you save strength, time, and expensive materials.
What to Do If You Encounter a Running Ground or Stuck Drilling Tool During Work
In manual drilling, running ground and tool jamming are the two most common problems.
How to pass through running ground:
- Preceding Casing. Do not attempt to drill an open bore. Lower the casing pipe to the stop and drive it down (by ramming or applying weight), while simultaneously removing the fluidized sand from inside with a bucket.
- Hydrostatic Support. Constantly fill the casing pipe with water. The water column will create counter-pressure, preventing sand from washing in from the bottom.
What to do if the drill is stuck:
- Do not pull with the winch "head-on"—this can snap the rods.
- Soil washing. Supply water into the borehole via the hose to soften the clay around the blades.
- Using jacks. Place two car jacks under the clamp on the drill rod and gently, with tension, pull the tool out while carefully rocking it with a wrench.
Main Mistakes of Beginners in Manual Drilling and How to Avoid Them
To avoid negating all your physical effort, it is important not to make typical mistakes that nine out of ten novice masters make.
Here are the main mistakes in self-drilling and ways to prevent them:
- Ignoring borehole verticality. If the drill drifts even a couple of degrees to the side, the casing pipe will get stuck during lowering. How to avoid: monitor the verticality of the rods using a construction level or plumb line with every extension.
- Delaying casing installation. You cannot leave an open shaft without pipes "for tomorrow"—the soil will collapse. How to avoid: lower the casing string immediately after reaching the target depth.
- Incorrect drill diameter. Using a tool that is "just fitting" the pipe size. How to avoid: choose a drill diameter with a 10–15 mm margin relative to the outer diameter of the casing couplings.
- Weak rod fixation. During reverse rotation, the threads can unscrew, and the tool will remain at the bottom. How to avoid: always duplicate threaded connections with pins or lock nuts.
- Stopping at the water table. Mistaking the first wet sand for a full aquifer, novices end up with a drying source. How to avoid: drill through the water table all the way to the impermeable clay layer beneath the main aquifer.
Conclusion
Self-drilling a well is a laborious but entirely achievable process that allows you to significantly save on budget and provide your plot with clean water. The main thing is to choose the right method (whether it is a simple Abyssinian needle or a reliable impact-rope method), prepare quality tools, and strictly follow the technology. Be patient, avoid rushing, and your own source will serve reliably for many years!