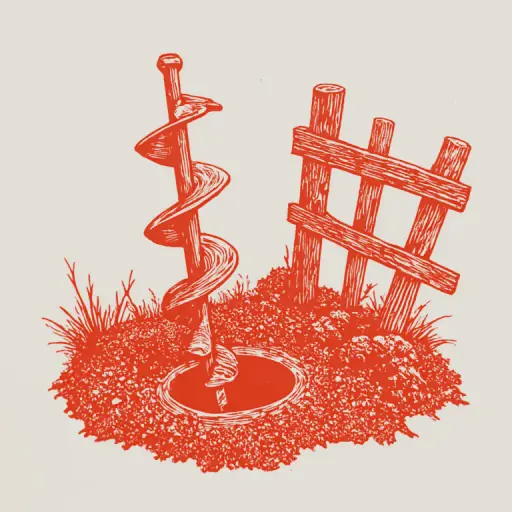
How to Drill Holes for Fence Posts: From Tool Selection to Concrete Pouring
- 15 min read
- 61
The reliability and durability of any fence directly depend on the strength of its foundation. Mistakes made during the footing preparation—whether insufficient depth or incorrectly chosen hole diameter—will inevitably lead to structural distortion after the first winter. This is why proper drilling of holes for posts is a critically important step.
In this practical guide, we will detail how to independently create holes for supports that can withstand any wind and snow loads. You will learn how to calculate the parameters of the holes considering the frost penetration depth, which tool to choose—a classic manual earth auger or a powerful motor auger for posts—and how to handle difficult soil types, including dense clay and rocky ground. We will go through the entire process step-by-step: from site marking to the final installation of supports using gravel backfilling or concrete pouring.
Preparation Stage: Calculating Hole Parameters and Site Marking
Any sturdy enclosure begins not with buying materials or even choosing an auger, but with accurate calculations on paper and proper site preparation. Mistakes at this stage—such as incorrectly determined depth or marking displacement of even a few centimeters—can lead to the entire structure warping after the first winter due to frost heave forces.
Before starting the motor auger or picking up the manual tool, it is necessary to clearly define the geometry of the future boreholes and transfer the fence design onto the real landscape. Let's look at how to correctly calculate the key parameters of the holes for popular post types and accurately mark the perimeter of the site.
Determining the Depth and Diameter of the Hole for 60x60 and 80x80 mm Posts Considering Frost Penetration
Correctly calculating the hole parameters is the key to ensuring the fence does not shift in the spring. The main reference point when determining the drilling depth is the regulatory frost penetration depth (FPD) in your region. To prevent frost heave forces from pushing the support out, the bottom of the post must be located 20–30 cm below the frost line. For example, if the FPD is 1.2 m, the hole must be drilled to a depth of at least 1.4–1.5 m.
The hole diameter directly depends on the post cross-section and the chosen fixing method (concrete pouring or gravel backfilling). For free pouring of mortar or quality layered tamping, the technological gap between the hole wall and the post face must be at least 50–100 mm.
Recommended parameters for popular post types:
- For 60x60 mm posts (diagonal ~85 mm): the optimal auger diameter is 150 mm (for concrete pouring) or 200 mm (for gravel backfilling).
- For 80x80 mm posts (diagonal ~113 mm): it is recommended to use an auger with a diameter of 200–250 mm.
Using an overly narrow auger will complicate post centering, while an excessively wide diameter will lead to waste of concrete mixture and increased labor costs.
Technology for Perimeter Marking and Calculating Optimal Post Spacing
Proper marking is the key to a straight fence without distortion. Start by defining the extreme and corner points of the site. Install sturdy stakes at these locations and stretch a construction cord (twine) between them. The cord must be pulled as tight as possible to prevent sagging.
Calculating the distance between posts:
- For light fences (profile sheeting, Euro-picket, wire mesh): the optimal spacing is 2.5 meters. This provides a balance between structural rigidity and material consumption. For strong wind loads, the spacing is reduced to 2.0 meters.
- For heavy fences (brick, concrete sections): the spacing is reduced to 1.5–2.0 meters.
Step-by-step marking algorithm:
- Mark the locations for the gate and pedestrian gate—these areas are marked first.
- Measure the net length of the remaining straight sections.
- Divide the length of each section by the planned spacing (e.g., 2.5 m). Round the resulting number up to get the number of spans, and adjust the spacing so that all spans are of equal length.
- Measure the calculated distances with a tape measure along the stretched cord and drive stakes at the locations of the future holes.
Equipment Selection: Manual Auger, Motor Auger, or Equipment Rental
Once the site marking is complete and the points of the future supports are clearly defined, the homeowner faces the main practical question: what exactly to use to make holes in the ground? The choice of tool directly determines not only the speed of work and physical labor but also the quality of the finished holes. There are three main ways to solve this problem: using a classic manual auger, using a gasoline motor auger, or renting professional specialized equipment.
Each of these options has its own technological limitations, economic viability, and requirements for soil type. To avoid overpaying for rentals and straining your back on heavy soil, it is important to compare the volume of upcoming work with the capabilities of each type of equipment in advance.
Comparison of Manual Auger and Motor Auger: Pros, Cons, and Economic Feasibility
The choice between manual tools and gasoline equipment depends on the scale of the work, the budget, and your physical fitness.
Manual earth auger—this is the most budget-friendly option.
- Pros: low cost, durability, independence from power sources, safety, and precision of drilling.
- Cons: enormous labor requirements. Drilling more than 5 holes with a depth of 1 meter turns into a heavy physical test, especially in loamy soils.
Post motor auger drastically speeds up the process.
- Pros: high speed (hole in 2–3 minutes), easy penetration of dense soil layers.
- Cons: high purchase price, considerable equipment weight, and the risk of injury if the auger jams (back-driving).
Economic feasibility:
For installing a gate or 5–6 supports for a light canopy, manual tools are perfectly adequate. However, if you plan a full perimeter fence (15–20 posts), the optimal solution is to rent a post hole digger for a day. This will save energy and allow you to prepare all the holes in one day without unnecessary expenses for purchasing expensive equipment.
Structural Features of Augers: Single-Pass, Double-Pass, and Homemade Attachments
The efficiency of work with both manual and motor augers directly depends on the geometry of its cutting part—the auger bit. Choosing the correct design facilitates drilling and reduces the physical strain on the hands.
- Single-flight augers have one spiral blade. They are characterized by low weight and affordable price, creating minimal resistance during rotation. However, in dense soils, such a auger often drifts sideways, requiring constant effort to keep it straight.
- Double-flight augers are equipped with two symmetrical blades. They ensure excellent centering, penetrate the ground strictly vertically, and vibrate almost none. This is the ideal option for heavy clay and loams.
- DIY attachments are usually made from circular saw discs or sheet steel welded onto a pipe at an angle. Adapters for powerful rotary hammers (with SDS-max chuck) are also popular, allowing construction tools to be used for quickly drilling small holes in soft soil.
| Auger Type | Pros | Cons | Optimal Soil |
|---|---|---|---|
| Single-flight | Lightweight, inexpensive | Drifts during drilling | Sand, loamy sand, topsoil |
| Double-flight | Straight path, high speed | Heavy, more expensive | Dense clay, loams |
| DIY | Budget-friendly, customizable | Requires welding, lower lifespan | Soft soil without stones |
Step-by-Step Guide to Drilling Holes
Once the appropriate tool and accessories are selected, you can move on to the practical stage—the actual drilling of boreholes on the site. The success of this work depends not only on the power of the motor auger or the sharpness of the manual tool blades but also on strictly following the technological sequence. The correct procedure minimizes physical effort, prevents equipment failure, and ensures that every post is set perfectly straight. Before making the first rotation of the auger, it is necessary to properly organize the workspace, prepare personal protective equipment, and accurately mark the drilling points to avoid deviations from the axis of the future fence.
Tool Preparation, Drilling Point Marking, and Safety Precautions
Before starting work, you must prepare a complete set of equipment and secure the work area.
1. Tool Preparation
In addition to the main auger (manual or gasoline), you will need:
- A spade for removing sod and creating a guiding pit;
- A tape measure, a spirit level, and a sturdy marking string;
- Wooden or metal stakes;
- A bright marker or spray paint for marking the soil.
2. Marking Drilling Points
Clear the fence line of tall grass and debris. Stretch the string between the corner stakes strictly along the fence axis. Using the tape measure, mark the calculated distance between posts and drive intermediate stakes. At the location of each stake, remove the sod with a spade to a depth of 10–15 cm—this creates a starting hole and prevents the auger from drifting sideways upon startup.
3. Safety Precautions
- PPE: Work wearing safety goggles, thick gloves, and boots with a hard toe.
- Utilities: Ensure there are no underground cables or pipelines on the site.
- Motor Auger Operation: Hold the tool firmly with both hands. Be prepared for a 'kickback' when the auger meets roots or stones. Do not block the trigger.
Drilling Technology, Soil Removal, and Verticality Control
The drilling technology begins with preparing the guiding pit. A small depression is dug with a spade to a depth of 10–15 cm—this prevents the auger from drifting sideways at the start.
When working with a manual or motor auger, the deepening is performed in stages:
- Interval Drilling: Lower the tool by 15–20 cm per pass.
- Soil Removal: Do not try to reach the full depth at once. Lift the auger up along with the soil, carefully shaking it away from the borehole opening. This protects your back from strain and the motor auger from jamming.
- Verticality Control: Check the tilt every 30 cm of drilling. To do this, place a spirit level (preferably a two-plane one) on the auger shaft. Correct any deviation immediately by widening the hole in the required direction, otherwise, the post will stand crooked.
Features of Working in Difficult and Problematic Soils
Even with perfect adherence to drilling technology, real site conditions often present unpleasant surprises. Uniform and light soil is a rarity. More often, gardeners and builders have to deal with capricious soils that behave unpredictably when trying to create a straight vertical hole.
Dense, viscous clay locks the auger tool in place, loose dry sand instantly falls back into the borehole, and hidden tree roots and large boulders can completely stop the work or damage the equipment. To successfully complete the fence installation in such conditions, it is necessary to adjust the standard drilling method and use proven professional tricks.
Drilling in Dense Clay and Loose Sandy Soil: Preventing Wall Collapse
Working in clay and sandy soils requires opposite technological approaches due to the physical properties of these media.
Dense Clay and Heavy Loam
The main difficulty here is high viscosity and the 'vacuum' effect, which makes it hard to pull the clay-filled auger to the surface.
- Working Technique: Drill in short intervals, penetrating only 10–15 cm per pass, then immediately lift the tool for cleaning.
- Lifehack: Pour 1–2 liters of water into the hole. It will soften the top layer and act as a lubricant, reducing the friction of the auger against the walls.
Loose Sandy Soil
Sand drills easily, but its walls instantly collapse back into the shaft, preventing the achievement of the required depth.
- Working Technique: Use the casing method. As soon as the hole starts to collapse, insert a plastic sewage pipe of a suitable diameter or a liner rolled from roofing felt into it.
- Continuing Drilling: Develop the soil inside this protective casing, gradually pushing (driving) it down to the design elevation. It will also serve as reliable formwork during subsequent concrete pouring.
What to Do When There Are Stones, Roots, and Bedrock in the Soil
Encountering underground obstacles is a common problem when preparing holes. Each type of obstruction requires its own passage technique:
- Stones and boulders. The auger of a motor drill lifts small fragments to the surface on its own. If the tool hits a large stone, drilling is stopped to prevent kickback and gearbox failure. The boulder is removed manually using a crowbar and a narrow shovel. If the stone is too large, it is broken up with a powerful jackhammer equipped with a pickaxe directly in the hole.
- Tree roots. Attempting to "drill through" a root with the auger will cause fibers to wrap around and jam the gearbox. Encountered roots are cut with a sharp axe on a long handle, a long chisel, or cut with a scythe saw.
- Rocky soil. Manual drills are useless when working in solid rock. In such conditions, heavy jackhammers (5–9 J) are used for localized rock destruction, or specialized equipment (a hole drill) equipped with carbide crowns is rented.
Installing and Securing Posts in Prepared Holes
Once the holes are successfully drilled and all obstacles like stones and roots are behind you, the most critical stage begins—installing and securely fixing the support posts. This step determines whether your fence will withstand wind loads and seasonal soil fluctuations. You cannot simply backfill the posts with excavated soil: the first spring and soil heaving will warp the entire structure.
Two proven methods are used to create a durable support, the choice of which depends on the soil type and the weight of the future enclosure. Below, we will detail the technique of gravel backfilling, which is ideal for frost-susceptible soils, as well as the rules for classic concrete pouring, which ensures maximum structural rigidity.
Dry and Wet Gravel Backfilling: Layered Compaction and Drainage
Gravel backfilling is a reliable alternative to concrete, especially effective in frost-susceptible clay soils. The gravel jacket around the post acts as drainage: it freely allows water to pass into the lower soil layers below the frost line, preventing the post from being pushed out when moisture freezes.
There are two main backfilling methods:
- Dry backfilling. Clean gravel of 5–20 or 20–40 mm fraction is poured into the hole around a strictly vertical post. The filling is done in layers—portions of 10–15 cm each—each layer being carefully compacted with a wooden beam or a metal crowbar with a welded heel.
- Wet backfilling (with pouring). To achieve maximum density, the gravel layers are mixed with sand or fine screening material and heavily watered. The water draws the sand particles into the voids between the gravel fractions, creating a strong natural "lock."
Before starting to fill, a drainage cushion of sand and gravel, 10–15 cm thick, must be laid at the bottom of the hole and also firmly compacted.
Technology for Securely Pouring Posts to Prevent Frost Heave
Concrete pouring is a classic fixing method, but installation errors can easily cause frost heave forces to push out or skew the supports. To avoid this, it is necessary to prevent the concrete from bonding with the frozen ground and to anchor the base of the post below the frost line.
The reliable concrete pouring technology includes three key steps:
- Creating a frost-resistant sleeve. Before pouring the mixture into the hole, a "sleeve" made of rolled-up roofing felt or a plastic pipe is inserted. This prevents cement slurry from migrating into the soil and creates a smooth, sliding surface. When the soil freezes, it will slide along the sleeve without pulling the post with it.
- Creating an anchor extension. It is advisable to create a small widening at the bottom of the hole, below the frost line. When the concrete is poured, a strong "heel" is formed, which acts as an anchor, preventing the post from being pushed out.
- Pouring and rebar tying. Use concrete of grade M200 or higher. The mixture is poured in layers, making sure to tie it with rebar to remove air bubbles. The top of the pour is shaped into a cone above ground level to divert rainwater.
Conclusion
Proper preparation and drilling of holes for posts is the invisible but most important foundation that determines the durability and aesthetics of your future fence. Mistakes made during the earthwork stage (insufficient depth, incorrect diameter, or ignoring soil type) cannot be fully compensated for even with the most expensive cladding material.
To summarize, here are the key rules for successful DIY post installation:
- Accurate parameter calculation: Always drill below the calculated frost depth for your region to prevent winter post displacement.
- Adequate tool selection: A manual drill is sufficient for 10–15 light posts, but for large-scale work, dense clay, or rocky soil, it is advisable to rent a motor auger.
- Geometry control: Check the verticality of the holes and the alignment of the markings at every stage—from the first auger pass to the final post fixation.
- Smart technology choice: Use roofing felt sleeves when concreting in frost-susceptible soils or use the layered dry gravel backfilling method when the groundwater level is high.
DIY hole drilling requires physical effort and precision, but it allows you to save a significant portion of the construction budget. By following proven technologies and not neglecting safety rules, you will create a reliable foundation for an enclosure that will stand for decades without warping or deformation. Good luck with your project!