How to drill a water well by yourself without special equipment
- 25 min read
- 69
Having a private source of clean water on a dacha or homestead is the guarantee of comfortable living, a well-maintained garden, and complete independence from utility services. However, calling a drilling crew with specialized equipment often costs a small fortune, and heavy wheeled machinery can irreparably damage the landscape design, garden beds, and paths. Fortunately, you can set up an autonomous water supply on your own. Self-drilling a well is a completely achievable task that will save your budget and allow you to control every stage of the work.
In this practical guide, we will thoroughly examine how to drill a water well yourself without resorting to expensive specialists. You will learn how to correctly identify the water-bearing horizon, choose the optimal location on the plot considering sanitary standards, and prepare reliable materials such as casing pipe and a homemade well filter.
We will detail four popular manual drilling methods:
- Abyssinian well (needle) — the most accessible way to get water in literally one day.
- Auger drill — classic rotary drilling, ideal for soft and medium soils.
- Percussion-cable method — a time-tested technology where the heavy casing plays a key role.
- Hydrodrilling — effective rock destruction and washing out using water pressure.
We will also share secrets on how to penetrate a tricky running sand layer, how the final well flushing is carried out to crystal clarity, and which surface pump or submersible equivalent will ensure an uninterrupted water supply.
Preparation for Drilling: Depth, Soil Types, and Site Selection
The success of manual drilling depends 90% on thorough preparation. Before picking up the tools, it is necessary to clearly assess the geological conditions of your plot and create a detailed action plan. Blindly digging into the ground in a random spot often leads to the shaft collapsing, homemade equipment breaking down, or, even worse, obtaining shallow groundwater unsuitable for drinking.
At this stage, it is important to solve two key tasks: calculating the physical capabilities of the manual method for a specific soil type and finding the ideal point on the plot. Correct depth calculation and adherence to sanitary zones will save you wasted effort and guarantee that the future source will provide clean water in the required volume.
What is the maximum depth that can be drilled manually and how to determine the water-bearing horizon
When drilling independently without heavy machinery, the drilling depth directly depends on the chosen technology, physical endurance, and the geological features of the site.
- Purely manual method (auger drill): Without using lifting mechanisms, the limit is 10–15 meters. The limitation is related to the weight of the drill string: manually lifting rods with a total length exceeding 15 meters becomes physically impossible.
- With minor mechanization (tripod, winch): Using the percussion-cable method or hydrodrilling, you can go deeper to 20–30 meters. This is quite enough to reach a quality first or second sandy water-bearing horizon.
To determine if you have reached the water-bearing horizon, you can look for several characteristic signs:
- Change in drilling speed. Upon hitting the water-bearing sand, the auger begins to move noticeably easier; the rods may literally 'sink' down 10–30 cm under their own weight.
- Nature of the excavated material. Wet, coarse-grained gray or yellow sand, sometimes mixed with fine gravel, appears on the auger or in the casing. Water easily separates from the solid particles in this layer.
- Absorption of drilling fluid. If hydrodrilling is used, when the aquifer is encountered, water from the pit begins to rapidly flow into the well—this is a sure sign of a draining sandy layer.
- Appearance of the static level. During dry drilling, water rises sharply in the well shaft. By measuring the distance from the ground surface to the water level, you determine the static level of the future source.
As soon as you have passed the water-bearing layer by 1–2 meters and hit the underlying impermeable layer (usually dense clay), drilling should stop to avoid 'piercing' the impermeable layer and losing water into lower dry horizons.
Choosing the optimal location for a well on the plot considering sanitary standards
Choosing the location for the future well is not just about finding a convenient flat spot, but strictly adhering to sanitary standards (SanPiN) and construction rules. Since in manual drilling we are most often targeting the first or second water-bearing horizon (sandy layer), the water in it is most vulnerable to surface contamination.
When planning the site, refer to the following minimum distances from the wellhead to potential sources of contamination:
- Septic tanks, autonomous sewage systems, and cesspools: at least 15–25 meters (on sandy and sandy-loam soils, this distance should be increased to 30–50 meters);
- Compost heaps, garbage containers, and 'flush-toilet' types: at least 20 meters;
- Poultry houses, aviaries, and livestock areas: at least 15 meters;
- Neighboring property line: at least 2–4 meters.
In addition to sanitary zones, it is important to consider technical placement requirements. Do not drill the well closer than 3–5 meters from the foundation of the house. Soil washout during drilling or subsequent suffusion can weaken the bearing capacity of the building's foundation. Also, ensure that there are no power lines or dense tree canopies above the chosen point that would impede raising the drilling rods.
Place the well on a rise or a level area. In low-lying areas, dirty water will inevitably accumulate during floods and heavy rains, which can seep into the water intake through the wellhead or the annular space.
Popular Manual Drilling Methods Without Special Equipment
The choice of a specific manual drilling technology depends on the soil type on your plot, the planned depth, and the available tools. When heavy equipment cannot access the site or the budget is limited, time-tested autonomous methods come into play. They require significant physical effort but allow for high-precision passage through all soil layers down to the water-bearing horizon.
In the practice of independently setting up a water intake, three basic approaches are most often used: rotary drilling, washing out rock under pressure, and impact fracturing of the stratum. Each of these methods has its own technological limitations, equipment requirements, and optimal application conditions that must be assessed before starting the work.
Auger Drill and Hydrodrilling: Features, Advantages, and Disadvantages
When considering popular manual drilling methods, one should first pay attention to two fundamentally different approaches: dry rotary drilling using an auger and wet rock washing—hydrodrilling. Both methods allow one to do without heavy machinery but require different equipment and physical effort.
Auger Drill is a classic "dry" method. You rotate the T-handle, the drill bites into the ground, and the spiral blades (auger) lift the broken soil to the surface. As the depth increases, the drilling column is extended with rods.
- Advantages: Simple design, minimal water consumption, easy visual control of soil permeability. The method is ideal for soft, clayey, and loamy soils.
- Disadvantages: High physical exertion. The weight of the column increases with every meter, making it progressively harder to pull out for cleaning. The maximum depth of manual augering rarely exceeds 10–15 meters. The method is ineffective against large boulders and running sand.
Hydrodrilling is based on washing away the soil with a stream of water pressurized through the drilling rods to the cutter (auger head). The water washes the broken rock to the surface into a special settling pit.
- Advantages: High penetration rate and minimal physical effort compared to augering. The water simultaneously cools the tool and strengthens the shaft walls.
- Disadvantages: Requires a constant water source (sometimes several cubic meters) and a motor pump for dirty water. Due to the constant presence of drilling fluid, it is difficult to accurately determine the moment of entering the water-bearing horizon.
| Comparison Criterion | Auger Drill | Hydrodrilling |
|---|---|---|
| Physical Exertion | High | Medium |
| Required Equipment | Drill, rods, crank | Pump, hoses, swivel, rods |
| Water Consumption | Not required | High (from 1-2 cubic meters) |
| Aquifer Detection | Easy (by moist sand) | Difficult (due to fluid) |
Percussion-Cable Method Using a Homemade Casing Pipe
The percussion-cable method is one of the most reliable and simplest methods for drilling a well independently. Its essence lies in breaking up and capturing rock with a heavy projectile, which is cyclically dropped into the shaft from a height on a strong cable. This method is indispensable in loose, sandy, and clayey soils where other methods might lead to constant wall collapse.
The main working tool here is the homemade casing pipe. It is a section of heavy steel pipe, 1 to 2 meters long and slightly smaller in diameter than the casing. A cutting edge or teeth are sharpened or welded onto the lower end of the casing pipe to loosen the soil, and a check valve is installed inside.
There are two main types of valves for the homemade casing pipe:
- Ball Valve — A heavy metal ball (e.g., from a large bearing) seals the opening in the tapered bottom of the pipe when lifting and opens under soil pressure during impact.
- Flap Valve — A steel plate on a spring or a dense rubber membrane that allows fluid to enter and closes under the weight of the captured rock.
The step-by-step drilling process is as follows:
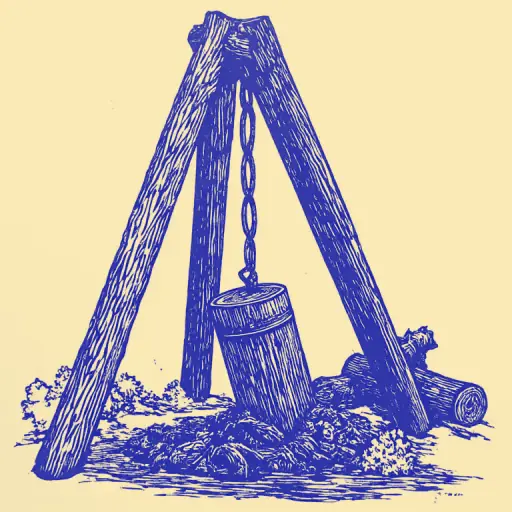
- A sturdy tripod, 2–3 meters high, is set up over the future well with a block at the top through which a steel cable is passed.
- The casing pipe is sharply dropped into the borehole. Upon impact, the valve opens, and a portion of the soil is packed into the pipe.
- When the cable is pulled, the valve closes, holding the rock inside the projectile.
- The casing pipe is raised to the surface, cleaned of dirt through a special technological window at the top of the pipe, and the cycle is repeated.
The main advantages of the method are the simplicity of equipment manufacturing, the ability to work alone, and high accuracy in determining the water-bearing horizon. The main drawback is high physical exertion and low penetration speed.
Step-by-Step Guide to Creating an Abyssinian Well (Needle) Yourself
Having mastered the percussion-cable method, which requires significant effort, it is worth looking at a more elegant and faster alternative—the abyssinian well, or needle well. This method is ideal for setting up autonomous water supply on a dacha by yourself in just one day. The main advantage of the "needle" is the ability to construct it even in confined spaces, such as a basement or a landscaped area, without disturbing the landscape.
The essence of the method is driving or narrowly drilling a thin pipe with a special tip down to the first sandy water-bearing horizon. Below, we will detail the practical steps for preparing the equipment and installing this reliable structure.
How to Make a Reliable Well Filter and Prepare the Casing Pipe
The needle filter is the heart of the abyssinian well. The quality of its manufacture determines not only the flow rate but also the longevity of the entire system. To create a reliable filter yourself, you will need: a one-inch metal pipe (1–1.5 m long), a steel cone tip, stainless steel woven mesh (P-48 or P-52 marking), stainless steel wire with a diameter of 1–1.5 mm, and lead-free tin solder.
Step-by-step filter manufacturing process:
- Pipe Perforation. A section 80–100 cm long is marked on the lower end of the pipe. Holes are drilled in a staggered pattern with a diameter of 8–10 mm and a spacing of 2–3 cm. The inner cavity of the pipe must be thoroughly cleaned of burrs and metal shavings.
- Wire Wrapping. Stainless steel wire is tightly wrapped over the perforated area with a spacing of 2–4 mm. This is necessary to create a gap between the pipe and the mesh, which increases the filtration area and prevents the mesh from sticking to the holes. The ends of the wire are secured with wraps or spot soldering.
- Mesh Installation. The woven mesh is stretched over the wire base. It is wrapped around the pipe in one layer with a slight overlap. The mesh is secured along its entire length with clamps or soldered with pure tin. Using lead is strictly forbidden—it will make the water toxic.
- Tip Installation. A steel cone is welded to the end of the pipe. The base diameter of the cone must be 3–5 mm larger than the outer diameter of the pipe with the wrapped mesh. This protects the filtering element from damage during driving.
Casing Pipe Preparation:
The rest of the casing column is assembled from pipe sections 1.5–2 meters long. Short pipe threads are cut on the ends of each segment. Strong steel couplings are used for connection. The sealing of the joints is a critical factor: the slightest air leak will make it impossible to lift water with a surface pump. Thread sealing is done using plumbing tape with a special paste or anaerobic sealant.
Step-by-Step Process for Driving or Drilling a Needle Well Yourself
The abyssinian needle well can be inserted into the ground using two main methods: classic driving or preliminary drilling followed by settling. We will examine the step-by-step algorithm of the most reliable combined method.
Step 1: Pit Preparation
Excavate a pit at the chosen location measuring approximately 50x50 cm and up to 1 meter deep. This will help pass the upper, densest layer of turf and ensure the stability of the guiding pipe.
Step 2: Preliminary Drilling
To facilitate the passage through the upper soil layers and prevent the filter from being damaged by stones, use a narrow auger drill with a diameter of 70–80 mm. Drill the guide shaft to the maximum possible depth—usually until water-saturated sand or running sand appears.
Step 3: Assembling and Centering the First Pipe Section
Lower the first section of pipe, equipped with the finished needle filter at the end, into the prepared shaft. Ensure that the casing pipe stands perfectly vertical. Use a spirit level for control.
Step 4: Driving Process (The 'Babby' Method)
If you decide to drive the pipe manually, abandon the sledgehammer—it often deforms the threaded connections and compromises coaxiality. Use a special sliding 'babka' (driver) weighing 25–30 kg:
- Secure a sturdy steel clamp (under-babka) onto the pipe at a distance of about 1 meter from the top edge.
- Place the 'babka' onto the pipe above the clamp.
- By striking the clamp with the 'babka', gradually drive the pipe into the soil. As you deepen, move the clamp higher.
Step 5: Building Up the Column
When about 20–30 cm of pipe remains above ground, screw on the next section. Be sure to seal the threaded connections with plumbing linen and paste or anaerobic sealant. Any air ingress will make it impossible to lift water with a surface pump.
Step 6: Determining the Water Table
Continuously pour water into the pipe during the driving process. As soon as the needle reaches the water table, the water in the pipe will sharply drain downwards. Drive the pipe an additional 0.5–1 meter so that the well filter is completely submerged in the aquifer layer.
Overcoming Difficult Obstacles: Passing Through Running Sand and Hard Rock
The manual drilling process rarely goes perfectly smoothly. Even with precise marking and the correct technology chosen, you may encounter serious geological surprises at depths of several meters. The most dangerous and difficult obstacles for the amateur craftsman are traditionally considered to be mobile saturated soils—running sands, as well as unexpected layers of hard rock or dense clay that literally block the progress of the drill.
Success in passing through such complex intervals depends not on physical strength, but on the correct application of special technological techniques. To avoid losing the already prepared shaft and breaking the homemade tool, it is necessary to prepare auxiliary materials in advance and master methods for reinforcing the excavation walls directly during the passage.
What to Do If You Encounter Running Sand During Drilling: Combat Methods
Running sand is a water-saturated layer of fine sand or silt that behaves like a liquid mush under pressure. Encountering it during manual drilling becomes a serious test: the shaft walls instantly collapse, burying the auger, and the tool can become firmly jammed in the soil. Trying to pass through running sand with a regular auger in an open bore is useless—no matter how much sand you pull out, its inflow will not stop.
Several proven tactics are used to successfully overcome this obstacle by hand:
Advance Casing Method (Drilling 'Ahead')
This is the most reliable method for percussion-cable or auger drilling. As soon as the auger reaches the running sand, a casing pipe is lowered into the well until it stops. Further soil destruction and removal occur exclusively inside this pipe. A narrow casing with a reliable check valve is used for this purpose. As the casing scoops out the water-saturated sand, the casing pipe is lowered, driven down by a heavy babka or by loading a heavy weight from above (such as bags of sand or barrels of water). The pipe must constantly stay slightly ahead of the soil removal zone, blocking the running sand's access to the bore.Rapid Passage (For the Abyssinian Needle)
If you are setting up an abyssinian well, the running sand can be passed using the driving method. Since the needle is a sealed pipe with a sharp tip, it is simply driven through the unstable layer with a heavy babka. The main thing is to move without stopping so that the running sand does not have time to 'jam' the pipe with frictional force. As soon as the filter passes the running sand and hits hard clay or coarse clean sand, the driving stops.Using Hydrodrilling with Solution Weighting
In hydrodrilling, passing through running sand is facilitated by creating counter-pressure from a water column. However, plain water is often insufficient—it quickly drains into the sand. To hold the walls, clay is added to the water, turning it into a dense drilling fluid that seals (plugs) the pores in the running sand.
The main rule when working in running sand is never to leave the tool on the bottom, even for a few minutes. Without constant movement, it will instantly be pulled down by the sand, and extracting the auger by hand will be practically impossible.
Using Bentonite, Casing Pipes, and Conduits for Wall Reinforcement
In manual drilling, especially using hydrodrilling or when passing through loose sands, mechanical effort alone is often not enough. To prevent the shaft walls from collapsing inward and blocking the drilling tool, a comprehensive approach is used: chemical reinforcement with bentonite and physical fixation using a conduit and casing pipe.
Using Bentonite Solution
Bentonite is a natural clay mineral that forms a gel-like suspension when mixed with water. During drilling, this solution performs three vital functions:
- Wall Sealing: The clay penetrates the pores of the sandy soil and creates a dense, waterproof crust on the bore walls, which literally 'glues' the sand grains together and prevents them from collapsing under the pressure of groundwater.
- Suspension Holding: Due to its high viscosity, the bentonite solution effectively carries the broken rock to the surface, preventing it from settling at the bottom when the pump stops.
- Tool Lubrication: It reduces the friction of the drilling rods against the well walls, easing manual rotation of the tool.
To prepare the solution by hand, gradually pour the dry bentonite powder into a container of water (calculating 2–4 kg per 100 liters of water, depending on the sand's looseness) while constantly mixing with a construction mixer. Allow the solution to stand for 20–30 minutes for the clay to fully swell.
Installing the Conduit
The conduit is the first, widest pipe (usually 150–200 mm in diameter) installed at the very beginning of drilling, to a depth of 1.5 to 3 meters. It prevents the erosion and collapse of the upper, loosest layer of soil (chernozem, loamy soil), sets a strictly vertical direction for subsequent drilling, and serves as a guide for the working casing pipe.
Casing Installation
The casing string is assembled from durable plastic pipes (PVC) using threaded connections. During manual drilling, it is lowered directly during the drilling process (advance casing method) or immediately after reaching the aquifer, provided the walls are securely held by bentonite. The pipes are carefully built up from the top, seating the string downwards by its own weight or with light taps through a wooden spacer to avoid damaging the plastic threads.
Well Flushing, Circulation, and Pump Selection
Once the casing string is securely installed and fixed, the drilling process can be considered complete, but it is too early to use the source. A slurry of clay, drilling fluid, and fine sand has accumulated at the bottom and in the near-wellbore zone, causing the incoming water to look like dirty sludge. It is strictly forbidden to use this water for domestic needs or to start a standard pump under these conditions—sensitive equipment will immediately clog and fail.
The final stage of setting up a DIY water intake involves two crucial steps: thorough flushing (circulation) of the well until visual clarity is achieved and proper selection of pumping equipment. Performing these procedures correctly will not only ensure you have crystal-clear water but also significantly extend the service life of the entire autonomous water supply system.
How to Properly Flush and Circulate a Finished Well Until Absolutely Clear Water Appears
After the casing pipe is installed and the filter is in the aquifer, the water in the well will be dirty, cloudy, and unusable. It contains drilling mud, clay particles, and fine sand. To turn this slurry into clean drinking water, two sequential stages must be performed: primary flushing and subsequent well circulation (pumping).
Primary Borehole Flushing
If drilling was done hydrostatically or with bentonite, the borehole is packed with clay slurry, which blocks water inflow. To remove it, flushing is performed:
- A flushing hose is lowered into the casing pipe to the bottom.
- Clean water is pumped under pressure using an external pump or motor pump.
- Water exiting through the annulus to the surface washes away the drilling fluid residue and heavy sludge.
- The process continues until clean technical water flows out of the annulus.
DIY Well Circulation
The goal of circulation is to wash out fine silt particles of sand and clay from the filter zone, creating a natural barrier of larger gravel fractions around the filter.
Crucial Rule: For circulation, it is strictly forbidden to use an expensive centrifugal or screw pump designed for continuous water supply. Abrasive particles will instantly destroy its impeller. For this purpose, a low-cost vibratory pump (such as "Malysh" or "Rucheek") is purchased.
Step-by-Step Circulation Algorithm:
- Pump Suspension Height. Lower the vibratory pump into the well so that it is located approximately 50–100 cm from the bottom (slightly above the filter level). If lowered to the very bottom, it will quickly bury itself in the sand and burn out. If hung too high, only the top layer of water will be cleaned, and the silt at the bottom will remain.
- Start-up and Monitoring. Turn on the pump. Initially, very dirty, gray, or brown sludge will flow. Periodically (every 1–2 hours), the pump must be gently lifted half a meter up and down to agitate the settled sand, and then fixed again.
- Equipment Cleaning. If the water pressure stops, it means the pump is clogged with sand. Remove it, rinse it in a bucket of clean water, and lower it back down.
- Process Completion. Circulation can take anywhere from several hours (in coarse sands) to several days or even weeks (in fine silt sands and clays). The process can only be stopped when the water becomes visually absolutely clear and stops settling when left undisturbed.
| Typical Circulation Error | Consequence | How to Do It Right |
|---|---|---|
| Using a centrifugal pump | Rapid wear and failure of expensive equipment | Use a cheap vibratory pump |
| Suspension too low (at the very bottom) | Pump sucks in sand, jams, and burns out | Suspend 50-100 cm above the bottom (above the filter) |
| Stopping pumping too early | Rapid silting of the well and reduced yield | Pump until the water is completely clear with no sediment |
Which Surface or Submersible Pump to Choose for Stable Water Supply
After visually clear water flows from the well and its yield stabilizes, it is highly not recommended to use a vibratory pump continuously. Constant vibrations in the near-wellbore zone can cause filter clogging (silting) with fine silt particles or even damage the threaded joints of the plastic casing pipe. For continuous water supply, the correct surface or submersible unit must be selected.
Equipment selection depends on three key parameters: the diameter of the casing pipe, the dynamic water level, and the planned flow rate.
Surface Pumps and Stations
This is the only possible option for abyssal wells (needle wells) where the pipe diameter (1–1.25 inches) physically prevents lowering a pump inside.
- Depth Limitation: Surface models can lift water by suction only if the distance from the pump to the water surface (dynamic level during pumping) does not exceed 8 meters. If the total well depth is 15 meters, but the water has risen and stands at a level 5 meters from the surface, such a pump will work perfectly.
- Configuration: It is better to purchase a complete pumping station with a pressure tank (accumulator) and a pressure switch. This protects the system from water hammer and eliminates the need to manually turn on the pump every time a tap is opened.
- Important Detail: A high-quality brass check valve must be installed at the end of the intake pipe (or directly before the pump on an abyssal needle well), otherwise, water will flow back into the well.
Submersible Pumps
If the dynamic water level drops below 8 meters, you will need a submersible pump. For manually drilled wells, they are divided into two main types:
- Centrifugal Pumps. They have high efficiency, operate quietly, and provide stable pressure. However, they are very sensitive to the presence of sand in the water (the permissible concentration usually does not exceed 50–150 g/m³). They are chosen for well-washed wells with a casing pipe diameter of 90 mm or more (three-inch models with a 75 mm diameter are suitable for this).
- Screw (Auger) Pumps. This is the optimal solution for sand wells drilled manually. Due to the design with a stainless steel working screw in a rubber casing, they easily tolerate the presence of fine mechanical impurities and do not clog as quickly as centrifugal pumps. They provide good pressure at a low flow rate, which is ideal for low-yield sources.
| Well Type | Dynamic Water Level | Recommended Equipment | Installation Features |
| :--- | :--- | :--- |
| Abyssinian Needle (1"–1.25") | Up to 8 meters | Surface pump station | Complete sealing of all suction connections is required |
| Narrow Casing Pipe (90 mm) | Deeper than 8 meters | Submersible screw or centrifugal pump 3" | The gap between the pump and the pipe wall must be at least 5–10 mm |
| Standard Pipe (from 110 mm) | Deeper than 8 meters | Submersible centrifugal pump 3" or 3.5" | Lowered on a stainless steel cable with a 1–2 meter safety margin to the bottom |
When installing a submersible pump, be sure to use a stainless steel safety cable (with a diameter of at least 3 mm) and a cable with waterproof insulation. Do not lower the pump to the very bottom—it must be at least 1–1.5 meters away from the filter zone to avoid capturing bottom silt and sand.
Conclusion
Drilling a water well independently is a complex, physically demanding, but entirely achievable project that allows you to save significant money and establish a reliable, independent water supply. Regardless of the chosen method—whether it is driving an abyssinian needle, using the percussion-cable method with a casing, or hydrodrilling—the success of the venture depends on your patience, strict adherence to the technology, and readiness to overcome unforeseen obstacles such as boulders or hard rock.
For your work to be successful, and for the well to serve for many years without silting or breakdowns, adhere to the following key rules:
- Thorough preparation. Do not neglect reconnaissance. Surveying neighbors, analyzing the depth of their wells and boreholes will help you anticipate the soil structure and the depth of the aquifer in advance.
- Quality materials. Use only specialized casing pipes (non-PVC or HDPE with threaded connections) and reliable filters. A homemade filter must be constructed strictly according to technology, using stainless steel woven mesh or blown polyethylene (PEBD) spray.
- Verticality control. At all stages of borehole advancement, carefully monitor that the casing string runs strictly vertically. Any tilt can jam the drilling tool or make subsequent pump lowering impossible.
- Proper flushing. Do not rush to lower the permanent pump into a new well. Always perform the initial flushing and pumping of cloudy slurry using a simple drainage or inexpensive vibratory pump that you do not mind damaging with abrasive sand.
- Work safety. Working with heavy tools, tripods, and homemade winches requires strict adherence to safety regulations. Use protective helmets, sturdy gloves, and reliable safety ropes for tools.
To help you choose the optimal drilling method for your conditions, use the summary table:
| Drilling Method | Optimal Soils | Maximum Depth | Main Advantage |
|---|---|---|---|
| Abyssinian Needle | Sand, light loams | up to 10–12 m | Installation speed (in 1 day) |
| Percussion-Cable | Clay, loams, gravel | up to 30–40 m | Equipment simplicity and reliability |
| Auger Drill | Soft soils without stones | up to 15–20 m | Cleanliness at the work site |
| Hydrodrilling | Sand, loess, clay | up to 20–30 m | High drilling speed |
Remember that even if the drill hits an impassable boulder on the first attempt, this is not a reason to give up. Shifting the drilling point by just a couple of meters often allows you to successfully bypass the obstacle and reach clean water. A private source on a dacha or garden plot is a result that fully justifies all the effort expended.