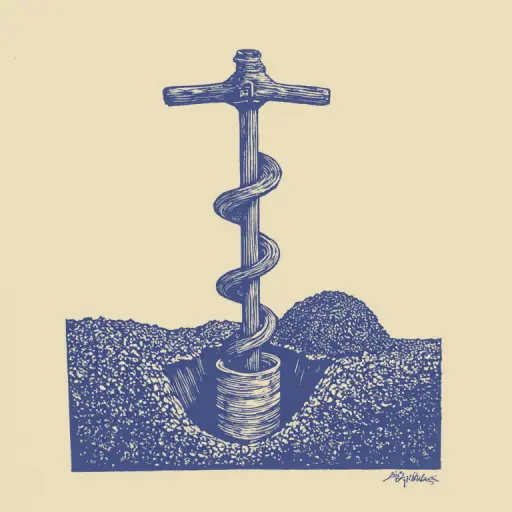
How to drill correctly and easily with a garden auger
- 17 min read
- 72
A garden auger is not just a replacement for a shovel; it is a specialized tool for creating controlled, cylindrical holes of the required diameter and depth. Its use significantly eases earthwork while preserving soil structure, which is critical for the health of seedlings and future constructions.
When exactly to use the auger?
- Installing supports and foundations: When erecting a fence, gazebo, or canopy, it is necessary to create holes for posts. The auger ensures an ideal vertical axis and specified diameter, which cannot be guaranteed when digging with a shovel.
- Planting seedlings: Instead of messy holes, the auger allows you to create even, deep holes for seedlings. This minimizes stress on the roots and helps better retain moisture.
- Setting up drainage and fertilization: The auger is indispensable for creating deep drainage channels or for spot application of nutrient solutions directly to the root system (vertical drainage).
Main principle: Use the auger when you need not just a "dug pit," but a controlled, vertical hole of a specified size. This saves your time and energy and guarantees a professional result that you can use in subsequent stages of construction or garden maintenance.
Section 1. Preparation Stage: Selection, Preparation, and Knowing the Basics
The effectiveness and ease of drilling are established even before the first turn of the auger contacts the ground. Even the most reliable tool will become a source of calluses and back pain if its parameters do not match the soil type, or if the cutting edges are dull. The preparation stage is the foundation of your safety and high work speed. Before heading to the site, you must critically assess the scope of work and bring the equipment into full combat readiness. The correct selection of the auger modification for a specific task and its proper technical maintenance will save you unnecessary effort and prevent premature tool failure. Let's look at the key nuances to pay attention to before starting earthwork.
1.1. Choosing the optimal auger for different tasks (diameter, soil type, purpose)
Choosing the right manual earth auger directly determines how much effort you will expend on the job. The main guide is the auger diameter and the type of planned work:
- 80–100 mm: Ideal for setting up subsurface irrigation, spot fertilization, and installing thin supports (e.g., for trellises or wire mesh).
- 150 mm: The universal garden standard. Optimal for drilling under fence posts (wooden or metal pipes) and creating holes for shrub seedlings.
- 200–250 mm: Used for columnar foundations of light structures (gazebos, sheds) and planting large fruit trees.
When choosing the design, be sure to consider the soil structure. For light sandy soils, a standard auger is suitable, which provides effective soil lifting in a single pass. However, if the site is dominated by heavy clay soil, opt for double-fluted models with a reduced pitch and sharp trimming knives. They penetrate dense layers more easily and reduce back strain when extracting soil.
1.2. Equipment and Tool Maintenance (Blade inspection, sharpening, correct handle)
Preparing the tools and equipment is the key to ensuring that the manual earth auger enters the soil as easily as possible, while you conserve strength and health.
Gardener's Gear:
- Gloves: Use thick work gloves with a rubberized or latex coating. They will prevent calluses and ensure a secure grip, preventing the handle from slipping.
- Footwear: Work in closed, hard-soled shoes to protect your feet if your foot accidentally slips on the auger frame.
Checking and Sharpening Auger Blades:
Dull blades increase back strain manifold. Before the season starts and every 10–15 holes, inspect the cutting edges. Sharpening the auger blades is easy to do yourself:
- Clean the blades of rust and stuck dirt with a wire brush.
- Use an angle grinder (Dremel/Grinder) with a grinding disc or a regular metal file.
- Remove metal only from the upper (inner) side of the blade at an angle of about 30–45 degrees. The lower surface, which contacts the ground, must remain flat, otherwise the auger will "push" outward.
Correct Handle:
The width of the T-shaped handle should be no less than 50–60 cm. A handle that is too narrow will require enormous effort to turn. If the handle is metal and slippery, wrap it with textile tape or fit rubber grips (such as bicycle grips)—this will provide maximum ease in earthwork and reduce vibration.
Section 2. Fundamentals of Effective Drilling: Technique and Ergonomics
Even a perfectly sharpened and correctly chosen manual earth auger can become an instrument of torture if you approach the work solely from the perspective of brute force. Effective drilling is not an exhausting endurance attraction, but a technological process where correct biomechanics of movement and understanding soil physics are paramount.
By mastering the basic principles of ergonomics, you can dig deep holes for fence posts or seedlings while expending minimal energy and completely protecting your lower back from overload. The secret lies in the synergy between your body and the tool: proper weight distribution, control of the vertical axis, and knowing when to adapt the pace to the resistance of different soil layers.
2.1. Principles of Correct Drilling: Posture, Pressure, and Work Rhythm (How Not to Strain Your Back)
Correct ergonomics when using a manual earth auger is the key to keeping your lower back healthy. To avoid strain and injury, observe three golden rules:
- Safe Posture. Always keep your back straight. Do not bend over the auger like a wheel. Stand with your feet shoulder-width apart and slightly bend your knees. The main rotational force should come from the muscles of the shoulders and torso, not from the lower back.
- Pressure Control. Do not try to force the tool into the ground with your entire body weight. Allow the sharpened auger blades to cut through the layers gradually. If the auger is going in stiffly, do not press harder; check the sharpness of the blades.
- Soil Extraction Rhythm. The main mistake of beginners is trying to go to full depth in one go. The optimal rhythm is: dig down 15–20 cm—carefully lift the manual auger, shake off the soil, and repeat the cycle. This prevents the tool from jamming in dense layers and protects your back from the strain of lifting heavy soil.
2.2. Easing the Process: Working Methods in Different Soil Types (Sand, Clay, Dense Soil)
Every soil type requires its own approach so that easing earthwork becomes a reality, not just a promise on the tool's packaging.
- Clay soil: The main mistake is trying to penetrate the entire auger height in one go. Viscous clay creates a powerful vacuum effect. Dig the manual soil auger only 10–15 cm per cycle, and immediately remove the soil afterward. If the clay is dried out and resembles stone, loosen the working layer with a crowbar first.
- Sandy soil: The main problem with sand is its crumbling nature. Dry sand cannot be lifted by the blades. Lightly pour water onto the drilling site: moist sand holds its shape well and is easy to extract. For deep holes, use a temporary plastic casing pipe.
- Dense and virgin soil: Work in two stages. First, drill a pilot hole with a smaller diameter auger (e.g., 100 mm), and then enlarge it with the main auger to the required size.
Section 3. Overcoming Obstacles: What to Do If the Auger Gets Stuck?
Even with perfect drilling technique and correct posture, the underground world always has surprises. Sooner or later, every gardener encounters a situation where a manual soil auger hits a solid obstacle or gets firmly stuck in dense soil layers. Trying to force the tool in this moment is the main mistake that can lead to auger breakage or serious back injury.
In this section, we will review proven emergency action algorithms. You will learn how to painlessly bypass or dismantle hidden stones and tree roots, as well as how to correctly apply the method of sequential deepening and moistening for working with viscous clay traps.
3.1. Working with Hard Objects (Stones, Roots): Obstacle Dismantling and Bypassing Techniques
Encountering hard objects is the most common and most unpleasant problem when drilling. Do not try to break through a stone or large root by force; this is not only exhausting but can also damage the auger itself. The main principle here is not to fight the obstacle, but to bypass it or dismantle it.
1. Bypassing the Obstacle (The Simplest Method):
If you see that the auger has hit a small stone or root, do not apply extra force. Gently but confidently shift the auger to the side, bypassing the obstacle. If it is a root, try to slightly pry it up with a shovel or rake to loosen its grip on the soil. Remember that even a small shift can give you several precious centimeters to continue working.
2. Working with Large Stones:
A large stone is not just an 'obstacle'; it is a local geological feature. If the stone is directly in the drilling path, use auxiliary tools. Take a regular crowbar or chisel and break the stone into several smaller, manageable pieces. After that, you can continue drilling. Do not try to break through it; destroy it.
3. Dismantling Roots:
Tree roots are not just 'obstructing threads'; they are powerful, often very dense structures. If a root is in the way, first assess its diameter and depth. If it is too large, it is best to bypass it. If it is small, try first to loosen the soil around it using a rake. Sometimes it is enough just to dig up the earth on both sides of the root so that the auger can pass by.
Important Tip: If you encounter a very dense, but not stony area (for example, compacted clay), before trying to pass through it, make a small depression around the obstacle so that the auger can 'grip' onto looser soil and not get completely stuck.
3.2. Strategies for Difficult Soils (Clay, Clay-Sand Mixture): Sequential Deepening and Moistening Technique
Clay soil and viscous loams are a serious test for the gardener. To ensure easier earthwork and to protect your back, use a proven tactic.
Sequential Deepening Technique:
- Frequent Soil Removal: Penetrate the clay by a maximum of 5–10 cm (1–1.5 auger turns) per pass. If you drive the manual soil auger deeper, a vacuum piston effect will occur, and extracting the tool will be extremely difficult.
- Regular Cleaning: Adhered clay reduces the efficiency of the blade. Scrape it off the blades after every lift.
Dosed Moistening:
If dry clay soil is unyielding, pour 2–3 liters of water into the hole and wait 10–15 minutes. The water will soften the material. The main thing is not to overpour, or the auger will start slipping in the liquid mud. Work in layers: soften, remove a portion of the soil, and deepen further.
Section 4. Specialized Scenarios for Using a Garden Auger
By mastering the basic technique for working in difficult soils and learning to protect your back, you can move on to solving specific practical tasks on the plot. The manual soil auger is a versatile tool that goes far beyond simple hole preparation. Depending on your goals, it can become an indispensable helper in both major construction and fine gardening work.
We will examine two key areas of this tool's application. On one hand, it is precise drilling for fence posts and elements of post foundations, where strict verticality and depth are critical. On the other hand, it is for delicate gardening tasks, such as preparing planting holes for seedlings and creating subsoil irrigation systems, which optimize plant care.
4.1. Drilling for Supports and Foundations: Technology for Creating Post Holes (Fence, Gazebo)
Drilling holes for posts is one of the most frequent and critical tasks on a garden plot. Here, not only is depth important, but also accuracy, as well as the tool's ability to handle the load created by the support elements. For light structures (fences, gazebos, pergolas), it is sufficient to drill holes with a diameter of 150–250 mm. It is important to remember, however, that the auger must not just make a hole, but create a stable base for pouring concrete or installing piles.
Step-by-Step Drilling Technology for Supports:
- Marking and Preparation: Determine the exact location of the posts and make markings. If you are using concrete supports, calculate the required volume of concrete and the hole diameter in advance. This will help avoid unnecessary costs and rework.
- Starting Work: Insert the auger strictly vertically at the marked location. Begin rotating with moderate but constant pressure. The main thing is not to try to drill the entire diameter in one squat. The work must be rhythmic so as not to strain your back.
- Working in Different Soils: If you encounter dense clay or stones, do not stop or apply excessive force. Take a break, slightly moisten the soil (especially clay), and continue slowly but surely. If the auger is stuck in a root, gently wrap around the root and try to shift it to the side, rather than breaking it by force.
- Finishing and Cleaning: After reaching the required depth, extract the auger. Be sure to clean the walls of the hole of any stuck dirt. This is critically important, as soil residue can degrade the concrete's adhesion to the soil.
Tips for Increased Efficiency:
- Saving Effort: If you need to drill many holes, do not fill them with concrete immediately. First, make all the holes, and then, during breaks, you can pour concrete into them. This will allow you to work in a "mass drilling" mode and save energy.
- Diameter Check: Always compare the drill bit diameter with the diameter of the intended support. An insufficient diameter will require additional widening, while an excessive one can lead to structural instability.
4.2. Using the Auger for Garden Needs: Planting Saplings and Subsurface Irrigation (Creating Holes and Drainage)
When it comes to garden needs, the auger becomes not just a construction tool, but an indispensable assistant in plant care and site landscaping. Using the auger in these scenarios requires a different technique than when drilling for posts, because the goal is not just to create an empty space, but to ensure ideal conditions for the sapling or irrigation system to thrive.
🌿 Planting Saplings: Creating the Ideal Hole
For planting saplings (apple trees, currant bushes, ornamental plants), it is important to create a hole that mimics natural conditions and minimizes stress to the roots. Using the auger here offers a huge advantage over a shovel:
- Size Control: The auger allows you to obtain a hole of a strictly defined diameter (usually 20–30 cm) and depth, which is critical for the root system.
- Structure Preservation: Unlike digging, the auger does not disrupt the layered structure of the soil, which is important for further root development.
- Ergonomics: You do not waste energy removing excess soil; you simply create the required volume.
Step-by-Step Planting Technique:
- Marking: Determine the planting location and the hole diameter. Use an auger corresponding to the diameter of the sapling's root ball.
- Drilling: Begin drilling using the technique described in Section 2. It is important not to exceed the depth required for the root system (usually 50–70 cm).
- Hole Preparation: After removing the soil, do not throw it away! Mix the excavated earth with a small amount of compost or humus. This will enrich the soil at the planting site.
- Planting: Carefully place the sapling in the prepared hole, cover it with the mixture, and lightly compact it.
💧 Subsurface Irrigation and Drainage
The garden auger is indispensable for creating drip irrigation or drainage systems. Instead of just digging a pit, you create a controlled network of holes:
- Drainage Trenches: To divert excess water (for example, after heavy rains), use the auger to create deep, narrow trenches. This will prevent waterlogging and improve soil aeration.
- Spot Fertilization: If you need to apply fertilizer or lime deep to the roots (for example, under old trees), the auger allows you to create a vertical "injection" channel. This guarantees that nutrients reach the root system, bypassing the upper, often poor, layer of soil.
Pro Tip: When drilling for saplings or for irrigation, always try to keep the hole walls as vertical as possible. This ensures even distribution of moisture and nutrients.
Section 5. Pro Tips: Operation and Maintenance
Even the highest quality garden auger will quickly fall into disrepair without proper care. After completing planting and construction work, it is important to dedicate time to tool maintenance. In this final section, we will discuss how to extend the life of your helper and in which cases you should consider upgrading it or switching to mechanized equivalents.
5.1. Prevention and Post-Work Care (Mechanical Cleaning, Storage, Seasonal Storage)
After drilling, you should not leave the auger in the ground. Proper tool care is the key to its long and effective service life. First and foremost, thorough cleaning is necessary. Remove the auger from the hole using a shovel and clean it of stuck soil. If you worked in clay or heavy, viscous soil, the dirt can dry and adhere very tightly. In this case, use a stiff brush or even a garden hose with high pressure to remove soil residue from the cutting edges and the body.
After cleaning, check the condition of the blades. If they are dull or chipped, do not use the auger until they are sharpened. Regular sharpening is preventative maintenance that will save you effort and ensure perfect operation. If the auger is used for different tasks (for example, first in sand, then in clay), check for signs of wear from different soil types.
Tool storage must be well thought out. The ideal place is a dry area, protected from direct rain and temperature fluctuations. This could be a shed or a gardener's storage area. Before long-term seasonal storage, it is recommended to lubricate the metal parts (especially joints and handles) with special oil. This prevents rust, which is the main enemy of garden equipment.
Remember that proper care not only extends the life of the auger but also guarantees that when you use it next, it will work as easily and effectively as on the first day.
5.2. Alternatives and Complex Tasks (When a Motor Auger is Needed, DIY Modifications)
If the volume of work exceeds 20–30 deep holes or if you have to drill heavy clay to a depth of more than 1.5 meters, it is advisable to replace the hand tool with a motor auger. It is indispensable for large-scale construction and saves a lot of effort.
To optimize the hand auger for complex tasks, gardeners often resort to DIY modifications:
- Shaft Extension: Extending the handle using sections of plumbing pipes connected with bolts.
- Auger Bit Modification: Welding or bolting hardened steel teeth (for example, from an old saw) onto the cutting edge for effective root cutting.
- Widening the T-Handle: Increasing the lever arm length makes turning the auger in dense soil easier.
Summary Table: Auger for Each Task (Quick Checklist)
| Task | Auger Diameter | Drilling Depth | Key Tip |
|---|---|---|---|
| Planting Saplings | 150–250 mm | 0.5–0.8 m | Loosen the bottom of the hole for better root growth. |
| Fence Posts | 100–150 mm | 1.0–1.5 m | Drill below the seasonal frost line. |
| Pillar Foundation | 200–300 mm | 1.5–2.0 m | Use shaft extensions and a bottom widener. |
| Drainage and Fertilization | 70–100 mm | 0.4–0.6 m | Fill prepared holes with gravel or nutrient mix. |