How to Dye a T-shirt Using Tie-Dye: A Step-by-Step Guide to Knot Dyeing
- 14 min read
- 67
Tie-dye, or knot dyeing, is experiencing another peak in popularity. This vibrant method of clothing customization has roots in the ancient Japanese art of Shibori, went through the rebellious 1960s era, and today has become a major trend in conscious consumption and upcycling.
The main appeal of tie-dye is that anyone can create a unique designer masterpiece right at home. You don't need to be a professional artist: thanks to the chaotic twisting of fabric and mixing of colors, every result is absolutely unique. It is a great way to give old items with stains a second life or simply to have fun with loved ones.
In this practical guide, we will thoroughly cover the entire process: from choosing the right cotton t-shirt and dyes to the secrets of color fixation, so that your original prints remain bright even after dozens of washes.
Preparation: Choosing Materials and Tools
The success of tie-dyeing directly depends on proper preparation. Even the most beautiful pattern will fade after the first wash if you make a mistake in choosing the base or use unsuitable pigments. Before twisting the fabric and mixing colors, you need to gather the correct working set.
In this section, we will discuss which materials guarantee a bright and long-lasting result at home. You will learn how the fabric composition affects pigment absorption, whether you can use regular art acrylic, and what minimal set of tools is needed to create your first masterpiece.
What Fabric Works and Can Regular Acrylic Be Used
The success of tie-dyeing directly depends on the correct choice of base.
What fabric works?
For this work, choose t-shirts made of 100% natural materials:
- Cotton — the ideal option, which absorbs pigment excellently and retains brightness for a long time.
- Viscose and linen — are also well suited for dyeing.
Important: avoid synthetics. If the fabric composition contains more than 20% polyester, the dye simply will not adhere to the fibers, and the pattern will become faded or completely wash out after the first wash.
Can regular art acrylic be used?
Using regular acrylic for classic tie-dye is not recommended. It does not penetrate the fibers but forms a dense, impermeable crust on the fabric. As a result, the t-shirt will become stiff, stand up rigidly, and the pattern itself will quickly crack with wear.
For soft knot dyeing, use special liquid fabric dyes (fiber-reactive) or textile acrylic paints (marked Textile). They maintain the elasticity and softness of the knit.
Necessary Equipment: Dyes, Rubber Bands, and Sodium Carbonate
To create a high-quality and durable tie-dye pattern, you will need a specific set of tools and reagents. Prepare them in advance so you are not distracted during the work process:
- Fiber-reactive dyes: The best choice for cotton is powdered procion dyes. They form a chemical bond with the fibers at a molecular level, which keeps the colors bright even after dozens of washes.
- Sodium carbonate (soda ash): The main secret to durability. Soaking the t-shirt in a soda solution activates the cotton fibers, preparing them to accept the pigment. Regular baking soda is not suitable for this purpose.
- Office rubber bands: Strong latex bands are necessary to fix the folds. The tighter they are pulled, the clearer the white boundaries of the pattern will be.
- Applicator bottles: Plastic bottles with a narrow nozzle for spot application of diluted dye.
- Protective gear: Thick rubber gloves, an apron, and polyethylene film to protect the workspace.
Step-by-Step Guide to Classic Twisting ("Spiral")
The classic "spiral" is the calling card of the tie-dye style, which is what most people start with in knot dyeing. This mesmerizing vortex of colors is associated with the hippie era and freedom of self-expression. Creating such a pattern on a cotton t-shirt at home is much easier than it seems, but this process requires carefulness and strict adherence to the technology.
In this section, we will step-by-step break down the entire creative cycle of creating a classic print. You will learn how to properly prepare and fold the damp fabric, as well as how to carefully apply liquid dyes to achieve vibrant, clean colors without unwanted mess.
Folding the Fabric and Securing with Rubber Bands
Lay a clean, slightly damp cotton t-shirt on a flat work surface and carefully smooth out all wrinkles by hand. Damp fabric is much more pliable than dry fabric: the folds are sharp, and the dye penetrates deeper.
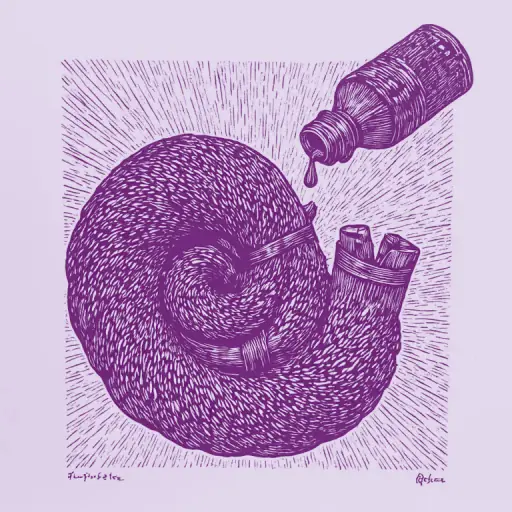
Determine the center of the future spiral—usually the geometric center of the t-shirt or the chest area. Pinch the fabric at this point with two fingers (or use a regular dinner fork) and begin to gently twist it clockwise. Carefully wrap the free edges of the t-shirt around the forming center, using your other hand to help create a dense, flat disk resembling a snail shell.
Now, secure the shape with rubber bands:
- Place the first rubber band directly through the center of the disk.
- Stretch the second one perpendicular to the first.
- Add two more rubber bands diagonally.
As a result, you should have a circle divided by the rubber bands into 6 or 8 equal sectors, resembling slices of pizza. Such tight fixation will maintain the spiral shape and prevent the fabric from unfolding during dyeing.
The Dye Application Process at Home
First, prepare your workspace: cover the table with protective film, and lay the twisted t-shirt on a plastic grate placed over a deep tray or basin. This prevents excess liquid from pooling under the fabric and protects the colors from unwanted mixing. Be sure to put on thick rubber gloves.
Take the prepared liquid fabric dyes in the bottles with a narrow dispenser. Apply the paint sequentially to each sector formed by the rubber bands, moving from the center of the spiral toward the edges. Thoroughly saturate the deep folds, slightly spreading them with your fingers so that no uncolored white spots remain inside.
After coloring the front side, carefully flip the t-shirt. Repeat the application of colors on the back side, strictly observing the sector boundaries so that the shades match. Avoid excess moisture so that the colors do not turn into mud. Carefully transfer the finished t-shirt into a clean plastic bag and tie it tightly.
Advanced Techniques: Shibori, Ice, and Reverse Dyeing
Having mastered the classic spiral, you will surely want to go beyond familiar circles and experiment with more complex visual effects. The world of tie-dyeing is incredibly deep: basic techniques are just the tip of the iceberg. There are advanced methods that allow you to create fine graphic patterns on fabric, soft watercolor transitions, or completely transform old dark items, giving them a second life.
These approaches require a little more patience and precision, but the result will exceed all expectations. They turn ordinary clothing customization into a true creative experiment, where physics and chemistry work to create a unique designer print that cannot be exactly replicated.
Shibori Japanese Technique and Ice Dye Method
Moving on to advanced methods, we open up space for true artistic experimentation.
Shibori Japanese Technique is based on strict folding geometry. To achieve the classic "Arashi" pattern (storm or wood grain effect):
- Fold the damp T-shirt neatly into a accordion pleat.
- Tightly wrap the resulting strip around a plastic tube diagonally.
- Secure it with strong thread, tightly cinching the fabric to one end of the tube to create fine folds, and apply the dye.
Ice Dye allows you to achieve fantastic watercolor bleeds and pigment splitting effects:
- Crumple the damp T-shirt (after soaking in baking soda) and lay it on a rack over a deep basin.
- Completely cover the fabric with ice cubes.
- Sprinkle dry powdered fabric dye directly onto the ice.
The ice will melt over several hours, slowly transferring the color to the fabric and creating unique soft transitions that cannot be replicated by hand.
Reverse Tie-Dye with Bleach to Save Old Items
If you have an old dark or black T-shirt that has lost its vibrancy or acquired an indelible stain, do not rush to throw it away. The reverse tie-dye technique using regular "Bleach" or any chlorine-containing bleach will give the item a second life.
Step-by-Step Reverse Dyeing Process:
- Preparation and Twisting. Take a dry or slightly damp dark cotton T-shirt. Twist it into a classic spiral or crumple it into a chaotic ball and secure it tightly with rubber bands.
- Applying Bleach. Put on thick rubber gloves and work in a well-ventilated area (preferably on a balcony or outside). Pour "Bleach" into a plastic bottle with a dispenser. For a softer color transition, you can dilute it with water in a 1:1 ratio. Carefully apply the liquid to the protruding areas of the twisted fabric.
- Time Control. The chemical reaction will begin, and the fabric will start to change color (black usually turns reddish, brown, or beige). Monitor the process: usually 10–20 minutes is sufficient. Do not leave the chlorine on the fabric for too long to avoid damaging the fiber structure.
- Neutralization. As soon as you see the desired shade, immediately rinse the T-shirt in a large amount of cold running water, remove the bands, and wash the item with liquid laundry detergent to completely stop the action of the chlorine.
Expert Tip: The resulting light spots on the dark T-shirt can be further colored with bright dyes. This will create a stunning neon contrast against the dark background.
Secrets of Color Fixing and First Wash
Once the bright spirals are applied and the reverse dyeing process is successfully completed, the most exciting moment arrives. To ensure your efforts are not washed away at the first encounter with water, and that the vibrant shades do not turn into faded spots, it is important to correctly complete the technological cycle. Fixing the pigment in the fabric fibers is a secret step that distinguishes professional customization from amateur experimentation. In this part of the guide, we will discuss how to reliably fix the dye at a molecular level and perform the first wash without the risk of ruining the pattern. Following these simple rules guarantees that your unique T-shirt will survive dozens of washing machine cycles, preserving the original contrast and richness of the palette.
How to Fix Dye on Fabric After Dyeing
After applying the dye, the most crucial stage begins—color fixation. Without proper fixation, the pigment will simply wash out during the first wash, leaving faded streaks instead of a bright design.
1. Heat Curing (for reactive dyes)
Immediately after dyeing, wrap the T-shirt in plastic wrap or place it in a sealed plastic bag. This prevents the fabric from drying out. Leave the item in a warm place (not below 20 °C) for at least 12–24 hours. Heat and moisture activate the chemical reaction between the dye and the cotton fibers.
2. Vinegar Bath (for universal dyes)
If you used direct or universal dyes, regular table vinegar will help fix them. Soak the T-shirt in a cold solution (1 cup of 9% vinegar to 5 liters of water) for 30 minutes. The acidic environment will "seal" the pigment into the fibers.
3. Heat Setting (for acrylics)
If you customized the T-shirt with acrylic fabric paints, after it is completely dry, iron the design with a hot iron through a cotton cloth or parchment paper for 5 minutes without steam.
Rules for the First and Subsequent Washes of the Finished T-shirt
The first wash is a decisive stage that determines whether your pattern will remain vibrant or turn into a faded spot.
First Wash Rules:
- Pre-rinsing. Without unfolding the T-shirt, rinse it under a stream of cold water. When the draining water lightens, remove the bands and gently unfold the fabric. Continue rinsing, gradually making the water slightly warm, until it becomes completely clear.
- Isolated Washing. The first time, wash the T-shirt strictly separately from other items. Run a quick or delicate cycle at 30°C. Use a mild liquid detergent for colored clothing without bleaching agents.
Subsequent Care:
- Friction Protection. Always turn the item inside out before loading it into the drum.
- Temperature Setting. The optimal choice is washing at 30–40°C on low spin speed.
- Proper Drying. Dry the T-shirt laid flat on a hanger or on a horizontal drying rack away from radiators and direct sunlight, which can accelerate pigment fading.
Typical Beginner Mistakes and How to Avoid Them
Even when strictly following the rules for the first wash and color setting, beginner artisans often encounter unexpected results. Tie-dyeing is a fascinating creative experiment, but without understanding the basic laws of color theory and fiber chemistry, it can bring disappointment instead of a vibrant designer piece. Most failures in learning tie-dye are related to violating the pigment application technology or incorrectly choosing materials. Let's examine the key mistakes that turn a potential masterpiece into a faded rag and learn how to prevent them so that every one of your clothing customization projects ends in triumph.
Why Colors Turn into Mud and How to Control Blending
Muddy, brown spots instead of vibrant transitions are the main problem for tie-dye beginners. This happens due to the uncontrolled merging of pigments directly within the fibers of damp fabric.
To keep your prints bright, observe three rules of color theory:
- Rule of Proximity (Color Wheel). Place only related colors next to each other. Blue pairs well with green or purple, and red pairs well with orange or yellow.
- Dangerous Pairs. Avoid direct contact between opposite colors. For example, combinations of red + green, blue + orange, or yellow + purple inevitably yield a muddy brown shade when mixed.
- Use "Buffer" Zones. If the design requires contrasts, leave a thin strip of uncolored fabric between them or lay down a neutral transition color (e.g., green between blue and yellow).
- Control Moisture. An overly wet t-shirt acts as a conductor: dyes spread and mix instantly. The fabric must be thoroughly wrung out before applying pigment—damp to the touch, but without dripping water.
Plan your color layout in advance to maintain the purity of each shade.
What to Do If the Design Fades or Washes Out Completely
You excitedly unfolded the t-shirt after the first wash, only to see pale, barely noticeable smudges instead of vibrant patterns? Or, even worse, did the dye practically wash out into the sink? Don't panic—this is a classic experience for a beginner, and the item can still be saved.
Main Causes of Failure:
- Unsuitable Fabric. If the t-shirt contains more than 20% synthetics, standard cotton dye will simply wash out because artificial fibers do not absorb it.
- Ignoring Washing Soda. Without pre-soaking the fabric in a soda solution, cotton fibers cannot undergo a chemical reaction with the pigment.
- Insufficient Dwell Time. The dye requires 12 to 24 hours in a moist and warm state to set securely.
How to Fix the Situation:
- Re-dye. A faded design is an excellent base for a new design. Wash the t-shirt, soak it in washing soda, twist it again, and apply darker, richer colors over the old ones.
- Use Heat Setting. If you dyed the t-shirt with special liquid textile acrylic, be sure to iron the dry item with a hot iron through a cotton cloth for 5 minutes. This will fix the polymer layer.
Conclusion
Tie-dyeing is not just a way to give an old cotton t-shirt a second life or to customize a new item. It is an exciting creative process where there is no room for strict rules or "wrong" results. Every time you remove the rubber bands and unfold the damp fabric, you will feel genuine delight, because it is simply impossible to predict the final pattern with 100% certainty. This is the main charm of DIY clothing customization—you create an absolutely unique designer wardrobe item with no equivalent.
Now that you have thoroughly studied all the subtleties of the process—from choosing the right textile and preparing the washing soda solution to advanced techniques like ice dyeing, reverse tie-dye with bleach, and Japanese Shibori—you are fully ready for your first independent experiment at home. Don't be afraid to mix colors, try new ways of folding the fabric, and let your imagination run wild.
Tie-dye is also a great reason to gather the whole family, engage children, or host a fun creative party with friends. Start with the classic spiral, get the hang of it, and then move on to more complex color theory experiments. The main thing is to observe the basic rules of pigment fixation and gentle first washing so that your handmade masterpiece remains vibrant and contrasting for as long as possible. We wish you endless inspiration, bold ideas, and the brightest colors!