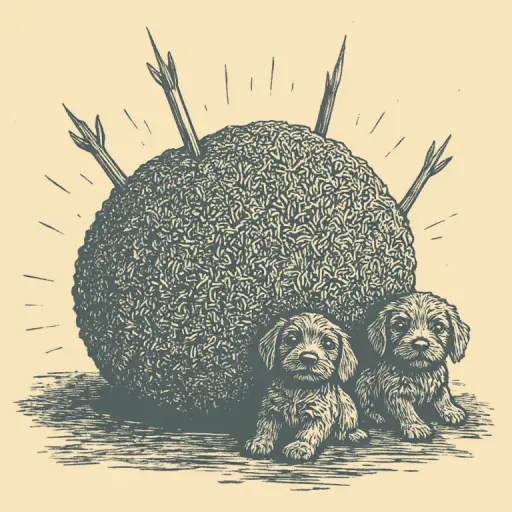
How to Felt Beautiful Toys from Dog Fur by Hand
- 15 min read
- 73
Felted dog undercoat is not just a fascinating hobby, but also a unique way to create heartfelt toys with your own hands, imbued with special energy. Unlike traditional sheep's wool, dog undercoat possesses amazing softness, a lively texture, and therapeutic warmth.
Why try dry felting specifically with this material?
- Availability: If you have a fluffy pet at home, high-quality crafting material is available to you absolutely free after every brushing session.
- Unique Texture: Toys made from dog hair turn out incredibly realistic, with a natural, 'alive' sheen and pleasant fluffiness.
- Pliability: Soft undercoat is excellent for felting, allowing for detailed work on even the smallest facial features.
Creating a keepsake souvenir from the wool of a beloved four-legged friend is a wonderful way to preserve a piece of their warmth for many years. However, working with this material has its secrets, which begin with the correct collection and cleaning of the raw material.
Preparing Dog Hair for Felting at Home
The transformation of a fluffy cloud of brushed undercoat into a dense, neat toy begins long before you pick up the felting needle. Working with dog hair has its unique nuances, as this material differs significantly from familiar factory-made sheep's wool. It requires delicate yet thorough preliminary cleaning and sorting.
Proper preparation of the raw material is the key to ensuring that the future figurine does not deform, does not have an unpleasant odor, and retains its texture for years to come. Let's explore how to turn the raw material into an ideal base for creativity, avoiding common mistakes made by beginners.
Collection, Sorting, and Selecting the Appropriate Undercoat Type for Work
Not all dog hair is suitable for creating a quality toy. We need exclusively soft undercoat (dog fluff), which is brushed out during seasonal shedding. Coarse guard hairs are unsuitable for felting: they hardly felt, curl unattractively, and make the surface of the item prickly.
The best 'donors' of quality material are long-haired and fluffy dog breeds with dense undercoats: Samoyeds, Huskies, Chow Chows, Pekingese, Collies, and Spitzes.
Collection and Sorting Rules:
- Brushing Only. Use a deshedding rake or a furminator. Hair cut with scissors or clippers is unsuitable because the cut fibers do not bond well together.
- Primary Cleaning. During collection, immediately remove large debris, twigs, and stiff mats.
- Sorting by Type. Separate the fluff by length and softness. Set aside the softest and longest undercoat for the final finishing of the toy, and the shorter one for forming internal volumes.
How to Properly Wash the Hair and Completely Eliminate the Specific Odor
To turn brushed dog undercoat into clean and pliable material for felting, it must be washed correctly. The main task at this stage is to gently remove skin oils, dust, and the specific 'doggy' odor, without causing premature felting of the fibers.
Step-by-Step Algorithm for Washing Dog Hair:
- Soaking. Place the fluff in a washing net or a muslin bag. Submerge it in warm water (about 30–35 °C) with a mild dog shampoo or liquid wool detergent. Leave it for 20–30 minutes. Under no circumstances should you rub or actively wring the material.
- Gentle Washing. Gently rinse the bag in soapy water using light squeezing motions.
- Odor Neutralization. To completely eliminate the characteristic aroma, add hair conditioner with a pleasant scent or a weak vinegar solution (1 tablespoon per liter of water) during the final rinse. Vinegar excellently neutralizes organic odors and softens guard hairs.
- Drying. Rinse the hair in clean water of the same temperature (a sharp temperature change can cause shrinkage). Gently squeeze the fluff through a terry towel and spread it in a thin layer on a horizontal mesh away from heating appliances.
Necessary Tools and Materials to Start Working
When the fluffy cloud of prepared dog undercoat awaits its time on the workbench, it is time to gather the right arsenal of tools. Dry felting is an amazing process where a shapeless material gives birth to a dense, lively sculpture. However, the specific nature of dog hair, which is often slicker or coarser compared to classic sheep's wool, requires a conscious approach to choosing equipment.
To ensure the work progresses quickly and your fingers remain intact, you will need reliable 'helpers.' Quality tools will not only make taming the unruly fluff easier but also help create a sturdy, durable toy that retains its shape for years. Let's review the basic set necessary for comfortable and safe crafting.
Choosing Felting Needles (Cross-section, Size) and Selecting Base Wool (Sliver)
For successful work with resilient dog undercoat, it is crucial to choose the needles and base correctly. Dog hair is slicker and more elastic than sheep's wool, so standard tools may slip.
Choosing Felting Needles:
- Initial Stage (Coarse): Triangular needle No. 36. This is necessary for quickly felting the base wool and giving it an initial shape.
- Main Stage (Medium): Star needle No. 38 (four-pointed). Thanks to the greater number of barbs, it excellently grips the unruly dog fluff fibers and compacts the detail from the inside.
- Finishing Stage (Fine): Triangular or star needle No. 40. Used for smoothing the surface and masking punctures.
- For Decoration: 'Crown' needle No. 38 or No. 40. The barbs on the very tip allow you to adhere the pet's wool to the base without embedding it too deeply, which is ideal for creating a fluffy 'coat.'
Selecting Base Wool (Sliver):
Felting the entire toy from dog undercoat is labor-intensive and uneconomical. As a base (core), it is recommended to use sliver—inexpensive, minimally processed sheep's wool. It has excellent bonding properties, felts quickly into a dense mass, and serves as a rigid frame. By building the desired volume from the sliver, you can cover the toy with a final 'fur' layer of the prepared dog hair.
Creating a Sturdy Wire Frame for Movable Toys
To create a movable toy from dog hair, a reliable 'skeleton' is necessary. It is best to use copper or aluminum wire with a diameter of 1.5–2 mm—it is flexible enough to withstand multiple bends. For miniature details (paws, tails), blue wire (fuzzy wire) is excellent.
Step-by-Step Algorithm for Assembling the Frame:
- Proportion Calculation. Sketch the toy to life-size. Bend the wire along the contour of the drawing, allowing for seam allowances (about 1.5–2 cm).
- Detail Twisting. Form the loop for the head, move to the spine, and then symmetrically twist the front and hind legs. Secure all joints tightly with pliers.
- Adhesion Wrapping. Smooth metal does not hold fur well. Apply a thin layer of glue (e.g., "Moment Crystal") to the wire and tightly wrap it, coil by coil, with a thin strand of fleece.
This prepared frame will ensure ideal adhesion with the dog undercoat in the following stages of work.
Step-by-Step Guide to Dry Felting a Toy
Once the sturdy wire frame is ready and securely wrapped with fleece, the real magic begins—bringing the sculpture to life. Dry felting (felting) from dog undercoat requires patience, as this material is softer and more elastic than classic sheep's wool, but it is what gives the toy its unique, lively texture and warmth. At this stage, we move from a schematic sketch to creating dense three-dimensional forms that will become the body and head of our future pet.
For this work, you will need medium and coarse needles (e.g., "star" #36), which will help quickly compact the fluffy fibers inside the piece. Remember the main rule of sculptural felting: we always move from the general to the specific, gradually compacting the details and creating a solid base for future refinement of fine features.
Forming the Body and Head Base from Large to Small Volume
We begin creating the toy by forming the largest parts—the body and the head. To conserve the prepared dog undercoat, it is recommended to use inexpensive sheep's fleece as the base (core), and then apply the finishing layer of your pet's wool over it. However, if you have enough dog fluff, you can form the base entirely from it.
- Forming the Body. Take a voluminous ball of wool that is approximately twice the planned size of the finished body. Gently knead it with your hands, giving it an egg or drop shape. Begin working the detail deeply with the coarse needle (#36), inserting it all the way to the center. Rotate the piece so that the compaction is uniform. The base should become resilient, but not "stone-like."
- Forming the Head. Similarly, form a dense, smaller sphere for the head. If you are using a wire frame, tightly wrap it with wool at the joint areas and secure the fibers with frequent needle jabs.
- Joining the Parts. Attach the head to the body. Leave the unfelted "skirts" of loose fibers at the joint between the parts and carefully felt them together in a circle using a medium needle (#38), achieving a smooth and firm transition.
Detailing the Muzzle, Creating Eye Sockets, and Building Volume
We start by marking the muzzle. Mark the locations for the eyes and begin deeply working the eye sockets with the coarse needle (#36 "star"). Insert the needle repeatedly into the same spot until deep, symmetrical depressions are formed. This is important so that the future bead eyes sit naturally, not askew.
To build up the volume of the cheeks, bridge of the nose, and brow ridges, use small clouds of cleaned dog undercoat. Apply the clump to the desired area and gently felt it around the perimeter with the medium needle (#38), gradually compacting toward the center. Dog wool holds its shape very well but requires more frequent punctures than sheep's wool. Form a voluminous "mask" of the muzzle: define the bridge of the nose and the pads by working the dividing line under the nose with frequent, deep needle jabs. Monitor the symmetry by regularly turning the toy in profile and front view.
Assembling Details, Final Finishing, and Decoration
Once the main volumes of the dog undercoat toy are formed, the most responsible and creative stage begins—assembly and final finishing. It is at this stage that the disparate parts are joined into a single harmonious whole, and the loose texture of the piece transforms into a dense, smooth, and durable sculpture. Working with dog wool in the final stage requires special patience: we must securely fix all movable elements, bring the surface to perfect density without visible puncture marks, and, of course, give the toy its individual character with small decorations and the creation of a realistic "live" coat.
Securely Attaching Movable Parts and Smoothing the Surface with Fine Needles
When attaching the movable legs and head to the body on the wire frame, always leave unfelted "skirts" of wool at the base of the parts. Place the part onto the free end of the wire, press it tightly against the body, and deeply felt these loose fibers to the base using a medium needle (#36 or #38 "star"). Rotate the toy to secure the joint evenly from all sides. If the connection seems loose, add a thin cloud of base wool on top and felt it down tightly.
After assembly, we move to smoothing. Dog undercoat often fluffier than sheep's wool, so the final treatment requires patience. Take a fine needle (#40 or #42 "star" or "crown"). Treat the entire surface of the toy with frequent, shallow, and quick movements. The needle should enter at a slight angle, smoothing out protruding hairs and closing small holes from previous stages of work. The surface should become dense, resilient, and smooth to the touch.
Attaching Bead Eyes, Ears, Whiskers, and Creating the Fluffy Finish Layer
Bringing the toy to life begins with giving it a gaze. Drop a drop of clear glue (e.g., "Moment Crystal") into the prepared and deepened eye sockets and firmly set black glass beads. To make the gaze lively, form the eyelids: felt thin strands of wool above and below the bead using a fine needle #38 or #40 "star".
Felting the ears separately on a sponge, making sure to leave the bottom edge unfelted and fluffy. Attach the ears to the head and felt these loose fibers through the skull, carefully masking the joint with a final layer of wool.
To create a realistic fluffy coat, use the staggered layering method:
- Cut strands of dog undercoat of equal length.
- Apply them alternately, starting from the lower part of the legs and tail, moving up toward the head (like shingles).
- Secure only the base of each strand with the needle, leaving the ends free.
For whiskers (vibrissae), a thin monofilament or fishing line works perfectly. Thread it through the muzzle with a long sewing needle, secure a micro-drop of glue right at the base, and trim. Finally, gently brush the fluffy layer with a soft brush.
Alternative Express Method and Common Mistakes
Creating miniatures by hand is a meditative process, but one that demands colossal patience. If you want to speed up the work or plan to create several blanks at once, the classic dry felting technique can be supplemented with quick shaping tricks. However, working with pliable but capricious dog undercoat hides many pitfalls for novice artisans. In this section, we will lift the veil on the secrets of quickly creating basic forms and discuss typical mistakes made by beginners. Understanding these nuances will help you avoid damaging valuable material and turn the creative process into pure enjoyment.
Felting Simple Toy Parts in Nylon Stockings Using a Washing Machine
If you need to quickly create dense round or oval blanks (for example, the base for a head, torso, or future paws), the express method of wet felting in a washing machine comes in handy. Dog undercoat felts excellently under the influence of hot water, friction, and soap.
Step-by-step process:
- Preparing the base. Form a dense ball of dog wool in the desired shape. To save material, you can place a dense core of scouring pad inside, tightly wrapping it with a final layer of dog undercoat.
- Securing in the stocking. Carefully place the blank into a nylon stocking or sock. Tie tight knots on both sides as close to the piece as possible to fix the shape and prevent the wool from spreading. If there are multiple pieces, separate them with knots.
- Washing. Place the blanks in the washing machine drum. Add liquid detergent for wool items.
- Cycle. Select a washing program at a temperature of 40–50 °C with spin. Hot water and mechanical friction quickly press the fibers into a dense felt.
- Drying. Remove the pieces from the stocking while they are still damp, gently smooth them with your fingers, and let them dry on a towel.
Main Mistakes of Beginners When Working with Animal Fur and How to Avoid Them
Working with dog undercoat has its nuances, which often lead novice artisans to be disappointed with the result. Here are the main mistakes and simple ways to avoid them:
- Attempting to felt the entire toy from dog fluff. Dog hair fibers are smoother than sheep's wool and bond less well. A toy without a core can quickly lose its shape or fall apart. Solution: Always use a sheep's scouring pad to create a dense core, and apply the pet's hair as a thin finishing layer.
- Poor preliminary cleaning. Undried or poorly washed fur will eventually start to emit an unpleasant musky odor, especially in high humidity. Solution: Perform a thorough wash with conditioner and completely dry the fluff in a smoothed-out state.
- Using unsuitable needles. Too thick needles leave unsightly holes in the delicate fluff. Solution: For finishing with dog hair, use only fine needles such as 'star' or 'crown' needles (No. 38 or No. 40).
- Over-compacting the core. If you make the toy's core stone-hard, it will be impossible to felt a fluffy layer onto it. Solution: Leave the core slightly springy when pressed firmly.
Conclusion: Little Masterpieces from Your Pet's Fur
Creating toys from your own pet's fur is not just a fascinating craft; it is an amazing way to preserve a piece of the warmth and memory of a beloved dog for many years. By mastering the subtleties of dry felting and learning how to properly prepare delicate dog undercoat, you gain the ability to create truly unique, 'living' sculptures. Such items possess a special energy because your care, patience, and sincere love for your four-legged friend are invested in every detail.
Do not be afraid to experiment with complex shapes, try felting on a frame, and combine fluff from different breeds with classic sheep's wool. Every new piece is a step toward perfecting your craft. Over time, your fingers will more accurately sense the density of the material, and the finished figures will become increasingly realistic and neat.
May this meditative creative process bring you only joy and tranquility, and may the finished fluffy miniatures decorate your home and bring smiles to your loved ones. We wish you inexhaustible inspiration, obedient fur, and easy needles on your path to creating your first unique masterpieces.