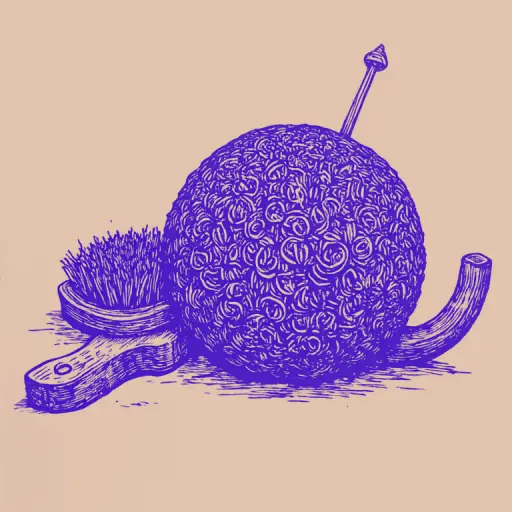
How to Felt Cat Hair and What to Make From It
- 14 min read
- 69
Every pet owner is intimately familiar with the problem of seasonal shedding. However, do not rush to throw away what your beloved pet leaves on brushes and furniture. Shed fur and soft cat down are magnificent, eco-friendly, and completely free material for crafts.
Felting (or needle felting) from cat hair allows you to give a second life to your cat's undercoat. From it, you can create amazing keepsakes: from miniature handmade toys to warm slippers and decorative souvenirs. The soft texture of cat down is excellent for both dry felting using special needles and the wet method using a soap solution.
In this practical guide, we will thoroughly cover all the stages of the work: from the correct collection and careful preparation of the fur to the step-by-step creation of your first craft. You will learn the secrets of masters that will help turn routine pet grooming into an engaging creative hobby.
Can Cat Hair Be Used for Felting?
Many owners of fluffy pets collect entire clouds of soft undercoat after grooming and wonder: can this material be turned into something beautiful and useful? The answer is a definite yes! Cat hair, especially the delicate undercoat (down), is excellent for felting. Crafting with animal fur allows you not only to ecologically dispose of shed down but also to create unique keepsakes, toys, and even practical accessories.
However, working with cat down has its nuances that significantly differ from familiar sheep's wool. Before arming yourself with needles or soap solution, it is important to understand the physical properties of this material and prepare it correctly for the creative process.
Features of Cat Down and Its Suitability for Felting
Cat down is a unique crafting material, possessing both undeniable advantages and its own quirks. Unlike classic sheep's wool, the fibers of cat undercoat are incredibly fine, soft, and silky. They practically lack a distinct scaly layer, which causes the natural bonding of the fibers to occur more slowly and requires more patience.
Key features of cat down:
- Exceptional softness: Finished items are very delicate to the touch, with a fine texture.
- Fiber length: Shed fur from long-haired and semi-long-haired breeds (Persian, Siberian, Angora) is best suited for felting. Short guard hairs hardly hold up to felting.
- Natural fluffiness: The material is ideal for creating realistic "fur" on toys.
Due to poor cohesion, cat down is often used in combination with sheep's wool (carding wool) as a base, but pure pet fur is excellent for souvenirs and small sculpting.
Collecting, Gently Washing, and Drying the Fur Before Starting
Proper fur preparation is the key to a neat item without unpleasant odors or creases.
1. Collecting the Raw Material
It is best to use a fur remover or a furminator to collect down during the pet's seasonal shedding. Collect only the soft undercoat (cat down). Immediately discard stiff guard hairs and dense clumps—they will ruin the texture of the future craft.
2. Gentle Washing
Cat down contains skin oils and has a specific odor, so wet treatment is mandatory:
- Pour warm water (about 30 °C) into a basin. Hot water can deform the fibers prematurely.
- Add mild pet shampoo or liquid baby soap.
- Soak the fur for 15–20 minutes. Do not rub or wring it to avoid premature matting. Rinse gently in clean water.
3. Drying
Spread the washed down in a thin layer on a terry towel away from heating appliances. Allow it to dry naturally, and then gently fluff it with your fingers. Now the shed fur is completely ready for creativity!
Necessary Materials and Tools for Crafting
Once the delicate cat down has been carefully washed, dried, and fluffed, it is time to prepare your workspace. Unlike classic sheep's wool, cat undercoat has a unique ultra-soft texture, so the standard felting kit will require a delicate approach. Choosing the right tools will not only protect your fingers from injury but also significantly ease the process of taming the pet's capricious fibers.
For the work, we need a concise but effective starter kit. It includes devices for fixing and compacting the down, as well as decorative elements that will help bring the future craft to life and give it a finished look.
How to Choose Felting Needles and a Base
Cat down is significantly softer and finer than classic sheep's wool, so the correct choice of tools determines the neatness of the final work. For dry felting, you will need special felting needles of different gauges:
- Coarse Needle (No. 36): Used at the initial stage for quick fiber bonding and base formation.
- Medium "Star" Needle (No. 38): A versatile tool for working with cat down. Thanks to its four facets, it effectively captures fine hairs, speeding up the compaction process.
- Fine Needle (No. 40): Necessary for the final surface smoothing and detailing.
- Reverse Needle (No. 38 or No. 40): Allows you to pull out fuzz to make the toy fluffy.
Never felt cat hair while hanging—this will lead to injury. For a felting base, it is better to use a dense foam sponge, a foam polyethylene mat, or a special brush. These will protect the needles from breaking and your fingers from accidental pricks.
Additional Accessories and Hardware for Decorating Items
To turn a shapeless clump of cat down into an expressive toy or stylish accessory, you will need quality hardware. It is these details that give the item a finished look and character.
To decorate faces and create ornaments, prepare:
- Eyes and Noses: ready-made plastic or glass cabochons with screw mounts. For miniature work, ordinary black beads or sequins work perfectly.
- Wire Frame: copper or brass wire is necessary if you want the toy's paws or tail to be movable.
- Glue: clear instant glue or a glue gun for securely fixing small details.
- Thin Fishing Line (Monofilament): indispensable for creating realistic cat whiskers.
- Dry Pastels or Acrylic Paints: Used for toning the face, darkening the eye sockets, and adding volume.
- Brooch and Keychain Bases: Metal pins and carabiners will help turn a keepsake into a practical accessory.
Properly chosen decor will emphasize the soft texture of the cat hair and make your craft truly unique.
Step-by-Step Master Class for Dry Felting a Simple Toy
When all the tools are prepared and the fluffy cloud of combed fur awaits its moment, the most magical moment of creativity arrives. Dry felting allows you to literally transform shapeless cat down into a dense, neat figure before your eyes. For a first experiment, a simple shape is ideal—for example, a miniature mouse or a cute kitten. Working with cat fur has its nuances: it is much softer than traditional sheep's wool and requires a bit more patience when compacting. In this practical guide, we will go step-by-step from a fluffy lump to a finished souvenir that will be a warm memory of your beloved pet.
Forming the Base: How to Make a Dense Ball from Down
To create the base of our future toy, take the prepared cat down. Keep in mind that during dry felting, the volume of the piece will decrease by about two to three times, so the initial ball of fur must be noticeably larger than the planned size of the piece.
- Fraying the Fibers. Carefully tear the combed fur by hand, folding the strands crosswise. This helps the fine hairs to bond better with each other.
- Initial Shaping. Pack the wool lump as tightly as possible with your fingers into a firm ball.
- Starting the Felting. Place the piece on a special felting mat. Take a coarse felting needle (e.g., triangular #36) and begin to poke it deeply into the center of the ball, constantly rotating it. Insert the needle strictly perpendicular to the surface to avoid breaking the tool.
- Compacting. Gradually work over the entire surface of the piece. The ball will begin to shrink and harden. A properly felted base should be elastic: when squeezed firmly with your fingers, it should not deform.
Detailing Small Features, Faces, and Surface Smoothing
On the prepared ball base, we begin to work out the facial features. Take two identical tiny clumps of fur and felt them onto the cheek area using a medium felting needle (#38). To make the ears, form two flat triangles from the cat down on the mat. Leave the bottom edge of the pieces fluffy—this is how we carefully attach the ears to the head.
For the eyes and nose, you can use small beads or felt contrasting sheep's wool. Once all the elements are secured, we move on to smoothing. Cat combed fur has a tendency to fluff up, so for a perfect smoothness, take a fine needle (#40 or #42). Often, process the entire surface of the toy by hand, not too deeply, until it becomes dense and silky. Carefully trim any stray, unruly hairs with small scissors. Our first miniature is ready!
Wet Felting of Cat Fur and Practical Craft Ideas
If dry felting is perfect for creating voluminous sculptural forms, wet felting opens up entirely different horizons for creativity. Soft and delicate cat down easily bonds into a dense, even fabric when exposed to warm water and soap. This method is indispensable when you want to create practical, durable items or flat decorative elements.
By mastering the wet technique, you can transform your pet's combed fur into useful household items or original accessories. Let's explore the basic principles of this fascinating process and get inspired by ideas for items that will warm you with their softness.
Felting Technique Using Soap Solution
Wet felting (wet felting) from cat down requires care, as these fibers are shorter and softer than sheep's wool.
Preparing the Soap Solution
For the work, prepare a warm soap solution. Dissolve 1–2 tablespoons of liquid soap, mild dish soap, or grated baby soap in 1 liter of hot water (about 40–50 °C). The solution should feel slippery to the touch but not overly foamy.
Step-by-Step Technique:
- Laying Out: Spread the cat fur evenly in thin strands onto a bubble wrap sheet. Layer the pieces perpendicular to each other (crosswise) so the fibers bond better.
- Moistening: Cover the layout with a mesh screen. Heavily spray the warm soap solution from a spray bottle or gently press with your palms, distributing the moisture.
- Compacting: Begin smoothing the fur with gentle circular motions using your palms through the screen. Gradually increase the pressure. When the fibers stop separating, carefully remove the screen.
- Felting and Shrinking: Roll the film with the fur into a log and roll it by hand 100–150 times. Rinse the finished item in clean water to remove soap residue and dry it in an outstretched position.
What Can Be Made: From Souvenir Beads to Slippers
Cat down felted using the wet method turns into a dense, soft, and very warm felt. From this eco-friendly material, you can create many practical items and memorable souvenirs:
- Souvenir Beads and Balls. This is an ideal start for beginners. Round pieces make excellent bouncy toys for the pet (especially if a bell or catnip is hidden inside), as well as original necklaces, garlands, and keychains.
- Warm Insoles and Slippers. Cat fur has a distinct warming and therapeutic effect. To make slippers, cut a template from thick plastic or laminate matting, layer the combed fur, soak it generously in soap solution, and felt it to the shape of the foot until it shrinks. Such items are excellent for helping with joint pain.
- Hot Pads (Coasters). Flat, dense mats in round or square shapes will reliably protect wooden table surfaces from hot mugs.
- Eyeglass and Phone Cases. A pouch felted on a flat template will reliably protect fragile gadgets from scratches and drops.
Troubleshooting and Care for Finished Items
Creating unique items from cat down is an engaging process, but it requires an understanding of the specifics of this delicate material. Unlike traditional sheep's wool, cat undercoat is incredibly soft, fine, and virtually lacks scales, which is why beginner crafters often encounter difficulties during the felting process.
To ensure that your memorable souvenirs, toys, or accessories retain their original appearance, do not deform over time, and are reliably protected from external factors, it is important to know several professional secrets. Below, we will discuss typical mistakes when working with cat down, effective ways to correct them, as well as the subtleties of gentle cleaning and storage of finished handmade masterpieces.
Why Cat Fur Doesn't Felt Well and How to Fix It
Cat down is an incredibly delicate and soft material, but during the crafting process, crafters often find that it is reluctant to felt. There are several reasons for this: the lack of pronounced scales on the hairs (unlike sheep's wool), the fibers being too short, and residual natural fatty oils.
To fix this problem and make the felting process comfortable, use the following professional tips:
- Blending: Add 30–50% sheep's wool (carded or merino) to the cat's fur. The sheep fibers will act as a sturdy framework that securely holds the slippery cat down.
- Thorough Degreasing: Before starting, be sure to wash the brushed fur in warm water with a mild dish soap or deep-cleansing shampoo to remove skin oils.
- Proper Tool Selection: For dry felting, use fine felting needles (No. 38 or No. 40 "star" or "crown"). They delicately tangle the short fibers without destroying the structure of the piece.
- Temperature Contrast: If you chose wet felting, use a hot soapy solution, and at the end, rinse the item in ice water. The sharp temperature change will cause the fibers to contract and compact.
By applying these methods, you can easily handle even the most temperamental fur of long-haired cats.
Rules for Gentle Cleaning, Washing, and Moth Protection
Masterpieces made from cat fur require delicate handling, as this material is much more delicate and softer than classic sheep's wool. To extend the life of your unique items, follow simple care rules.
Cleaning and Washing:
- Dry cleaning is a priority. Dust and small debris are best removed with a soft, natural-bristle brush or gently blowing with a hairdryer on a cold setting.
- Gentle washing. If the item gets dirty, wash it only by hand in cool water (no higher than 30 °C). Use a mild baby shampoo or a special liquid wool detergent.
- No rubbing. Gently squeeze the item in soapy water, avoiding wringing. Rinse in clean water of the same temperature to prevent unwanted shrinkage.
- Proper drying. Gently squeeze the item through a terry towel and dry it laid flat. If necessary, reshape the details while they are still damp.
Moth Protection:
Cat fur attracts pests more strongly than sheep's wool, so protection must be reliable.
- Store the crafts in airtight zip-lock bags or tightly sealed plastic containers.
- Use natural repellents: sachets of dried lavender, cedar shavings, or carnation flowers.
- Periodically ventilate closets and take the items outside into the fresh air on a sunny day.
Conclusion
Felting with cat fur is not just a fun hobby, but also an amazing way to express love for your pet by giving a second life to its brushed fur. In this guide, we have detailed all the key stages of this eco-friendly craft: from the gentle collection and delicate preparation of the fur to the subtleties of working with dry and wet felting techniques.
By using soft cat fur, properly selected felting needles, and a dense backing, even a beginner can create their first unique toy with their own hands. Even if this material seems overly delicate and capricious at first, patience and knowledge of small tricks—such as using a soapy solution for the wet method or adding sheep's wool for the framework—will surely bring excellent results.
Don't be afraid to experiment with shapes and textures. Your beloved pet's brushed fur, which would otherwise just be thrown away during shedding, can now turn into elegant keepsake beads, warm home slippers, original brooches, or miniature figurines resembling the four-legged friend. Such handicrafts give items a special energy, warmth, and soul. We wish you endless creative inspiration, obedient material, and pleasant moments creating your personal fluffy masterpieces!