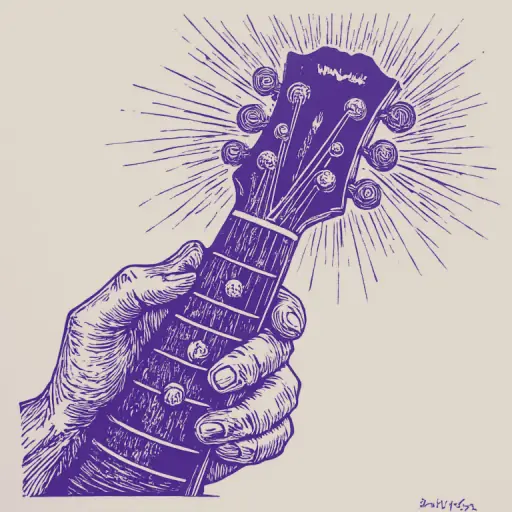
How to properly fret guitar chords for a clean sound
- 15 min read
- 59
Anyone who picks up a guitar for the first time dreams of playing their favorite song right away. However, reality often brings disappointment: instead of a beautiful chord sounding from under your fingers, there is a dull buzz, adjacent strings are involuntarily muted, and your hand starts to hurt unbearably after just five minutes of practice. Familiar picture?
The good news is that the clarity of the guitar sound does not depend on innate talent, but on correct technique. It doesn't matter if you are trying to fret a simple open Am chord or struggling with a complex barre—the secret lies in the anatomically correct hand positioning, the angle of pressing, and the distribution of effort.
In this practical guide, we will break down a step-by-step algorithm: from the correct placement of the thumb on the neck to the secrets of fast chord changes without pauses. You will learn how to press strings with your finger pads without unnecessary tension and permanently get rid of unpleasant buzzing.
Fundamentals of Correct Positioning: Preparing the Left Hand for Chording
A clear guitar sound begins not with pressing force, but with correct biomechanics. If your left hand is cramped and your fingers rest flat on the strings, even the simplest chord will turn into a dull buzz. Before fretting the first chords, you must prepare your hand and set up its correct interaction with the instrument.
Correct positioning is the foundation that will protect you from hand pain and rapid fatigue. Understanding how the effort is distributed between the thumb and the other fingers, as well as knowing the landmarks on the neck, will allow you to play any chord easily and naturally. Let's examine the basic principles of a guitarist's anatomy that will instantly improve your sound.
Left Hand Positioning: Rounded Fingers and Perpendicular String Pressure
The main secret to clear chord sound lies in the geometry of your fingers. To prevent strings from buzzing or muting each other, observe two basic rules:
- Rounded Fingers ("Dome"). Imagine holding a tennis ball in your left hand. Your fingers must form elegant arches. Avoid bending the joints inward—this drains the hand of strength and causes the fingers to lie flat on adjacent strings.
- Perpendicular Pressure. The string must press against the neck at a strict 90-degree angle. To achieve this, use the very tips of your finger pads (closer to the nail, but not the nails themselves—they should be trimmed short before playing).
With this positioning, each finger touches only its own string, leaving adjacent strings open for free vibration. If the sound is dull, check if your wrist is drooping or if the flat part of your finger is touching a neighboring string.
Anatomy of the Guitar Neck: Frets, Strings, and Correct Thumb Placement
Understanding the neck's structure is the key to clear sound extraction. The guitar neck is divided into frets by metal barriers, and the strings are numbered from bottom to top: from the thinnest first string to the thickest sixth string. To prevent a string from buzzing, press it with your finger pad not in the middle of the fret, nor directly on the metal barrier, but right next to it—on the right side (closer to the instrument body).
The thumb is the main stabilizer of the left hand. It serves as a point of support and should be placed roughly in the middle of the back of the neck, perpendicular to its axis, opposite the index or middle finger. Do not let it droop sideways or stick out too high over the neck at the beginning. Correct left-hand positioning creates a stable lever, allowing you to fret open chords without extra effort and preparing the hand for future barre chords.
How to Read Chord Diagrams (Tablatures) for Beginner Guitarists
Left-hand positioning is the foundation, but to start playing favorite songs, you need to learn to understand the 'map' of the neck. For this, musicians use chord diagrams—special graphic schemes that show which strings and on which frets need to be fretted. Without the ability to quickly read these charts, it is impossible to master even the simplest chords.
Understanding the visual language of chords will save you from having to memorize every movement blindly. Let's break down how the standard chord grid is structured, what the numbers and symbols on it mean, and get acquainted with the international letter system that will help you navigate any songbook easily.
Decoding the Chord Grid: Strings, Frets, and Finger Notations
The chord grid is a schematic representation of a part of the neck that allows you to instantly visualize a chord. It is very simple to understand:
- Vertical lines represent the strings. The leftmost line is the thickest, the sixth string (E), and the rightmost line is the thinnest, the first string (E).
- Horizontal lines denote the frets. The thick top line is the nut. If the chord is fretted lower on the neck, the starting fret number is indicated by a number on the side.
- Dots (circles) show where the strings are pressed. Numbers inside or below the diagram indicate the fingers of the left hand:
- 1 — index finger;
- 2 — middle finger;
- 3 — ring finger;
- 4 — pinky finger.
- Symbols above the grid: The symbol "o" indicates an open, sounding string, and "x" requires muting the string or not playing it.
Understanding these basic notations eliminates confusion when analyzing new songs.
Letter Notation System (Major and Minor Chords)
In the musical world, chords are denoted by Latin letters that correspond to basic notes. Memorizing this system is easy if you match the letters to the note names, starting from the note 'A':
- A — La
- B (in some schools H) — Si
- C — Do
- D — Re
- E — Mi
- F — Fa
- G — Sol
The main difference between major and minor chords in notation is the presence of the small letter "m" (from the English minor).
- Major chord (sounds bright and joyful) is denoted by a simple capital letter. For example, C is C major, and E is E major.
- Minor chord (sounds sad and lyrical) always has the prefix "m". For example, Am is A minor, and Dm is D minor.
Understanding this simple marking will allow you to instantly determine the character of the chord and easily read any songbook.
Step-by-Step Technique for Fretting Basic Open Chords Without Buzzing
Theory and reading diagrams are just the map, but now it's time to pick up the instrument and extract the first real chords. The transition from graphic notation to live sound is often accompanied by difficulties: strings start buzzing unpleasantly, and fingers refuse to obediently take their places. At this stage, it is crucial to lay a correct foundation to avoid typical beginner mistakes.
We will start by mastering basic open chords, which will form the basis of your first repertoire. Step by step, we will examine how to correctly place the finger pads on the neck, why unwanted artifacts occur, and how to achieve a sound where every string in the chord sounds crystal clear, full, and confident.
We will move from theory to practice and break down three basic chords: Am (A minor), C (C major), and Em (E minor). For them to sound clear, the main rule is to press the strings strictly with the pads of the fingers (the very center of the fingertips, closer to the nail). The fingers of the fretting hand must be bent into neat "arches," perpendicular to the fretboard plane.
Here is how to correctly position the fingers for each chord:
- Am (A minor): Place the index finger on the 2nd string (1st fret), the middle finger on the 4th string (2nd fret), and the ring finger on the 3rd string (2nd fret). The sixth string does not sound in this chord.
- C (C major): From the Am position, simply move the ring finger to the 5th string (3rd fret). The index finger remains on the 2nd string (1st fret), and the middle finger remains on the 4th string (2nd fret).
- Em (E minor): Press the 5th string (2nd fret) with the middle finger, and the 4th string (2nd fret) with the ring finger. All other strings remain open.
The Secret to Clarity: Try to press the string not in the middle of the fret, but as close as possible to the metal fret wire (fret edge). This minimizes buzzing and requires far less physical effort for a clear tone.
Why Neighboring Strings Mute and How to Achieve Perfect Clarity in Every Note
A dull, buzzing sound when playing the first chords is a typical beginner problem. The main reason neighboring strings are muted lies in "bunched up" fingers. If the joints of the fretting hand are not bent at the correct angle, the flat part of the phalanx inevitably rests on the adjacent string, blocking its natural vibration.
To achieve perfect clarity in every note, follow these three simple rules:
- Position fingers in a "dome": The upper phalanx must be strictly perpendicular to the fretboard plane. Imagine you are gently holding a tennis ball in your palm.
- Press the string closer to the fret wire: Not in the middle of the fret, and not on the metal fret wire itself, but literally 1–2 millimeters before it. This requires minimal effort for a clear tone.
- Perform a check by picking: After fretting the chord, slowly play each string one by one from top to bottom. If any string sounds dull, slightly adjust the position of the interfering finger.
This conscious control will quickly rewire your muscle memory, eliminating buzzing.
Mastering the Barre Chord Technique: Taking Chords Without Pain or Strain
The transition from open chords to barre chords is a real baptism by fire for every beginner guitarist. It is at this stage that many encounter their first serious difficulties: strings start buzzing, the hand tires quickly, and uncomfortable tension develops in the fist. However, pain and strain are not mandatory companions to barre chords; they are merely a result of incorrect effort distribution and ergonomic errors.
Mastering this technique requires not so much brute physical strength as correct biomechanics. Understanding how the lever of your fretting hand works and at what angle the pressure is applied will allow you to play even the most complex voicings clearly and without unnecessary suffering. Let's break down how to master this technique while maintaining ease and freedom of movement.
Technique for Placing the Index Finger for Barre and Effort Distribution
The secret to a clean barre is not in the crushing strength, but in the correct anatomical point of contact. Instead of pressing the strings with the soft pad of the index finger, slightly turn it sideways—towards the thumb. The side edge of the finger is stiffer, allowing you to press the strings with much less effort.
Key placement rules:
- Closeness to the Fret: Position the index finger right up against the metal fret wire, but do not go over it. The closer the finger is to the fret, the less force is required for a clear sound.
- Natural Bend: The finger should not be perfectly straight like a ruler. Allow a slight curve so that the joints land on the spaces between the strings, and the stiff phalanges press the strings themselves.
- Leverage Instead of Clamping: Do not try to crush the neck only with the strength of the thumb and index finger. Instead, slightly pull the left shoulder back, using the weight of the entire arm as a natural lever. The right forearm slightly presses the guitar body against the torso, creating a counterweight.
This distribution of effort will protect your wrist from overexertion and cramps.
Exercises for Developing Finger Strength and Relieving Excess Wrist Tension
To solidify the correct hand position and avoid overexertion, perform three simple exercises every day before your main practice:
- "Half-Barre" (Gradual Step). Do not try to press all six strings at once. Start with the three lower strings on the 5th fret using only the index finger. Achieve a clear sound. The next day, add the fourth string, then the fifth and sixth. This prevents muscle overload.
- "Press-Release" (Pulsation). Press a barre on the 5th fret and play the sound. Then, completely relax the fretting hand without removing the fingers from the strings—they should just rest on them, muting the sound. Repeat the cycle of "press (2 seconds) — release (4 seconds)" 10–15 times. This trains muscle memory and relieves spasms.
- "Finger Independence." Press a barre with the index finger on the 3rd fret. Without pressing the other strings, tap the middle, ring, and pinky fingers sequentially on adjacent frets. This exercise separates muscle effort: the index finger maintains the pressure, while the others remain relaxed and mobile.
If you feel burning in the thumb or forearm area, take an immediate break and shake out your wrist.
Secrets to Quick Chord Changes and Skill Consolidation
Even if you have learned to produce a clear sound from each individual chord, the real magic of music begins when they transition smoothly into one another. For beginner guitarists, the transition between voicings is often the main obstacle: tempo is lost, pauses occur, and fingers search chaotically for the correct frets on the neck.
To make the playing sound cohesive and professional, you must rewire the work of the brain and muscles. Instead of rebuilding the chord shape from scratch every time, we will learn to optimize the movements of the fretting hand. In this section, we will examine proven techniques that will help you reduce the time spent repositioning fingers to a minimum and automate this process.
The "Anchor Finger" Method and Muscle Memory for Smooth Transitions
When transitioning between chords, beginners often make a critical mistake—completely lifting the hand off the neck, losing tactile orientation. The "Anchor Finger" method allows you to maintain the stability of the fretting hand and make transitions smooth and fast.
The essence of the method lies in finding common elements between chord voicings:
- Common Fingers: If one of the fingers must remain on the same string and fret when changing chords, do not lift it. For example, when transitioning from Am to C, the index finger (1st fret, 2nd string) and middle finger (2nd fret, 4th string) remain in place. Only the ring finger moves.
- Sliding Fingers: If a finger stays on the same string but needs to move to a different fret, do not remove it completely. Loosen the pressure and gently slide the fingertip along the string to the new position.
To train muscle memory, use the "Air Chord" technique: press the chord, then lift your fingers just 1–2 millimeters above the strings, maintaining the fingering shape in the air. Transfer this "shape" to the next chord and only then press the strings. This trains your fingers to reposition simultaneously, not sequentially.
Daily Practice with a Metronome: Building Simple Sequences
Practicing with a metronome is the only way to turn chaotic finger movements into rhythmic playing. The metronome prevents you from "hanging" between chords, forcing your brain to prepare the fingers for the transition in advance.
For a daily 10-minute practice, use the following algorithm:
- Choose a simple sequence. Start with the classic circle: Am — C — G — Em. These chords have common notes and convenient voicings.
- Set a slow tempo. Start at 60 BPM (beats per minute). Allocate four beats to each chord (one measure).
- "Strike and Prepare" Scheme:
- On beat "one", make one even downstroke across the strings.
- On beats "two," "three," "four", the sound continues, but your left hand begins to relax and smoothly move toward the next shape.
- On the next beat "one", the new chord must sound perfectly clear.
- Increasing Difficulty. When transitions on one beat become confident, play two beats per measure (on "one" and "three"), and then move to every metronome beat.
Increase the tempo by 5–10 units only when the sequence sounds without pauses or buzzing at the current speed.
Conclusion
Mastering guitar chords is a journey that requires patience, regularity, and a conscious approach to every movement. Clarity of sound does not come instantly, but adhering to basic rules guarantees stable progress. Remember the key points:
- Rounded finger shape and perpendicular pressing with the fingertips on the strings near the frets.
- Correct placement of the thumb on the back of the neck to create a stable support.
- Gradual mastery of barre chords without excessive wrist tension and with proper distribution of effort.
- Regular transition practice using the "pivot finger" method with a metronome.
Do not get discouraged if the strings buzz or mute at first. Your fingers will gradually strengthen, muscle memory will develop, and chord changes will become automatic. Start with simple and favorite songs, dedicating just 15–20 minutes to daily practice. The guitar is an instrument that reveals itself to those who value consistency and are not afraid of temporary difficulties. We wish you creative success and clear, inspiring sound!