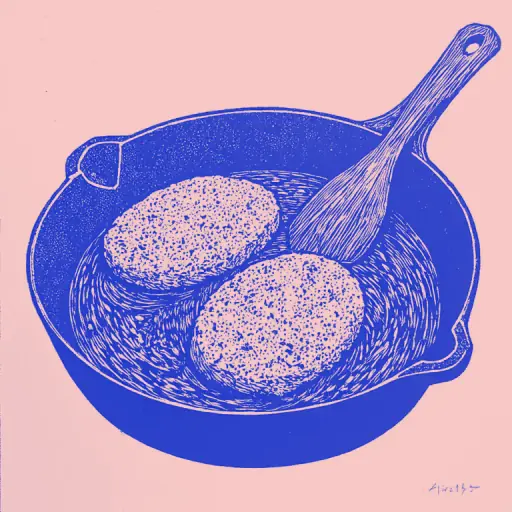
How to Fry Juicy Homemade Cutlets with Breadcrumbs According to Professional Chef Instructions
- 8 min read
- 62
Homemade cutlets are a culinary classic capable of bringing the whole family to the table. However, it is not always easy to prepare them so that the filling remains juicy inside while forming a perfect crispy crust on the outside. Often, the breading falls off during frying, and the meat itself turns out dry and tough.
In this practical guide, we will cover professional chef secrets: from the correct choice of meat and adding butter to the mince to the subtleties of double breading using liaison. You will learn how to properly set the medium heat, how long to fry the cutlets in the pan, and how to keep them juicy inside a crispy shell.
Preparing Juicy Mince: Chef Secrets
The foundation of a perfect cutlet is properly prepared mince. Even the crispest breading cannot save the dish if the meat inside is dry and tough. Chefs know that juiciness is established at the ingredient selection and meat mass texturing stage. Let's review the basic rules for preparing the base that guarantee a flawless result even before the cutlets hit the pan.
Secret Ingredient: Adding Butter and Choosing Meat for Juiciness
For perfect homemade cutlets, chefs recommend using a mixed mince: juicy pork shoulder and beef brisket in a 1:1 ratio. If you prefer chicken mince, choose fattier meat from thighs, not dry breast.
The main secret to restaurant-quality juiciness is butter in the mince. Add it in one of the following ways:
- Grated Butter: Grate cold butter using a grater and quickly mix it into the prepared mince.
- Butter Filling: Place a small stick of frozen butter in the center of each cutlet while shaping.
When heated, the butter will melt inside, creating a juicy texture that the crispy crust will securely seal.
Proper Kneading and Shaping Cutlets Before Breading
After adding all ingredients, the mince must be thoroughly kneaded by hand for 5–7 minutes. This activates the meat protein, making the mass viscous and uniform.
Next, be sure to pound the mince: gather it into a ball and forcefully throw it back into the bowl or onto the work surface 10–15 times. This technique removes excess air, makes the texture dense, and prevents the patties from falling apart in the pan.
Shape the cutlets with wet hands. The ideal form is tightly packed ovals without cracks. Smooth the surface of each cutlet thoroughly so that the juices do not leak out and the breading lies in an even layer.
Secrets of Perfect Breading: So the Crumbs Don't Fall Off
Proper breading is not just a decorative detail; it is a protective barrier that holds the meat juices inside the cutlet and gives it that coveted crispy crust. If a mistake is made at this stage, the crumbs will quickly fall onto the pan, start to burn, and the dish will lose its juiciness.
To ensure the breading holds together monolithically and does not fall off during frying, chefs use a proven technique for bonding the layers. Let's review the professional subtleties of creating an impeccable "armor" for our cutlets.
Why Liaison is Needed and How Double Breading (Flour, Egg, Breadcrumbs) Works
Double (or classic triple) breading is a reliable armor for preserving the juiciness of homemade cutlets. It consists of three mandatory layers:
- Flour: The first layer, which absorbs excess moisture from the mince surface and ensures perfect adhesion to the next step.
- Liaison: Beaten egg (sometimes with a couple of tablespoons of water or milk added). Liaison for cutlets acts as a strong culinary glue.
- Breadcrumbs: The final layer, which adheres firmly to the egg mixture.
During frying, this "shell" instantly sets on the hot pan, sealing the meat juices inside and guaranteeing that the crumbs do not fall into the oil.
Rules for Coating in Breadcrumbs to Create a Crispy Crust
To ensure the breadcrumbs form an even, dense layer and turn into that golden crust during frying, follow three rules:
- Use dry dishes. Pour the breadcrumbs onto a flat plate in a wide layer.
- Gentle pressing. Dip the cutlet in the breadcrumbs after the liaison and gently press with the palm on both sides. The breading must literally "press into" the egg mixture, filling all voids.
- Shaking off excess. Lightly tap the patty against your fingers to remove excess, loosely attached crumbs. If you leave them, they will quickly burn in the hot oil.
Step-by-Step Frying of Cutlets in a Pan
Once the perfect breading is fixed on the patties, the most critical stage begins—thermal processing. It is in the pan that the fate of the dish is decided: will the homemade cutlets become a culinary masterpiece with a crispy crust, or will they lose all their juicy mince due to temperature errors? Proper frying requires strict control of the heat and the correct choice of fat so that the crumbs do not burn before the center is fully cooked.
Vegetable Oil, Pan Heating, and Why Medium Heat is Important
For frying breaded cutlets, refined vegetable oil (sunflower or corn) is ideal—it has a high smoke point and a neutral taste. Pour oil into the pan so that it covers the bottom by about 3–5 mm, and heat it well.
Why is medium heat important?
- With too high a flame, the breadcrumbs will instantly burn, while the mince inside will remain raw.
- With low heat, the breading will start absorbing oil like a sponge, causing the cutlets to become greasy and the meat juices to leak out.
Optimal medium heat allows the crumbs to "set" quickly, sealing the juices inside, and ensures even cooking of the meat.
How Many Minutes to Fry Cutlets and Whether to Cover the Pan
To maintain a crispy crust and juicy mince, forget about the lid during the initial frying stage. If you cover the pan immediately, the condensation will soften the breadcrumbs, and they will lose their appetizing crispness.
Optimal frying time on medium heat:
- First side: 4–5 minutes until a firm golden crust forms.
- Second side: Flip and fry for another 3–4 minutes.
If you decide to finish the cutlets in the pan, reduce the heat to a minimum and cover them with a lid, leaving a gap for steam to escape, for 2–3 minutes. However, chefs recommend avoiding the lid altogether, using alternative methods.
Finishing Cooking and Checking the Result
After the perfect golden crust has formed in the pan, the main task for the cook is to fully cook the meat inside without drying it out or softening the crispy breading. Ordinary simmering under a lid in the pan often ruins the texture of the crumbs, turning them into mush due to accumulated condensation.
To avoid this, chefs use professional tricks for temperature control. We will review how to delicately bring the dish to perfection using the oven and how to infallibly determine the moment when the juicy cutlets are ready to be served.
Combined Method: Quick Pan Frying and Oven Finishing
The combined method is the secret to perfect texture from chefs. Instead of long simmering under a lid, which softens the breading, use the oven.
Quick Frying: Place the cutlets on a well-heated pan with vegetable oil. Fry on medium heat for only 2–3 minutes on each side until a firm golden crust forms.
Baking: Transfer the cutlets to a baking sheet and place them in an oven preheated to 180 °C for 8–10 minutes.
This technique allows the meat to cook completely from the inside, preserving the mince's juiciness, while the breadcrumbs remain incredibly crispy.
How to Check Doneness and Keep the Crust Crispy Before Serving
To check the doneness of the cutlets and not spoil their texture, use a culinary thermometer. The internal temperature of the finished product should reach 70–75 °C for pork and beef, and about 75–80 °C for chicken mince. If you do not have a thermometer, carefully pierce the cutlet with a wooden skewer in the thickest part: the oozing juice must be completely clear, without a pink tint.
To maintain a crispy crust, observe two rules:
- Use a rack. After the oven or pan, place the cutlets on a metal rack. This allows air to circulate, and the bottom part of the breading will not become soggy from its own steam.
- No lids. Never cover the finished cutlets with a lid or foil "for warmth"—condensation instantly destroys crispness. Serve the dish immediately.
Conclusion
Preparing perfect homemade cutlets with breadcrumbs is a true culinary art accessible to everyone. By combining the secrets of juicy mince with butter, reliable double breading using liaison, and the correct temperature regime during frying, you are guaranteed to achieve a flawless result. The crispy golden crust will securely seal all the juices inside, turning a simple everyday dish into a restaurant-level masterpiece.
Serve the hot cutlets with your favorite side dish—tender mashed potatoes, fluffy rice, or fresh vegetables. Do not be afraid to experiment in the kitchen, because now you have proven techniques from professional chefs in your arsenal! Enjoy your meal!