How to Grow a Pineapple Indoors with the Correct Instructions
- 14 min read
- 69
Growing a real tropical pineapple on a windowsill is not fantasy, but a completely achievable and incredibly exciting experiment. Many indoor gardening enthusiasts dream of having exotic plants at home but are often afraid of the care difficulties. In fact, you can get your own viable indoor pineapple from a regular top of a ripe fruit bought at the nearest supermarket.
This green tuft of leaves, which professional horticulturists call a "pineapple sultan," has an amazing regenerative ability. Proper rooting of the top allows you to grow a beautiful decorative plant that, with proper care, will eventually delight you with exotic flowering and even a miniature fruit. In this practical guide, we will detail the entire process step by step: from choosing the perfect fruit in the store to the subtleties of watering and stimulating fruiting.
Choosing the Fruit and Preparing the Top for Planting
The success of the entire home experiment of growing an exotic fruit is 90% dependent on the quality of the starting material. If you purchase a supercooled or rotten fruit, all subsequent rooting efforts will be in vain. This is why the first and most responsible step is the correct selection of the crown at the supermarket and the delicate separation of its green top, which professional horticulturists call the sultan.
Before planting, the top must be prepared correctly to prevent tissue rot and stimulate the rapid appearance of a viable root system. Below, we will detail what external signs of the fruit to look for when buying and how to correctly separate and dry the leaf rosette for a guaranteed result.
How to Choose the Right Pineapple in the Store
The success of the entire windowsill pineapple growing experiment is 90% dependent on choosing the right fruit in the store. We need not just a tasty, but a physiologically healthy and viable specimen.
When buying, pay attention to the following criteria:
- Condition of the crown (sultan): The leaves must be dense, juicy-green, and firm. If the tips are slightly dry—that's not a problem, but a completely dry or gray top will not take root.
- Growth point: Look into the very center of the rosette. Small young leaves should be visible there. If the center is cut, damaged, or rotten, the fruit will not grow.
- Maturity and quality of the crown: Choose a golden-yellow fruit with a pleasant sweet aroma. A too-green pineapple does not have a ripened bud, and an overripe one (with brown spots and indentations) has already started to rot, which will destroy the growth point.
- Temperature factor: Avoid buying pineapples in winter from outdoor stalls—a frostbitten top is guaranteed to die when attempting to root it.
Methods for Separating and Drying the Top
The top (sultan) can be separated from the fruit in two reliable ways:
- Twisting. Grip the crown with one hand, and with the other, grasp the base of the leaves right at the fruit and gently but firmly twist. The sultan should separate along with a small, sturdy stem without excess pulp. This is the most preferred option.
- Cutting. If the pineapple is firm, cut the top off with a sharp knife, taking about 1–2 cm of pulp. Then, be sure to clean the stem: carefully scrape off all the fibrous pulp from the fruit until you reach a solid cylinder, otherwise, it will rot quickly.
After separating, prepare the top for rooting:
- Exposing the stem: Carefully tear off the lower leaves in a circle to a height of 1.5–2 cm. On the exposed stem, you will see small bumps—the beginnings of future roots.
- Disinfection: Sprinkle the cut with crushed activated charcoal.
- Drying: Hang the sultan with the leaves facing down in a dry, dark place for 3–5 days. The cut should dry and form a thin crust, which will protect the plant from rot.
Pineapple Rooting Methods
Successful rooting of the prepared sultan is the decisive step that determines the viability of the future indoor pineapple. At this stage, it is important to create conditions that stimulate the rapid appearance of a healthy root system while preventing the tender stem from rotting. In home horticulture, two proven approaches are equally popular, each with its advantages and devoted supporters among growers.
The choice of method depends on your experience and desire to control the process: you can observe the development of roots in a transparent container or trust nature's forces by immediately placing the cutting in soil. Let's detail the features of both options so you can choose the path most comfortable for you.
Rooting in Water
Rooting in water is the most visible and reliable method for beginners, as it allows visual monitoring of the first roots and timely detection of signs of rot.
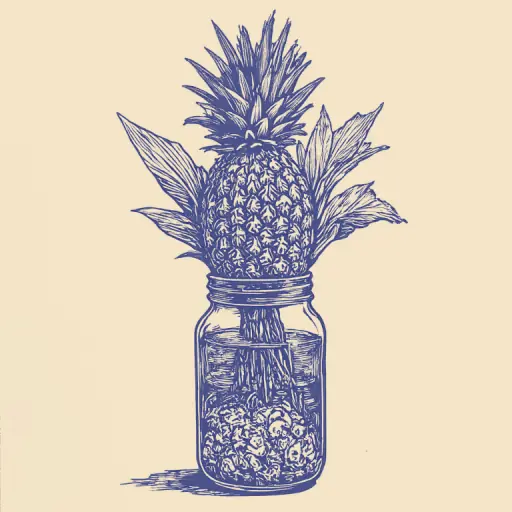
For this method, you will need a clear glass or jar with a narrow neck. The pineapple sultan must be securely fixed by weight: only the exposed stem (about 2–2.5 cm) is submerged in water, while the lower leaves must remain dry in the air.
Step-by-step algorithm for water rooting:
- Water preparation. Use room-temperature, settled or filtered water. To prevent rot, you can dissolve an activated charcoal tablet in it.
- Placement. Place the container in a warm (+22…+25 °C) and well-lit area, protected from direct sunlight.
- Hygiene. Change the water every two days to prevent acidification and bacterial growth. Gently rinse the container with each change.
The first white roots usually sprout after 10–14 days. When the pineapple's root system forms a dense "beard" about 2–3 cm long, the plant will be completely ready for transplanting into a permanent pot.
Rooting Directly in Substrate
Rooting the sultan directly in soil is a reliable method that eliminates the intermediate transplanting stage and minimizes the risk of damaging delicate young roots.
For this method, you will need:
- Light substrate: A mixture of peat moss and river sand (or perlite) in a 1:1 ratio. This soil allows excellent air circulation and does not retain excess moisture.
- Small pot: Slightly larger in diameter than the top itself (about 10-12 cm) with mandatory drainage holes.
- Rooting stimulant: "Kornevin" powder or crushed wood charcoal to dust the cut.
Step-by-Step Planting Process:
- Place a layer of expanded clay (2-3 cm) at the bottom of the pot, then cover it with the prepared substrate and lightly moisten it with warm water.
- Treat the dried cut of the crown with a root growth stimulant or charcoal to protect against rot.
- Make a small indentation in the center and vertically insert the sultan, burying it 2-3 cm (down to the base of the lower leaves). Gently compact the soil around the stem for stability.
- Cover the seedling with a transparent plastic bag or a cut plastic bottle to create a mini-greenhouse effect.
Place the pot in a warm (+22...+25 °C) and bright location, protected from direct sunlight. Ventilate the greenhouse daily for 10-15 minutes and water the soil only as it dries using a spray bottle. Rooting usually takes 4 to 8 weeks. A sign of a successful process will be the appearance of new bright green leaves in the center of the rosette.
Planting in a Permanent Pot
The successful appearance of the first roots is a crucial victory in indoor pineapple cultivation. However, for the fragile seedling to turn into a robust exotic plant, it needs the right "home." Transplanting a rooted sultan into a permanent pot requires delicacy, as the pineapple's root system has unique characteristics: it is shallow, compact, and extremely sensitive to excess moisture.
At this stage, it is critically important not just to move the plant into any available container, but to create conditions for it that closely approximate natural tropical environments. To do this, we need to approach two key factors intelligently: choosing the right pot with reliable drainage and preparing a light, slightly acidic substrate.
Choosing the Container and Organizing Drainage
The pineapple's root system has specific features: it is shallow, fibrous, and does not penetrate deeply into the soil. Therefore, narrow and deep containers are absolutely unsuitable for planting.
Pot Selection Rules:
- Shape: Choose a wide and shallow pot. The height of the container should not exceed 15–20 cm.
- Size: For the first planting of a rooted crown, a pot with a diameter of 12–15 cm is sufficient. Too much soil volume will lead to soil acidification.
- Material: Unglazed clay or terracotta is ideal—they allow the roots to "breathe." Plastic pots are also acceptable but require more careful watering.
Drainage Organization:
The presence of drainage holes at the bottom of the pot is mandatory. Water stagnation around the roots will instantly cause the sultan to rot. A dense layer of drainage material, at least 3–5 cm thick (about 1/4 the height of the pot), must be placed at the bottom of the container. Large expanded clay, clean gravel, or pieces of broken brick are best for drainage material. A thin layer of charcoal can be spread over the drainage layer to serve as an additional antiseptic.
Optimal Soil Composition for Bromeliads
Since the pineapple's root system is sensitive to moisture stagnation and requires a constant supply of oxygen, regular garden topsoil is unsuitable for planting. Bromeliads require a light, loose, and slightly acidic substrate with an optimal pH level between 4.5–5.5.
You can purchase a ready-made potting mix for bromeliads or cacti at a store, but for guaranteed results, it is better to prepare the substrate yourself.
Ideal Recipe for Indoor Pineapple Soil:
- Acidic top peat moss (3 parts) — provides the necessary acidity and moisture retention.
- Leaf compost or heath soil (2 parts) — serves as a source of nutrients.
- Large river sand or perlite (1 part) — ensures drainage and aeration.
- Crushed pine bark and charcoal (1 part) — prevents soil acidification and the development of rot.
Before filling the pot, be sure to disinfect the mixture: bake it in an oven at 90 °C or pour over it with a pink solution of potassium permanganate, then allow the soil to "rest" for several days.
Care Rules for Active Growth
Successful planting is only half the battle. For the exotic sultan to turn into a strong, healthy plant, it needs its environment recreated to closely resemble its native tropics. The indoor pineapple reacts sensitively to any changes in microclimate, so regular care will be the main guarantee of its active development.
In this section, we will thoroughly examine how to properly organize the daily care of your green pet. You will learn which environmental parameters are critically important for its well-being, how to properly dose moisture, and what to feed the exotic plant for rapid green mass accumulation.
Lighting, Temperature Regime, and Watering the Rosette
For active growth, the indoor pineapple requires conditions that closely mimic the tropics.
- Lighting. The pineapple is a light-loving giant. It needs at least 12 hours of bright, diffused light per day. The best location for the pot is a south or southeast window. During the autumn and winter, be sure to use grow lights for supplemental lighting, otherwise, the plant's growth will stop.
- Temperature Regime. The plant is extremely heat-loving. The optimal range in spring and summer is +24...+30 °C. In winter, the temperature must not drop below +18 °C. Protect the exotic plant from drafts and contact between leaves and frosty window glass.
- Watering the Rosette. This is a key feature of caring for bromeliads. Water the pineapple with warm (about +30...+35 °C) settled water directly into the center of the leaf rosette. The water, accumulating in the axils, nourishes the plant. However, during cooler weather, watering the rosette should be stopped to prevent rot, switching to moderate moistening of the dry soil.
Fertilizing and Ensuring Air Humidity
For active green mass accumulation, the tropical exotic plant requires regular feeding and high air humidity. During the vegetative period (from March to September), fertilize the indoor pineapple every two weeks.
Fertilizing Rules:
- Fertilizer Choice: Use liquid complex mineral fertilizers for bromeliads or orchids. Organic feeds based on humates are also excellent.
- Dosage: Dilute the fertilizer to half the concentration indicated on the package to avoid burning the pineapple's sensitive root system.
- Application Method: Combine fertilization with watering, applying the nutrient solution both to the roots and directly into the center of the leaf rosette.
Ensuring Humidity:
Dry indoor air, especially during the heating season, quickly leads to the tips of the leaves drying out. To avoid this, regularly spray the sultan with warm, settled water. It is also useful to place the pot on a tray with moist expanded clay or gravel (ensuring the bottom of the pot does not touch the water) or to use a household humidifier.
Stimulating Flowering and Preventing Mistakes
When your indoor pineapple has become robust, developed a lush leaf rosette, and turned into a healthy ornamental plant, the most exciting stage of the home experiment begins. In its natural environment, bromeliads flower without external help, but in apartment conditions, this tropical exotic often requires a delicate nudge to transition to fruiting.
To successfully bring about the appearance of the first juicy fruit and not ruin the plant at the finish line, it is important to know special stimulation tricks and to recognize signs of distress in time. Let's examine how to safely bring about the long-awaited flowering and what hidden difficulties novice plant growers most often encounter on this path.
How to Make an Indoor Pineapple Flower and Fruit
An indoor pineapple grown from a crown is usually ready to flower in the 3–4th year of life, when its rosette has formed at least 10–15 large leaves. If the plant is healthy but is slow to bud, it requires a delicate stimulus. In nature, the gas ethylene provokes flowering. In home conditions, this process can be recreated in simple and safe ways.
- Smoking with ripe fruits. Place the pot with the pineapple in a large, clear plastic bag. Place 2–3 ripe apples or bananas next to the rosette. Seal the bag tightly for 1–2 weeks. As they decompose, the fruits release ethylene, which stimulates the formation of a flower bud. Ventilate the greenhouse every 2–3 days and replace the fruits with fresh ones if necessary.
- Acetylene water. Dissolve a small piece of calcium carbide (about 10–15 g) in 0.5 L of water. When the bubbling stops, carefully filter the clear liquid. For a week, pour 50 ml of this solution directly into the center of the pineapple's leaf rosette every day.
Usually, 2–3 months after this stimulation, a bright red or purple flower stalk appears in the center of the rosette, which will eventually turn into a fragrant fruit.
Typical Novice Mistakes and Pest Control
Even with correct flowering stimulation, daily care mistakes can kill the indoor pineapple. Let's look at the main blunders of novice florists and ways to protect the exotic plant from pests.
Typical care mistakes:
- Overwatering. The most common cause of plant death is waterlogging, which causes the root system and the base of the rosette to rot. If the leaves become wilted, immediately reduce watering or repot the pineapple, removing any rotten roots.
- Watering with cold water. The pineapple is a heat-loving plant. Watering with water below room temperature leads to thermal shock and growth cessation.
- Dry air. Due to dryness in the room, the tips of the leaves begin to dry out and deteriorate. Regularly mist the air around the plant.
Pest control:
A weakened pineapple can be attacked by scale, spider mites, or mealybugs. The first signs of infestation are small holes in the foliage, dry spots, and loss of leaf turgor.
For effective insect control, use specialized preparations such as "Actara," "Insector Supra," or "Phytoverm." Timely treatment will quickly restore the plant's healthy appearance.
Conclusion
Growing a pineapple on a windowsill is an exciting and incredibly captivating experiment that any patient florist can undertake. Although this tropical guest requires attention to detail—from choosing the right fruit at the supermarket to maintaining temperature and humidity—the entire process brings great pleasure.
In just a short time, an ordinary green sultan will turn into a luxurious exotic plant at home, capable of decorating any interior with its original shape. And with proper care, correct watering, and timely stimulation, you can surprise your loved ones with a real fragrant fruit grown with your own hands.
The main components of success in home pineapple cultivation:
- Quality start: Choose only a ripe fruit with a healthy, un-frozen crown.
- Comfortable environment: Use light substrate for bromeliads and ensure the pineapple's root system has good drainage.
- Attention to detail: Remember the abundance of light, warmth, and specific watering directly into the leaf rosette.
Do not be afraid of difficulties and start planting with confidence. May your indoor pineapple become a true pride of your home collection and a bright testament to your gardening skill!