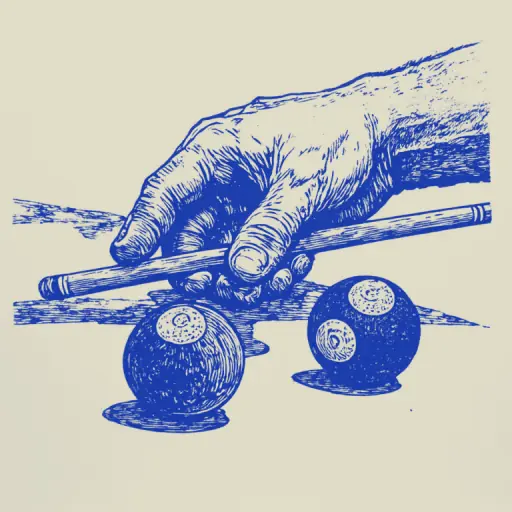
How to hold the cue in billiards: instructions for a perfect shot
- 15 min read
- 57
Billiards is often called "chess in motion," where physics and geometry merge. But even the most precise trajectory calculation will be useless if the cue slips at the moment of contact. This is why the correct cue grip and a reliable billiard bridge account for about 80% of the success of any shot.
Many beginners make the critical mistake of focusing solely on aiming. However, true control is born in the points of contact between your body and the implement:
- The leading hand is responsible for transferring energy and the smooth follow-through of the ball. It is critically important here to find an individual balance point and avoid excessive tension in the fingers.
- The supporting hand stabilizes the direction of movement. The choice between an open bridge and a closed bridge determines not only the trajectory but also the stability of the cue when executing complex spins.
Correct billiard striking technique begins with understanding: the cue is an extension of your body, not a heavy wooden block. By mastering the synergy between the grip and the player's stance, you will move from chaotic hits to conscious and effective play.
Part 1. Fundamentals: Studying Cue Anatomy and Body Position
Before moving on to practice and mastering different ways to hold the cue, a solid foundation must be laid. Any successful shot in billiards begins not with arm movement, but with the correct positioning of the entire body relative to the aiming line and an understanding of the instrument's physics.
In this section, we will break down how to turn your body into a stable and balanced system. We will study the basic principles of weight distribution, find the cue's balance point, and determine the optimal degree of shaft compression with the leading hand to eliminate unnecessary muscle tension even before starting the backswing.
1.1. Correct Stance and Posture: Setting Up the Body for Accuracy (From Sightline to Balance)
The correct stance in billiards is the foundation without which a stable shot trajectory is impossible. It ensures body balance and allows you to precisely align your sightline with the cue's direction line.
To establish the ideal body position, follow this step-by-step algorithm:
- Determine the shot line. Stand opposite the cue ball, looking at the target ball. Your dominant foot should be placed exactly on this imaginary line.
- Take a side step. Step slightly forward and to the side with your non-dominant foot (approximately shoulder-width apart). This creates a stable base and frees up space for the cue to move freely along the body.
- Distribute weight. Transfer about 60% of your weight onto your supporting foot. The back leg should remain straight, ensuring the rigidity and stability of the entire structure.
- Lean the torso. Gently lower the upper body parallel to the table. Your head should be as low as possible so that your chin is practically above the cue. This allows you to look along the shaft, as if through a sight.
This position minimizes unnecessary body movement during the backswing and guarantees that the shot will be struck precisely along the intended trajectory.
1.2. Relaxation and Grip: How to Hold the Cue So It Doesn't "Resist" (Finger and Wrist Technique)
From a stable stance, we move to direct contact with the implement. The main secret to a perfect shot is controlled relaxation of the leading hand. If you grip the cue too tightly, the trajectory of the movement will inevitably curve, and the shot itself will lose precision and softness.
How to correctly distribute effort in the grip:
- Balance Point: Find the cue's center of gravity and move your hand back approximately 10–15 cm. This is the optimal zone for the leading hand grip.
- "Bird" Rule: Hold the cue as if a live bird were in your palm. Squeeze it gently enough not to crush it, but firmly enough so that it does not slip out.
- Finger Action: The main contact is provided by the thumb and index finger, forming a soft guiding ring. The middle, ring, and pinky fingers only lightly touch the butt. During the backswing, they should naturally open slightly, freeing the cue's movement.
- Straight Wrist: Your wrist should hang freely downwards, forming a single vertical line with the forearm. Do not bend the wrist inward or outward—this breaks the natural pendulum trajectory.
Allow the cue to move freely, and you will feel it stop "resisting" your movements.
Part 2. Key Skill: Mastering the Supporting Bridge (With the Second Hand)
In the previous stage, we detailed how to relax the leading hand grip and set the wrist so that the cue can move freely. However, for a perfect shot, simply holding the cue correctly is not enough; we need a stable platform to keep the entire system balanced. This platform is the supporting bridge, which we form with the second hand. It is the key element that connects your stance to the striking process itself, ensuring the necessary immobility and trajectory control.
Setting up the supporting bridge is not just about "placing your hand on the table." It is a complex but critically important skill that requires an understanding of mechanics and anatomy. Depending on the task and your personal comfort, there are different bridge setups. We will examine how to correctly form this bridge and why its function goes far beyond simple support—it must be stable, yet not impede the natural movement of the cue.
2.1. Bridge Setup Variations: Comparing Open and Closed Bridges
Choosing the type of bridge is not just a matter of convenience; it is a strategic decision that affects the stability and control of the cue during the shot. In billiards, two main types are traditionally distinguished: the open and the closed bridge.
Understanding the differences between them is critical for selecting the technique that suits your playing style and skill level.
1. Open Bridge:
- How it is formed: You spread your fingers with your palm on the table, creating a V-shaped indentation. The cue is placed in this space, resting on the phalanges of the index and middle fingers. This position allows the cue to slide freely while maintaining a certain degree of stability.
- Advantages: The open bridge provides good visibility of the shot line and allows the cue to make smooth, controlled movements during aiming. It is more universal for beginners as it does not require perfect fixation.
- Characteristics: It requires the player to pay attention to ensuring the cue does not "drift" during movement, and that the entire hand remains relaxed yet controlling the trajectory.
2. Closed Bridge:
- How it is formed: The cue is fixed in a lock between the index and middle fingers, forming a kind of "O." The fingers are brought as close together as possible, creating a stiffer support.
- Advantages: The closed bridge ensures maximum cue fixation. This minimizes the probability of the cue deviating from the planned trajectory, which is critically important for highly precise, complex shots.
- Features: It is more difficult to master and requires a high degree of muscle memory and control from the player. It is better suited for advanced players who have already mastered the basic striking mechanics and require maximum stability.
2.2. Functions of the Supporting Hand: Why the Bridge Must Be Stable and Control Trajectory
The function of the supporting hand goes far beyond simply holding the cue. It is a critically important element that ensures the stability of the entire striking system. Essentially, the bridge must perform three key tasks:
- Stabilizing the Center of Gravity: A correctly positioned hand (especially when using an open bridge) helps the player fix their body and center of gravity. This minimizes unnecessary oscillations that can affect the trajectory and power of the shot. The more stable the body, the more accurate the aim.
- Controlling Trajectory: The supporting hand acts as a guiding stabilizer. It not only holds the cue but also helps to "ground" its movement, preventing it from deviating at the moment of maximum effort. This is especially important when executing complex or powerful shots.
- Creating the Working "Bridge": The supporting hand forms an anatomically correct and stable "bridge" (a V-shaped curve of the fingers). This bridge must be sturdy enough to withstand pressure, but it must not create excessive tension in the wrist. It must be relaxed yet firm.
Remember: the bridge must be as stable as possible, but it must not impede the free, natural movement of the cue. If you feel the need to tense your forearm muscles to hold the cue, it means the bridge is set up incorrectly. The ideal bridge is one that allows you to focus exclusively on the movement of the leading hand and the aim.
Part 3. Practice: From Grip to Movement (Instantaneous Control)
Once a stable supporting bridge is formed and the body has adopted a stable stance, the moment of transition from static to dynamic arrives. All the magic of a precise shot is born from the synergy of two hands: while the supporting hand sets the rigid guiding trajectory, the leading hand takes on the role of the "engine" and the fine regulator of power. In this part, we move from the theory of holding to the practice of controlled movement. You will learn how to correctly dose the compression force with the leading hand during the backswing and how to master the smooth sweeping motion (The Sweep), which ensures ideal cue acceleration without losing alignment. Setting this balance is the final step before executing a flawless shot.
3.1. Developing the Leading Hand Grip: Holding and Controlling the Shot Process
The leading (striking) hand is responsible for transferring energy and the trajectory of the movement. To control the cue correctly, first find its balance point—it is usually located 30–45 centimeters from the bumper (cushion). The grip is made approximately 10–15 centimeters further along from this point toward the end of the cushion.
The main secret to a professional grip is controlled relaxation. Do not grip the wood tightly. Imagine you are holding a bird: if you squeeze too hard, you damage it; if you loosen your hand, it will fly away. The cue should rest freely on the finger pads, not be clamped in the palm.
Key Rules for Leading Hand Control:
- Finger Action: The primary contact is provided by the thumb and index finger, forming a light ring. The middle, ring, and pinky fingers only gently support the shaft, naturally opening during the backswing.
- Wrist Position: Keep the wrist relaxed and strictly vertical. Avoid bending the wrist inward or outward—it must form a single line with the forearm.
- Pendulum Elbow: The striking hand's elbow is fixed at the top, and the forearm moves freely and perpendicular to the floor, like a pendulum.
This grip eliminates parasitic oscillations of the instrument and guarantees stable ball tracking.
3.2. Executing the Cue Sweep: Shot Preparation Technique
After the leading hand grip is set, move on to mastering the cue sweep—the shot preparation technique (The Sweep). These are smooth back-and-forth movements that stabilize the trajectory and prepare the muscles for the final impulse.
To perform the sweep correctly, follow this algorithm:
- Pendulum Principle: Fix the elbow of the leading hand. Only the forearm should move. Imagine your arm, from elbow to wrist, is a clock pendulum, making strictly vertical oscillations.
- Warm-up Swings (Feathering): Make 2–3 soft trial movements forward and backward over the bridge. Do not rush. These swings are necessary to feel the cue's balance and ensure it sweeps smoothly along the intended line without drifting sideways.
- Tension Control: During the backswing, the leading hand grip slightly loosens (fingers relax), and as it moves forward, it gently returns to its original position.
- Final Pause and Ball Tracking: Before the shot itself, take a short pause at the cue ball to verify the aim. Execute the shot itself with mandatory ball tracking—the cue must pass through the point of contact, continuing its forward motion.
Part 4. The Perfect Shot: Finalizing Technique and Error Correction
At this stage, we combine all the elements learned: from the relaxed grip and stable bridge to the cue sweep. The perfect shot is not just a physical action, but a complex cognitive and motor synchronization. Before striking, it is necessary to adjust not only the body but also the gaze. This is where the true magic of billiards begins.
In this part, we will delve into the details that distinguish an amateur from a master. We will analyze how to correctly synchronize the gaze with the line of the shot to ensure maximum aiming accuracy. Furthermore, we will systematize the most common mistakes made by beginners—from excessive tension to incorrect body positioning. Understanding these "pitfalls" will allow you not only to avoid errors but also to consciously work on eliminating weaknesses in your technique.
4.1. Aiming and Gaze Phase: How to Synchronize Vision with the Shot Line
Synchronizing the gaze with the shot line is a mental bridge connecting your stance and grip to the final accuracy of the hit. Without correct visual work, even a perfect cue grip will be useless.
To establish a flawless aiming line, follow this proven algorithm:
- Determining the sight center. Position the cue stick directly under your dominant eye (or exactly between your eyes, depending on individual physiology). The cue stick should become a visual extension of your arm.
- The 'pendulum' method for the eyes. During warm-up swings (shot preparation), your gaze should smoothly move: from the contact point on the cue ball to the target ball and back. This helps assess the trajectory and ensures that the supporting hand and grip guide the cue stick straight.
- Final fixation. At the moment of the final backswing and pause, fix your gaze on the target point of the object ball (where the cue ball should land). The last thing you should clearly see at the moment of impact is the point of contact on the object ball, not the tip of the cue stick.
Bend over the table as low as possible so that your chin is a few centimeters above the cue stick shaft. This will create the correct perspective and allow you to control the straightness of the instrument's movement without distorting the field of view.
4.2. Beginner Pitfalls: Common Errors in Holding and Striking (Over-gripping, Tense Stance)
Even with perfect aiming and a calibrated line of sight, the slightest tension in the body can send the cue ball off course. Let's examine the main errors that prevent beginners from making a clean shot and how to correct them.
'Dead Grip' (Over-gripping)
The most common mistake is a spasmodic clenching of the cue. When you grip the wood too tightly, the tension transfers to the forearm and shoulder. As a result, the natural pendulum motion is broken, and the cue stick drifts off the aiming line at the moment of contact with the ball. To understand how to hold the cue correctly, imagine holding a tube of toothpaste without a cap: squeeze it just enough so the paste doesn't squeeze out, but the tube doesn't fall out. The main cue grip rests on the thumb and index finger, with the others only gently assisting.Tense and Unnatural Stance
If the player's stance is excessively tight, the body tires quickly, and movements become jerky. Tension in the neck and shoulder girdle blocks a free swing. Before every shot, take a controlled exhale, consciously relaxing your shoulders. Body weight should be distributed so that you feel a solid base, but can still breathe easily.Abrupt Push Instead of Follow-Through
Beginners often stop the cue stick immediately upon contact with the cue ball. The correct billiards striking technique always includes a smooth ball follow-through—the cue stick must 'pass through' the cue ball and travel forward another 15–20 cm after contact.
Eliminating these tensions is the main step toward stable and effective play.
Final Recommendation: From Theory to Practice — How to Turn Knowledge into Mastery
The transition from theoretical understanding to muscle memory is the key step toward consistent play. When you are just beginning to consciously control your cue grip and build your billiards bridge, movements may feel unfamiliar and even stiff. This is a natural stage of your body adapting. Your goal is to translate technical elements into automatic skills.
To accelerate this process and solidify the correct technique, use this proven algorithm for home and club practice:
- 'Dry' Warm-up (5–10 minutes): Start every session at the table without playing balls. Assume the player's stance, establish a stable open (or closed) bridge, and make 20–30 smooth swings. Ensure your supporting hand is still and the leading hand holds the cue stick relaxed.
- Controlling Ball Follow-Through: When taking shots, focus on the cue stick smoothly passing through the cue ball, rather than stopping at the moment of contact. Clean ball follow-through is the main indicator of a correct grip.
- Over-gripping Test: While aiming, mentally check the condition of the leading hand's fingers. If your fingers are white from tension—take a deep breath and loosen your grip.
Remember that in billiards, discipline and consistency always beat strength. Regular short 30-minute sessions three times a week will bring much more benefit than rare, long amateur games. Give your body time to master the new biomechanics, and the accuracy of your shots will reach a completely new level.