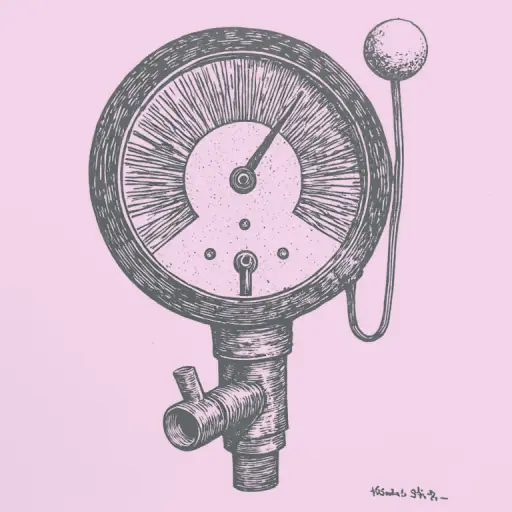
How to increase pressure in a gas boiler: step-by-step guide
- 15 min read
- 71
The stable operation of a heating system directly depends on the parameters of the heat transfer fluid. If you notice that the gas boiler has unexpectedly shut down and an error code is flashing on the control panel, the first thing to check is the boiler's pressure gauge. A drop in boiler pressure is one of the most common malfunctions encountered by owners of private houses and apartments.
Normally, the operating pressure in a closed system should be within 1.5–2 bar. When the gauge needle drops below 1 bar, the safety automation is triggered, and the equipment locks out, leaving the house without heat or hot water supply.
In this practical guide, we will thoroughly examine why the pressure drops in a gas boiler, how to correctly and safely increase the boiler pressure using the filling cock, and how to check the boiler's expansion tank and eliminate air pockets yourself. These simple steps will help you quickly restore heat to your home and understand when you can handle it yourself and when a specialist's help is necessary.
Preparation and Diagnostics: Pressure Norms and Causes of Drop
Before taking any action or attempting to raise the system pressure, it is necessary to perform a proper diagnosis. Unsystematic refilling of the boiler with water without understanding the cause of the malfunction is merely a temporary fix for the symptom, which can worsen the underlying problem, such as accelerating element corrosion or triggering a water hammer.
In this section, we will review the basic guidelines for the safe operation of the heating circuit. You will learn what manometer readings indicate normal operation, why systematic pressure drop occurs, and how to locate hidden heat transfer fluid leaks without dismantling the entire system.
What Pressure is Considered Normal in the Boiler and How to Monitor It
For the stable operation of a closed heating system in a private house or apartment, it is critically important to maintain the correct level of heat transfer fluid pressure.
- Cold state (system off): The norm is a reading within 1.0–1.2 bar.
- Operating state (when heating): The pressure naturally increases due to the thermal expansion of water and should be in the range of 1.5–2.0 bar.
If the value drops below 0.8 bar, most modern gas boilers block operation and display an error. Exceeding the threshold of 2.5–3.0 bar triggers the safety group's pressure relief valve for emergency excess water discharge.
These indicators can be monitored in two ways:
- Mechanical manometer: The needle instrument on the front panel of the boiler. The green zone on the scale clearly shows the operating range, and the red zones indicate critical deviations.
- Electronic sensor: Transmits precise digital values directly to the control board's LCD display.
Regular visual inspection of the manometer allows you to notice a gradual pressure drop in time and prevent emergency equipment shutdown.
Why Does Pressure Drop in a Gas Boiler: Main Causes
A pressure drop on the manometer below 1–1.2 bar is a clear signal of a leak or a malfunction in the equipment. Four main reasons are identified for why pressure drops in a gas boiler:
- Heat transfer fluid leak. The most common problem. Even a micro-crack in a radiator, a loose fitting, or a worn seal at pipe joints leads to a gradual loss of water. In two-circuit boilers, the leak can be internal—through a damaged primary or secondary heat exchanger.
- Expansion tank problems. If the air pressure in the tank drops or the membrane bursts, it stops compensating for water expansion during heating. As the temperature rises, excess liquid is discharged through the safety valve, and when the system cools, the pressure drops sharply.
- Air ingress (air entrapment). After filling with new heat transfer fluid or performing repairs in the system, air pockets inevitably remain. As automatic air vents gradually release this air, the total volume of liquid decreases, leading to a drop in pressure.
- Supply valve malfunction. If the pressure relief valve is clogged with hardness salts or is worn out, it may continuously leak, draining water into the drain.
Before starting to refill the system, it is important to localize the specific problem to rule out more serious equipment failures.
Locating Hidden Heat Transfer Fluid Leaks in the Heating Circuit
Hidden leaks are the most insidious cause of pressure drop. Even a microscopic leak evaporating from a hot pipe or radiator can gradually empty the system without leaving visible puddles on the floor.
To detect hidden defects, use the following algorithm:
- Paper towel test. Wipe all threaded connections, pipe joints, couplings, and radiator valves with dry toilet paper or a napkin. The paper will instantly darken from moisture even with a microscopic leak.
- Distribution manifold inspection. Check the automatic air vents and regulating valves on the underfloor heating manifold. Salts and white or reddish deposits on the brass are a sure sign of an evaporating leak.
- Sectional shutdown. If the system is radiant, alternately close the circuits on the manifold for 12–24 hours. If the pressure stops dropping when a specific branch is closed, the problem is localized.
- Thermal imaging for concealed piping. If the pipes are embedded in screed or walls, use a thermal imager. At the location of the hot water leak under the floor, a bright, blurred spot will be clearly visible.
If these methods do not help, the system will need to be pressurized with air or water using a manual pump.
Practical Guide: How to Increase Pressure Correctly
Once the system's integrity has been checked and hidden leaks eliminated, you can proceed with active measures to restore operating pressure. Returning the manometer needle to the green zone (optimally 1.5–2 bar) requires caution. Mistakes at this stage can lead to a sudden pressure spike, triggering the safety valve, or air entrapment in the radiators.
Depending on the initial cause of the malfunction, you will need to perform one of three standard procedures: carefully refill the system with fresh water, adjust the air pressure in the expansion tank, or vent accumulated air pockets. Below, we will detail each of these practical steps so you can safely restore heat to your home.
Step-by-Step Instructions for Using the Filling Cock
Using the filling cock is the simplest and fastest way to raise the pressure in a gas boiler to the operating level (1.5–2 bar). This valve temporarily connects the closed heating circuit to the cold water supply system to replenish the volume of the heat transfer fluid.
To safely fill the system, follow these steps:
- Turn off the boiler. Disconnect the heating appliance from the mains and wait for the coolant to cool down slightly. This prevents thermal shock to the heat exchanger and ensures accurate manometer readings.
- Locate the filling cock. It is usually located at the bottom of the boiler casing, near the pipe connections. Most often, it is a small round or T-shaped plastic valve in black, blue, or yellow.
- Slowly open the valve. Turn the cock counter-clockwise very slowly. You will hear a characteristic sound of incoming water. Slow opening protects the sensors and pipes from water hammer.
- Monitor the boiler manometer. Keep an eye on the manometer needle or the readings on the electronic display. As soon as the pressure rises to 1.5–1.8 bar (optimal operating range), stop filling.
- Close the cock tightly. Turn the valve clockwise until it stops. Ensure it is completely shut off and not leaking.
After this, start the boiler and observe its operation. If the pressure has stabilized, the problem is solved.
How to check and manually inflate the expansion tank
If the pressure on the boiler manometer rises sharply during water heating (up to the point of the safety valve tripping), and drops to a minimum when cooling down, the cause lies in the expansion tank. It compensates for the thermal expansion of the coolant.
To check and adjust the tank, follow these steps:
- Power off the boiler and close the isolation valves of the heating circuit (supply and return).
- Drain the water from the boiler through the drain cock. The pressure on the boiler manometer should drop to zero. Leave the drain cock open.
- Check the membrane integrity. Locate the tank's air nipple (similar to a car's) and press on its plunger. If water sprays out of the nipple—the membrane is torn, and the tank must be replaced. If air comes out or nothing happens—the membrane is intact.
- Inflate with air. Connect a car pump with a manometer to the nipple. Pump air until the displaced water stops flowing from the boiler's drain opening.
- Set the operating pressure. Inflate the tank with air to a reading of 1.0–1.2 bar (it should usually be 0.2 bar lower than the cold system pressure).
- Start the system. Close the drain cock, open the isolation valves, and fill the system with water up to 1.5 bar.
Removing air pockets from the system using bleed valves
Air pockets in radiators and pipes are one of the main causes of unstable pressure and uneven heating throughout the house. When air accumulates in the system, the coolant circulation is disrupted, and the boiler manometer may show false readings or sharp spikes. Bleed valves (Maevsky valves) installed on the ends of the radiators are used to remove air.
Step-by-step procedure for bleeding the system:
- Preparation. Turn off the gas heating boiler and the circulation pump. If you do not do this, the pump will break up the air bubbles, circulating them around, and they cannot be removed. Wait 10–15 minutes for the air to rise to the top points of the radiators.
- Tools. Prepare a special four-sided wrench (or a slotted screwdriver), dry rags, and a small container to collect water.
- Releasing air. Slowly turn the bleed valve screw counter-clockwise (usually half or one turn is enough) until a characteristic hiss of escaping air is heard.
- Completing the process. Hold the container under the valve. As soon as a steady stream of water without bubbles comes out instead of hissing, carefully screw the valve back in. Repeat the procedure for every radiator in the house, starting from the lower floors and moving up to the upper floors.
After removing the air pockets, the pressure in the gas boiler will inevitably drop because the released volume is filled with water. Check the boiler manometer: if the needle has dropped below the norm (less than 1–1.2 bar), use the filling cock to restore the operating pressure to the optimal 1.5 bar.
Safety and Troubleshooting Prevention
Successfully restoring pressure using the filling cock and removing air pockets is only half the battle. For the heating system to operate long-term and without failures, it is critically important not just to eliminate symptoms but also to monitor the overall safety of the equipment. Sudden pressure spikes or systematic pressure drops often indicate hidden malfunctions that, if ignored, can cause the boiler to fail.
In this section, we will discuss how to correctly react to abnormal situations, when the safety automation begins to release excess water, what preventive measures can help avoid emergency shutdowns during the heating season, and in which cases self-intervention becomes dangerous, requiring the immediate call of a professional service engineer.
What to do if the safety group's pressure relief valve trips
The tripping of the pressure relief valve (usually set to 3 bar) is an emergency system reaction to a critical pressure increase. If water begins to drip or leak from the valve, it signals a malfunction that cannot be ignored.
Step-by-step procedure when the valve trips:
- Power off the boiler. Turn off the gas supply and disconnect the appliance from the mains. Allow the coolant to cool down to reduce natural thermal expansion.
- Record the manometer readings.
- If the pressure is above 2.5–3 bar: The valve tripped normally. The cause of excess pressure is usually a malfunction of the expansion tank (torn membrane or lack of air) or a poorly closed filling cock.
- If the pressure is normal (1.5–2 bar), but water continues to leak: The pressure relief valve itself is clogged with hardness salts, dirt, or its spring has weakened. Debris has entered the valve seat, causing it to lose its seal.
- Release excess pressure. Drain some of the coolant through the drain cock or the bleed valve on the radiator until the manometer needle returns to the 1.5 bar mark.
- Clean or replace the valve. Manually turn the plastic cover of the valve (usually red or yellow) several times in the direction of the arrow to flush the seat with water. If the leak does not stop, the part must be replaced.
Remember: frequent draining of water through the safety valve will quickly cause it to fail, so it is important to promptly eliminate the root cause—adjust the expansion tank or replace the filling cock.
Rules for regular maintenance: filter cleaning and connection inspection
Regular maintenance is the main way to prevent sudden pressure drops in the gas boiler. Fine particulates, rust, and scale gradually clog the system, reducing throughput and provoking failures.
Cleaning the coarse filter (dirt trap):
- Disconnect the boiler from the mains and close the shut-off valves on the inlet and outlet of the heating circuit.
- Drain the water from a small section of pipe where the filter is installed using the drain valve.
- Unscrew the filter cap nut using a wrench, placing a small container underneath to collect residual water.
- Remove the metal mesh, thoroughly rinse it under a strong stream of water, and clean it of scale with a stiff brush.
- Reinstall the mesh, replace the sealing gasket on the cap if necessary, and tighten it securely.
Inspecting Connections and Components:
- Visual Inspection: Inspect all threaded connections, radiator fittings, feed valves, and connections to the boiler once a month. Even barely noticeable salt deposits or "scale" indicate a micro-leak, which gradually lowers the pressure.
- Leak Check: Run a dry napkin along the pipe joints. If the napkin gets wet—the connection requires tightening or replacing the sealant (Teflon tape, plumber's putty).
Perform these procedures at least twice a year: before the start of the heating season and after its completion. This will protect the system from air ingress and stabilize the pressure in the circuit.
When It Is Critically Important to Call a Qualified Technician
Although many pressure adjustment operations can be performed independently, there are several critical malfunctions where a non-professional's intervention is dangerous to life and equipment integrity. Contact a certified specialist in the following cases:
- Suspicion of Heat Exchanger Damage. If the system pressure continuously rises above the norm (more than 2.5–3 bar) even with the feed valve closed, the internal partition in the heat exchanger is likely breached. Water from the mains directly enters the heating circuit. Professional replacement of the unit is required.
- Gas Odor or Burner Malfunctions. Any issues related to gas fittings, safety automation, or the electronic control board must only be addressed by a technician authorized for gas-hazardous work. Self-repair is strictly forbidden here.
- Hydraulic Group Failure of the Boiler. If a leak is found inside the boiler casing itself—for example, dripping from the circulation pump, three-way valve, or internal connections. Repairing these requires disassembling the hydraulic block and using original spare parts.
- Constant Pressure Drop Without Apparent Cause. If you have repeatedly topped up the system, checked the expansion tank, and all open pipes, but the pressure gauge stubbornly trends toward zero, professional diagnostics using a thermal imager or pressure testing of the circuits are required.
Remember that unqualified repair of gas equipment can lead to warranty voidance and create emergency situations.
Conclusion
Stable pressure in a gas boiler is the guarantee of warmth, comfort, and safety in your home during the heating season. Maintaining optimal levels within 1.5–2 bar does not require deep engineering knowledge from the owner, but it does require regular attention and care.
Most standard situations, such as a slight pressure drop after venting air pockets or during seasonal startup, can be easily resolved independently. For this, it is sufficient to use the feed valve or check the pressure in the expansion tank. The main thing is to follow the step-by-step instructions, act smoothly, and constantly monitor the gauge readings.
To ensure the heating system runs without failures, make it a habit to follow several simple recommendations:
- Regular Monitoring: Check the gauge readings at least once every two weeks.
- Smooth Operation: When using the feed valve, open it slowly to avoid water hammer.
- Prevention: Before every heating season, check the pressure in the expansion tank's air chamber and clean the coarse filters.
However, do not forget the safety limits. If the pressure drops regularly, and no visible leaks can be found, or if you encounter signs of heat exchanger damage, do not try to fix the problem by force. Timely calling of a qualified technician will protect the system from expensive repairs and extend the boiler's service life for many years. Caring for the heating equipment today is a guarantee of its reliable operation on the harshest winter days.