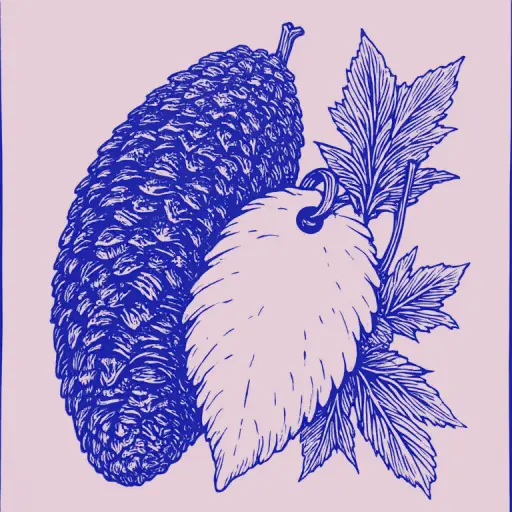
How to Label an Autumn Craft to Look Beautiful and Original at an Exhibition?
- 8 min read
- 66
Every autumn, traditional exhibitions of crafts made from natural materials take place in kindergartens and primary schools—"Autumn Fantasies" or "Gifts of Autumn." Children and parents spend evenings creating real masterpieces from cones, leaves, and vegetables. However, even the most magnificent piece can get lost on a general display stand if it lacks a neat and original label.
A properly designed label for a craft is not just a formality, but an important part of the project's presentation. It helps the jury and viewers learn the author, understand the creative concept, and appreciate the work's original title. In this guide, we will explore how to beautifully label an autumn craft, what label design rules exist, and how to make the tag a stylish element of the entire composition.
What to Include on the Label: Mandatory Design Rules
Even the most magnificent forest castle or funny hedgehog made of cones can get lost at a school exhibition if they are not labeled correctly. The label is the "passport" of the creative work, helping the jury and viewers identify the author. To ensure the signature looks neat and meets the organizers' requirements, it is important to follow basic design standards.
What Information Should Be on the Tag for School and Kindergarten
To make the craft label for an exhibition in a kindergarten or primary school informative, the following data must be included:
- Work Title: Bright and original (for example, instead of the banal "Gifts of Autumn," it is better to write "Forest Commotion").
- Author's Full Name: Complete (for example, Ivan Ivanov).
- Child's Age or Grade: For kindergarten—group (for example, "Sunny Group"); for school—grade (for example, "2-B Class").
- Supervisor's or Co-author's Full Name: If the work was done in collaboration with parents, you can add a note like "Family Creativity" or list the teacher's full name.
Optimal Card Size and Font Requirements
To ensure the craft label looks neat and is easily readable at a kindergarten or primary school exhibition, adhere to simple standards:
- Optimal Size: The ideal card format is from 70×100 mm (A7) to the size of a business card (50×90 mm). A label that is too large will distract from the natural material work, while a small one will be difficult to read.
- Font: Choose simple, easily readable sans-serif fonts (for example, Arial, Calibri, or Roboto). Avoid complex decorative flourishes.
- Text Size: Use a bold font size of 14–16 pt for the work title, and 11–12 pt for the author's name and group/grade.
- Contrast: The text must be clear and dark (black, dark brown) on a light background.
How to Come Up with an Original Title for an Autumn Work
Once the technical details of the label design are settled, it is time to move on to creativity. The title is the soul of your autumn craft. It is what transforms a simple leaf appliqué or a cone figurine into a finished work of art that immediately attracts the attention of the jury and viewers at the exhibition.
A successful name can emphasize the character of the work, bring a smile, or make one think. Let's explore how to move away from banal options and choose a truly memorable title using simple creative techniques.
Collection of Creative Titles by Craft Theme
To make your work stand out at a kindergarten or primary school exhibition, avoid banal options like "Autumn Fantasies" or "Gifts of Autumn." Try to come up with original titles that reflect the plot of the handmade craft:
- Forest Characters (from cones, acorns, branches): "Important Cone on a Walk," "Guardian of Forest Secrets," "Hedgehog Family in a Mushroom Meadow."
- Leaf and Herbarium Compositions: "Ballet of Golden Foliage," "Whisper of a Waning Garden," "Rug of Fallen Leaves."
- Vegetable and Fruit Crafts: "Chariot for a Forest Fairy" (made from pumpkin), "Autumn Catch," "Look What a Harvest!".
Such bright titles will immediately attract the attention of the jury and viewers to your craft label.
Using Metaphors, Fairy Tale Motifs, and Wordplay
To make the craft label memorable to the jury at a kindergarten or primary school exhibition, avoid banal phrases. Use simple creative techniques:
- Metaphors and Personification: Imagine autumn as a living being. Instead of "Autumn Bouquet," write "Whisper of the Golden Wind," "Rug of Fallen Leaves," or *"Amber Drops on a Birch Leaf."
- Fairy Tale Motifs: Connect the natural material with magic. A hut made of branches will become the "Forest Spirit's Residence," and a cone composition will become the *"Secret Council of Forest Gnomes."
- Wordplay and Puns: Play with the names of the materials. A craft with a large cone can be called "Important Cone," and a hedgehog made of seeds can be called *"Family of Prickly Thoughts."
Such original titles immediately set the work apart from dozens of other "Gifts of Autumn."
Master Class: Making the Label Yourself in an Eco-Style
Once the original title has been thought of, it is important to give it a worthy visual embodiment. A plain white card on a bright autumn composition of branches, cones, and leaves often looks out of place. To make the label harmoniously complement the creative work, it is best to design it in a popular eco-style.
In this practical master class, we will turn a simple label into a true continuation of a forest fairy tale. We will learn to use a natural palette and textures so that the card looks like a natural detail of the craft itself.
Thematic Design: Labels in the Shape of Leaves, Scrolls, and Wood Slices
To make the label a harmonious part of the composition, avoid the ordinary white rectangle. Try three effective eco-formats:
- Autumn Leaf. Cut out the silhouette of a maple or oak leaf from thick kraft paper. You can carefully draw the veins with a white gel pen and write the text with a contrasting liner.
- Mini-Scroll. Slightly age a strip of thick paper using strong tea or coffee, dry it, roll it into a scroll, and tie it with jute twine.
- Wood Slice. Write the child's details with a fine permanent marker directly onto a small, flat branch slice. This type of label looks incredibly aesthetic and professional.
Tools and Materials for Creating a Beautiful Label
To bring creative ideas to life and create an aesthetic craft label yourself, you will need a simple set of materials. Most of them can be found at home or in the nearest park:
- Base: Thick kraft paper, textured watercolor paper, or small wooden slices.
- Writing Tools: Black liners, gel pens (gold, white, or silver for beautiful contrast), and fine permanent markers.
- Decorative Elements: Jute twine, raffia, dried flowers, miniature leaves, and acorn caps.
- Tools: Scissors (can be shaped), a regular hole punch for threading, and a hot glue gun for secure element fixation.
Ready-Made Solutions: Printing Templates and Secure Attachment
If you do not have time for painstaking handmade work, ready-made digital solutions will help. A beautiful printed template will save precious hours before a kindergarten or school exhibition, and proper mounting guarantees that the card will not get lost among other works. Let's explore how to quickly prepare an aesthetic label on a printer and securely fix it to delicate natural materials.
How to Choose and Prepare a Printed Label Template
Using ready-made templates is the fastest way to get a neat label for a kindergarten or primary school exhibition. When choosing a layout, focus on the overall style of the work:
- Theme: For "Gifts of Autumn" or "Autumn Fantasies" exhibitions, templates with frames made of watercolor leaves, acorns, or pumpkins are excellent.
- Color Palette: Choose warm autumn tones (ochre, terracotta, deep green, mustard).
- Printing Material: Use thick matte paper (from 160 g/m²) or designer cardstock. Kraft paper looks great—it emphasizes the natural beauty of the material.
Before sending it to print, enter the child's details in a word processor, choosing a beautiful but readable font (for example, Georgia or Monotype Corsiva), and carefully cut out the label along the contour.
Ways to Attach the Label to a Natural Material Craft
To prevent the finished label from getting lost during the exhibition, choose the most suitable fixation method depending on the structure of the natural material:
- Wooden Skewer or Toothpick. Glue the card to the top of the skewer and carefully insert it into the base made of modeling clay, floral foam, styrofoam, or soft vegetables (such as pumpkin or zucchini).
- Jute Twine or Sisal Cord. Punch a neat hole in the corner of the label using a hole punch, thread the string through, and tie it to a sturdy branch, the handle of a basket, or the stem of a fruit. This perfectly complements the eco-style of the work.
- Hot Glue (Glue Gun). This is the optimal option for hard and flat surfaces. It allows you to securely attach the label to a wooden slice, a large stone, or a cardboard base.
- Decorative Mini-Clip. Clamp the label with a clip and secure it to the edge of the composition, a thick dry leaf, or a vine.
These simple techniques guarantee that the card will not blow away during transport and will maintain a presentable appearance throughout the event.
Conclusion
A beautiful and neat label is the final touch that turns an ordinary children's work into a true exhibition piece. By dedicating a little time to the label design, you emphasize the uniqueness of the craft and show respect to the viewers and the jury.
May your joint work with your child take a honored place at the autumn exhibition in school or kindergarten! We wish you creative inspiration and well-deserved victories!