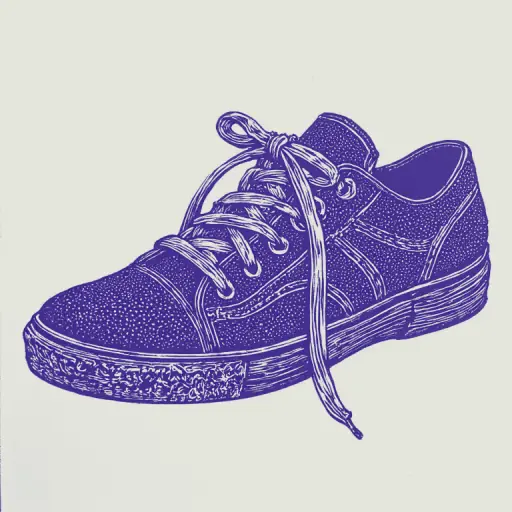
How to Lace Shoelaces: A Complete Guide for Beginners from Scratch
- 8 min read
- 56
Knowing how to tie shoelaces quickly and beautifully is not just a basic skill, but a real life hack for saving time and creating a stylish look. Most of us use the same familiar method from childhood, without even realizing how many convenient alternatives exist.
In this guide, we will go from simple basic knots to advanced techniques. You will learn:
- How to secure sneakers in 2 seconds;
- How to lace shoes without a bow;
- Which patterns are ideal for sneakers with 5 and 6 eyelets.
Let's break down the step-by-step instructions that will make your daily life more comfortable!
1. Lacing Basics: Preparation and Fundamental Knowledge
Before moving on to flashy knots and speed methods, it is important to lay a solid foundation. Proper lacing starts not with the first crossing, but with understanding the anatomy of your footwear and the properties of the laces themselves. Every detail—from the material of the lace to the shape of the eyelets—directly affects how securely the sneakers fit on the foot and how long the knot will hold.
In this section, we will cover the basic guidelines that will help you prepare your shoes for a perfect fit and approach the choice of lacing technique consciously.
1.1. What You Need to Know About Laces and Shoes (Lace Selection, Eyelet Types)
Before starting with lacing patterns, it is important to correctly choose the laces and assess the eyelets on your shoes. This affects not only the aesthetics but also how quickly and securely you can tie the knots.
Lace Selection:
- Shape: Flat laces untie less often and are perfect for classic sneakers and trainers. Round laces are more durable but tend to slip more easily.
- Material: Cotton laces hold the knot more securely than slippery synthetics.
- Length: For standard sneakers with 5–6 eyelets, choose a length of 90–110 cm.
Eyelet Types:
- Metal Rings: Provide easy sliding, allowing you to tighten the shoe in just a couple of seconds.
- Fabric Loops and Slits: Guarantee a tight fit, preventing the tension from loosening spontaneously.
1.2. Understanding the Goals of Lacing (Fixation, Aesthetics, Comfort)
Proper lacing solves three main tasks:
- Secure Fixation. This is important for sports and active walking. It holds the foot firmly, protecting the ankle from injuries and preventing chafing.
- Maximum Comfort. Even pressure distribution prevents the top of the foot from being squeezed. For everyday wear, a "lazy" lacing style is ideal, allowing you to put on shoes in seconds.
- Aesthetics and Style. Patterns like straight lacing or bowless variations emphasize the silhouette of your sneakers and trainers, making you stand out from the crowd.
By understanding these goals, you can easily choose the perfect method for any situation.
2. Basic Methods for Beginners (Step-by-Step Instructions)
Mastering the art of lacing begins with simple but highly effective techniques. These basic methods are the foundation that will allow you to secure your sneakers or trainers quickly and reliably without wasting extra time in the mornings. They are ideal for everyday wear, guarantee comfort throughout the day, and are easy even for those holding laces for the first time. Let's break down the step-by-step instructions that will make your shoes comfortable in mere seconds.
2.1. Classic Crossing Method (The Most Universal Way)
The classic crossing method (zigzag) is the base that everyone knows. It is perfect for any sneakers or trainers, ensuring a secure hold on the foot and even pressure distribution.
Step-by-Step Instructions:
- Start: Thread the lace through the lowest eyelets from the inside out. Even out the ends so they are of equal length.
- Crossing: Cross the lace ends and thread them into the next holes from bottom to top (inside out).
- Repetition: Continue crossing the laces and threading them through the eyelets up to the top.
- Finish: Tie a standard knot with a bow.
This method minimizes fabric wear and is suitable for everyday wear.
2.2. "Rubber" Knot: Quick and Strong Method (Knotted Lacing)
The "rubber" knot (or knotted lacing) is the perfect life hack for those who want to turn their sneakers or trainers into comfortable slip-ons and stop tying bows. Thanks to micro-knots at every crossing, the lacing absorbs shock well while walking and holds its shape securely.
Step-by-Step Instructions:
- Thread the lace through the lowest eyelets from the inside out.
- Before each crossing, make a simple single knot (interlacing) in the middle.
- Thread the ends into the next holes.
- At the very top, secure the ends with knots from the inside so they do not slip out, and tuck them away.
This method allows you to put on shoes in a couple of seconds without constant untying.
3. Advanced Techniques: For Beauty and Efficiency
Having mastered the basic knots, you are ready to reach a new level. Advanced lacing techniques are not just a way to secure the foot, but a complete tool for self-expression and comfort optimization. A properly chosen pattern can drastically change the look of your favorite sneakers or trainers, making you stand out from the crowd.
Furthermore, complex patterns allow for precise pressure regulation on the top of the foot. This is critically important for athletes and those who spend all day on their feet. Let's break down how to combine impeccable aesthetics with maximum functionality.
3.1. Aesthetics and Style: Original Lacing Patterns (Diamonds, Web, European Zigzag)
If you want your sneakers or trainers to stand out, standard methods won't suffice. An original lacing pattern can completely transform even the simplest footwear.
Here are three effective and simple ways:
- European Zigzag: The lace is threaded through the lower eyelets from the inside. One end goes diagonally into the upper hole, and the other goes in a zigzag through one level. This creates neat parallel lines on the outside and a secure hold.
- Web (Grid): Ideal for shoes with 6 holes. The laces cross at an angle, creating a dense mesh pattern. This method holds its shape well and allows you to wear the shoes without a bow, tucking the ends inside.
- Diamonds: The lacing is built by crossing the ends inside and outside through one eyelet, forming geometric diamonds in the center of the tongue.
These options combine aesthetics and practicality, making your look unique.
3.2. Maximum Fixation and Comfort (Segmental and Straight Lacing for Sports)
For athletes and active leisure enthusiasts, secure foot fixation is important. The two best techniques for this are segmental and straight lacing.
- Segmental (Zonal) Lacing: Use two short laces instead of one. Lace the lower part of the sneaker looser for toe comfort, and the upper part tightly for secure ankle fixation.
- Straight Sports Lacing: The laces run in parallel lines without crossing over the tongue. This reduces pressure on the sensitive top of the foot, prevents toe numbness, and guarantees a tight fit during running.
4. Life Hacks and Tips: Expert Recommendations
Even the most secure lacing pattern can fail if you don't know the small tricks for securing knots. In this section, we have gathered proven life hacks from experts that will make wearing shoes as comfortable as possible. We will tell you how to forget about laces coming undone at inconvenient times, how to avoid unpleasant skin chafing, and how to easily and stress-free teach this useful skill to the youngest family members.
4.1. Protection and Comfort: How to Prevent Laces from Untying and Chafing
To prevent sneakers from chafing and laces from coming undone at the wrong moment, use proven expert techniques:
- Heel Lock: Thread the lace through the highest, extra eyelet on the same side, forming a small loop. Cross the ends, thread them into the opposite loops, and tighten. This secures the foot and prevents the heel counter from rubbing against the heel.
- Double Slip Knot: When tying a standard bow, make an extra wrap of the loops around each other. This simple life hack guarantees that the knot will not come undone while walking.
- Correct Material: Replace slippery round nylon laces with flat cotton ones—they have higher friction, so they hold knots much more securely.
4.2. For Parents: Simple Games to Teach Children Lacing
Teaching a child to tie shoelaces can easily be turned into an exciting game:
- "Bunny Ears" Method: Fold two laces into loop-ears, cross them, and thread one "ear" under the other. This is the most understandable method for toddlers.
- Cardboard Trainer: Cut out a shoe mockup from cardboard, make eyelets, and insert colorful laces. Practicing on a bright template is much more fun.
- Snake Story: Tell a story about a snake (one end) crawling up a tree (the loop) and diving into a burrow.
Summary: When and Which Method to Use Best
To summarize, the choice of the ideal lacing method depends on your goals, the type of footwear, and your pace of life:
| Task | Recommended Method | Main Advantage |
|---|---|---|
| For Everyday Use | Classic Crossing | Versatility, easy to adjust |
| For Sports and Running | Segmental or Straight | Maximum foot fixation and safety |
| For Style and Self-Expression | Web, Diamonds, or Zigzag | Aesthetic look, highlights sneakers |
| For Children and Always Rushing | "Rubber" Knot or Yan Method | Ties in 2 seconds, laces don't come undone |
Experiment with techniques and colors to find your perfect balance between comfort and style!