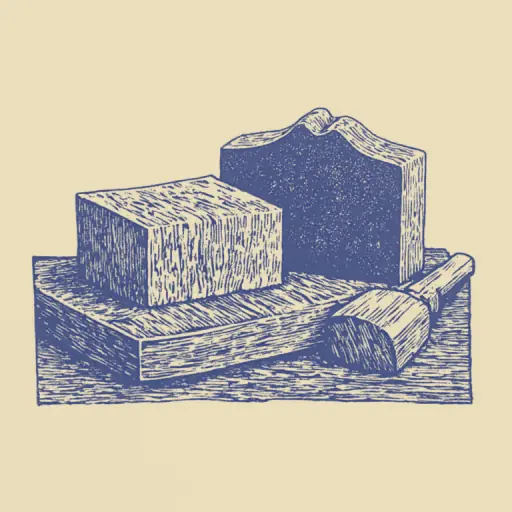
How to Make Cold Process Soap at Home Yourself
- 17 min read
- 65
Creating natural soap from scratch is an amazing combination of precise science and pure creativity. Unlike working with a pre-made soap base, the cold process (CP) allows you to fully control the composition: from choosing nourishing oils to the intensity of the fragrance and the texture. You create a product perfectly suited to your skin, without unnecessary chemicals or synthetic surfactants.
Cold soap making does not require constantly heating the mixture on a stove, as the hot process does. The saponification process of fats occurs through a natural chemical reaction between the base oils and the alkaline solution. The result is a gentle, delicate soap that, after curing, delights with a soft lather and an aesthetic appearance.
In this practical guide, we will break down the entire process step-by-step: from selecting equipment and calculating the recipe on the lye calculator to safely mixing the ingredients and cutting the finished batch.
Preparation: Safety and Tools
The transition from theory to practice in cold soap making begins not with choosing fragrance oils, but with organizing the workspace. Since this method involves working with an active chemical substance—lye—proper preparation is key not only to a quality result but also to your personal safety. Before starting the creative process, you must transform a home table into a safe and functional mini-laboratory.
In this section, we will cover the precautions that will protect you from unpleasant surprises, as well as compile an exact list of the equipment needed for the job. By preparing all tools in advance, you can fully concentrate on the magic of soap making without being distracted by searching for the right utensils at the most critical moment.
Safety Precautions When Working with Lye
Working with sodium hydroxide (NaOH) requires extreme concentration. Lye is a corrosive chemical substance capable of causing serious chemical burns if handled carelessly.
Key Safety Rules:
- Personal Protective Equipment (PPE): Always wear safety goggles, a respirator (to protect the respiratory tract from caustic fumes), and thick rubber gloves. Clothing must be made of thick, long-sleeved fabric.
- The Golden Rule of Soap Making: Always pour dry lye into cold water (or ice) in small portions, but never pour water into the lye! Violating this rule will cause instant boiling and a dangerous chemical release.
- Ventilation: Dissolve the lye under a working fume hood or near an open window, trying not to inhale the vapors.
- First Aid: Keep a weak solution of vinegar or citric acid nearby to neutralize splashes on surfaces. If the solution gets on the skin, immediately rinse the affected area with plenty of running water.
Do not allow children or pets into the work area until cleaning is complete.
Necessary Equipment and Soap Molds
After ensuring personal safety, it is important to choose the right working tools. For the cold process, you will need a separate set of equipment that will no longer be used for cooking:
- Digital scale accurate to 0.1 g or 1 g. In soap making, all ingredients, including liquids, are measured strictly in grams.
- Immersion blender. This is necessary for quickly mixing the oils with the lye and reaching the trace stage. A regular whisk would require several hours of continuous work.
- Thermometer (digital or non-contact pyrometer) to monitor the temperature of the phases before combining them.
- Heat-resistant containers. Use containers made of stainless steel, heat-resistant glass, or durable plastic marked PP (polypropylene, code 5). It is strictly forbidden to use aluminum containers, as lye reacts destructively with it.
- Silicone spatulas for stirring and carefully pouring the mixture.
- Soap molds. Silicone molds (single or for cutting into a block) are ideal—the finished soap can be removed easily. Wooden boxes lined with parchment paper can also be used.
Ingredients and Recipe Calculation
Once the tools are prepared and safety rules are firmly understood, the most creative and yet most responsible stage begins—choosing ingredients and calculating the recipe. In 'from scratch' cold soap making, we are not just melting a ready-made base; we are creating a unique product with our own hands, controlling its properties at a chemical level.
Every oil in the future soap composition is responsible for specific qualities: the hardness of the bar, the abundance of lather, or the cleansing or nourishing properties. To balance these indicators and make the soap gentle on the skin, it is important to understand the properties of the base fats and learn to calculate proportions accurately. For this, we need two key soap-making tools: the concept of superfat and a specialized lye calculator.
Base Oils and the Concept of Superfat
Each base oil imparts unique properties to the finished soap made from scratch. They are generally divided into two main groups:
- Hard Oils (Butters): Coconut, palm, cocoa, or shea. These are responsible for the hardness, durability, and abundant lather of the finished bar. For example, coconut oil provides excellent cleansing but can dry out the skin if used alone.
- Liquid Oils: Olive, almond, castor, or sunflower. These give the soap nourishing, softening, and conditioning properties. Olive oil is a classic base that makes the soap texture silky.
To ensure the soap cleanses the skin gently and does not dry it out, superfat must be included in the recipe. This refers to the free oils that do not participate in the chemical reaction with the lye and remain in the final product unchanged. In the cold process, the standard superfat ranges from 5% to 10%. It not only nourishes the skin but also serves as a safety buffer in case of minor errors when weighing ingredients.
How to Use a Soap Calculator
The soap calculator (lye calculator) is the primary tool for safety and accuracy in soap making. Since every oil has its unique saponification value, arbitrary substitution of ingredients in the recipe is unacceptable. Even a small deviation can make the soap dangerous for the skin or, conversely, excessively soft and prone to spoilage.
Step-by-step algorithm for using the calculator:
- Select Units of Measurement: Always set the weight in grams for maximum accuracy.
- Set Water Percentage: For the cold process, the optimal range is 30% to 33% of the total oil weight.
- Indicate Superfat: For bar soap, use 5% to 10%. The calculator will automatically reduce the lye amount so that some oils remain unsaponified.
- Enter Oils: Select your base oils from the list and specify their exact weight in the recipe.
- Calculate: Press the calculate button. The program will provide the exact weight of lye (NaOH) and water, which must not be rounded.
Always recalculate the recipe if you decide to replace even one oil.
Step-by-Step Guide: From Mixing to Trace Stage
Once the exact proportions are calculated and the tools and protective gear are prepared, the most exciting and responsible moment arrives—the practical creation of the soap. Cold process soap is good because it does not require external heating for saponification: all the magic happens due to the internal chemical reaction between fats and alkali. At this stage, extreme precision is crucial, as the accuracy of the actions determines not only the aesthetics but also the safety of the final product. The entire process of turning oils into soap at this stage is divided into two key steps: preparing the temperature regimes of both phases (the lye solution and the oil base), and then combining them and blending the mass with a blender until it reaches the "trace" stage. Let's break down how to do this correctly and safely, step by step.
Preparing the Lye Solution and Preparing the Oils
We start the process with two key stages: preparing the lye solution and preparing the oils. Remember that safety comes first, so these stages require maximum concentration.
1. Preparing the Lye Solution (Lye Reaction):
- Strict Rule: Always pour the alkali (sodium hydroxide, NaOH) into the ice-cold water, and never the reverse. This is critically important for controlling the reaction and preventing a strong heat release.
- Process: Measure the required amount of alkali and dissolve it in pre-cooled water. Use safety goggles, gloves, and a respirator. Stir thoroughly until the alkali is completely dissolved. The resulting solution must be as cold as possible.
- Important: Do not try to speed up the process or add water if the solution has already started to heat up.
2. Preparing the Oils (Fat Phase):
- Weighing: Measure all base oils (olive, coconut, palm, etc.) on an electronic scale. In soap making, weight is the only reliable indicator, not volume.
- Melting: Heat the oils in a double boiler. This is the safest method as it ensures even and controlled heating. Solid oils (such as coconut oil) will melt first, while liquid oils will simply warm up.
- Temperature Control: After melting the oils, let them cool to the optimal temperature. Remember that the temperature of the lye solution and the oils must be as close to each other as possible (ideally within a 5–10°C difference) to ensure perfect and smooth phase combination.
Combining Phases and Reaching Trace
When both phases—the lye solution and the oil mixture—have reached the same temperature (optimally in the 35–40 °C range, with a difference of no more than 2 °C), it is time to combine them.
- Filtering. Slowly pour the lye solution into the container with the oils through a fine plastic or steel sieve. This ensures that undissolved granules of alkali do not end up in the finished soap.
- Initial Mixing. Gently stir the mixture with a spatula. The liquid will begin to cloud, initiating the chemical reaction.
- Blender Work. Submerge the immersion blender at an angle to release trapped air. Mix the mass in short bursts of 3–5 seconds, alternating with stirring while the appliance is off. This protects the motor from overheating and prevents the formation of bubbles.
Soon, the mass will begin to thicken and reach the trace stage. This is the state where drops of the mixture falling from the blender whisk leave a distinct, non-sinking pattern on the surface. For cold process, a "light trace" (the consistency of thin jelly) is optimal—at this stage, the soap is easily poured into the mold.
Gel Stage and Working with the Finished Mass
Once the soap mass has reached a stable trace stage, one of the most magical and responsible stages of cold soap making begins. Our task now is to correctly transfer this active emulsion into the mold, where the key physicochemical process known as the gel stage will begin. It is at this stage that the soap acquires its final texture, density, and color saturation.
Properly passing through this phase and timely cutting determine not only the appearance of the finished bar but also its quality. Let's look at how to help the soap successfully "heat up" in the mold and when the perfect moment arrives to carefully divide it into portioned pieces.
Pouring into Molds and Going Through the Gel Stage
After reaching the trace stage, the soap mass is carefully poured into the prepared mold. It is best to use silicone molds or wooden boxes lined with parchment paper. To eliminate air pockets and bubbles, the mold with the poured mass must be gently but firmly tapped several times on the work surface.
Next begins the important physicochemical process—the gel stage. At this point, the soap heats up due to the internal exothermic reaction, darkens, and acquires a gel-like, translucent texture from the center outwards. Going through the gel stage makes the colors of the finished product brighter, and the soap itself—harder and faster to cure.
You can manage this process depending on your goals:
- Stimulating the Gel: Wrap the mold in towels and place it in a warm spot (for example, on a radiator or in an oven preheated to 50 °C and turned off).
- Preventing the Gel: If you are making soap with milk, whey, or adding honey, overheating can spoil the color. In this case, immediately after pouring, place the mold in the refrigerator or freezer for several hours.
After this stage is complete, the soap is left to cool and harden at room temperature for 24–48 hours.
Rules for Cutting Handmade Soap
Cutting soap is one of the most aesthetically pleasing, yet most responsible, stages. A properly cut bar not only looks beautiful but also ensures even curing, as all parts will be equally exposed to air and moisture.
Preparation for Cutting:
- Cooling: Ensure that the soap mass has completely cooled and hardened. If you try to cut it too early, it may be soft, sticky, and adhere to the knife, resulting in uneven and unattractive pieces.
- Tools: Use a sharp, clean, and preferably metal (or soap-making specific) knife. If you are working with a large volume, consider purchasing a dedicated soap cutting board.
- Surface: The work surface must be clean, dry, and stable.
Cutting Technique:
- Cutting Direction: Cut the soap across the mold, making careful, confident movements. Do not try to 'pull' a piece out, but rather separate it from the base.
- Thickness: Try to achieve a maximally uniform thickness for the pieces. This is critically important for even curing. If the pieces are of different thicknesses, they will dry at different rates, which can lead to uneven texture and even cracking.
- Scrap Handling: Do not throw away the scraps! This is a valuable resource. The scraps can be used in the next soap-making cycle: either by adding them to the next batch of soap base or, if they are soft enough, by grating them and using them as a scrub in the next recipe.
Tips for a Perfect Result:
- If the soap seems too hard, let it 'rest' for several hours at room temperature. This will help it become more pliable, but not soft.
- If you want to give the soap an additional decorative effect, you can embed dried herbs or flowers directly before cutting, while the mass is still slightly moist but no longer liquid. This will add not only beauty but also an extra aroma.
Remember that cutting is not just the completion of the process, but the beginning of its next stage: curing.
Soap Curing and Troubleshooting
After you have carefully cut and gathered your first bars, the most responsible, yet most exciting, stage remains—curing. Do not be discouraged if the soap seems imperfect to you. Remember that the soap-making process is not just about mixing ingredients, but also about patience. It is during the curing process that the final magic happens: the soap gains ideal hardness, and all residual chemical reactions are completed, making it safe and maximally beneficial for the skin.
This stage is critically important for the quality of the final product. We will thoroughly examine how to store the soap correctly so that it retains its properties, and, no less importantly, we will look at the most common mistakes beginners make. Knowing these 'pitfalls' will help you avoid disappointment and ensure that your first soap-making experience ends with perfect, fragrant, and long-lasting soap.
Curing Times and Storage Conditions for Finished Soap
After cutting, cold process soap is not yet ready for use—it needs to go through the curing stage. On average, this process takes 4 to 6 weeks (for delicate Castile soap made with olive oil—6 to 12 months). During this time, excess moisture evaporates from the bars, the saponification reaction is completed, the soap becomes hard, produces a soft lather, and its pH level drops to skin-safe values.
Storage Rules During Curing:
- Ventilation: Lay the bars on wooden racks, cardboard, or parchment paper with 1–2 cm of space between them so that air circulates freely.
- Protection from Sun and Moisture: Choose a dry, cool, and dark place (such as a cupboard or pantry). Avoid humid rooms, such as the bathroom.
- Surface Material: Do not use metal trays (especially aluminum), as contact with metal can trigger oil rancidity.
Store the finished, cured soap in paper packaging, cloth bags, or cardboard boxes. Do not wrap it in plastic wrap—the natural product must 'breathe.'
Why Soap Crumbles or Fails: Typical Mistakes
Failure in soap making is not the end, but simply a learning stage. Most problems beginners face stem from a lack of knowledge of basic chemical rules or from rushing. To minimize risk, remember three main rules:
- Do not change the recipe at your own risk. All recipes are calculated using specialized soap calculators. If you want to replace a base oil (e.g., olive oil with coconut oil), you must recalculate the entire recipe to maintain the ideal ratio of fatty acids and alkali. Otherwise, the soap may not harden or, worse, turn out to be too harsh.
- Test additives in small batches. If you are using a new dye, fragrance, or clay, do not add it immediately to a large mass. First, test it on a small amount of soap batter. This will help you understand how a specific component will behave in your unique mixture (for example, some dyes may settle or change color upon contact with alkali).
- Maintain the temperature regime. The temperature difference between the alkali solution and the oils should not exceed 10°C. If the components are too hot or too cold, this can disrupt the saponification process, slow the reaction, or cause separation.
Typical Mistakes and How to Fix Them:
- Soap crumbles during cutting: This is most often a sign that the soap has not fully completed the gel stage or that it was too soft when cut. Solution: Let the soap cool and stabilize in the mold, and only cut it after it has completely hardened and passed a minimum of 24 hours.
- Soap has an unpleasant smell: This may be related to using low-quality or overly strong fragrances. Solution: Use only tested, cosmetic essential oils and always adhere to the proportions specified by the manufacturer.
- Soap separates or develops a liquid layer: This can be a sign of excess water in the solution or improper mixing of phases. Solution: Beat the mixture thoroughly until it reaches a uniform, creamy consistency, without neglecting the proportion recommendations calculated by the calculator.
Remember that soap making is a process that requires patience and attention to detail. Do not be afraid to experiment, but always start with basic, proven recipes.
Conclusion
Congratulations! You have gone through the entire journey from beginner to independent soap maker. Making soap using the cold process is not magic, but a precise science that requires attention to detail, safety, and, of course, patience. Remember that soap is not just a cleaning agent; it is the result of your labor, which must go through several important stages.
What's Next?
- Patience is your main ingredient. The most important thing to grasp is: soap is not ready immediately. The curing process (minimum 4–6 weeks) is critically important. It is during this period that excess alkali is finally washed out and the structure is stabilized, making the soap safe and ideal for the skin.
- Learn from your mistakes. If the soap crumbles, it is most likely related to premature cutting or incorrect proportions. If it is too hard, you may have needed more curing time. Every failed piece is a priceless lesson.
- Experiment responsibly. After mastering the basic recipe, feel free to experiment with additives: natural colorants (turmeric, clay), scrubs (coffee grounds, oatmeal), or essential oils. But always remember calculations and safety.
Pro Tip:
- Waste Reduction: Don't throw away the scraps! They can be used to create scrubs, added to the next batch of soap, or made into liquid soap. This is not only eco-friendly but also saves your resources.
- Self-Care: Remember that soap is a body product, not a facial cleanser, especially when you are just starting out. Begin with simple, basic recipes.
- Practice Makes Perfect: The more you make, the better you will feel the stages (from trace to gel) and the more intuitive the process will become. Don't be afraid to repeat basic recipes to hone your technique.
Soap making is a fascinating and rewarding hobby that allows you to create natural cosmetics with your own hands. The main thing is to observe safety procedures, respect the chemical process, and enjoy the process of creating perfect, beneficial soap!