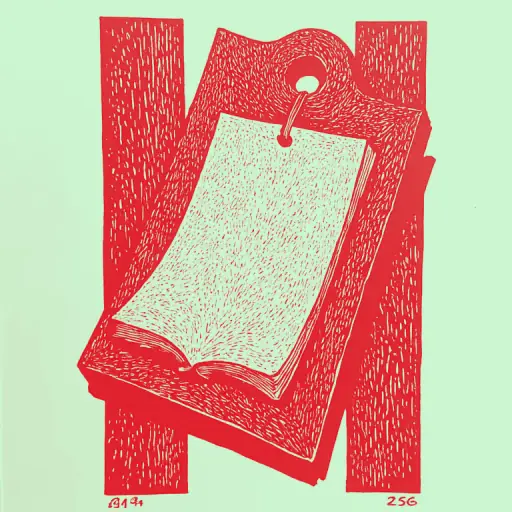
How to Mount a Tear-Off Calendar on the Wall Strongly and Beautifully?
- 8 min read
- 101
Classic calendar displays are not just a convenient planning tool, but also a soul-warming decorative element that takes us back to childhood. Currently, vintage aesthetics are making a comeback, and paper calendars often adorn modern kitchen or living room interiors. However, to keep the calendar pleasing to the eye every day, it is important to mount it on the wall correctly. In this guide, we will discuss how to securely mount a tear-off calendar using double-sided tape, hooks, or a decorative base, and share tips on how to tear off pages neatly without damaging the cardboard backing.
Basic Preparation and Choosing the Ideal Location
Before hammering the first nail or applying tape, important preparatory work must be done. The reliability and aesthetics of mounting a classic calendar depend heavily on two factors: choosing the right location in the house and the strength of the construction itself. The calendar must not only look good but also harmonize with the room, without deforming during daily use. Let's find out how to locate the ideal zone from an ergonomics perspective and how to prepare a rigid base that will protect both the wall and the calendar from wear.
Where to Mount the Calendar: Comfort Rules and Feng Shui Tips
The placement of the calendar determines how comfortably it can be used every day. The ideal height for mounting is eye-level (about 150–160 cm from the floor). Traditionally, calendars are placed in the kitchen or near the entrance, where family traffic is highest.
From a feng shui perspective, the calendar manages the flow of time, so it is important to follow these rules:
- Good Zones: East (family sector) and North (career sector) in the living room or kitchen. This activates growth energy.
- Forbidden Placement: In the bedroom (symbolizing the rush of time hindering full rest) and in the bathroom (achievement energy will 'be washed away').
Proper placement will attract harmony to the home and help organize plans.
How to Make a Rigid Decorative Base Yourself
The thin cardboard backing of a standard calendar will quickly warp due to daily handling. A homemade rigid decorative base will not only protect the calendar from damage but also transform it into a stylish interior element in the kitchen or living room.
Simple step-by-step algorithm:
- Material Selection. Take a piece of plywood (4–6 mm), thick binding cardboard, or a wooden board. Cut a rectangle that exceeds the size of the calendar by 3–5 cm on each side.
- Decoration. Sand the material, coat it with varnish, acrylic paint, or cover it with textured fabric (linen, burlap).
- Assembly. Attach a hanger or decorative string to the top of the base. The calendar itself is fixed to the center of the base using 'super glue' or small screws.
Such a rigid shield will provide strong support, and the pages will detach neatly.
How to Securely Mount a Calendar on the Wall
Once the decorative base is ready, comes the most important moment—securely mounting the tear-off calendar on the wall. The choice of mounting method depends on the wall material, the construction weight, and your desire not to damage wallpaper or plaster. Modern technology and time-tested tricks allow you to mount a calendar very strongly or without any trace at all. Let's discuss the best hook options that guarantee the calendar won't fall when used daily.
Classic Options: Nails, Screws, and Special Hooks
Traditional mounting using nails or screws is the most reliable way to hold a heavy calendar on wood or drywall. If the partition is made of wood, simply use small finish nails with neat heads. For concrete and brick walls, it is better to use wall dowels or specialized calendar mounting hooks (e.g., hooks with thin steel nails that barely leave a mark on wallpaper).
When mounting, be sure to consider the weight of the decorative base. Insert the hook through the metal grommet at the top of the cardboard base. This will prevent the cardboard from tearing when pulled, as you tear off pages daily.
How to Mount a Calendar Without Drilling: Double-Sided Tape, Velcro Adhesive, and Magnets
If you do not want to damage wallpaper or are renting an apartment, a tear-off calendar can be mounted without a single nail. Modern hanging systems easily support the weight of a standard calendar.
- Mounting Double-Sided Tape. Choose foam tape—this is excellent for compensating for minor unevenness. Apply several strips to the calendar's cardboard base and press firmly onto the cleaned wall surface.
- Interior Velcro Adhesive. Specialized hooks (e.g., Command systems) are ideal for painted walls and wallpaper. They hold the construction firmly and can be removed without a trace if necessary.
- Magnetic Strips. If you want to decorate the kitchen interior and mount the calendar on the refrigerator, attach flat magnets to the back. This allows the calendar to be easily removed to make notes.
Retro Calendar Aesthetics in Modern Design
Once the technical mounting issues are resolved, it is time to think about visual harmony. A traditional tear-off calendar is not just a practical planner, but also a strong vintage accent. Currently, retro aesthetics are experiencing a true revival, and a good old calendar can inject comfort even into the most minimalist interiors, connecting generations and adding a touch of nostalgia to the room.
Incorporating Soviet or Vintage Calendars into Kitchen or Living Room Interiors
Vintage calendars are not just planners; they are expressive works of art with a warm touch of nostalgia. To look harmonious in a modern space, use the technique of contrast:
- Kitchen Interior: Place the calendar in the dining area or near the coffee corner. This will perfectly complement Provence, Country, and Scandinavian minimalist styles. Hang it near an open shelf holding pottery, spice jars, or copper utensils.
- Living Room: Incorporate the calendar into a 'gallery wall' among modern posters, black-and-white family photos in slim frames, or botanical illustrations. This will prevent the excessive 'museum' feel from retro details.
The main rule is to avoid visual clutter around it. Let the textured cardboard base be the main accent on a calm, plain wall.
To transform a standard calendar into a centerpiece work of art, surround it with harmonious decorations. A great solution is to create a mini thematic gallery:
- Photo Frame: Hang the calendar inside a larger, empty wooden frame. This will instantly turn it into a finished painting.
- Retro Details: Place black and white family photos, herbariums under glass, or vintage botanical illustrations nearby.
- Functional Decor: Install a narrow wooden shelf beneath it for knick-knacks or hang a brass holder with a pen for quick notes.
This arrangement will connect the calendar to the overall style of the room, making it a full part of the interior.
Cautious Use of Tear-Off Calendars
Even a securely and aesthetically mounted tear-off calendar will quickly lose its charm if treated carelessly. Tearing off the sheet every day is a special ritual that requires care. To prevent the cardboard base from warping, and for every new day to begin with a perfect cut, it is important to follow simple care rules for your paper assistant.
How to Tear Sheets Neatly and Carefully: Clip and Ruler Tricks
To ensure your favorite calendar sheet detaches perfectly, without unsightly tears at the bottom, use a simple office trick:
- Metal Ruler. Press a thin ruler precisely along the perforation line at the very top of the calendar. While holding it with one hand, pull the sheet down and slightly toward you. The ruler will act as a guide knife.
- Binder Clip. Attach a wide clip to the top cardboard section of the block, right above the tear line. This will securely hold the remaining stack of paper, preventing the spine from becoming messy due to daily efforts.
Preventing Cardboard Base Damage During Daily Use
Tearing off a sheet every day certainly puts stress on the calendar's cardboard base (the back). To prevent it from warping and tearing faster than intended, use these simple preventative tricks:
- Reinforcing the Hanging Hole. The most vulnerable part is the hole where the calendar is hung. Apply a piece of thick tape to the back of the base or install a metal grommet using a manual punch.
- Moisture Protection. If the calendar is hung in a kitchen, coat the cardboard base from the back with a thin layer of clear varnish or cover it with transparent adhesive film. This will protect the cardboard from moisture and steam deformation.
- Securing the Bottom Edge. To prevent the base from curling forward when pulled, secure its bottom corners to the wall with a small piece of double-sided tape or a magnetic strip.
Conclusion
A properly mounted tear-off calendar is not just a convenient planner, but also a soul-warming decorative element that connects generations. By choosing a sturdy wall hook (whether a classic calendar hook or invisible double-sided tape) and creating a rigid decorative base, you will protect the cardboard base from wear. May this small ritual—tearing off a sheet neatly every morning—bring joy and harmony to your kitchen interior!