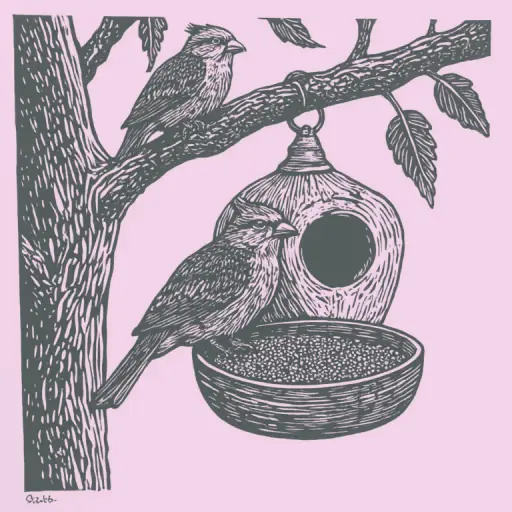
How to paint a plastic bottle bird feeder to make it vibrant and safe?
- 25 min read
- 70
Creating a functional and safe feeder is the first and most important step. Our goal is to transform a normal waste item (a plastic bottle) into a cozy and safe home for feathered friends. Before starting to paint, it is necessary to think about the structure itself.
1. Base Selection and Preparation:
- Material: A plastic bottle of 1.5 to 5 liters is ideal. It is robust enough to support the weight of the food and is easily available. Choose bottles with smooth and clean surfaces.
- Safety: Always wash and dry the bottle. If you plan to use cuts or sharp edges, make sure to treat them (for example, by covering them with tape or insulation) to prevent birds from getting hurt.
2. Functionality Design:
- Entrance: The diameter of the entrance must be optimal: 4–5 cm. This size is sufficient for chickadees, sparrows, and nuthatches, but it will not allow larger birds (such as corvids) to completely empty the stores, which is important for the small inhabitants. The entrance must be spacious enough not to interfere with the decoration.
- Perches and Shelter: For birds to be comfortable sitting and eating, it is necessary to create perches. These can be wooden sticks or pins inserted through the bottle. If you are making a "smart" feeder, think about how the controlled distribution of food will happen (see advanced diagrams in Section III).
- Protection: Remember that the feeder must protect the food from direct rain and snow, but at the same time, it must be open enough to allow birds to fly and move around freely.
3. Step-by-Step Assembly (Beginner Example):
- Clean the bottle of any liquid residue. Dry it.
- Using a utility knife or scissors, create the entrance opening (4–5 cm) at a comfortable height.
- On the opposite side, create holes to attach the perches (e.g., two round holes for sticks).
- Insert the wooden sticks through these holes. The sticks must protrude outwards, creating comfortable landing spots.
- Wrap the neck with a strong rope or wire to secure the structure and provide a hanging point. Done! Your base is ready to be transformed into a work of art.
I. Preparatory Phase: Functionality and Safety (Upcycling and Material Selection)
Transforming a normal plastic bottle into an aesthetic and safe feeder is not just a fun DIY project, but also an important step towards conscious consumption. Upcycling allows us to give a second life to plastic that would otherwise end up in a landfill and, at the same time, demonstrates care for feathered neighbors. However, for the future "bird dining table" to be visually pleasing and perform its functions correctly, it is essential to start with careful planning.
In this preparatory phase, we will lay the solid foundations of our project. We will analyze why plastic is ideal for outdoor work, how to design a structure resistant to wind and bad weather, and prepare the bottle base for the subsequent transformation, paying particular attention to bird safety.
1.1. Overview of Goals: Why a Plastic Feeder? (Ecology, Upcycling, Overcoming the Idea)
Starting a project with the question "Why?" is half the success. Before taking out scissors and paint, it is important to understand what mission our feeder serves. Using a plastic bottle is not just an "eco" or "upcycling" trend; it is a practical, economical, and responsible solution with several important aspects.
1. Environmental Responsibility (Upcycling):
The most obvious advantage is recycling. Instead of sending clean but unused plastic containers to the landfill, we give them a useful second life. This is a great example of how household waste can become decorative and functional objects for nature. We are not just doing a little craft; we are participating in the cycle of sustainable development.
2. Accessibility and Affordability:
Plastic bottles are one of the most common and accessible materials. They do not require the purchase of expensive and specialized construction or decorative materials. This makes the project ideal for family leisure time, where the budget is limited, but the desire to create something beautiful and useful is great.
3. Functionality and Simplicity:
Plastic is resistant, waterproof, and lends itself quite easily to basic processing (cutting, fastening). This allows us to create an object that is not only beautiful but also functional, which will withstand seasonal temperature variations and weather conditions. We can easily integrate elements into the bottle that ensure controlled food distribution or comfortable perches.
4. From "Concept" to "Reality":
Many instructions propose wooden or ceramic feeders, but these materials can be heavy, require complex tools, or be too expensive for a beginner. The plastic bottle allows us to quickly move from concept to a reliable finished product that can be decorated and used the same day. In this way, we achieve an ideal balance between accessibility, ecology, and high functionality.
1.2. Structure Design: From Idea to Functional Feeder (How to make it so it doesn't break?)
Moving from the idea to the designs, it is important to understand that lightweight plastic is a malleable, but insidious material. Without correct design, your feeder will fly away at the first gust of wind or deform and break over time. For the structure to last, incorporate three engineering rules into the project:
- Maintaining Frame Rigidity: Do not cut windows too large. Leave wide plastic crossbeams (no less than 4–5 cm) between the openings. Use the natural ribs of the bottle as supporting "columns." If you are making a horizontal feeder from a 5-liter bottle, maintain the integrity of the bottom and neck.
- Combating Sail and Weight: An empty plastic bottle weighs very little. In the wind, it will turn into a chaotic rotating attraction, scaring away birds. The solution is to add weight to the bottom. Design the addition of a thin layer of clean gravel or flat stones before filling with food. Also, plan for a robust fastening: instead of a single suspension point from the neck, use a two-point fastening (for example, tying the bottle to a tree trunk with elastic string).
- Drainage System: Water is the main enemy of food. Obligatorily plan 5-7 small drainage holes on the bottom of the bottle (2-3 mm in diameter), drilled with a hot pin. This will allow rainwater and meltwater to drain, preventing swelling and spoilage of the seeds.
By thinking about these details on paper, you will create a reliable engineering project that will withstand any whim of the weather.
1.3. Tutorial: Assembling the Feeder Base (Step-by-Step Calculation and Bottle Preparation: Attaching Perches, Creating the Bunker)
After defining the ideal structure and ensuring our feeder is sturdy and functional, it is time for the most exciting phase: assembly! This tutorial will help you transform a simple plastic bottle into a safe and beautiful home for your feathered friends.
What you need for assembly:
- Plastic bottle (1.5 to 5 liter volume, depending on the desired feeder size).
- Wooden sticks or dowels (for perches and seats).
- Office knife or sharp scissors.
- Durable string or wire (for hanging and decorative fastenings).
- Marker and ruler (for precise marking).
- (Optional) Plastic glue or sealant.
Step-by-step assembly instructions:
- Base Preparation: Wash and thoroughly dry the bottle. If you are using a large bottle (5 L), it is recommended not to create edges higher than 2-3 cm to ensure good ventilation and prevent moisture buildup.
- Creating Food Holes: Determine the points where the food niches will be placed. Draw rectangular holes with a marker. It is important that the dimensions are optimal: large enough for finches and sparrows (about 4-5 cm), but not too large to allow access to larger birds that could damage the structure.
- Installing Perches: Create small circular slots under each food hole. Insert the wooden dowels into these slots. These will serve not only as a perch but also as additional support for the birds while feeding.
- Forming the Bunker (if necessary): If you are making a "smart" feeder with controlled dispensing, you will need to drill through holes at different levels (as described in more complex models). Thread spoons or wooden dowels through them to create the food dispensing mechanism. Remember safety: all cut edges must be treated to prevent birds from getting hurt.
- Fastening and Suspension: Drill holes in the neck of the bottle (or the top, if it will be hung). Thread durable string or wire through them. This will ensure safe suspension and allow the feeder to be attached to a branch or a special support.
Important safety points:
- Edge Treatment: Seal or sand all sharp plastic edges (for example, with adhesive tape or electrical tape). This is crucial to prevent birds' feet from getting hurt.
- Drainage: Ensure there are small drainage holes at the bottom of the feeder. This prevents water stagnation and food rot.
- Weighting: For better stability, consider adding a small weight to the base (for example, by attaching it to a small wooden board).
II. The Art of Decoration: Techniques and Materials for Vibrant Coloring
Once the feeder base is assembled safely and robustly, the most creative and fun phase begins: decoration. Transforming a simple plastic bottle into an original work of art that beautifies your garden is achievable for everyone. However, in the search for a vibrant design, it is essential to remember that the bird feeding station must remain absolutely safe for its feathered guests.
In this section, we will analyze how to harmoniously combine the artistic approach with nature care. We will prepare for the selection of durable materials, learn simple techniques to imitate natural textures, and see how to combine painting with natural decoration, creating a true upcycling masterpiece.
2.1. Choosing Safe Pigments: Animal Paints and Ecological Standards (Emphasis on non-toxicity and safety, preventing poisoning)
- NON-TOXICITY (Mandatory): This is the main criterion. Paints must not contain heavy metals, lead, cadmium, or other toxic pigments. The ideal choice is acrylic or tempera paints, specifically labeled as "ecological" or "for decorative purposes in contact with animals." Always check the composition!
- WATER RESISTANCE: Since the feeder will be exposed to rain and humidity, the paint must be water-resistant. If you use acrylic, always complete the process with a protective coating to create a protective barrier.
- PLASTIC BASE: Ensure that the chosen paint adheres well to the plastic. Some paints may chip or change color when in contact with polymer materials.
What absolutely not to use:
- Spray paints: They often contain solvents and chemical components that can be harmful during evaporation and contact with birds. Use them only as a base coat, and the finish must be a protective paint.
- Fabric or wood paints: They may not guarantee adequate adhesion to plastic or may contain components dangerous to birds.
- Unverified compositions: If you have doubts about the composition, it is better to forgo painting or use only natural and safe materials (e.g., wrapping with bark or twine).
Safety tip: If you use bright and contrasting colors, remember that they might distract or even stress some bird species. The decoration must be beautiful, but it must not compromise the natural functionality of the feeder nor hide access to food.
2.2. Plastic Decoration Techniques (Layering, Patina, Wood/Stone Imitation)
To transform a simple plastic bottle into an aesthetic garden element, specific artistic techniques are used. Plastic has a smooth surface, so before starting, degrease it with alcohol and apply a thin layer of primer (a safe artistic acrylic primer will suffice).
Here are three simple and effective techniques for decoration:
Layering (Creating Depth)
Apply a base background color (e.g., dark green or dark blue). After it is completely dry, take a semi-dry sponge or a stiff brush, dip it in a lighter shade, and brush it over the surface of the bottle with light, dabbing motions. This will create a beautiful three-dimensional effect.Wood or Stone Imitation
- For wood: Cover the bottle with a light brown or beige base color. After drying, take a flat, stiff brush, dip it in dark brown paint, and brush it along the entire length of the bottle with quick vertical strokes, imitating wood grain.
- For stone: Apply a gray or sand tone. While the paint is still wet, press a natural sponge dipped in white and black paint onto it. For a realistic texture, you can add a pinch of fine, clean sand to the paint.
Patina Effect (Noble Aging)
Paint the feeder a dark color (bronze, copper, or dark green). When the base coat is dry, take a very small amount of turquoise or light green paint on a dry brush, wipe the excess onto a piece of paper, and lightly trace the raised seams, the neck, and the curves of the bottle. This will create the illusion of antique metal.
2.3. DIY: Material Combination (Pairing Paints with Bark, Twine, or Jute Covering)
When the base paint on the plastic looks too uniform, it is time to add texture and natural charm to the feeder. Combining paints with natural elements is not only beautiful but also increases the decor's resistance to temperature and humidity variations. The fundamental principle here is contrast: the bright, artificial plastic must "settle" next to soft, organic textures.
What you need for the combination:
- Paints: Non-toxic acrylic or spray paints (for the base).
- Natural materials: Dried bark (e.g., pine), twine (jute, sisal), burlap, small twigs, moss (dried).
- Adhesive: Strong, waterproof glue (e.g., "Moment" or hot glue that adheres well to plastic), thin wire.
Step-by-step instructions for decoration:
- Base Preparation: Ensure the plastic feeder is completely dry after painting. If you used bright colors, you can lightly brush the edges and corners with white paint to create a "patina" effect and visually soften sharp transitions.
- Creating the "Natural" Band: Choose a section of the feeder (e.g., around the neck or on the sides of the container) that you want to "anchor" to nature. Glue strips of bark or burlap here. To make the imitation realistic, do not glue the material uniformly, but slightly overlap the pieces, simulating natural growth.
- Wrapping with Twine: Twine perfectly masks joints and attachment points. Wrap the neck or pegs from the inside and outside with jute twine. To secure, do not wrap too tightly: leave small gaps so that the material "breathes" and looks natural.
- Fixing and Protection: After all elements have been glued, you must apply a protective sealant over the entire structure (exterior acrylic adhesive is ideal). The paint will not only protect your decor from the elements but will also unite all the heterogeneous materials into a single piece. This will give the piece a finished and professional look.
Remember: the greater the contrast between the smooth, shiny plastic and the rough, matte bark, the more effective your feeder will be. It is not just an ornament; it is a mini-ecosystem for your feathered friends.
III. Improving Functionality: From Decoration to Smart and Efficient Feeder
Having transformed a simple plastic bottle into a true piece of garden art with paints and natural decorations, it is important not to forget its main purpose. A beautiful feeder must be as comfortable and safe as possible for its feathered guests, and practical to maintain for you.
In this section of the guide, we will move from aesthetics to simple engineering solutions. We will see how to transform the painted bottle into a smart and functional "dining room" that automatically dispenses food, provide the birds with comfortable resting spots, and choose the ideal location to safely place the structure in the garden.
3.1. Process Automation: Creating a Controlled Food Dispensing Container (How to make a self-feeding bird feeder? - Mechanism Modeling)
We move from pure aesthetics to true functionality. If you want your feeder to be not only beautiful but also as efficient as possible, you must solve a problem: how to ensure birds have constant access to food without it scattering in an hour? The solution is automated dispensing. This will make the process slightly more complex, but it will drastically increase the practical value of your upcycling.
Principle of Operation for the "Smart" Feeder:
Instead of simply pouring food into the bottle, we will create a system where food is dispensed into the "dining area" as the birds consume it. This minimizes waste and ensures a stable food supply.
What is needed for the upgrade:
- Plastic bottle (1.5-2 liters) — the base.
- Wooden spoons or sturdy sticks (2 pieces) — will serve as "dispensers" and support pins.
- Office knife or sharp scissors.
- Point or nail — for precise marking.
- Strong wire or rope — for fastening and stabilization.
Step-by-step instructions for creating the controlled dispensing container:
- Marking and First Hole: Take the bottle and mark the spot for the first hole. The ideal height is 10-12 cm from the bottom. Drill a through hole, wide enough to pass a wooden spoon through.
- Second Hole: Rotate the bottle 90 degrees and move down 5-6 cm. Drill a second through hole. This will ensure stability and allow the food to fall evenly.
- Installing the Dispensers: Thread the wooden spoons through the drilled holes. It is important that the spoons are fixed so that their ends protrude outwards, forming the "dining area" for the birds.
- Creating the "Windows": Above the spoon holes, cut two rectangular "windows" (about 3x5 cm). These "windows" will serve as additional access to the food, but their edges must be mandatorily covered with colored electrical tape or adhesive tape to prevent the birds' feet from damaging the sharp edges of the plastic.
- Fastening and Hanging: Wrap the neck of the bottle with strong wire or rope. This will not only give it a finished look but also ensure secure fastening to a branch or a special support. In this way, you will obtain not just a painted vase, but a complete, smart, and safe feeder, ready for use.
3.2. Ensuring a Resting Spot: Mounting Perches and Feeders (Using wooden pins and supports)
The plastic bottle is a slippery and cold material, so it is extremely uncomfortable for birds to rest on its edges while eating. For the feathered guests to feel comfortable, the feeder must be equipped with sturdy wooden support pins and comfortable supports.
Choosing materials for the support pin:
- Natural twigs: It is best to use dry branches from deciduous trees (birch, hawthorn, apple) with a diameter of 8-12 mm. The rough bark helps the birds grip firmly with their feet.
- Wooden sticks for food: An accessible and smooth option, easy to mount.
- Wooden spoons: An excellent hybrid, where the handle serves as a support pin and the spoon itself is a small, comfortable dish for food.
Step-by-step mounting of the perching:
- Marking and Holes: Mark two symmetrical points under the entrance opening (1.5–2 cm below the cut edge). Drill through holes with a chisel or a heated nail. The hole diameter must be slightly smaller than the stick thickness so that it enters with tension.
- Installation: Thread the wooden stick through the entire bottle. It must protrude from both sides by at least 5–7 cm; this is sufficient for the birds to perch comfortably.
- Fixing and Safety: To prevent the perching from spinning or falling, secure the plastic joint points with a drop of hot glue on the outer side. It is essential to treat the edges of the plastic cut above the perching with electrical tape or slightly heat them with a lighter, so that the birds do not injure their feet when landing.
These simple wooden elements will make your plastic feeder as cozy and safe as possible for chickadees and sparrows.
3.3. Suspension and Placement Systems: Choosing the Right Spot for the Feeder (Where is the best place to hang it safely?)
Now that the feeder is equipped with comfortable perches, it is important to place it correctly. Even the most colorful and functional structure made from a plastic bottle can become a trap for birds if hung in an unsafe location.
When choosing the location and mounting method, follow these rules:
- Height from the ground. Hang the feeder at a height of 1.5–2 meters. This will protect the birds from cats and dogs, but it will also allow you to refill the food without strain.
- Predator protection. Position the feeder 2–3 meters away from dense bushes or trees. Birds need a shelter where they can hide in case of danger, but the branches must not be too close, otherwise a cat might jump directly onto the feeder.
- Structure stabilization. Light plastic swings a lot in the wind, scaring birds and causing food to fall. To secure the bottle, use a double support: tie it from the neck to the upper branch and secure the bottom with twine around the tree trunk. You can also place a couple of flat, clean stones at the bottom of the feeder to weigh it down.
- Gentle tree treatment. For suspension, use a strong nylon cord or twine. If metal wire is used, ensure that a piece of thick fabric or a rubber tube is placed underneath it to avoid damaging the tree bark.
The correct placement ensures that your vibrant feeding station becomes a safe and beloved place for all the neighborhood birds.
IV. Final Touches and Usage: Care, Food, and Seasonality
Proudly, we conclude the creation and decoration phase of our feeder. In this phase, we have transformed a normal piece of plastic waste into a work of art that will not only beautify your garden corner but will also become a source of life for our feathered friends. However, for this beauty to last long and be as safe as possible, we must pay attention to the final details, which are no less important. This involves protection from external agents, a correct approach to feeding, and, naturally, care for the feeder itself. These steps ensure that your work is not just a beautiful artifact, but a lasting and effective aid in caring for nature.
4.1. Finishing: Protective Layers and Decoration Fastening (Varnish Coating, Joint Sealing)
After the paint is completely dry and the decorative elements (twine, bark, or twigs) are in place, it is necessary to protect the feeder from the aggressive action of the external environment: rain, snow, and ultraviolet rays. Without a finishing layer, even quality paint will fade quickly and begin to chip.
Choosing the Protective Varnish
The main rule when choosing the protective coating is its absolute safety for the birds after complete drying.
- Water-based acrylic varnish: The ideal and safest choice. It has no strong odors, dries quickly, forms a durable elastic film, and does not release toxic substances. It is best to choose a matte or semi-gloss varnish so that the finished product does not create strong reflections that might scare away timid birds.
- Marine or polyurethane varnish: Not recommended for use. Despite its high resistance, these compounds release toxic vapors for a long time, especially when heated by the sun.
Varnish Application Technique:
- Apply the varnish with a soft, wide synthetic brush in 2–3 thin coats.
- Each coat must dry for at least 2–4 hours (consult the manufacturer's instructions).
- Pay particular attention to the joints of the decorative materials (e.g., the points where the bark or twine adheres to the plastic): the varnish must "seal" these areas, preventing the decay of natural materials.
Sealing Joints and Cuts
To prevent water from penetrating inside the feeder, all technical holes (perching points, piece junctions, suspension attachment points) must be sealed.
For this purpose, aquarium silicone sealant or a good quality hot glue is perfect. Aquarium silicone is completely safe for living organisms after polymerization, is not afraid of frost, and maintains elasticity. Carefully apply a small amount of sealant to the joints on the exterior side of the structure.
If the cuts in the openings have not been treated previously, cover them with a longitudinally cut rubber band, soft felt, or insulating tape. This will protect the birds' feet from cuts caused by thin plastic.
Important: After completing all the work, allow the feeder to air out for 2–3 days outdoors (on a balcony or veranda) until even the slightest odor of the materials has completely disappeared.
4.2. Choosing the Correct Menu: Which Foods are Suitable for Birds and How to Store Them in the Feeder (Dry Foods, Seeds, Preventing Deterioration)
Filling the feeder is not simply pouring random crumbs from the table; it is genuine care for the health of the birds. Since our feeder is made of plastic, it has specific operational characteristics: the plastic walls do not allow air to pass through, which means condensation can easily accumulate inside, leading to seed deterioration.
Correct Menu for Feathered Guests
For most small birds (tits, sparrows, robins, greenfinches), the ideal choice is dry food rich in vegetable fats and carbohydrates.
| Food Type | Suitable For | Characteristics |
|---|---|---|
| Sunflower seeds (unsalted, unroasted) | Tits, robins, sparrows, finches | Universal base. Excellent source of caloric fats. |
| Barley, oats, wheat | Sparrows, greenfinches, finches | Nutritious cereal food for small birds. |
| Pumpkin and melon seeds | Tits, robins | Must be slightly dried before being poured. |
| Dried fruits (sorbo, rowan berries) | Robins, thrushes | Attracts lively winter migrants. |
What is Absolutely Forbidden to Give Birds?
- Fresh white and black bread — causes dangerous fermentation in the birds' stomachs and obstructs the throat.
- Millet — unlike sorghum, it does not have a protective husk, so the fats on its surface oxidize rapidly in the air, becoming toxic.
- Salty, fried, and spicy products (chips, salted lard, fried seeds) — inflict irreparable damage on the birds' liver and kidneys.
How to Prevent Food Deterioration in a Plastic Container?
Plastic is airtight, so poured seeds can become damp from the birds' breath or raindrops. To keep the food fresh at all times, follow three simple rules:
- Control the volume. Do not fill the bunker to the brim if the birds cannot eat it within 1–2 days. It is better to add fresh food in small portions.
- Use drainage. Ensure that there are small drainage holes (1–2 mm in diameter) at the bottom of the container to remove accidental moisture.
- Regular cleaning. Every week, completely empty the straw residue and compacted food to prevent the formation of mold dangerous to birds.
4.3. Usage and Safety: Regular Care and Precautions (Remember Hygiene, Weather Protection, Seasonal Adjustments)
Using the feeder is not just about observing the birds, but also about responsibly caring for the ecological structure you have created. For the feeder to last over time and remain safe, it is necessary to follow some maintenance rules.
🧼 Hygiene and Cleaning: The Main Rule is Cleanliness
The most common mistake is neglecting cleaning. Bird droppings, food residue, and mold can quickly deteriorate the material and, more importantly, spread diseases.
- Cleaning Frequency: At least once every 1-2 weeks, especially if the feeder is in a damp location. Immediately during outbreaks or after heavy rain.
- What to Use for Washing: Use mild soap and a clean brush. Important: Do not use harsh chemicals that could be toxic to birds. After washing, let the feeder dry completely in the sun to kill mold spores.
- Treatment: If you used decorative elements (twine, bark), check that no small particles have detached that could end up in the food.
🌧️ Weather Protection: Reinforcing Decor and Structure
Your colorful feeder must withstand not only the joy of its guests but also harsh weather conditions.
- Painting: If you used acrylic or similar paints, cover all exterior surfaces with a protective varnish (the most suitable is a matte or semi-gloss acrylic varnish). This will not only keep the decor vibrant but also protect the plastic from moisture and temperature variations.
- Sealing: Check all joints and attachment points of the decorative elements. If there are cracks or crevices, use a waterproof and non-toxic sealant. This will prevent excess moisture from entering the structure.
- Stability: When hanging it, ensure that the wire or cable is robust enough to support the weight of the food and strong gusts of wind. Avoid places where the feeder might swing too much; this scares birds.
🍂 Seasonal Adjustments: Year-Round Feeding
The approach to using the feeder changes depending on the season.
- Winter: This is the peak activity time. The feeder must be protected from direct snow and rain as much as possible. Increase the cleaning frequency and ensure the food is as high in calories as possible (sunflower seeds, lard, unsalted fat).
- Spring/Autumn: An active period for decor and observation. Ensure the structure does not become clogged with debris and is easy to clean. This is the time to change the decor using seasonal materials (e.g., spring flowers or autumn acorns).
- Summer: During the heat, be careful that the feeder does not overheat in the sun. It is better to place it in a shaded area to prevent the plastic from deforming due to heat.
Remember: the feeder is not just a decoration, but a living element of the ecosystem. Responsible care ensures that your feathered guests are nourished and safe in every season.
Your Colorful and Safe Feeder is Ready: Enjoy the Feathered Guests!
Your colorful and safe feeder is ready! Congratulations on completing this creative and useful project. You have not only created a beautiful decorative element for your garden but have also concretely contributed to the well-being of local wildlife.
Remember that beauty and functionality must go hand in hand. Thanks to the correct choice of non-toxic paints and a well-designed structure, your feeder is not only pleasing to the eye but is also completely safe for chickadees, sparrows, and other visitors.
Enjoy the process of observing your feathered friends! Observing the feeder is not just joy, but also an opportunity to learn about bird habits, their seasonal migrations, and their nutritional needs. May your feeder become a point of attraction for small, but very lively guests!