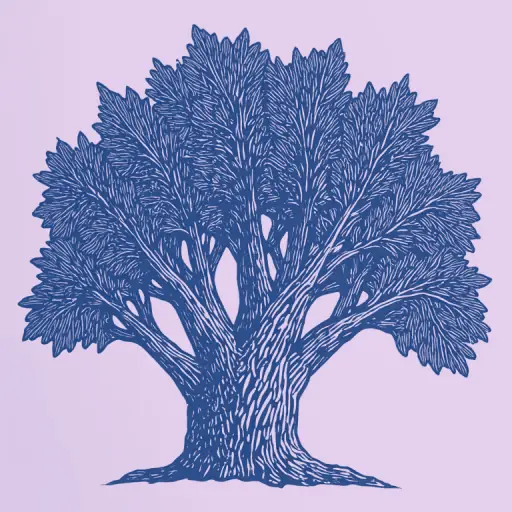
How to paint a tree with gouache beautifully and realistically
- 15 min read
- 62
A pictorial representation of a tree is one of the most popular and captivating subjects in fine art. Whether it is a sprawling ancient oak on a sheet of paper or an elegant decorative pattern on a wooden blank, every aspiring creator dreams of conveying the natural beauty of the bark and the lushness of the canopy. Gouache, with its dense, velvety texture, excellent opacity, and bright color palette, is ideally suited for achieving this creative goal. It easily forgives beginners' mistakes, allows for layered work, and enables the creation of stunning volumetric effects.
In this practical guide, we will thoroughly examine how to draw a realistic tree using gouache paints step-by-step. You will learn professional secrets for mixing shades to create vibrant foliage, learn to convey the volume of the trunk, and become familiar with the subtleties of painting wooden items—from proper priming to the final varnish coat. These simple and accessible techniques will help you believe in your abilities and create a true masterpiece with your own hands.
Preparing Materials and Working with Gouache
Before diving into the magic of creating a picturesque canopy and textured bark, it is necessary to organize your workspace correctly. Gouache is a surprisingly pliable, yet capricious, material. Its velvety texture and opacity are fully revealed only with the proper selection of tools and correct preparation of the surface, whether it is thick paper or a wooden blank.
The success of your future work directly depends on how obedient the paint is in your hands. Let's examine which specific tools will help you achieve realistic effects and how to properly prepare the working surface so that the paint applies evenly, does not dry out, and does not flake off over time.
Choosing Brushes, Palette, and Preparing Paints
For creating a realistic tree drawing with gouache, the correct selection of tools is crucial. Gouache is a dense, heavy, and opaque paint, so soft natural bristles (such as sable) are not suitable for it. Prefer synthetic brushes or bristle brushes:
- Flat synthetic brushes (No. 6–10) are ideal for outlining the wide tree trunk and large branches.
- Fine round brushes (No. 1–3) are indispensable for detailing: small twigs, bark cracks, and light highlights.
- Fan brush or a stiff round bristle brush is the best choice for quickly and naturally depicting a lush tree canopy.
For a color palette, it is best to use a plastic or ceramic plate. Wooden palettes without a special coating quickly absorb moisture from the gouache, instantly drying it out.
Preparing Paints:
Before starting, ensure that the gouache has the consistency of thick sour cream. If the paint has dried out, add a little warm water and mix it thoroughly until uniform. Remember that proper mixing of colors on the palette is the key to clean and rich shades in your future work.
Surface Preparation: Is Priming Necessary for Wood?
When working with wooden blanks, the question often arises: is priming wood mandatory before applying gouache? The answer depends on the desired result, but in most cases, preliminary preparation is extremely important.
Wood is a porous material that actively absorbs moisture. If you apply gouache to an untreated surface, the paint will quickly lose its brightness, become dull, and its consumption will increase manifold. Furthermore, excess water can deform thin plywood or raise the wood grain, making it rough.
Why priming is necessary:
- Paint Economy: The primer fills the wood pores, preventing excessive absorption.
- Color Vibrancy: Colors remain rich and saturated, just like in the jar.
- Adhesion: The gouache applies in an even layer and does not flake off after drying.
What to prime wood with for gouache:
- Art acrylic primer (gesso). The ideal option, creating a matte white base.
- PVA glue solution with water (in a 1:1 ratio). An accessible way to 'seal' the wood pores. A protective film forms after drying.
- A mixture of white gouache and PVA. This allows you to prime and lighten the surface simultaneously.
If your goal is to preserve the visible natural texture and grain of the wood, you can skip priming. In this case, paint with thick paint, using minimal water, and thoroughly sand the blank beforehand with fine-grit sandpaper.
Step-by-Step Tree Drawing on Paper for Beginners
Having mastered material preparation, it is time to move on to practice. Drawing on paper is the best way to 'feel' the gouache, understand its plasticity, density, and how obediently it lays under the brush. For beginner artists, drawing a tree will be an excellent exercise: it combines graphic branch lines with the painterly softness of foliage.
The step-by-step approach will prevent you from getting lost in the details and will allow you to build the composition sequentially, from general to specific. We will start with the basic structure of any tree, gradually moving to filling it with color and volume, to ultimately achieve a harmonious and lively drawing.
How to Draw a Voluminous Trunk and Realistic Bark
For the tree trunk to look voluminous rather than flat, it is important to immediately determine the direction of the light source. The light side will be warm, and the shadow side will be deep and cool.
- Base Tone (Underpainting). Mix the main brown shade on the palette. For the illuminated part of the trunk, add a little ochre or white, and for the shadowed part, add a drop of ultramarine. Apply these colors to the trunk with vertical strokes, gently blending the boundary between them with a damp brush directly on the paper.
- Creating Bark Relief. Once the base layer is dry, take a fine round brush. Sketch the longitudinal cracks and curves of the bark in a dark color (a mix of brown and black). The lines should be broken, uneven, and curve around the knots—nature has no perfect geometry.
- Light Accents. Using a semi-dry flat brush with stiff bristles, load it with light ochre and lightly brush over the convex parts of the bark on the illuminated side. This instantly reveals the rough texture.
Finally, add some grayish-green strokes at the base of the trunk to imitate moss, which will make the tree drawing even more lively and natural.
Color Mixing Techniques and Creating a Lush Canopy
To make the tree canopy look alive and voluminous, never use green paint straight from the tube. In nature, foliage consists of numerous shades that constantly change under the influence of light and shadow.
Secrets of Color Mixing for Foliage:
- Base Shadow: Mix green with a drop of ultramarine or brown. This deep dark shade is applied first to the shadowed areas of the canopy.
- Mid-tone: Combine green with yellow or ochre. This is the natural color of foliage illuminated by diffused light.
- Sunlit Highlights: For the lightest areas, mix yellow with white and add only a small amount of green.
Step-by-Step Volume Creation Technique:
- Underpainting: Using a wide brush, sketch the general shape of the canopy with the darkest green mixture. This will create depth inside the tree.
- Mid-tone Layer: Using a semi-dry round bristle or fan brush, apply the mid-tone over the underpainting with quick dabbing (stippling), leaving dark gaps.
- Detailing: Use the lightest shade to place highlights on the tips of the branches where imaginary light falls.
This layered method, from dark to light, will instantly transform a flat green patch into a lush, realistic canopy.
Painting Wooden Blanks and Crafts with Gouache Paints
Transferring painting techniques from paper to real wood is an exciting step that turns a simple drawing into a tangible decorative object. Wooden blanks, whether they are boxes, figurines, or panels, have a unique texture but require a special approach. Gouache adheres well to wood due to its opacity, but the porous structure of the material dictates its working rules.
To ensure your crafts retain their vibrancy and that the paint applies evenly without running, it is important to consider several technical nuances. Next, we will cover how to properly prepare the wooden surface for painting, what brushstrokes to use, and how to reliably protect the finished piece from moisture and abrasion.
Rules for Applying Gouache to Wooden Items
Applying gouache to a wooden blank has important nuances because wood is a porous material that actively absorbs moisture. To ensure the drawing lies evenly, does not fade, and does not crack, observe these key rules:
- Paint Consistency. The gouache should have the consistency of thick sour cream. Paint that is too thin will soak deep into the fibers, causing the wood to swell and the pigment's brightness to fade. Paint that is excessively thick will apply in uneven strokes and crack over time.
- Stroke Direction. When applying the base tone, guide the brush strictly along the wood grain. This guarantees even color distribution and a neat appearance of the item.
- Layered Drying. Apply paint in thin layers. Before creating fine details (such as rendering bark, branches, or foliage), be sure to wait for the base layer to dry completely (15–20 minutes).
- Moisture Control. Use synthetic brushes. They are resilient and do not hold excess water, unlike animal hair or sable. Always blot the brush on a napkin after rinsing.
For creating a beautiful bark texture on a wooden craft, the "dry brush" technique works perfectly: load a little thick paint onto a stiff bristle brush, wipe off the excess on a paper towel, and lightly brush over the surface of the blank.
Finishing Treatment: What to Cover Gouache With So It Doesn't Wash Off
Gouache is a water-soluble paint, so without a protective layer, the finished wooden item will quickly lose its appearance from moisture or accidental contact with wet hands. To fix the drawing and make it durable, you must properly select and apply a finishing coat.
The best solution for protecting gouache on wood is acrylic varnish. It comes in matte, semi-matte, and glossy finishes. Matte varnish will preserve the noble velvety texture of the gouache, while glossy varnish will make the colors brighter and more vibrant.
Methods for Applying Protective Coating:
- Acrylic Spray Varnish (Aerosol). This is the ideal option for beginners. Spraying eliminates direct contact between the brush and the paint, meaning the drawing is guaranteed not to smudge. Spray the varnish in thin layers from a distance of 25–30 cm, allowing each layer to dry for 15–20 minutes.
- Water-Based Liquid Acrylic Varnish. If you are using liquid varnish and a brush, choose the softest synthetic filbert brush. Apply the varnish with quick, light strokes in one pass, without going over the same spot twice, to avoid smudging the gouache layer.
- PVA Glue. As a budget alternative, you can use PVA glue diluted with water in a 1:1 ratio. After drying, it forms a transparent protective film, but this method is less durable and water-resistant than acrylic varnish.
Before varnishing, ensure that the gouache is completely dry (it is best to wait 12–24 hours). After applying 2–3 coats of varnish, your wooden craft will be reliably protected from moisture, dust, and fading.
Secrets of Mastery and Preventing Common Mistakes
Gouache painting requires not only neatness but also an understanding of the material's specific characteristics. Due to its density and velvety nature, this paint can behave unpredictably when layered, especially when conveying complex natural shades of bark and foliage. To make your work look professional and to enjoy the process, it is important to master several coloristic subtleties and expand your arsenal of tools. In this section, we will discuss key nuances that will help avoid frustrating blunders and make the wood texture truly alive and deep.
How to Avoid a Muddy Effect When Mixing Green and Brown Tones
Mixing green and brown shades is the main stumbling block when painting trees. Instead of a vibrant canopy and deep shadows where branches and leaves meet, a dull grayish-brown patch often results, which artists call "mud." Gouache is an opaque but capricious material, prone to clouding when mixed excessively mechanically on paper.
To maintain the richness and purity of the palette, adhere to several simple rules:
- Use Ochre and Yellow as "Bridges" Between Colors. Never mix pure green and dark brown directly. To gently transition the green of the foliage into the shadow of the branches, add golden ochre or natural sienna to the mixture. This will make the transition natural and warm.
- Control Moisture and Layering. Gouache easily smears the previous layer. If you paint brown branches over a wet green canopy, the paints will mix into a muddy mass. Wait for the underpainting of the canopy to dry completely before applying the trunk details with a semi-dry brush.
- Limit the Number of Pigments in the Mixture. Try not to mix more than three different paints on the palette at one time. For example, to achieve a deep shadow green, it is better to mix ultramarine with yellow ochre rather than adding pre-made brown to a bright green gouache from the tube.
- Apply Optical Mixing. Instead of rubbing the paints on the paper, use the technique of separate strokes. Apply strokes of pure green, yellow, and brown next to each other. From the viewer's distance, their eyes will combine them into a voluminous texture of bark and foliage.
Using Auxiliary Tools: Fan Brushes, Sponges, and Splattering
To prevent the tree canopy from looking like a flat monolith and the bark from being a uniform wash, professional artists often go beyond classic round and flat brushes. Auxiliary tools allow for the creation of complex textures in minutes that would take hours with standard rendering.
Fan Brush. This is an indispensable tool for depicting coniferous trees, as well as the light, sparse foliage of birches or weeping willows. Load the tips of a dry or slightly damp fan brush with thick gouache. Do not dilute the paint with water too much, or the bristles will clump together. Apply the paint to the surface using light dabbing (tip-loading) or quick sweeping strokes. This will instantly create the illusion of numerous small needles or individual leaves.
Foam Sponges. A regular household sponge or an artist's sponge is ideal for creating a lush, voluminous canopy of deciduous trees (oak, linden, maple). Cut a small piece of sponge with torn, uneven edges. Dip it in paint on the palette and be sure to make a test impression on a sketch to remove excess moisture. Transfer the paint to the drawing using light patting motions. Start with the dark underlayer, and then apply medium and lightest shades to the protruding parts of the canopy using a clean sponge.
Splattering Technique. This technique is essential for conveying the effect of fine spring foliage, blooming cherry blossoms, or autumn leaves. Take a stiff bristle brush or an old toothbrush. Dilute the gouache with water to the consistency of thick sour cream. Aim the bristles at the drawing, run a finger or palette knife across them toward yourself, and release sharply. Small splatters will cover the work with a beautiful scattering of dots. To prevent staining the already finished tree trunk or background, cover these areas with paper stencils.
Conclusion
Painting a tree with gouache is an amazing process that combines classical painting and applied arts. By mastering the basic techniques of working with this material, you can easily create both picturesque paintings on paper and unique wooden crafts to decorate your home or serve as a heartfelt gift for loved ones. Gouache is an incredibly forgiving medium. Thanks to its high opacity, you can always correct a failed stroke simply by covering it with a new layer after it dries. This makes it an ideal choice for children and beginner artists taking their first steps in creativity.
Let's reinforce the main rules that will help you achieve excellent results:
- Observe Nature. Pay attention to how light falls on the canopy of real trees, and what shades predominate in the bark on a sunny or cloudy day. Realism is born from attention to detail.
- Don't Be Afraid to Experiment with Tools. Fan brushes, foam sponges, stiff bristles, and even a regular toothbrush for splattering—these are your best helpers in creating complex natural textures of foliage and bark.
- Follow the Technology. When working with wooden blanks, always use a primer, apply gouache in thin layers to prevent cracking, and always protect the finished work with acrylic varnish. This will protect your work from moisture and abrasion.
- Control Paint Moisture. Gouache likes balance: paint that is too thin will run and lose vibrancy, while paint that is too thick will lay down uneven clumps and may flake off after drying.
Remember that in art, there are no rigid boundaries. Every tree you paint will possess its own unique character and mood. Don't be discouraged if your first strokes seem imperfect—with every new drawing, your movements will become more confident, and your palette will become richer and more harmonious. Practice, trust your imagination, and enjoy the creative process!