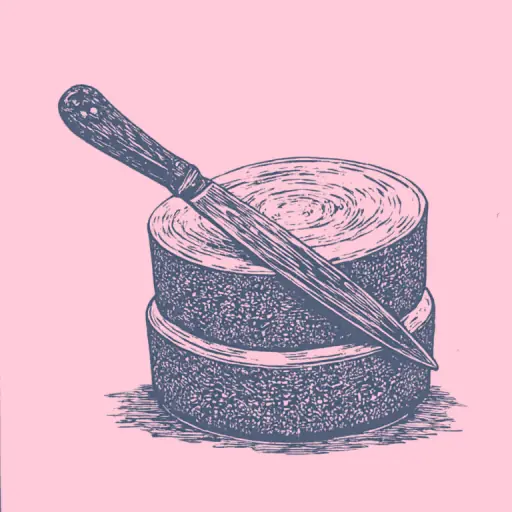
How to Prepare Perfect Layers: The Technique for Evenly Slicing Cakes with a Knife
- 7 min read
- 59
Perfectly even layers are not just an aesthetic detail; they are a technological necessity in confectionery. When assembling a multi-layered cake, every millimeter of height and every cut line affects the overall geometry of the product. An uneven cut leads to visual imbalance, and excessive compression can deform the biscuit structure, which may disrupt the even distribution of the filling.
Users often ask, "How do I slice cakes evenly?" and encounter issues with crumbling or delamination. There are several approaches: from direct cutting with a knife to using thread or specialized tools. The choice of method depends on the type of biscuit (fragile, dense) and the desired degree of cut perfection. Our goal is to give you an algorithm for choosing the technique that minimizes mechanical stress on the cake.
Section 1. Preparation for the Perfect Cut: Tools and Biscuit
Before starting the actual cutting, it is necessary to understand the physics of the process. Biscuit is a porous structure that loses its structural integrity with sudden temperature changes or mechanical stress. Therefore, preparation is 80% of the success.
1.1. Which Tool to Choose: Comparing Knives, Thread, and Special Tools
The choice of tool is directly related to the porosity and fragility of your biscuit. There is no universal "best" tool; there is only the one suitable for the specific task.
- Long Sharp Knife (Bread or Pastry): Ideal for those who are confident and working with relatively dense cakes. The key here is the blade length: it must be significantly longer than the diameter of the cake to ensure smooth movement without needing sharp maneuvers near the edges.
- Thread/Fishing Line: The best choice for very delicate, crumbly biscuits. This method works on the principle of "tension," not cutting, which minimizes the risk of crumbling. This is an excellent way to learn how to carefully slice a biscuit into even layers if you are afraid of using a knife.
- Pastry String/Holders: Specialized tools for a professional level. They ensure maximum repeatability and accuracy, especially when working with many layers.
1.2. Critical Preparation Stages (Cooling, Moisture, and Marking): Conditions for Successful Cutting
Technological aspect: the biscuit must be completely stabilized. A warm or even slightly cooled biscuit is not a set structure but rather a "soft" mass that deforms from the slightest pressure.
Preparation Algorithm:
- Complete Cooling: Leave the biscuit at room temperature for at least 6–8 hours (or according to the recipe). It must not just be cool, but stabilized—its structure must "set."
- Moisture and Hygroscopicity: If you are using a very dry, crumbly biscuit, you can lightly brush the cuts with a sugar syrup solution (1 part sugar to 4 parts water) before cutting to increase its plasticity and prevent crumbling. However, do not overdo it—excessive moisture will make the cut sticky.
- Marking: Regardless of the chosen method, preliminary marking (scoring with a knife or using templates) sets your "roadmap" for cutting and increases confidence in the process.
Section 2. Step-by-Step Even Cutting Techniques: Knife vs. Thread vs. String
Here we move to the practical mechanics. Choose the technique based on how fragile your biscuit is.
2.1. Using a Classic Knife for a Professional Cut (Scoring and Rotation Technique)
This method requires the pastry chef to have a steady hand and a long tool. It is best suited for moderately dense, well-baked biscuits.
Step-by-Step Instructions:
- Applying Scores (Marking): Take the knife and make shallow but clear scores along all the cut lines. Important: these scores must be parallel to the surface of the table to avoid "undercutting" the base.
- Fixing: Place the biscuit on a stable surface and secure it if necessary (e.g., under a ring or in a special holder). If you are trying to slice a cake evenly, ensure the base does not shift during cutting.
- Rotation and Cutting: Take the knife, which must be longer than the cake's diameter. Start moving from the outer edge toward the center (or vice versa, but consistently). Move smoothly, making rotational movements along the scored lines. Do not press down with your body weight on the blade; let the cutting edge do the work.
- Checking: After cutting, check the slice: it should be clean and continuous. If you feel resistance, stop, slightly moisten the knife (dip it in hot water), and continue moving.
2.2. Alternative and Safe Methods: Thread/Fishing Line Method and Pastry String
These methods are a lifesaver for beginners or for very delicate, "powdery" biscuits. They work on the principle of separating fibers, not cutting dense mass.
Thread Method (Fishing Line):
- Score Guide: First, make a superficial score with a knife along the line of the future cut—this sets the direction for the thread and prevents the line from "running away." Use toothpicks to mark the height of the cut.
- Wrapping: A strong thread (or special pastry fishing line) is wrapped around the biscuit along the scored line. The ends of the thread cross at the cut point.
- Separation: Slowly, evenly, and parallel to the table surface, pull the ends of the thread in opposite directions. The tension of the thread creates controlled stress that separates the biscuit fibers along the scored line without damaging the surrounding structure.
Pastry String Method: This tool mimics the ideal tension of thread but with greater mechanical support. You simply set the desired height and pass the string through the cake. This is the most controlled way to achieve a perfectly even cut.
Section 3. Advanced Techniques and Troubleshooting
Professionalism is shown not in the perfect cut, but in the ability to correct an error or improve the shape.
3.1. How to Trim Sides and Level Height (Fixing Techniques, Using Removable Rings for a Perfect Base)
A perfect cake requires not only even slicing into layers but also uniform geometry for each layer.
- Leveling Height: If you need to get several layers of the same thickness from one large sheet, use a removable ring mold. Cut the biscuit along the score lines (as in section 2.1), and then carefully remove each layer through this ring. The ring acts as an ideal template and stabilizer.
- Trimming Sides: If the layers are too wide or uneven, use the "trimming" method. Take a knife with a serrated edge (it handles soft perimeter cuts better) and carefully run it along the entire edge. Then, you can use a special culinary compass for the final trimming.
3.2. Common Beginner Mistakes: What to Do When Crumbling, Deforming, or Cutting Unevenly (FAQ and Error Prevention)
- Problem: Crumbling during the cut. Cause: Biscuit is too dry or the movement is too abrupt. Solution: Always moisten the knife before each new cut using hot water. If crumbling is severe—use the thread method.
- Problem: Deformation (squishing) of the cake. Cause: Too much pressure from the knife or attempting to cut warm biscuit. Solution: Work smoothly, guiding the blade in the direction of movement, rather than pressing down on it. Always work with a completely cooled product.
- Problem: Uneven cut (conicity). Cause: Attempting to cut in one direction without rotation. Solution: When cutting in a circle, always make small, controlled rotational movements of the biscuit so that the knife "meets" the material evenly from all sides.
Conclusion: Summary Table for Choosing the Ideal Method for Your Baking
| Biscuit Type | Desired Result | Recommended Method | Advantages | Notes |
|---|---|---|---|---|
| Very delicate, crumbly | Maximum structural preservation | Thread/Fishing Line | Minimal mechanical impact. | Requires preliminary knife scoring. |
| Moderately dense, stable | High speed and accuracy | Long sharp knife (with scores) | Fast and controlled process. | Must be cooled to full stabilization. |
| Requires perfect geometry | Repeatability, perimeter evenness | Pastry string / Ring | Maximum result repeatability. | Ideal for multi-layered cakes. |