How to Propagate Tulips Quickly and Effectively with Bulbs
- 8 min read
- 58
Bright tulips are the main adornment of the spring garden. Every gardener strives to propagate their favorite varieties without spending unnecessary money on purchasing new planting material. The most reliable and fastest method to do this at home is vegetative propagation using daughter bulbs. Unlike the complicated seed method, bulb division guarantees the one hundred percent preservation of variety traits.
In this guide, we examine how the mother bulb is structured, how to encourage the formation of numerous tulip daughter bulbs, and how to properly prepare them for a lush bloom.
Advantages of Vegetative Propagation over the Seed Method
Choosing the right propagation method is the foundation of successful gardening. While wild tulips rely on self-propagation in nature, the vegetative method is the only reliable way for cultivated varieties. Propagation with daughter bulbs not only saves years of waiting but also guarantees that the new flowers fully inherit the decorative characteristics of the mother plant. Let's examine why this approach is superior to the generative one and how the biological generational change works in bulb plants.
Why the Seed Method is Unsuitable for Cultivated Tulips
Seed propagation of cultivated tulips is a labor-intensive and inefficient process for the average gardener. Its main disadvantage is the loss of variety traits. The tulip is a cross-pollinated plant, so seedlings grown from seed practically never inherit the unique decorative characteristics of the mother flower (color, double or fringed blooms).
Furthermore, this method requires enormous patience:
- Long Waiting Period: The first buds on the plants do not appear until after 5–7 years.
- Complex Care: Young seedlings are extremely susceptible to diseases in their first years and require greenhouse conditions.
This is precisely why the vegetative method is used exclusively for the fast and guaranteed preservation of the variety.
Life Cycle of the Mother and Daughter Bulb
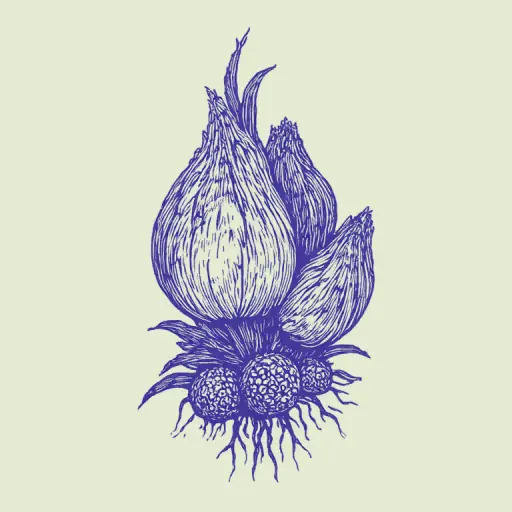
The tulip's life cycle is structured so that the mother bulb survives only one season. In spring, it gives all its energy to flowering and the formation of offspring and then dies completely. In its place, a new bulb cluster forms, consisting of a large replacement bulb and several smaller ones – these are the daughter bulbs and tulip daughter bulbs.
The replacement bulb takes over the flower bud and is ready to bloom in the following year. The small daughter bulbs, which form at the base of the storage leaves, require mandatory subsequent growth. This annual vegetative self-renewal allows the plant to constantly rejuvenate itself and preserve all the variety traits of the mother organism.
Propagation Stimulation: How to Obtain the Maximum Number of Daughter Bulbs
To accelerate the vegetative propagation of tulips and obtain as many healthy, large daughter bulbs as possible, the natural processes of bulb replacement are often insufficient. Gardeners use special agrotechnical procedures that redirect the plant's energy from flowering to the formation of underground organs. Correct intervention in the flowering life cycle can increase the propagation factor manifold and improve the quality of the planting material.
Decapitation of Buds to Increase Bulb Weight
Bud decapitation is one of the most effective methods for stimulating the growth of the plant's underground part. When the tulip blooms, it consumes an enormous amount of nutrients for flower formation and subsequent seed ripening. Removing the flower bud redirects this energy flow back to the bulb.
Rules for Decapitation:
- Timing: Perform the procedure 3–4 days after the bud opens, after confirming the variety conformity of the bloom.
- Technique: Only pull or cut off the flower bud.
- Preserving Greenery: Under no circumstances cut off the stem and leaves – they must remain green to ensure photosynthesis, which nourishes the mother bulb and stimulates the active growth of the daughter bulbs and tulip daughter bulbs.
Thanks to this method, the mass of the bulb cluster increases by 30–40%, and the tulip daughter bulbs form larger and more vital.
Fertilizing Scheme for Active Bulb Division
For the active formation of daughter bulbs, tulips require enhanced nutrition. The fertilizing scheme comprises three key phases:
- During Bud Formation: Apply a complex nitrogen-phosphorus-potassium fertilizer (e.g., ammonium nitrate) for general strengthening and above-ground growth.
- During Bloom (or immediately after decapitation): Completely omit nitrogen. Use superphosphate and potassium sulfate (15–20 g per m² each). Potassium stimulates bulb division, and phosphorus strengthens the tissue.
- 10–14 Days After Bloom: Repeat the potassium-phosphorus fertilization for maximum filling of the daughter bulbs.
Important: Avoid an excess of nitrogen in later stages, as the bulbs will become loose and susceptible to rot during storage.
Correct Digging, Sorting, and Storing of Planting Material
Successfully stimulating bulb division is only half the battle. For the pulled daughter bulbs to become full-fledged planting material, they must be removed from the ground in time and prepared correctly for the dormancy period. Errors in digging and storage often lead to the drying out of small bulbs or fungal infections. Correct harvesting of the bulbs, careful sorting, and strict adherence to the temperature regime ensure that every daughter bulb retains its vitality and forms a healthy flower bud.
Timing of Digging and Sorting Small Daughter Bulbs
The signal to dig is the yellowing and drying out of about two-thirds of the above-ground part of the tulip. In temperate climates, this period usually falls between late June and early July. If the bulbs are dug up too early, the daughter bulbs will not manage to form a dense protective sheath. If one waits too long, the bulb cluster will disintegrate in the soil, and the small planting material will be irretrievably lost.
After removal, the bulbs are carefully cleaned of soil and sorted into fractions:
- Large (Extra, Grade I, and II): Diameter of 3 cm or more, ready for full bloom in the next season.
- Small (Grade III and Daughter Bulbs): Diameter of less than 1.5–2 cm. These are separated from the mother stock and calibrated separately.
All soft, rotten, or damaged specimens are immediately discarded to prevent the spread of fungal infections.
Creating Optimal Temperature Conditions for Storage
For the successful preservation of daughter bulbs and large tulip bulbs until autumn planting, adhering to a temperature schedule that mimics the natural cycle is crucial:
- July (first month after digging): Keep the temperature at about +20...+22 °C. During this time, the buds of future flowers actively develop within the bulb.
- August: Gradually lower the temperature to +17 °C.
- September – October: Before actual planting, lower the temperature to +12...+15 °C.
Store the planting material in a dry, well-ventilated room in net crates in a single layer. Avoid stagnant air, as the ethylene released by the bulbs can damage the sensitive small daughter bulbs.
Autumn Planting and Propagation of Tulip Daughter Bulbs
The autumn planting is a crucial step in propagating tulips with daughter bulbs. It is precisely during this time that the foundation for their future growth and full development is laid. For the small planting material to survive the winter and grow into large, flowering bulbs, the agrotechnical rules must be strictly followed. The correct choice of location, the preparation of the substrate, and the planting depth determine how quickly your tulips will adapt and grow in the spring.
Preparing the Drained Soil and Planting Depth
For the successful propagation of tulip daughter bulbs, a light, excellently drained soil is essential, as standing water is fatal to unestablished bulbs. Sandy or loamy soil with a neutral pH (pH 6.5–7.0) is best. When digging to a depth of 25–30 cm, add mature compost (calculated at 5–6 kg/m²) and river gravel for looseness.
The planting depth is calculated according to the classic rule: three times the height of the bulb. For small daughter bulbs, this is only 5–8 cm. Plant them in furrows with a spacing of 5–7 cm from each other and leave about 15 cm between the rows. This ensures optimal nutrient area for rapid weight gain.
Care of Plantings and Protection Against Loss of Variety Traits
After autumn planting, it is important to provide the daughter bulbs with the correct care in the spring. As soon as the snow melts, gently loosen the inter-rows and mulch the bed surface with peat or compost. Young bulbs require regular but moderate watering and timely fertilization of the bulbs with complex mineral fertilizer rich in nitrogen and potassium.
To maintain the variety traits and prevent deterioration, follow three rules:
- Phytosanitary Cleaning: Immediately remove plants showing signs of spotted bloom (unusual streaks on leaves and buds) along with the soil clump.
- Sorting: Never mix daughter bulbs of different varieties when digging.
- Timely Decapitation: Remove buds from the propagating daughter bulbs and do not let them bloom so that all energy flows into bulb growth.
Conclusion
The vegetative propagation of tulips with daughter bulbs is the most reliable and fastest method to obtain an abundance of flowering plants while preserving all variety traits. By following the simple sequence of steps, you achieve the maximum result:
- Stimulation: Timely decapitation of buds and potassium-phosphorus-rich fertilizers for bulb growth.
- Care: Careful digging, sorting of small daughter bulbs, and adherence to the temperature regime during storage.
- Planting: Timely autumn deep planting in drained soil and gentle care.
By applying these uncomplicated agrotechnical procedures, you slightly increase your collection of favorite varieties and transform your garden into a blooming oasis without unnecessary financial costs.