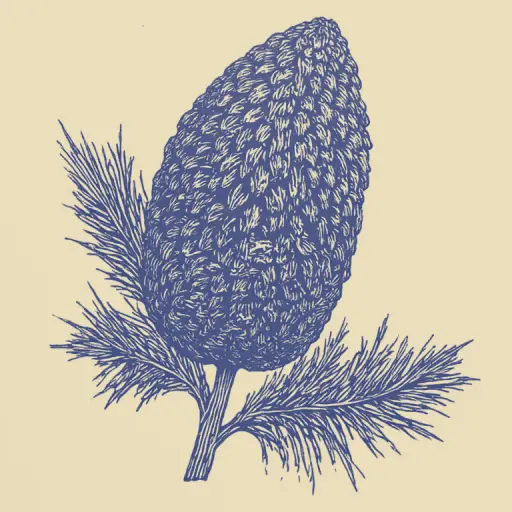
How to Quickly Open Pine Cones at Home Using Simple Methods?
- 8 min read
- 60
Pine cones are a magnificent natural material for creativity, often used by florists, decorators, and craft enthusiasts. However, freshly gathered forest finds are usually tightly closed, covered in resin, and may hide small insects inside. To turn them into the perfect base for holiday decorations or children's crafts, the cone scales must be opened correctly. In this guide, we will cover the fastest and safest home methods—from express drying in the microwave to using a conventional oven—and explain how to properly prepare the material for use.
Preparing Cones for Opening: Cleaning and Disinfection
Before proceeding with the thermal treatment and opening of pine cones, they must be thoroughly prepared. Forest material often hides bits of dirt, needles, sticky resin, and small insects. If you skip this step and immediately put the cones in the oven or microwave, the dirt will bake permanently onto the scales, and the unpleasant odor will spoil the entire impression of the work.
Proper preliminary cleaning and disinfection not only guarantee the aesthetic appearance of the future craft but also make the creative process completely safe for health.
How to Properly Clean Cones from Dirt, Insects, and Excess Resin
Let's start with mechanical cleaning. Using an old toothbrush or a stiff brush, thoroughly remove needles, dirt, and dry debris from the surface of the scales.
If there are sticky resin streaks on the cones, do not try to scrape them off dry—you will only damage the material. Dampen a cotton pad or stick with medical alcohol and gently wipe the contaminated areas. Alcohol quickly dissolves pine resin without deforming the scales.
To get rid of small insects and spiders hiding inside, prepare a bath: mix warm water with regular table vinegar in a 1:1 ratio. Soak the cones for 20–30 minutes. They will temporarily close from the moisture—this is a natural process—but all pests are guaranteed to leave their hiding places.
Preliminary Washing and Antiseptic Treatment Before Drying
After the vinegar bath, thoroughly rinse the cones under running warm water to remove residual acid and loosened dirt. For reliable disinfection and to prevent mold growth during subsequent storage, treat them with an antiseptic.
Effective treatment options:
- Hydrogen peroxide solution (3%): Soak the cones for 10–15 minutes. This will destroy hidden fungal spores.
- Wood antiseptic: Submerge the material in the solution for 30–60 seconds.
After disinfection, lay the cones on paper towels. Their scales will temporarily shrink from the moisture—this is a normal reaction before final drying.
Thermal Methods for Quick Cone Opening
Once the forest finds are cleaned and disinfected, the most fascinating stage begins—opening them. Natural drying can take weeks, but crafters and decorators usually need the result immediately.
Thermal methods are the best way to make the cone scales quickly spread under the influence of dry heat. High temperature not only accelerates moisture evaporation, causing the wood fibers to contract, but also completely sterilizes the material by melting residual resin.
Safe Oven Drying: Step-by-Step Guide and Temperature Setting
Oven drying is one of the most reliable methods. It not only quickly opens the cone scales but also disinfects the material, destroying hidden insects and fungal spores.
Step-by-step algorithm:
- Trays Preparation. Line the tray with parchment paper or foil so that any leaking resin does not spoil the dish.
- Arrangement. Lay the pine cones in a single layer with a small distance between them for free air circulation.
- Temperature Setting. Preheat the oven to 120–130 °C (no higher than 150 °C to avoid ignition).
- Process. Place the tray inside for 30–50 minutes. The time depends on the moisture content of the raw material. Regularly check the process and do not leave the oven unattended.
- Cooling. When the scales are fully open, turn off the heat, slightly open the door, and let the decoration cool in the oven for another 20 minutes.
This method guarantees that your DIY decorative preparations will be clean, dry, and ready for further work.
Microwave Express Method: Opening in Minutes
If you are completely short on time, the ordinary microwave oven comes to the rescue. This express method allows the cone scales to open in just 1–3 minutes.
Step-by-step algorithm:
- Preparation: Line a flat dish suitable for microwave use with several layers of paper towel. This protects the dish from drops of sticky resin.
- Arrangement: Place the prepared pine cones on a small distance from each other.
- Heating: Turn on the microwave on medium power (600–700 W) for 1 minute.
- Control: Check the result. If the cones are not fully open, heat them for another 30–60 seconds.
Important: Do not leave the appliance unattended to avoid resin smoke. This method is the ideal solution when DIY craft and decoration materials are needed right now.
Alternative Home Drying Methods
If the express methods in the oven or microwave do not suit you due to the risk of overheating or lack of time for constant monitoring, it is worth looking at softer alternatives. These methods require minimal involvement, although they take longer. They are ideal for delicate preparation of natural material, preserving its natural texture and preventing scale deformation.
Drying on a Radiator: Process Features and Timelines
Drying on a radiator is an excellent compromise between speed and safety, perfect for the heating season.
Process Features:
- Surface Protection: Be sure to cover the radiator with thick cardboard, foil, or place the cones on a tray. This will protect the radiator from drops of hard-to-remove pine resin.
- Evenness: Lay the material in a single layer and periodically turn it over for even scale heating.
- Auditory Indicator: As moisture evaporates, you will hear a characteristic light crackling—this means the process is going correctly.
Timelines:
Depending on the radiator temperature and the initial moisture content of the material, the complete opening of pine cones takes from 1 to 3 days.
Natural Air Drying Method
Natural air drying is the gentlest, albeit longest, method. It is ideal if you have plenty of time and want to maximally preserve the natural shape and color of the material.
How to properly organize the process:
- Lay the cleaned cones in a single layer on newspapers, paper, or a wooden tray.
- Place them in a warm, dry, and well-ventilated area (for example, on a glazed balcony or veranda).
- Avoid direct sunlight so that the scales do not overdry and become too brittle.
With this method, the cones will fully open in 1–2 weeks. Periodically turn them over for even moisture evaporation.
How to Fix the Shape of an Opened Cone
After the pine cones have impressively opened their scales under the influence of heat, a new task arises for the artisan. Natural material reacts sensitively to the humidity level in the room: when humidity increases, the scales can close tightly again, deforming the finished craft. To prevent your creative efforts from being wasted, the opened shape must be securely fixed.
Moisture Protection: What to Do So the Cone Does Not Close Again
To ensure that the opened pine cone permanently retains its shape and does not close due to air humidity, its scales must be fixed. The most reliable method is to use acrylic lacquer (matte or glossy) in aerosol form. Spray it thoroughly from all sides, penetrating deep between the scales.
Alternative protection options:
- PVA glue solution (diluted with water in a 1:1 ratio). Dip the cone in the solution for a few seconds, shake off the excess, and let it dry. The glue will create a strong, invisible film.
- Extra-hold hairspray. This is a fast express method, but it is less durable compared to acrylic lacquer.
Rules for Storing Prepared Craft Material
To ensure that the prepared cones maintain their shape and do not mold, follow simple storage rules:
- Breathable Packaging. Never store cones in tightly sealed plastic bags. Use cardboard boxes, paper kraft bags, or bags made of natural fabrics.
- Dry and Dark Place. Store supplies in a well-ventilated area away from sources of moisture and direct sunlight, which makes the scales brittle.
- Loose Arrangement. Do not pack the material too tightly to avoid damaging the opened scales.
Conclusion
Preparing pine cones for creativity is a simple and fascinating process if you know the correct techniques. The choice of method depends on your time frame:
- Microwave oven—ideal for express opening in a couple of minutes;
- Oven—guarantees reliable disinfection and even results;
- Natural drying—preserves the natural structure without thermal impact.
The main thing is not to forget the preliminary cleaning and the final shape fixation with lacquer or glue. Now that you know all the secrets to preparing this ecological material, your crafts and decorative elements will bring joy for years to come. We wish you inspiration and successful creative experiments!