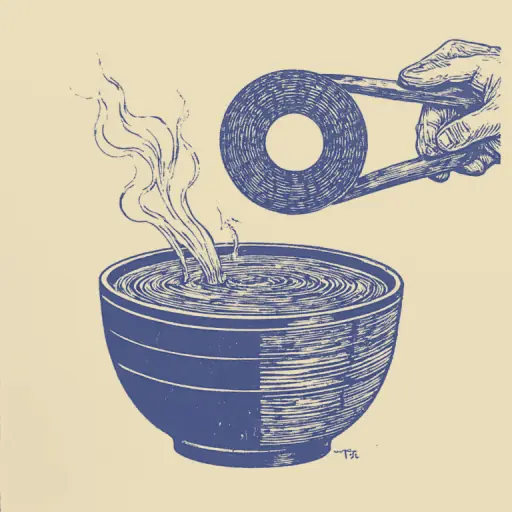
How to Restore the Shape and Elasticity of a Deformed Rubber Gasket
- 14 min read
- 63
Rubber seals and gaskets are inconspicuous yet critically important components in household appliances, automobiles, and plumbing systems. They are what ensure reliable hermeticity of connections, protecting against water leaks, drafts, and pressure loss. However, over time, under the influence of temperature fluctuations, oxygen, and time, inevitable seal deformation occurs: the rubber hardens, compresses, and loses its shape.
When faced with this problem, do not rush to discard the part. In many cases, it is possible to effectively revive the gasket at home. There are proven practical methods that allow you to soften the seal and restore its former flexibility.
In this guide, we will thoroughly examine how to perform rubber elasticity restoration using readily available means:
- thermal treatment (boiling);
- folk chemical methods (using kerosene for rubber or ammonia spirit);
- modern compounds, such as silicone grease for rubber.
We will also honestly discuss the limits of these methods and determine when the deformation has progressed too far and the part must be replaced.
Diagnosing and Preparing the Seal for Restoration
Before proceeding with the thermal or chemical revival of a deformed seal, it is necessary to soberly assess its current condition and prepare it correctly for work. Not every rubber part is suitable for restoration: if the material has completely degraded, any manipulation will be a waste of time. Thorough preliminary inspection and cleaning are the foundation of a successful repair. Accumulated dirt, grease, limescale deposits, or remnants of old sealant not only mask hidden cracks but also prevent restorative compounds from penetrating the polymer structure. A proper start guarantees that the subsequent treatment will restore the gasket's former elasticity and hermeticity.
Assessing the Degree of Damage: When the Rubber Can Still Be Saved
Before attempting to revive the seal, it is necessary to soberly assess its condition. Polymer aging is an irreversible process, and if the destruction has progressed too far, expending effort on restoration is pointless.
Perform a simple test to assess the part's viability:
- Visual Inspection: Examine the surface under good light. If through cracks, tears, or crumbling edges are found—the part is only suitable for replacement. Minor surface indentations and general shape deformation can still be corrected.
- Elasticity Test: Try to gently bend the gasket. If it retains minimal flexibility but feels "hardened"—it can be softened. If, however, the rubber cracks or breaks when attempting to bend it—the material has completely degraded.
- Material Texture: Sticky, "spreading" rubber in the hand that leaves black marks indicates irreversible destruction of polymer bonds.
| Feature | Can Be Saved | Only Replacement |
|---|---|---|
| Surface | Indented, with light residue | Deep cracks, tears |
| Flexibility | Stiff, but bends without cracking | Breaks when bent |
| Texture | Dry, dense | Sticky, crumbling |
If the gasket successfully passes this initial screening, you can proceed to prepare its surface.
Cleaning and Preparing the Part's Surface
Before starting the thermal or chemical restoration, the deformed gasket must be thoroughly cleaned. Accumulated dirt, grease, limescale deposits, or remnants of old sealant clog the micro-pores of the rubber and prevent the uniform penetration of restorative compounds.
The preparation process includes several simple steps:
- Initial Wash. Place the part in a warm soapy solution. Use regular liquid soap or dishwashing detergent. Gently remove surface contaminants with a soft sponge or an old toothbrush.
- Removing Stubborn Deposits. If limescale has formed on a plumbing gasket, treat it with a weak solution of citric acid or table vinegar (mixed with water in a 1:1 ratio), then rinse thoroughly.
- Degreasing. Wipe the part with ethyl or isopropyl alcohol. Avoid using aggressive solvents such as acetone or white spirit, as they can permanently destroy the structure of rubber not resistant to chemicals.
- Drying. Wipe the seal dry with a lint-free cloth. Do not use a hair dryer to speed up the process at this stage.
Only a completely clean and dry part is ready for subsequent revival procedures.
Thermal Method: How to Restore Shape Using Heat and Boiling
Thermal treatment is a classic and most accessible way to restore elasticity to deformed rubber at home. Under the influence of high temperature, the intermolecular bonds in the polymer structure temporarily weaken, making the material pliable and plastic. This allows for the easy removal of creases, dents, and the restoration of the seal's original geometry, which seemed irretrievably lost.
The main advantage of the thermal method is its simplicity: you do not need expensive chemicals or specialized equipment. It is enough to use regular water and controlled heating. Below, we will detail how to correctly perform the boiling procedure to soften the hardened part without damaging its structure.
Step-by-Step Guide to Boiling a Deformed Gasket
To restore the geometry and elasticity of a deformed seal using the boiling method, follow these steps:
- Container Preparation. Take a small metal pot or saucepan large enough to hold the gasket completely, without bending. Pour water until it completely covers the part.
- Secret Ingredient. Add regular table salt to the water (1–2 tablespoons per liter). The salt solution slightly raises the boiling point and promotes deeper and more even heating of the rubber structure.
- Heating Process. Submerge the gasket in the water and place the container on the stove. Bring the water to a boil over medium heat.
- Time Control. Boil the part for 5–10 minutes. For thin plumbing gaskets, 3–5 minutes is sufficient; for massive automotive seals, up to 15 minutes. The rubber should become soft and pliable.
- Removal. Carefully remove the seal with tongs or tweezers, taking care not to stretch or damage the heated, vulnerable material.
Proper Cooling and Shape Fixing
After the gasket has undergone thermal treatment, it is critically important to properly fix its geometry during cooling. Hot rubber is plastic, and if left to cool in a deformed state, all efforts will be in vain.
Perform the following steps to set the shape:
- Extraction: Carefully remove the part from boiling water using tweezers or tongs. Do not stretch it while hot.
- Shaping: Quickly place the gasket on a flat, heat-resistant surface or immediately install it in its designated seating (if safe).
- Fixing: Press the part with a flat, heavy object (e.g., a board with weight) or clamp it with pliers. If the seal is mounted on the device door, close it tightly.
- Cooling: To set the shape, you can gently rinse the fixed part with cold water. If the part cools under pressure, leave it in that position for 40–60 minutes.
Proper cooling ensures that the restored seal remains effective for a long time.
Chemical Methods for Softening and Restoring Elasticity
If thermal treatment restores the seal's original geometry, chemical methods aim for a deep restoration of the material's structure. Over time, rubber loses plasticizers, causing it to become hard, brittle, and prone to cracking. In such cases, readily available chemical reagents and specialized compounds help restore its original elasticity and softness.
In this section, we will examine two main approaches to the chemical "revival" of parts. First, we will look at time-tested folk remedies based on ammonia and kerosene, which deeply penetrate the polymer structure. Then, we will move on to milder and more modern methods—using professional silicone greases and impregnations that create a protective barrier and restore elasticity to the material without the risk of degradation.
Application of Ammonia and Kerosene Solution
For deeply softening hardened rubber and restoring its original elasticity, readily available chemical reagents—kerosene and ammonia—are excellent. These substances temporarily alter the material's structure, making it more pliable and allowing the original shape to be recovered.
Method 1. Using Kerosene
Kerosene effectively penetrates the rubber pores, restoring elasticity and helping to smooth out deformed areas.
- Pour a small amount of kerosene into an enamel or glass container.
- Place the gasket inside and leave it for 2–3 hours. During this time, the material will slightly swell and become soft.
- Remove the part and wash it thoroughly with warm, soapy water to remove residual solvent and strong odor, then dry it.
Method 2. Ammonia Solution
This method acts faster and is excellent for moderately hardened seals.
- Prepare an ammonia water solution by diluting it with clean water in a 1:7 ratio.
- Immerse the deformed gasket in the resulting bath for 30–60 minutes.
- Remove the part, rinse it under running water, and dry it.
Important Warning: This type of chemical revival provides a temporary effect, as volatile components evaporate from the rubber structure over time. To fix the achieved softness, the part must be properly treated in the next step.
Treatment with Silicone Greases and Special Impregnations
After deep softening with aggressive compounds or for the prevention of light rubber drying, milder but highly effective agents are used—silicone greases and specialized conditioners. They do not destroy the polymer structure but gently fill micro-cracks and restore elasticity to the material.
Step-by-Step Treatment Algorithm:
- Product Selection. Use a thick silicone grease (in tubes) or a liquid spray. Medical-grade glycerin is also excellent for household needs.
- Application. Apply the compound to the clean, dry gasket with a dense layer using a lint-free cloth or sponge.
- Exposure. Leave the part for 1–2 hours. During this time, the silicone or glycerin will deeply penetrate the rubber pores, restoring its elasticity and creating a reliable hydrophobic barrier.
- Final Cleaning. Wipe the seal dry with a clean rag, removing excess product so that dust does not stick to it.
This treatment not only restores the seal but also protects the part from UV radiation and temperature fluctuations.
Specifics of Working with Gaskets in Various Fields
The successful restoration of a seal largely depends on the conditions under which it operates. Restoring the elasticity of a small plumbing gasket is one thing, but restoring the complex contour of a household appliance or an automotive seal subjected to constant temperature changes is quite another. Each application dictates its own rules, as the rubber's properties must match the specific operational loads.
In this section, we will discuss the practical nuances of reviving seals in household use, automotive applications, and plumbing.
Restoring a Refrigerator Door Magnetic Seal
The refrigerator magnetic seal most often suffers from localized deformations (creases) in the corners and areas of frequent contact. This compromises the seal, causing the compressor to run non-stop and ice to form on the chamber walls. In this case, the rubber's softness can be restored and its shape recovered directly on the door, without disassembling the part.
Step-by-Step Thermal Regulation Method:
- Hair Dryer Heating. Direct a stream of hot air from a standard household hairdryer onto the deformed area from a distance of 10–15 cm. Heat the material evenly until it becomes soft and pliable. Avoid excessive heating to prevent damage to the door's plastic casing.
- Straightening. Gently smooth the heated seal with your fingers, pulling it toward the refrigerator's metal body to eliminate the gap.
- Fixing. Close the door tightly. If a small gap still remains in the deformed area, place a thin strip of cardboard or foam under the inner part of the seal. Secure the door with painter's tape for 3–4 hours until the rubber is completely cool.
If the seal has hardened all around the perimeter, it must be carefully removed from the grooves and soaked in hot water (about 70–80 °C) for 20–30 minutes, then immediately reinstalled and the door closed until it cools.
Reviving Automotive and Plumbing Gaskets
Restoring automotive and plumbing seals has its own nuances due to the harsh conditions of their operation—high pressure, temperature fluctuations, and contact with aggressive environments.
- Automotive Seals: Door and hood seals often suffer from drying out and UV exposure. To restore the rubber's softness and restore cabin airtightness, thoroughly clean the part of road dirt and treat it with penetrating silicone grease for rubber. For heavily hardened elements of headlights or hoses (not in contact with gasoline), brief softening in kerosene is permissible.
- Plumbing Gaskets: Mixer and cistern seals become covered with limescale and harden over time. First, clean them by soaking them in a warm citric acid solution. To soften the seal, apply a generous amount of thick silicone grease (preferably plumbing-grade, certified for water contact).
| Application Area | Main Problem | Express Revitalization Method |
|---|---|---|
| Automotive | UV rays, frost, loss of elasticity | Silicone spray grease or rubber conditioner |
| Plumbing | Limescale, deformation under pressure | Cleaning with citric acid + treatment with thick silicone gel |
Preventing Deformation and When Replacement is Necessary
Even the most successful restoration of a rubber seal will only be a temporary measure if the operating conditions are not corrected. Rubber is a material subject to natural aging, which is significantly accelerated by temperature fluctuations, UV radiation, and aggressive household chemicals. To avoid having to perform emergency revitalization of parts every few months, it is important to establish a proper preventive care system. However, the physicochemical capabilities of polymers are not limitless: sooner or later, the point comes when the material's structural changes become absolutely irreversible, and any further repair attempts lose practical meaning.
Care Rules to Prevent Rubber Drying
To extend the life of a restored or new rubber gasket and prevent a recurrence of airtightness loss, it is important to follow simple preventive care rules:
- Regular Cleaning. Dust, grease, and residues of household chemicals gradually destroy the rubber structure. Wash the seals with warm soapy water at least once every few months. Avoid using aggressive solvents and alcohol-based products.
- Protective Treatment. The main enemy of rubber is drying out. Regularly apply a thin layer of protective agent to the clean, dry surface. A thick silicone grease for rubber or medical-grade glycerin is best for this. They create a moisture-repellent barrier and maintain the material's elasticity.
- Protection from External Factors. If possible, protect rubber parts from direct sunlight (UV) and sharp temperature changes, which accelerate polymer aging.
- Proper Storage. Store spare gaskets in a dark, cool place, having first placed them in a sealed polyethylene bag to prevent natural drying in the air.
This simple care will prevent seal deformation and save you from the need for frequent part revitalization.
Signs of Final Material Degradation and Choosing a New Part
Even the most effective revitalization methods are powerless if the material has passed the point of no return. Attempts to restore a completely degraded seal will only temporarily postpone the problem and may lead to a sudden loss of airtightness at the most inopportune moment.
Signs that the gasket needs replacement:
- Deep cracks and crumbling: If deep cracks are visible on the surface upon slight bending, or if small particles are detaching from the part, the polymer structure is destroyed.
- Complete loss of elasticity ("glassing"): The rubber has become as hard as plastic and does not react to heat or chemical softeners.
- Stickiness and softening: The appearance of a sticky residue that cannot be washed off with soap indicates irreversible chemical decomposition of the rubber.
Rules for choosing a new part:
- Precise Parameters: Measure the inner and outer diameter, as well as the thickness of the old part or mounting groove, using calipers.
- Considering the Operating Environment: For plumbing and heating systems, choose heat-resistant silicone or EPDM. For automotive components in contact with fuel and oil, only oil and gasoline-resistant rubber (NBR) is suitable.
- Original Components: For household appliances and cars, always prefer original manufacturer parts (OEM)—this guarantees a precise fit and calculated service life.
Conclusion
Restoring a deformed rubber gasket is an excellent way to extend the life of household appliances, plumbing, or automotive components without unnecessary expense. Using the thermal method, kerosene, ammonia, or silicone greases allows the seal to regain its former softness and airtightness for a long time.
However, it is important to remember that polymer aging is an irreversible process. Any revitalization provides only a temporary effect. To encounter the problem of deformation less often, perform preventive care regularly: clean the seals of dirt and treat them with protective compounds. And if the rubber begins to crumble or develops deep cracks, do not delay buying a new part—the safety and reliability of equipment operation must always come first.