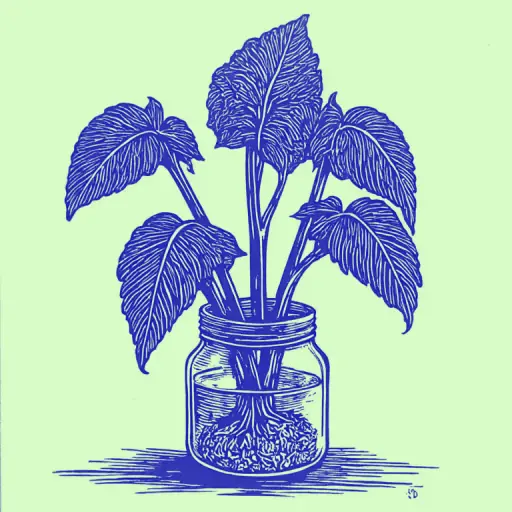
How to Root a Cut Ficus Branch Indoors for Fast Rooting
- 14 min read
- 17
Ficus is one of the most popular and beloved houseplants. Whether it is the elegant Benjamin ficus or the majestic rubber tree ficus, every plant enthusiast eventually faces the question of how to propagate it. Perhaps you are performing formative pruning, want to give a gift to a loved one, or are saving a accidentally broken shoot.
Cloning a ficus indoors is the most reliable way to get a new, strong plant. However, simply placing a branch in water is often not enough: the copious milky sap can block root growth, and an improper cut will lead to rot.
In this guide, we will cover:
- How to properly cut and prepare a cutting;
- What is more effective: rooting in water or in a special substrate;
- How to create the ideal microclimate for rapid root formation.
Choosing and Preparing Planting Material
The success of the entire rooting process is determined in the very first minutes—at the moment of selecting the donor branch and separating it from the mother plant. Even the strongest growth stimulant will not help if you take a weakened, overly old, or, conversely, an immature green shoot. Proper cutting preparation is the foundation that determines how quickly the plant will form callus and produce its first healthy roots.
Before starting the work, it is important to assess the condition of the mother ficus and prepare the correct tools. There are no trivial details in this matter: the cleanliness of the cut and the subsequent treatment of the wound surface directly affect whether the cutting will grow or simply rot in water. Let's examine how to perform these critically important first steps correctly.
How to Properly Cut a Ficus Branch
A proper cut is the basis of successful rooting. For this work, you will need a sharp utility or budding knife, previously disinfected with alcohol. Using household scissors or pruning shears is not recommended: they crush the stem, damaging the delicate vascular tissues, which subsequently leads to tissue rot.
For propagation, a terminal cutting or a section of a healthy semi-hardwood shoot, 10–15 cm long, is ideal. Too young green twigs dry out quickly, while old, woody branches are reluctant to root.
Make a slanted cut at a 45-degree angle, stepping back about 1 cm below a node (internode). This cut increases the contact area with moisture, stimulating active callus formation and future roots. The prepared cutting should have no more than 2–3 internodes remaining. Immediately remove the lower leaves to minimize moisture evaporation.
Removing Milky Sap and Treating the Cut
Immediately after cutting, a thick white latex—milky sap—will appear on the lower end of the cutting. If left, it will quickly harden in the air, clogging the vascular tissues. This will block moisture uptake and guarantee shoot rot.
To avoid this, perform the following steps:
- Rinse the cut under a stream of warm running water or place the cutting, lower end first, in a container of warm water for 1–2 hours until the sap stops oozing.
- To stimulate root formation on thicker shoots, make a light cross-cut or several longitudinal scratches 1–1.5 cm long at the base. This increases the area for callus formation.
- Blot the cut with a paper towel and air dry for 30–60 minutes.
- Dust the dried wound surface with ground activated or wood charcoal for disinfection.
Rooting Methods: Water vs. Soil
Choosing the rooting method is a key decision point for every plant enthusiast. Traditionally, two main methods are distinguished: rooting in water and direct planting in a light soil substrate. Each has its advantages and specific risks. For example, the water method is ideal for beginners because it allows visual monitoring of the first roots and timely detection of rot. Rooting in soil, conversely, saves time on subsequent adaptation and minimizes stress for delicate roots, but it requires strict control over the microclimate's moisture level.
The choice of a specific path often depends on your experience, available time, and the type of ficus. Below, we will detail both options so you can choose the most reliable method for your green pet.
Step-by-Step Process for Water Rooting with Charcoal
Water rooting is the most visible and simple way to get a new plant. Using activated charcoal prevents the water from becoming acidic and inhibits the development of putrefying bacteria.
Step-by-step algorithm:
- Container Preparation. Take a small vessel, preferably made of dark glass or opaque plastic. Roots form faster in such containers because light does not stimulate the growth of green algae.
- Water Preparation. Pour room-temperature, settled or filtered water.
- Adding Charcoal. Drop one tablet of activated charcoal (or a piece of wood charcoal) into the water. It will act as a natural antiseptic.
- Placing the Cutting. Submerge the prepared cutting in the water so that the lower nodes are immersed by 1.5–2 cm. Ensure that the leaves do not touch the water, or they will rot.
- Conditions. Place the container in a warm (+22...25 °C) and bright location, protected from direct sunlight.
No need to change the water during the rooting process; it should only be carefully topped up as it evaporates. In about 2–3 weeks, a white deposit (callus) will appear on the cut, followed by the first roots.
Rules for Planting a Cutting Directly in Substrate
Planting the cutting directly into soil minimizes stress for the plant, as it eliminates the stage of root adaptation when transplanting from water. For this method, the correct choice of substrate is critical. Ordinary garden soil is unsuitable—it is too heavy.
Ideal Substrate Recipe:
- A mixture of peat moss and perlite (or vermiculite) in a 1:1 ratio.
- Coconut substrate with added aerators.
Planting Algorithm:
- Container Preparation. Use small plastic pots (100–200 ml) with mandatory drainage holes.
- Cut Treatment. Dust the dried cut with a rooting stimulant (e.g., 'Kornevin').
- Planting. Make a hole in the moistened soil with a pencil and gently insert the cutting to a depth of 1.5–2 cm. Do not push it in forcefully to avoid rubbing off the preparation.
- Reducing Evaporation. If you have a large-leaved ficus, roll its leaves into a tube with the underside facing inward and secure it with a soft rubber band.
- Creating a Microclimate. Cover the cutting with a clear glass or bag to create a mini-greenhouse.
Propagation Features of Popular Ficus Species
Although the general rules for cutting preparation are the same for the entire family, in practice, plant enthusiasts often encounter the fact that different ficus species react to rooting completely differently. Small-leaved and large-leaved varieties have their own unique anatomical features—from the intensity of milky sap secretion to the surface area for moisture evaporation from the leaf blades.
To guarantee healthy roots and prevent rot, the classic method must be adapted to the specific species of your green plant. Next, we will examine the key nuances of working with two of the most popular indoor ficus varieties, whose propagation requirements differ significantly.
Specifics of Rooting the Small-Leafed Benjamin Ficus
The Benjamin Ficus is one of the most adaptable species for propagation, but its delicate, elegant branches require careful handling. For successful rooting, it is best to use a terminal cutting 10–15 cm long with a semi-hardwood stem. Overly green, herbaceous shoots rot quickly, while older, fully woody branches are reluctant to root.
Key rules for working with this species:
- Proper Cut: Make a neat diagonal cut with a sharp knife directly under a node. Using scissors is discouraged as they crush the delicate tissues.
- Cleaning Sap: Thoroughly rinse off the sticky milky sap with warm running water so that it does not dry on the cut and block root system development.
- Clustering: Plant 3–5 cuttings in one container. Their flexible stems can be braided into an elegant braid as they grow.
For quick results, place the prepared branches in water with an added tablet of activated charcoal or directly into loose substrate, making sure to cover it with a clear bag to create a moist greenhouse.
Nuances of Propagating the Large-Leafed Rubber Ficus
The large-leafed rubber ficus (Ficus elastica) requires a special approach due to its massive leaves and abundant milky sap secretion. Without proper preparation, cuttings will quickly wilt or rot.
Here are the key rules for propagating this giant:
- Sap Removal. Thoroughly rinse the cut with warm running water to wash off the sticky sap; otherwise, after drying, it will block root growth.
- Reducing Evaporation. Leave only 1–2 leaves on the cutting. Gently roll them into a tube with the underside facing inward and secure it with a soft rubber band or thread. This helps retain moisture within the tissues.
- Callus Stimulation. Make a couple of shallow longitudinal scratches about 1 cm long on the lower part of the woody stem. In areas where the bark is damaged, callus tissue and roots form much faster.
- Support Installation. To prevent the heavy cutting from falling into the soil, thread a wooden skewer through the rolled leaf tube and firmly embed it in the substrate.
For propagating the rubber variety, both terminal cuttings and stem segments with one healthy axillary bud are equally suitable.
Creating Conditions for Rapid Root Emergence
Proper cutting preparation is only half the battle. To initiate the active rooting process and awaken dormant buds, the cut ficus branch must have conditions recreated that are close to its native humid tropics. Without the optimal balance of heat, humidity, and gentle light, even a perfectly prepared shoot may simply stall in growth or, worse, begin to rot.
In home settings, this is achieved by creating a controlled environment that minimizes moisture evaporation from the leaf surface and stimulates cell division in the cut area to form callus. Let's examine how to properly organize this space and what auxiliary tools can significantly speed up the appearance of the first strong roots.
Setting Up the Greenhouse and Maintaining Microclimate
Creating a greenhouse effect is one of the main secrets to successful ficus rooting. Without a greenhouse, leaves evaporate moisture faster than the cutting can absorb it without roots.
A mini-greenhouse can be constructed at home using readily available materials:
- Plastic Cup or Cut Bottle. Cover the container with the cutting using a clear plastic cup or the top part of a bottle.
- Plastic Bag. Place a clear bag over the pot, securing it with a rubber band. Use wooden skewers as a frame so the film does not touch the leaves.
Optimal Microclimate Parameters:
- Temperature: Maintain a stable +22…+25 °C. If rooting occurs on a cool windowsill, place styrofoam under the pot or use a heated mat. Warm substrate stimulates rapid cell division.
- Light: Cuttings require bright, but diffused light. Direct sunlight under the film will create a "sauna" effect and kill the plant.
- Ventilation: Open the greenhouse daily for 10–15 minutes to allow fresh air in and remove condensation. This protects the cutting from mold.
Using Growth Stimulants and Plant Hormones
The greenhouse microclimate is a reliable foundation, but using plant hormones can nearly double the speed of initial root appearance. Proven preparations are excellent for ficuses:
- "Kornevin" (based on indolebutyric acid): Ideal for dusting the cut before planting in substrate. If you are rooting the branch in water, do not sprinkle the powder directly into the container—this will cause rot. It is better to soak the cutting in its solution for 6–12 hours before placing it in clean water.
- "Heteroauxin": A powerful root-inducing stimulant. Dissolve the tablet according to the instructions and soak the lower part of the cutting in it for 10–14 hours.
- "Epin-Extra" or "Circon": These adaptogens are useful for spraying the cutting's leaves directly in the greenhouse once a week. They reduce stress and stimulate photosynthesis.
Expert Tip: To make plant hormones work more effectively on woody shoots, make a thin cross-cut or several longitudinal bark scratches 1–2 cm long on the lower cut. This increases the surface area for absorbing the preparation and accelerates callus formation, from which the roots will develop. The main thing is to strictly observe the dosage, as an excess of hormones can slow down plant development.
Potential Difficulties in Rooting and Transplanting
Even with perfect adherence to temperature regimes and the use of the best growth stimulants, the ficus rooting process does not always go smoothly. Beginner gardeners often encounter alarming symptoms: the cutting suddenly drops its leaves, and its base begins to darken and spoil.
To avoid losing valuable planting material, it is important to recognize signs of distress in time and take emergency measures. Furthermore, successful root emergence is only half the battle; the young ficus still has a delicate stage of moving into permanent substrate to endure. Below, we will discuss how to save a rooting shoot at the first signs of wilting and how to perform its first transplant correctly.
What to Do When a Cutting Rots or Loses Leaves
Even when strictly following ficus propagation rules, gardeners sometimes encounter stem darkening or leaf drop. The main cause of rot is moisture stagnation and bacterial proliferation.
If you notice that the lower part of the cutting in water has darkened and become soft, act immediately:
- Remove the cutting and cut off the rotten part with a sharp, disinfected knife until you reach healthy, light-colored tissue. Make the cut at an angle (diagonal cut).
- Thoroughly rinse the cut area under warm water to completely remove any milky sap that hinders healing.
- Dry the cutting for 15–20 minutes, then sprinkle the cut with crushed activated charcoal.
- Change the water in the container to fresh water, making sure to add a new charcoal tablet for disinfection. If rooting in soil, completely replace the substrate with fresh, less moist material.
Losing one or two lower leaves is a natural process of the plant redistributing its energy. However, mass leaf drop signals stress, lack of light, or root rot. In this case, regulate the humidity in the greenhouse, ventilate it more often, and move the container to a brighter spot away from drafts.
Rules for Transplanting a Young Ficus into a Permanent Pot
Transplanting a young ficus that has successfully developed a root system is a delicate process. The roots of a rooted cutting are very fragile, so haste and carelessness are unacceptable here.
1. Choosing the Pot
The main mistake beginners make is planting a small cutting in a large pot "for future growth." In an excessive volume of soil, moisture stagnates quickly in areas not yet colonized by roots, leading to soil acidification and the death of the fragile plant. The first container should have a diameter of no more than 9–11 cm and must have drainage holes.
2. Substrate Preparation
A young ficus requires a light, nutritious, and airy soil with neutral or slightly acidic pH. The optimal mix composition is:
- Peat or leaf mold (2 parts);
- Sphagnum moss (1 part);
- Coarse river sand or perlite (1 part) to improve aeration.
3. Step-by-Step Planting Process
- Drainage: Place a layer of medium-grade expanded clay (about 1.5–2 cm) at the bottom of the pot to prevent waterlogging.
- Filling: Pour a small mound of prepared soil over the drainage layer.
- Placement: Carefully transfer the cutting into the pot. If rooting occurred in water, gently spread the delicate roots over the surface of the mound. If rooting was done in a peat pellet, plant it directly in the pellet, first carefully nicking and removing the outer mesh.
- Filling: Fill in the sides with soil, gently tapping the pot walls to ensure even distribution of the soil. Do not bury the root collar—it should be level with the soil surface.
- Watering: Water the seedling moderately with warm, settled water.
For the first 7–10 days after transplanting, keep the young ficus in a location with diffused light, protecting it from direct sunlight and drafts to minimize stress and accelerate adaptation.
Conclusion
Rooting a cut ficus branch indoors is a fascinating and rewarding process that even a beginner plant enthusiast can manage. The main secret to success lies in strictly following the basic rules: making a careful diagonal cut, ensuring the milky sap is removed, using growth stimulants, and maintaining a stable microclimate in the greenhouse.
Regardless of the method you choose—classic rooting in water with added activated charcoal or direct planting in loose substrate—your attention and care will surely pay off. Soon, an ordinary cutting will turn into a strong, healthy young plant ready to decorate your interior.
Don't be afraid to experiment with propagating different types of ficus, whether it's the small-leaved Benjamin or the majestic rubber tree. Be patient, provide the young shoot with warmth and diffused light, and your green companion will surely reward you with active growth and a lush, beautiful canopy for many years to come!