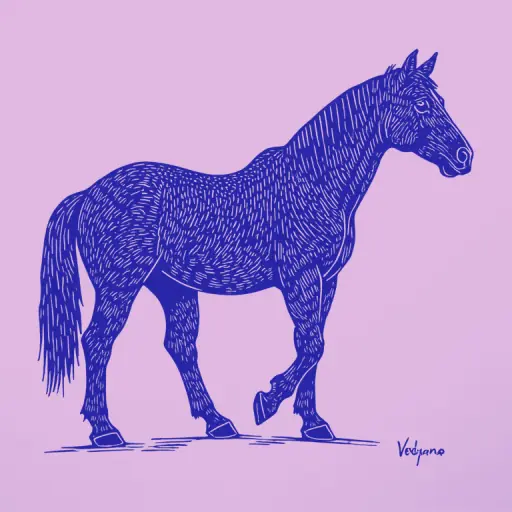
How to Sculpt a Horse from Snow: A Step-by-Step Guide
- 20 min read
- 22
Winter is not just an excuse for coziness by the fireplace, but also an ideal field for realizing the boldest creative fantasies. Among winter pastimes, snow sculpting holds a special place. Why a snow horse? Because it is not just a cute figure; it is a challenge to skill, an opportunity to work with volume, anatomy, and texture, transforming ordinary snow into a majestic, living work of art. The snow horse is a symbol of grace, strength, and a winter fairy tale, and creating such a figure requires not only imagination but also an understanding of basic sculpting principles.
This guide is designed so that you, regardless of your experience, can go from a simple snowball to a detailed, realistic horse. We will not just show you how to sculpt; we will explain why we take certain steps so that your sculpture is sturdy and beautiful. We have addressed all your questions: what snow to choose, what tools to bring, and how to achieve maximum realism. Our goal is to provide you with a step-by-step, maximally practical action plan that will allow you to enjoy the process of winter creativity and achieve an impressive result.
Before we move on to choosing the perfect snow, it is important to understand that success in this endeavor depends on proper preparation. We will go through all the preparatory stages so that you can focus on creativity, not on technical failures.
Section 1: The Foundation of Success – Preparing for Snow Horse Sculpting (Answer to: What snow is best? What tools are needed?)
So, we are ready to move from general ideas to the most important thing—the materials and preparation. Success in creating a monumental snow horse depends 80% on the correct choice of raw materials and tools. Incorrect snow or inadequate equipment can lead to your elaborate figure collapsing before you even have a chance to give it a mane.
Before starting to form the silhouette, it is necessary to ensure you have the ideal
1.1. Choosing the Ideal Snow: Moisture and Density for a Durable Sculpture
Choosing the right snow is not just a matter of having snow; it is the guarantee that your snow horse will not turn into a puddle after a couple of hours. To create a durable and detailed sculpture, we need snow with an ideal balance of moisture and density. The ideal snow should be moist enough to hold its shape well during sculpting, but it must not be too wet and sticky, otherwise, it will begin to melt and lose structure quickly.
How to determine the ideal snow on site?
Take a handful of snow and squeeze it tightly in your fist. If the snow holds its shape without crumbling into fine powder, and yet does not flow through your fingers, you have found the right material. If the snow is too dry and loose, it will crumble when adding details; if it is too wet, it will spread, which is critical for creating the horse's clear contours.
Temperature Influence:
The optimal temperature for working is around zero degrees Celsius. At lower temperatures, the snow becomes too hard and brittle, which makes it difficult to give the soft, organic shapes necessary for an anatomically correct horse. As the temperature rises, even by a couple of degrees, the melting process begins, and you will have to constantly work with water to stabilize it.
Tip for Beginners: If you doubt the quality of the snow, slightly warm it by adding a small amount of ice water to the handful and kneading it thoroughly. This will help distribute the moisture evenly and improve the material's plasticity to start working on the basic form.
1.2. Artist's Inventory: Gathering Necessary Tools and Materials (Gloves, Water, Blades)
After you have confirmed that your snow is ideal, it is time to gather the artist's arsenal. You do not need expensive professional tools to create a snow horse, but having a basic set will significantly simplify the process and improve the quality of the final work. The main thing is the correct approach to material selection.
Essential Minimum to Start:
- Gloves: These are your main barrier against cold and moisture. Avoid thin knitted gloves, as they will quickly get wet, and wet snow will hold its shape poorly. The ideal option is thick, waterproof sports or tactical gloves. It is advisable to have a spare pair of dry gloves in case the main pair gets wet.
- Water: A canister or bucket of cold water is an indispensable helper. Water is used not only to moisten the snow to make it more plastic but also to smooth out imperfections and strengthen the joints between parts of the sculpture.
- Shaping Tools: You will need items that allow you to cut and shape. A kitchen knife or a palette knife (if available), as well as sturdy but not sharp blades, will work well. For the initial stage, you can manage with your hands, but for refining details (such as the mane or muzzle), tools are critical.
Additional, but Useful Inventory:
- Shovel: Needed for collecting and moving large volumes of snow. The more snow you collect at once, the less time you will spend gathering material.
- Armature Elements (Optional): If you plan a large and tall horse, consider having thin, sturdy sticks or wire. They will serve as an internal skeleton, preventing the collapse of thin parts like the neck or legs.
Remember that every tool is an extension of your hand. Start with the simplest, and then move on to detailing, using these materials to achieve the desired effect.
1.3. Choosing and Preparing the Location: How to Ensure the Stability and Preservation of Your Figure
Choosing a spot for your snow horse is not just a matter of convenience; it is a critically important stage that directly affects the durability and appearance of your sculpture. An incorrect location can lead to the rapid destruction of the figure due to weather conditions or human interference.
Criteria for Choosing the Ideal Site:
- Surface Stability: A flat, dense, well-compacted snow surface is ideal. Avoid areas where the snow is loose or on slopes, as they are prone to avalanches and collapses.
- Wind Protection: Strong wind is the main enemy of a snow sculpture. Choose a spot protected by natural barriers (such as dense trees, low fences, or natural shelters). This will help maintain the shape and prevent drying/melting.
- Accessibility and Safety: Ensure that the chosen location is safe for you and your team. If you are working in a public area, check the park or territory rules regarding the creation of sculptures.
- Lighting (for Photo Documentation): If you plan to photograph your work, choose a spot with good, even lighting that will emphasize the texture and volume of your horse.
Preparing the Location Before Sculpting:
Section 2: Anatomy of the Process – Step-by-Step Technique for Creating a Snow Horse (Answer to: Step-by-Step Guide to Sculpting a Horse from Snow)
So, we have prepared the ideal snow material and chosen a reliable location. Now it is time to move from raw material to work of art. This stage is the heart of our project, where we transform a pile of snow into a majestic snow horse. We will move from the general to the specific, starting with a rough mass and gradually adding anatomical accuracy.
Our goal is not just to sculpt a shape, but to create a recognizable silhouette of a horse. We will begin by creating a massive yet proportional body, and then move on to detailing the head, neck, and limbs to give the figure vitality and realism.
2.1. Creating the Basic Form: From Large Lump to Body Outline (Principles of Volume Building)
After you have prepared the ideal snow substrate and gathered all the necessary equipment, it is time to move on to the most exciting stage—creating volume. The main principle when sculpting any large figure, including a snow horse, is to build from the general to the specific. Do not try to sculpt a detailed head or mane right away; first, create a massive but correct framework.
Stages of Building Basic Volume:
- Forming the Central Lump: Start by creating the largest, main lump of snow. This will be the horse's torso. As mentioned before, it is best to roll the lump on the ground, gradually increasing its diameter until it is dense and stable. Compact it with your hands so the snow holds its shape.
- Creating Axes: A horse is an elongated but powerful shape. Instead of a perfect sphere, aim for an oval. Consider how the animal's weight is distributed. The torso must be wide and sturdy.
- Building the Limbs: Do not sculpt the legs immediately as separate parts. First, form four massive pieces attached to the main body.
When transitioning from massive volumes to delicate, fine elements—such as a slender neck, graceful legs, or a mane—the risk of collapse increases exponentially. The main task here is to ensure structural integrity without sacrificing aesthetics. Two key methods are used for this: hydrostatic stabilization and internal armoring.
Hydrostatic Stabilization: The Secret to Density
Water is your most powerful, yet often underestimated, tool. It not only helps smooth the surface but also increases the cohesion of snow grains.
- "Compaction-Spraying" Method: After forming a thin part (e.g., the tip of an ear or the edge of the mane), gently mist this area with a very fine, even layer of water from a spray bottle. Do not pour water in a stream! The goal is to moisten the surface so that the snow "glues" together under the effect of freezing.
- "Bonding" Details: If you are attaching a small detail (e.g., an ear) to a larger body, first slightly dampen the contact area of both parts. Then, press them firmly together and let them sit in the cold. This creates a strong, almost monolithic connection.
Internal Supports: When Snow Is Not Enough
For very tall or protruding elements that cannot support their own weight, internal support is necessary. This is especially relevant for the neck or head if you want to give it an unnaturally high or graceful shape.
- Framework Base: Use strong but flexible materials, such as thin branches, wire (if it won't damage the texture), or even plastic rods that you have pre-frozen.
- Support Integration: Insert the support into the base of the element (e.g., into the base of the neck). Then, using wet snow, carefully wrap and secure this support, completely masking it. The snow must envelop the frame on all sides so that it becomes indistinguishable from the natural structure.
Practical Tip: Always begin stabilization with the thinnest and most protruding parts, as they are most susceptible to premature collapse.
3.2. Achieving Photorealism: How to Imitate Fur and Musculature (Texturing and Carving)
After achieving structural integrity and preventing collapse, comes the most magical stage—giving your snow horse life. Photorealism in snow sculpture is achieved not only through form but also through imitating texture, which gives the figure volume and believability.
Imitating Fur: Texturing Techniques
The horse's coat is not a smooth surface. To convey this texture, use several methods, depending on the desired level of detail:
- **Method
3.3. Secrets to Durability: Tips for Protecting Your Sculpture from Melting
After achieving the perfect texture and giving your snow horse realistic features, the most critical stage begins—ensuring its longevity. Snow, being a natural material, is very sensitive to temperature and humidity, so without proper protection, your masterpiece can quickly lose its shape.
Strengthening and Protection Strategies:
Moisture Control: The most common cause of destruction is temperature fluctuations and melting. If you know the sculpture will be outdoors for a long time, try to place it in a spot with minimal direct sunlight. The sun is the arch-enemy of snow sculpture.
Internal Stabilization (for large works): If your horse is very tall or has thin, protruding elements (such as a long mane or thin legs), consider creating an internal frame. This could be an invisible frame made of strong but not too thick branches or even thin metal rods, which you then carefully wrap with snow. This prevents collapse under its own weight.
Using "Freezing" Agents (with caution): In extremely cold conditions, when working with very wet snow, a small amount of crushed ice or very cold, almost frozen snow can be used to "seal" the surface layers. This helps reduce the rate of evaporation and melting.
Wind Protection: Strong wind accelerates sublimation (ice evaporation) and dries out the snow, making it brittle. If possible, place the sculpture under a canopy or in a sheltered corner where gusts of wind are minimal.
Decorative "Patches": If you notice a part starting to settle or crumble, do not try to simply press it down. It is best to take fresh, firmly packed snow that matches the texture and carefully "patch" the damaged area, using a technique similar to restoration.
Remember that even the most brilliant snow sculpture is a temporary work of art. Cherish this process, enjoy the moment, and remember that even small changes in environmental conditions require constant, attentive care.
Section 4: Variations and Expanding Horizons – From Horse to Winter Festival (Response to: Ideas for Snow Sculpting)
After mastering the basic techniques for creating and stabilizing your snow horse, it is time to expand your horizons. Snow sculpting is not just about perfect realism; it is about creative freedom. If you feel you have mastered equine anatomy, you can confidently move on to larger and more diverse projects.
This section will show how to adapt the skills gained from sculpting a horse for different purposes. We will look at how to simplify the task for the youngest, how to move on to complex, multi-component compositions, and how to turn a single figure into part of a large winter art installation.
4.1. Ideas for Beginners: Simplified Snow Horse for Children
Once you have mastered the basic techniques for creating a snow horse, it is time to think about how to make the process as fun and accessible as possible for the youngest. For children, the main thing is not perfect anatomy, but the creative process itself and the joy of creating something large and beautiful. We offer several simplified approaches that will allow even the youngest masters to create a recognizable and cute snow horse.
🐴 Simple Horse: Focus on Silhouette
For beginners and young children, it is best to avoid complex muscle detailing and fine features. The goal is to create a recognizable silhouette.
- Base: Start by creating a large, rounded mound that will serve as the body. It must be dense enough to hold its shape.
- Head and Neck: Form the head and neck as two smaller spheres firmly attached to the body. Do not strive for realistic anatomy; let it be a stylized, friendly horse.
- Limbs: Make four thick, cylindrical
When you have mastered basic proportions and learned to stabilize a simple figure, it is time to move on to true mastery. Creating a complex, monumental snow horse requires not only sculpting skill but also an understanding of engineering principles. Two powerful tools come into play here: armatures and the principle of the "Roman Arch."
Armatures: The Skeleton of Your Sculpture
For large, tall, or heavily elongated parts of the horse (such as a neck that needs to be graceful, or legs that must not sag under the body's weight), snow alone will not support the load. An internal armature is necessary here.
- Armature Materials: Use sturdy, straight branches, thick sticks, or even metal rods (if working in controlled conditions).
- Attachment Principle: The armature must be integrated into the body, not just attached to it. For example, if you are making a tall neck, the stick must pass inside the snow mass, and then the snow must tightly wrap around it, creating the illusion of an organic form.
- Application to the Horse: To create a graceful curve in the neck, insert a stick, bending it at the desired point, and then carefully layer snow to hide this "skeleton." This is critical for maintaining verticality.
The "Roman Arch" Principle: Ensuring Stability
This principle applies not only to bridges but to any sculpture that has significant overhangs or weight transitions. It ensures that the weight is distributed evenly, rather than pressing down on a single point.
- How it Works: Instead of simply piling snow onto a thin leg, you create an internal support that redistributes the load onto a wider, more massive part of the body (such as the torso).
- Practical Example: When sculpting limbs, especially if they are meant to be long and thin, do not simply "attach" them. Create an internal "arch" of tightly packed snow that rests on the main body mass, and then form the external, thinner shape of the leg.
Step-by-Step Approach to Complex Assembly
- Design: Before touching the snow, sketch a design noting all points of maximum load and areas requiring internal support.
- Armature Installation: Insert all necessary supports (sticks, arches) into the base form. Ensure they are securely fastened in the densest snow.
- Volume Building: Begin building up the snow around the armature, using it as an internal template. This allows you to construct the form rather than just "sculpting" it.
- Finishing Touches: Only after the entire structure is securely fastened should you proceed to texturing and adding fine details, as described in previous sections.
4.3. Master Tips: Using the Snow Horse as a Base for Winter Decor
Once you have mastered the basic techniques for creating a snow horse and learned to strengthen its structure, it is time to move from a simple exercise to creating a true winter art object. The snow horse can become not just a standalone sculpture, but a central element of a large-scale, festive decoration. The mastery here lies in integrating the figure into its environment and using it as a base for more complex compositions.
Integration into the Winter Landscape
Do not limit yourself to the horse standing alone in the snow. Use it as an anchor for the entire composition. This adds depth and narrative to your work.
- "Morning Fog" Scenario: Around the horse's legs, you can carefully lay smaller, looser snow elements to imitate clouds of fog. Use a carving technique to create the effect of light mist at the base.
- Background Decoration: If the horse is standing near a tree or fence, use these elements as a natural backdrop. You can sculpt snow "bushes" or a "hedge" around it to emphasize its silhouette.
- Symbolism: Consider what your horse symbolizes. If it is a mythical steed, add elements around it reminiscent of a magical forest or starry sky (using dark snow or charcoal to simulate stars).
The Horse as a Base for Festival Decor
The most advanced level is using the horse as a central element in a multi-component installation. Here, it ceases to be just an animal and becomes part of a winter spectacle.
- Royal Throne: If the horse looks majestic, you can build a small snow "throne" or pedestal around it. This requires a sturdier base than just the ground and may involve using denser, compacted snow.
- Narrative Line: Create a mini-story. For example, the horse can "lead" a group of other, smaller snow figures (such as snow deer or small travelers) lined up stretching into the distance. This transforms a static sculpture into a dynamic scene.
- Interactive Elements (with caution): Depending on event rules, you can add elements that interact with the figure. For example, small snow "gates" or an "arch" in front of the horse through which viewers can pass, creating a sense of immersion in the winter world.
Tips for "Bringing" the Sculpture to Life
To make your snow horse look not just like a sculpture, but like a living creature in a winter fairy tale, use the following techniques:
- Light and Shadow Play: Position the sculpture so that natural winter light falls on it at a specific angle. This will emphasize the texture you created in Section 3 and give the figure volume.
- Contrast: If the surrounding snow is very white, use dark accents (such as charcoal, moss, or specially colored snow) to simulate eyes, nostrils, or a mane. Contrast is the key to drama.
Remember that in decorative mastery, not only the perfect form matters, but also the overall atmosphere you create around your snow horse.
Conclusion: Enjoy Winter Creativity
After mastering the basic techniques for creating a realistic snow horse and learning to stabilize its structure, the most exciting stage arrives—transforming a solitary sculpture into part of a grand winter canvas. At this stage, we move from creating an individual sculpture to integrating the snow horse into large-scale winter decor. This allows your creation to gain not just form, but a story and a place in the winter landscape.
The Horse as a Central Compositional Element
Your snow horse can be more than just an object for contemplation; it can be a key character in an entire winter scene. Think about what is happening around it. The horse can be:
- A Guide: It can stand at the edge of a snowy forest, as if directing the viewer deeper into the composition.
- A Hero of Action: If you are creating a battle or festival scene, the horse can be in motion, which requires a more dynamic pose and more complex internal support.
- Part of a Narrative: It can be pulling a carriage, or another, smaller character (such as a snow deer or a human figure) can be near it, giving the piece a narrative meaning.
Using the Environment to Enhance the Effect
Realism and atmosphere are achieved not only by the horse itself but also by how it interacts with its surrounding world. Use snow and natural elements as additional "materials" for the sculpture:
- Snow "Grounds": Create an uneven, natural landscape around the horse. Not just a flat circle, but hills, mounds, and tracks leading to it. This instantly gives the piece depth.
- Trees and Branches: If there are trees nearby, use them as a natural backdrop. You can gently "wrap" the base of the horse with branches to create the feeling that it is standing in a snowy forest.
- Light and Shadow: This is the most underestimated tool. If you are working in natural light, try to position the horse so that the sun (or artificial light, if it is an evening installation) creates distinct shadows. Shadows are what give three-dimensionality and drama, making your snow figure come alive.
From Sculpture to Installation
The transition from "how to sculpt" to "how to present" is a shift from craft to art. If you want your horse to become part of a large winter festival, consider the following techniques:
- Scaling: If you have created a perfect medium-sized figure, think about how to scale it up without losing proportions. Sometimes it is better to create several figures of different sizes to create a sense of depth and movement.
- Lighting Integration: For evening exhibitions, use LED strips carefully hidden under the base or inside the "mane." Soft, warm light shining through the snow creates a magical, fairy-tale effect.
Remember that a snow sculpture is ephemeral art. Its beauty is in the moment. Enjoy the creation process, watch how your horse changes under the influence of wind and temperature, and appreciate this unique winter creative experience.