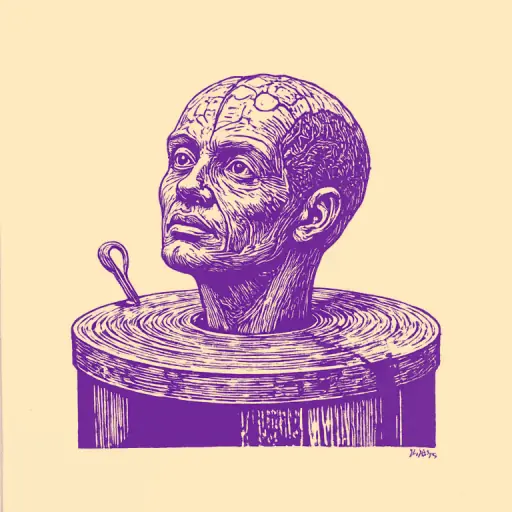
How to Sculpt a Human Head According to Principles of Plastic Anatomy and Sculpture
- 15 min read
- 59
Sculpting the human head is one of the most fascinating and simultaneously complex stages in a sculptor's training. Creating a realistic portrait requires not just developed fine motor skills, but also a deep understanding of internal structure: how plastic anatomy and the human skull hidden beneath soft tissues determine external forms. Without knowledge of the basic laws of academic drawing and sculpting, it is easy to make mistakes that will make the face look unnatural or asymmetrical.
In this practical guide, we will cover the entire process of creating a head sculpture from 'A' to 'Z.' You will learn how to correctly calculate facial proportions, assemble a sturdy foil and wire armature, and master the step-by-step sculpting of the eyes, nose, and lips. Regardless of the material you choose—classic sculpting clay, pliable polymer clay, or regular clay—these universal rules will help you confidently convey character and lively facial expression in three dimensions.
Preparation for Work: Materials, Tools, and Workspace Setup
Before diving into the subtleties of plastic anatomy and beginning to shape the first features of the face, it is necessary to properly prepare the foundation for creativity. Success in sculpture is half dependent on how comfortably your workspace is organized and what materials are readily available. Inappropriate clay or the lack of the right tools can easily turn an engaging process into a series of technical difficulties.
In this section, we will discuss how to properly set up the sculptor's workspace so that nothing distracts you from creation. We will help you decide on the type of modeling mass—be it classic clay, pliable sculpting clay, or modern polymer clay—and select a basic set of tools that will make the work precise and neat.
Material Selection: Advantages of Sculpting Clay, Polymer, and Classic Clay
Material selection is the first and most crucial step, determining the working technique, the speed of sculpture creation, and the durability of the finished human head. For academic study and creative experiments, three main materials are most often used:
- Sculpting Clay. Ideal for studying plastic anatomy and for multiple practice sessions. It does not dry, allowing you to endlessly adjust facial proportions, work out expressions, and detail. For work, it is best to choose a medium-firm material.
- Polymer Clay (Plastic). The optimal choice for creating original dolls and miniature portraits. It allows for jeweler-like detailing of eyelids, lips, and ear shells, and after baking in a regular oven, it becomes hard and durable.
- Classic Clay. A traditional material for large academic busts. It is incredibly pliable in the hands but requires constant moisture control and subsequent firing or removal of a plaster mold, otherwise, the finished piece will crack upon drying.
| Material | Main Advantage | Optimal Scale |
|---|---|---|
| Sculpting Clay | Ability to endlessly correct mistakes | Any (from miniatures to full-size busts) |
| Polymer Clay | Strength after baking, fine detailing | Small and medium (up to 15-20 cm) |
| Classic Clay | Natural plasticity, ease of mass acquisition | Large (from 1:1 to life-size and larger) |
Sculpting Tools: Types of Tools, Boards, and Workspace Requirements
After deciding on the material, you must prepare your tools and organize your workspace correctly. The right choice of tools directly affects the accuracy of conveying anatomical details and the comfort of the work.
Main Tools (Sculpting Tools):
- Wooden and plastic spatulas: indispensable for laying out basic volumes, shaping cheek, forehead, and neck planes.
- Loop tools (wire): used for cutting away excess mass, smoothing surfaces, and gently modeling large forms.
- Metal tools with miniature tips (balls, smoothers): necessary for fine detailing of eye sockets, nostrils, lips, and ear shells.
Workspace Organization:
- Turntable: A key element. The human head must be constantly rotated to check symmetry and silhouette from all angles.
- Lighting: Set up a directional light source (such as an adjustable desk lamp) from the side or above. This will create clear light and shadow boundaries, helping you see the plasticity of the face.
- Workboard: Use a dense plastic or lacquered wooden board that does not absorb moisture.
Keep a damp cloth (for classic clay) or alcohol wipes (for cleaning tools) handy to maintain neatness during the process.
Creating a Sturdy Armature and Building the General Mass of the Head
Every academic sculpture begins not with detailing, but with creating a strong, stable foundation. Without reliable internal support, heavy sculpting clay or clay will quickly deform under its own weight, nullifying all efforts to maintain proportions. The armature acts as the 'skeleton,' holding the mass and allowing the work to be freely rotated during modeling. At this stage, we lay the foundation for the future human head. First, we will construct a rigid framework capable of supporting the weight of the material, and then we will move on to building the primary volume. This will allow us to smoothly transition from an abstract egg shape to the expressive bony structure of the skull, upon which all facial features will later be built.
Step-by-Step Construction of a Sturdy Wire and Foil Armature
To create a reliable 'skeleton' for the future head, you will need: thick aluminum or copper wire (3–5 mm in diameter), pliers, a roll of aluminum foil, masking tape, and a wooden base stand.
The step-by-step process of assembling the armature:
- Mounting the Axis. Secure a vertical piece of thick wire in the center of the wooden base. This will be the future neck and the support axis of the entire sculpture.
- Creating the Loop. At the free upper end of the wire, form a loop in the shape of an oval using pliers. This will prevent the sculptural mass from rotating around the axis.
- Building Volume with Foil. Tightly wrap the loop with several layers of aluminum foil, giving it a basic egg shape (the back of the head should be slightly wider than the face). Compress the foil thoroughly with your hands to ensure there are no internal voids. This saves material and lightens the head's weight.
- Reinforcement. Wrap the resulting form with thin wire or masking tape. This will create a rough surface for better adhesion with the clay or plasticine.
Building Primary Volume: From Egg Shape to Skull Structure
Start by applying the material evenly onto the prepared armature. First, form a generalized egg shape that tapers toward the chin and widens in the occipital area. At this stage, it is important to constantly rotate the work, checking the silhouette from the front and profile.
Once the basic volume is established, proceed to define the skull's bone structure using the "subtraction" method—sketching out major planes:
- Facial Plane: Slightly cut the front of the "egg" with a spatula, defining a flat front.
- Eye Sockets: Sketch soft depressions beneath the brow ridges.
- Cheekbones and Jaw: Define the width of the face at the cheekbones and form a sharp angle at the lower jaw with the chin.
- Occipital Volume: Emphasize the roundness of the cranium and its transition into the semi-cylindrical neck.
Work with large planes, as if carving the form out of stone. This will create the correct anatomical foundation for future details.
Principles of Plastic Anatomy and Marking Basic Facial Proportions
Once the overall mass of the skull is built up, the sculptor faces the most crucial task: correctly "placing" the face onto the created base. Plastic anatomy is not just dry theory, but a living tool that helps avoid gross errors in symmetry and scale. For the future portrait to look harmonious and realistic, we must mark out the model based on time-tested academic canons.
At this stage, we transform the featureless form into a structured coordinate system. We will define key landmarks that will set the position of each facial element relative to the others. Accurate marking of axial lines and understanding proportional divisions will help you confidently move on to the detailed refinement of the character and the subject's expression.
Academic Canons: Axial Lines, Symmetry, and Dividing the Head into Three Parts
In academic sculpture, a system of axial lines and the classic canon of head division are used to maintain facial proportions and symmetry.
First, draw the vertical axis of symmetry (median line), which divides the face exactly in half. It passes through the middle of the forehead, the bridge of the nose, the tip of the nose, the philtrum, and the center of the chin. This line helps control the parity of all elements.
Next, apply the horizontal eye line, which divides the entire height of the head (from the crown to the chin) exactly in half.
The facial area (from the hairline to the bottom of the chin) is divided into three equal parts:
- Upper third: from the hairline to the brow ridges.
- Middle third: from the brow ridges to the base (tip) of the nose.
- Lower third: from the base of the nose to the edge of the chin.
The lower third is also divided into three parts: the upper third of this zone defines the line of the mouth, the middle defines the chin crease, and the lower defines the chin itself.
Anatomical Landmarks: Determining the Position of Eyes, Nose, Lips, and Ears
To accurately place facial details on the prepared scheme, use key anatomical reference points:
- Eyes: The eye line divides the height of the head exactly in half. The distance between the eyes (on the bridge of the nose) equals the width of one eye, and the total width of the face at this level accommodates exactly five eyes.
- Nose: The base of the nose lies on the lower boundary of the middle third of the face. The width of the nostrils in classical proportion projects vertically downward from the inner corners of the eyes (tear ducts).
- Lips: The line of the mouth is located approximately one-third of the distance from the base of the nose to the edge of the chin. At a relaxed facial expression, the corners of the lips project onto imaginary verticals dropped from the centers of the pupils.
- Ears: The height of the ear is strictly limited: the lower edge of the lobe is at the level of the base of the nose, and the upper edge of the helix is at the level of the brow ridges. In profile view, the ear axis is slightly tilted backward, mirroring the tilt of the nasal bridge.
Detailed Sculpting and Refinement of Facial Features
When the general proportions of the head are established, and the key anatomical landmarks are marked on the plastic base, the most engaging and responsible stage begins—the detailed refinement of the face. It is at this stage that the generalized model transforms into a living image with a unique character and expressive expression.
Sculpting fine details requires extreme precision, patience, and correct tool usage. We move from large volumes to the finest plasticity: we will sequentially build up and refine the shape of the eyes, model the curves of the lips, build the characteristic relief of the nose and cheeks, and work out the complex curves of the earlobes. Every step you take at this stage must adhere to the laws of symmetry and plastic anatomy, transforming the material into a realistic sculpture.
Step-by-Step Modeling of Realistic Eyeballs, Eyelids, and Lips with Tools
To sculpt realistic eyes and lips, use thin metal and wooden tools (spatulas and loops).
Modeling Eyeballs and Eyelids:
- Base: Roll out two identical spheres and place them in the eye sockets. Gently press them in so they settle into place.
- Eyelids: Roll out four thin strips. Lay them over the top and bottom of each sphere. Remember the anatomical rule: the upper eyelid always slightly overlaps the lower eyelid at the outer corner of the eye.
- Smoothing: Gently press the outer edges of the eyelids against the brow ridges and cheekbones with a flat spatula, preserving a clear inner boundary for the eye opening.
Modeling Lips:
- Marking: Sketch the line of the mouth with a thin knife tool on the convex area ("tooth semi-cylinder").
- Volume: Form the upper lip in the shape of a shallow 'M' and the lower lip from two soft volumes. The upper lip usually overhangs the lower one slightly.
- Detailing: Deepen the corners of the mouth with a round tool, drawing them inward into the cheek volume to give the face a natural expression.
Modeling the Shape of the Nose, Earlobes, Cheeks, and Conveying Expression
When moving on to modeling the nose, cheeks, and ears, it is important to remember their rigid anatomical connection to the skull's bone structure.
- Nose Sculpting. Start by placing a clay prism on the axial line. Define the bridge, the dorsum, the tip, and the nostrils. Carefully carve out the nostrils from below with a loop tool, forming the septum. Remember that the plane of the nose tip defines the character of the entire profile.
- Cheeks. The cheekbones determine the width of the face. Build up volume in the area of the zygomatic arches with small strokes, smoothly blending them into the temples and cheeks. This creates the necessary relief and correct shading.
- Earlobes. Position the ears in the projection between the brow line and the base of the nose. Mark the tilt of the ear—it must be parallel to the nasal bridge line. Form the outer shape of the "shell," and then refine the helix, antihelix, and lobe with a thin round tool.
- Conveying Expression. A living facial expression is achieved by changing the shape of the nasolabial folds, the tension of the skin on the cheeks, and a slight squint. Slightly alter the position of the facial muscles with a tool to convey the desired emotion.
Final Finishing, Symmetry Check, and Error Correction
When the basic facial features and expressive nuances have been worked out, one of the most critical stages begins—the final refinement of the sculpture. At this stage, it is important to step away from small details and look at the work as a whole to assess its integrity and harmony. Even minor asymmetry or texture unevenness can destroy the realism of the image, so our main task now is to perfect the form.
Final finishing requires extreme concentration and a systematic approach. We will learn how to correctly evaluate the head's silhouette under different lighting angles, identify hidden plastic defects, and timely correct proportional deviations that often escape notice during active sculpting.
Surface Smoothing Techniques and Silhouette Check from All Angles
After completing the main sculpting, it is necessary to give the work a finished look and ensure the anatomical volumes are correct.
Surface Smoothing Techniques:
- Sculpting Clay: Use isopropyl alcohol, white spirit, or baby oil. Apply a drop of liquid to a medium-stiffness synthetic brush and gently smooth out tool marks.
- Polymer Clay: To remove fingerprints, use lint-free wet wipes or a cotton swab dipped in alcohol. Flexible silicone tools are also effective.
- Modeling Clay: Use a damp sponge, a soft cycler, or a fan brush. Avoid excess water so that the clay does not crack when drying.
Silhouette Check from All Angles:
To control facial symmetry, it is not enough to look at the sculpture only from the front:
- Rotation: Constantly rotate the sculpting stand. The silhouette must look harmonious in profile and three-quarter view.
- Mirror Method: Look at the work through a mirror or take a photo with your phone and flip the image horizontally. This will instantly reveal hidden distortions.
- Top and Bottom View: A top view will show the correctness of the brow and cheekbone curves, while a bottom view will show the symmetry of the nostrils and jaw.
Typical Beginner Errors in Facial Proportions and How to Correct Them
Even after careful surface smoothing and checking the silhouette from all angles, novice sculptors often encounter characteristic distortions in form. Understanding these mistakes will help correct the work in time before the material fully sets.
Here are the most common errors and practical ways to correct them:
- "Flat" Face. Beginners often sculpt facial features on a single plane, forgetting about three-dimensional volume. How to correct: Check the head in profile. The eye sockets should be recessed into the skull, and the bridge of the nose and jaw should project forward. Cut away excess volume in the temple area and deepen the eye sockets with a loop tool.
- Overly High Eye Line. It seems as if the eyes are located in the upper part of the face, resulting in a forehead that is too small. How to correct: Remember that the eye line divides the entire height of the head exactly in half. Measure the distance from the crown to the bridge of the nose and from the bridge of the nose to the chin—they must be equal. If necessary, cut away the frontal bone and lower the brow ridges.
- "Flattened" Occipital Area. Attention is often focused only on the facial part, causing the back of the skull to look flat. How to correct: Build up mass on the occipital and parietal bones, referencing the basic ovoid shape.
- Uneven Level of Paired Elements. Eyes or ears often end up at different heights. How to correct: Draw horizontal axial lines across the raw form with a tool. Cut away protruding parts and build up sunken areas, referencing the markings.
Conclusion
Sculpting the human head is a complex but incredibly fascinating process that combines precise scientific calculation with pure creativity. Mastering plastic anatomy, proportion rules, and working with the armature requires time and regular practice. Do not be discouraged if your first works seem imperfect. Every new model develops your spatial thinking and refines the precision of your hands.
For further development, we recommend:
- Regularly making quick sketches of faces from life or from photographs.
- Copying classical plaster casts (e.g., a bust or David's head).
- Experimenting with different materials—from soft sculpting clay to bakeable polymer clay.
Constant practice and attention to detail will help you create truly lifelike, expressive, and anatomically accurate sculptural portraits over time. We wish you inspiration and success in your creative endeavors!