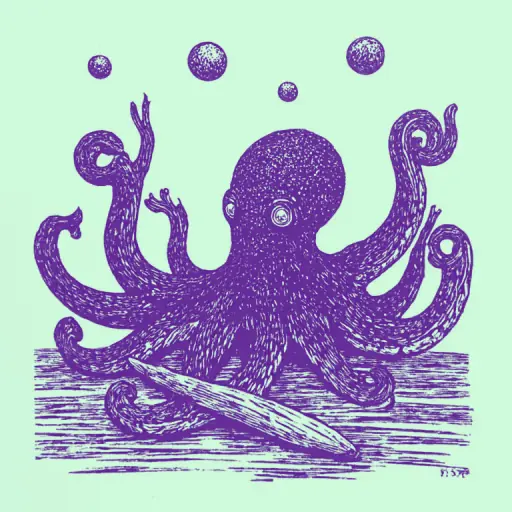
How to Sculpt Sea Animals from Plasticine Following Instructions
- 14 min read
- 64
Welcome to the world of underwater creativity! If you have ever dreamed of creating your own bright and vibrant "Underwater World" out of plasticine, you have come to the right place. This article is your detailed, step-by-step guide to transforming ordinary plasticine into an entire marine ecosystem. Our goal is not just to sculpt beautiful crafts, but to conduct an engaging creative process that will be beneficial for both you and your child.
We know you are interested in everything from simple and quick schemes for toddlers (like sculpting a starfish or a fish) to more complex masterclasses (octopus, crab) and, of course, creating a full "Underwater World" composition on cardboard. Here, we have gathered all the necessary knowledge and life hacks to make the sculpting process as simple and enjoyable as possible.
In this guide, we will not only show you how to sculpt various sea creatures—from graceful fish to mysterious octopuses—but also tell you how to properly prepare the materials so that your work turns out perfect. Ready to dive into the depths of creativity? Then let's begin!
Preparation for Creativity: Choosing Materials and Tools
Before diving into the amazing underwater world and letting your imagination run wild, it is necessary to properly prepare your workspace. The success of the creative process and the neatness of the future figures largely depend on the correctly chosen base and auxiliary tools. Quality materials will not only make the work easier for small fingers but also help avoid annoying mistakes during the sculpting process.
Let's figure out what type of plasticine is best suited for creating sea creatures and what simple aids can make the sculpting process as comfortable, safe, and engaging for both children and adults.
Material Comparison: Classic Plasticine vs. Lightweight (Air-Dry) Plasticine
Both materials are suitable for creating sea creatures, but they yield completely different results. Let's compare their key features so you can choose the ideal option for your child.
| Criterion | Classic Plasticine | Lightweight (Air-Dry) Plasticine |
|---|---|---|
| Texture and Weight | Dense, heavy, requires pre-warming by hand. | Lightweight, very soft, ready to use immediately. |
| Durability | Figures remain pliable; they can be reworked endlessly. | Hardens in air within 12–24 hours, turning into a sturdy toy. |
| Detailing | Holds fine details well (octopus suckers, fish scales). | Details may slightly smooth out as it dries. |
| Joining Parts | Elements easily connect to each other at any time. | Requires quick assembly; dried parts adhere poorly. |
What to choose?
If you plan to create a flat appliqué on cardboard (plasticineography), choose classic plasticine. If, however, the child wants to play with a finished crab or octopus as a real toy, opt for air-dry plasticine.
What You Will Need for Work: Tools, Boards, and Additional Materials
To ensure the sculpting process is only enjoyable, it is important to organize your workspace correctly and select the right tools. You will need:
- Sculpting board. A plastic or silicone mat will reliably protect the table from dirt and facilitate rolling out small details.
- Sculpting tools. A basic plastic knife will help neatly divide the blocks. Tools with round tips (dots) are ideal for pressing out eye sockets, creating octopus suckers, or adding texture to a crab's shell.
- Auxiliary materials:
- Toothpicks or matches — useful for securely joining large parts and detailing small elements (e.g., fish scales).
- Beads, sequins, and buttons — will make the sea creatures' eyes expressive and shiny.
- Thick cardboard — will serve as the base for creating appliqués.
Keep wet wipes handy to quickly clean your hands when switching from dark plasticine colors to light ones.
Step-by-Step Masterclasses: Sculpting an Octopus and a Crab
Once the workspace is prepared and bright blocks of plasticine and convenient tools are at hand, it is time to move on to the magic of modeling. Sculpting three-dimensional figures is not just an enjoyable activity, but also an excellent exercise for a child's fingers. We will begin our dive into the underwater world by creating two charming and very popular characters that will instantly win the young artist's affection.
Ahead of you are simple yet detailed instructions that will transform shapeless pieces of material into fun deep-sea inhabitants. We will master basic techniques: rolling neat balls, pulling out thin tentacle-like strands, and forming sturdy parts. These skills will form an excellent foundation for any future plasticine masterpieces.
How to Sculpt a Friendly Octopus with Suckers
Sculpting an octopus is a great way to train fingers and develop fine motor skills. For the work, choose a bright block of plasticine (for example, purple or turquoise) and a contrasting shade for the suckers.
Step-by-step process for creating the figure:
- Head: Roll one large ball and gently stretch it upwards to give it an egg shape.
- Tentacles: Divide the main-colored plasticine into 8 equal parts. Roll them into long sausages that taper slightly at one end.
- Suckers: Roll many small balls from yellow or white plasticine. Attach them along each tentacle and gently press them down in the center with a pen tip or toothpick—this will create realistic round suckers.
- Assembly: Join the tentacles at the base in a star shape, and secure the head to the center top. Bend the arms into waves to give the figure dynamism.
- Face: Make eyes from white and black discs, and use a sculpting tool or a marker cap to carefully press a friendly smile.
Our fun underwater resident is ready!
Creating a Bright Crab with Claws Yourself
A bright and fun crab will be a great companion for our octopus. For its creation, it is best to use rich red, orange, or even pink plasticine.
Step-by-step process for sculpting the crab:
- Shell. Roll one large ball and gently press it with your palm onto the work surface to form a voluminous oval patty.
- Legs. Prepare eight identical small pieces of plasticine. Roll them into thin sausages, gently bend them into an arc, and symmetrically attach them to the underside of the shell—four on each side.
- Strong Claws. Roll two medium-sized balls and stretch them into teardrop shapes. Using a sculpting tool, make a deep triangular cut on the wide end of each drop. Attach the finished claws to the front of the body.
- Bringing the Character to Life. Make two small stem-like strands, attach them to the top of the shell, and affix eyes made from white and black circles on top. Draw a friendly smile with the tip of a sculpting tool.
Our fun crab is ready to take its place on the seabed!
Simple Designs for Toddlers: Starfish and Fish
When moving on to creativity with the youngest sculptors, it is important to choose the simplest and most understandable shapes. Toddlers still have difficulty maintaining attention on complex details for long periods, so our next figures will be based on basic geometric shapes—spheres, petals, and simple sausages. Sculpting these characters will not only bring the child joy from a quick and beautiful result but will also serve as an excellent trainer for developing fine motor skills, tactile perception, and coordination of movements.
In this section, we will cover elementary designs that children as young as three can handle with minimal adult help. We will learn to create a bright five-pointed star and get acquainted with two easy techniques for modeling fish, using only fingers and the simplest methods of working with plasticine.
Sculpting a 3D Starfish in a Few Steps
Sculpting a starfish is an ideal way to introduce a toddler to basic shapes and develop fine motor skills. Both classic and light-colored plasticine (such as orange or coral) work well for this.
Step-by-step instructions:
- Blanks. Roll five identical balls of plasticine, the size of a large cherry, and one very small one for the center.
- Forming the Rays. With your fingers, roll each ball into a drop or an elongated cone. Gently press them onto the board so that one side becomes flat.
- Assembly. Join the wide bases of the rays in the center. Carefully smooth the joints with your fingers so that the figure looks whole and sturdy.
- Texture. Roll several tiny balls of contrasting-colored plasticine and attach them to the rays. Using sculpting tools or a regular toothpick, make small indentations in these spots.
Our 3D starfish is ready to decorate the home underwater world!
Two Easy Ways to Sculpt a Fish (Round Shape and From Triangles)
Sculpting fish is a wonderful way to reinforce a child's knowledge of geometric shapes and develop fine motor skills. We will look at two maximally simple methods that even the smallest fingers can manage.
Method 1: Round Fish
- Base: Roll a large ball of plasticine of any bright color and gently flatten it with your palm into a flat disk.
- Details: Make three small balls from material of a different color. Roll one into a drop shape and press it with your finger—this is the tail. Turn the other two into small petal-fins.
- Assembly and Decor: Attach the fins and tail to the body. Use a sculpting tool to apply scale patterns, and form the eyes from tiny white and black balls.
Method 2: Fish from Triangles
- Blanks: Roll two balls of different sizes and flatten them into squares. Cut each square diagonally with a sculpting tool—you will get triangles.
- Assembly: Place the large triangle with its base facing backward (this is the body). Attach the small triangle to the base with its sharp point—you will get a neat tail.
- Final Touches: Make fins from the remaining triangles. Decorate the fish body with thin, colorful streamers.
Creating an "Underwater World" Composition on Cardboard
Once all the key characters—from the funny octopus to the agile fish—are ready, it is time to bring them together into a single picturesque story. Creating a full "Underwater World" composition on thick cardboard allows the child to feel like a real director of their own fairy tale. This stage not only reinforces sculpting skills but also develops spatial thinking, sense of composition, and artistic taste.
We will turn a regular sheet of cardboard into a real seabed, where every plasticine inhabitant finds its cozy corner. To do this, we will use a combination of flat elements and 3D figures, creating a mesmerizing effect of depth. Let's prepare the base and breathe life into our home plasticine aquarium!
Decorating the Seabed: Seaweed, Rocks, and Shells in Plasticineography
Plasticineography is an ideal technique for creating a picturesque relief of the seabed. To turn ordinary cardboard into a realistic underwater landscape, follow these simple steps:
- Sandy Ground. Take yellow, orange, and brown plasticine. Pinch off small pieces and spread them with your fingers across the bottom part of the cardboard using a "spreading" method. Mix the colors directly on the paper to achieve natural transitions.
- Sea Rocks. Roll small balls from gray, brown, and black plasticine. Press them onto the "ground," slightly flattening them. Apply a rough texture with a sculpting tool or a toothpick.
- Seaweed. Roll long, thin streamers from green plasticine of different shades. Attach them to the base with wavy movements, imitating swaying in the water. Gently press the bases of the stems onto the ground.
- Shells. Roll small streamers and coil them into a spiral, or make small drops and draw stripes on them with a sculpting tool.
This textured background will make your work three-dimensional and prepare it for inhabiting creatures.
Assembling the Collage or Mini-Aquarium from Finished Figures
Now that the relief seabed is ready, it is time to bring our underwater world to life. Assembling the composition is the most exciting stage of the craft with children, developing spatial thinking and compositional vision.
You can decorate the work in two ways:
- Option 1: Collage on Cardboard. Arrange the finished figures on the prepared background before fixing them. Place the plasticine octopus and the colorful handmade crab on the "seabed" among the rocks and seaweed. "Launch" the fish into the water volume diagonally to convey the dynamism of movement. Gently press the details onto the cardboard. If you used light plasticine and the figures have already dried, fix them with a drop of PVA glue.
- Option 2: 3D Mini-Aquarium. Take a small box (e.g., from shoes), and decorate the inner walls with blue plasticine. Secure the heavy bottom dwellers to the lower wall. Light fish can be suspended from the top of the box on thin threads or fishing line.
Use sculpting tools to add final touches: squeeze out round air bubbles around the fish and draw texture on the shells. Our bright diorama is ready!
To ensure that joint activities bring maximum benefit and joy, it is important to guide the child correctly during the process. We have prepared practical recommendations that will help you turn simple modeling into an effective developmental game, and we will also advise you on how to carefully preserve the finished masterpieces for a long time.
Developing Fine Motor Skills and Speech During Modeling with Children
Modeling is not just entertainment; it is a powerful tool for neurostimulation. The projection of the hand in the cerebral cortex is located in close proximity to Broca's speech area. When a child kneads plasticine, rolls balls for an octopus's head, or stretches a seahorse's tail, they are actively stimulating speech centers.
To maximize the benefit for speech and motor skill development, use the following techniques during activities:
- Verbalizing Actions. Ask the child to comment on their movements: "I am rolling out a long sausage for the tentacle," "I am flattening a shell." This enriches the verbal vocabulary.
- Finger Exercises. Before starting the work, conduct a short, sea-themed warm-up (for example, imitating the movement of waves or the twitching of a crab's claws).
- Sensory Variety. Combine classic plasticine with natural materials (shells, pebbles) and sculpting tools. This creates new tactile sensations, developing finger coordination.
This comprehensive approach transforms the creative process into an engaging speech therapy and developmental game.
How to Avoid Typical Mistakes When Working with Plasticine and Preserve the Craft
To ensure that the creative process brings only joy and that the finished sea creatures delight the eye for a long time, it is important to avoid typical modeling mistakes and know the secrets to the durability of the crafts.
Common Mistakes and Their Solutions:
- Dirty Colors. Young children often forget to clean their hands when switching from dark shades to light ones. Keep wet wipes handy and regularly wipe down the sculpting tools.
- Weak Connection. Heavy crab claws or long octopus tentacles might fall off. To prevent this, press the parts firmly and carefully smooth the joints with your fingers. For large elements, use toothpicks as a hidden frame.
- Dust and Deformation. Classic plasticine quickly collects dust and softens from heat.
How to Preserve the Craft:
- Cooling. Place the finished figure made of classic plasticine in the refrigerator for 10–15 minutes to allow it to fully harden.
- Varnishing. Cover the figure with water-based acrylic varnish or regular hairspray. This will create a protective film, remove stickiness, and protect against dust.
- Drying. If you used air-dry clay, simply leave the figure in the air for 12–24 hours—it will dry on its own and turn into a sturdy, lightweight toy.
Conclusion
Creating a bright underwater world with your own hands is not just a fun hobby, but also a powerful tool for a child's all-around development. The simple step-by-step instructions presented in our guide prove that anyone can turn ordinary classic or air-dry clay into fun characters. Whether you are modeling a friendly octopus from plasticine, creating a funny crab with your own hands, an elegant fish, or a textured starfish—each such master class brings you closer to your children and brings joy through shared creativity.
During the process of working with sculpting tools and soft mass, fine motor skills are subtly trained, spatial thinking, concentration, and imagination are developed. Do not be afraid to experiment with colors, add new decorative elements, and invent your own plots for plasticineography. May your home plasticine aquarium be regularly supplemented with new amazing inhabitants, and may the crafts with your children bring only joy, inspiration, and pride in their first creative successes!