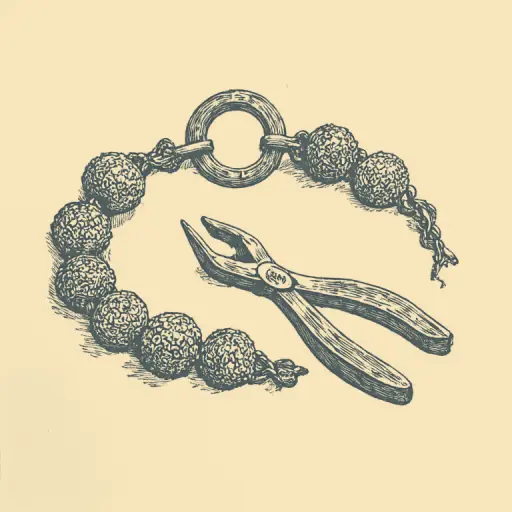
How to Secure a Clasp on a Beaded Bracelet So It Holds Firmly
- 15 min read
- 62
Creating an elegant beaded bracelet is a fascinating creative process that requires patience and precision. However, even the most flawless weaving can be ruined if the clasp is chosen and secured incorrectly. The clasp bears the main mechanical load when wearing the jewelry, so its reliable fixation determines the longevity of the entire piece.
Beginners often run into issues where the fishing line or monofilament frays at the attachment point, the knot unties at the worst possible moment, and the beloved bracelet gets lost. To avoid these frustrating mistakes, it is important to master professional jewelry assembly techniques.
In this practical guide, we will thoroughly examine how to correctly install popular types of clasps—from the classic carabiner to the stylish toggle. You will learn why crimps, bails, and connecting rings are necessary, which tools (needle-nose pliers, round-nose pliers) will facilitate the work, and how to achieve impeccable factory quality for your jewelry.
Preparing Materials and Tools for Work
Creating a durable piece of jewelry begins long before you tie the first knot or crimp the metal. The reliability of the clasp fixation directly depends on the quality of the hardware used and the precision of working with it. Even the most delicate beaded bracelet will quickly deteriorate if the connecting elements are fragile and you do not have the right tools on hand for their careful mounting.
Before moving on to the technical assembly part, you need to gather the correct working set. We will cover which metal parts will ensure maximum structural strength and which specific tools will help you secure the fittings neatly, without risking damage to the beads or breaking the line.
Choosing Reliable Hardware: Carabiners, Toggles, and Auxiliary Elements
The correct choice of hardware determines not only the aesthetics but also the durability of the beaded jewelry. Two types of clasps are most commonly used for securing bracelets:
- Carabiner (Lobster) — The classic and most reliable option. It is resistant to accidental opening. To make the bracelet easy to put on independently, the carabiner is recommended to be paired with an extender chain.
- Toggle (Toggle) — Consists of a ring and a T-shaped crossbar. This is an excellent decorative element for heavy or wide bracelets. When purchasing, it is important to check that the crossbar passes easily through the ring but does not slip out under tension.
Auxiliary hardware is also necessary for quality assembly. You will need connecting rings (it is best to choose double-loop or solid split rings with a thickness of 0.7–0.8 mm), as well as crimps (clamping beads) and bails (end caps), which will help neatly hide the ends of the fishing line or monofilament.
Necessary Tools: Pliers, Round-Nose Pliers, and Scissors
For high-quality hardware installation, you will need a basic set of hand tools. Each one performs its indispensable task:
- Flat-nose pliers (preferably with thin, smooth, non-serrated jaws). These are necessary for neatly opening and closing connecting rings, as well as for securely clamping crimps (metal fixing beads). The smooth surface prevents scratches on the metal hardware.
- Round-nose pliers. This tool is indispensable if you need to form a neat circular loop from jewelry wire (pin) or carefully bend the clasp's loop.
- Scissors or cutters (side cutters). Sharp scissors are useful for cutting monofilament or nylon thread. If you are working with jewelry cable or wire, be sure to use side cutters so as not to damage the blades of regular scissors.
Choosing the right tools will not only save your fingers but also guarantee that the clasp sits straight, without distortion or damage to the decorative coating.
Classic Method of Fastening Using Bails and Crimps
The classic assembly method using bails and crimps is the standard for professional jewelry making. This method allows a handmade beaded bracelet to achieve an impeccable factory look, reliably hiding all working knots and line ends inside neat metal hardware.
Using clamping beads (crimps) guarantees that the base of the piece will not slip out under tension, and the end caps (bails) aesthetically mask the technical details, creating a smooth transition to the clasp. Let's examine how to perform this fastening correctly so that your bracelet looks neat and lasts for years.
Step-by-Step Securing of the Line Using Clamping Crimps
Miniature metal beads—crimps—are used to securely fasten the base of the bracelet (fishing line or monofilament). This method guarantees that your piece will not fall apart during wear.
Here is the step-by-step fastening algorithm:
- Preparing the line end. Thread the bail onto the working line first (through its central hole), and then thread the clamping crimp.
- Forming the loop. Pass the end of the line back through the crimp in the opposite direction to form a small loop. If you are attaching the clasp directly, thread the line through the carabiner or toggle ring before returning the line.
- Adjusting tension. Tighten the line so that the crimp sits snugly at the base of the weaving, but leave a microscopic gap (about 1 mm) so that the bracelet is not excessively stiff.
- Crimping. Use flat-nose pliers and firmly squeeze the crimp. It should flatten and securely fix the line.
- Trimming. Carefully cut the excess line end with scissors, leaving a tail of 2–3 mm for security.
How to Hide the Knot and Crimp Inside the Bail (End Cap)
After the crimp is securely clamped onto the line, the most aesthetic stage begins—masking the technical knot. The bail (or end cap) externally resembles an open shell with a loop, which perfectly hides all assembly imperfections and protects the monofilament from friction.
Step-by-step masking process:
- Positioning: Slide the bail along the line so that the clamped crimp and the tied knot are exactly in the center of the metal cup.
- Closing the cup: Take the flat-nose pliers. Gently, without sudden movements, squeeze the halves of the bail together. They should meet, forming a smooth metal bead. Avoid excessive pressure to prevent deforming the hardware.
- Trimming excess: Carefully trim the protruding line end close to the closed bail with sharp scissors.
- Attaching the clasp: Gently bend the bail's loop with round-nose pliers, thread a connecting ring onto it (to which the carabiner or toggle is attached), and then close the loop tightly.
This simple trick gives the beaded bracelet a professional look, ensuring that the knot will never come undone.
Attaching the Clasp Without Professional Hardware (To Line, Monofilament, or Thread)
Sometimes professional metal hardware is not readily available, or the jewelry design requires a maximally soft, inconspicuous transition from the weaving to the clasp. In such cases, the classic method of securing the clasp directly onto the working thread, fishing line, or monofilament comes in handy. This method is as reliable as using crimps, provided the technology for tension distribution and knot fixing is strictly followed.
Attaching without auxiliary hardware allows the bracelet ends to retain flexibility and avoids excessive metallic shine, which is especially important for delicate, openwork pieces. Below, we will explore how to create a strong foundation for a carabiner or toggle using only the beads and proven knotting techniques.
Forming a Secure Bead Loop for Clasp Attachment
To create a sturdy hardware-free attachment, we will form a loop from beads that replaces a metal connecting ring. This method is ideal if you do not have crimps or caps available, and you are working with strong fishing line or monofilament.
Step-by-step process for creating a bead loop:
- Bead Stringing: String an even number of beads (optimally 6–8 small caliber beads) onto the fishing line extending from the end of the bracelet.
- Clasp Insertion: Thread the needle through the attachment eyelet of the component (this could be a carabiner or the receiving part of a toggle).
- Loop Closure: Pass the needle back through the very first bead of the stringing in the same direction. You will form a neat bead ring inside of which the clasp eyelet moves freely.
- Structure Reinforcement: Be sure to pass the fishing line or monofilament around the entire loop 2–3 more times. This is critically important in bead weaving: multi-layered passage of the thread prevents breakage under tension.
This loop looks aesthetic, harmonizes with the overall pattern of the bracelet, and securely holds the clasp.
Technique for Tying a Strong Knot and Its Additional Glue Reinforcement
After the loop is formed, it is critically important to properly secure the thread or fishing line. A standard single knot on slippery monofilament will quickly unravel under tension, so we will apply a proven double surgical knot technique followed by chemical fixation.
Step-by-step tying and fixing technique:
- Knot Tying. Pass the working end of the fishing line through the nearest bead of the weave. Form a loop around the main thread, pass the tip through it twice (forming a surgical knot), and gently tighten. The knot must sit flush against the bead.
- Duplication. Pass the fishing line further through the next bead and repeat the knot. Make 2–3 such knots at different points of the weave for maximum security.
- Glue Reinforcement. Take a toothpick and apply a microscopic drop of clear glue (polyurethane glue like Moment Crystal or jewelry GS Hypo Cement is ideal). Gently touch the knot with the tip of the toothpick. The glue should permeate the knot but not stain the adjacent beads.
- Trimming. Wait 5–10 minutes for the glue to initially set. Using sharp scissors, cut off the excess fishing line, leaving the end about 1 mm long. If you worked with nylon thread, this end can be carefully melted with a lighter.
Using Protectors (Protective Sleeves) for a Perfect Finish
Although knots and glue handle their tasks well in simple jewelry, master jewelers use professional hardware to create premium quality pieces. If you want your bracelet to look flawless, and the fishing line or monofilament never rubs against the metal clasp eyelet, the best solution is to use protectors (protective sleeves).
These miniature U-shaped parts not only protect the base from mechanical wear in areas of constant friction but also give the attachment point a neat, jewelry-like appearance. Let's examine why this element is so important in bead weaving and how to correctly integrate it into your bracelet's structure.
Advantages of Using Protectors to Prevent Fishing Line Abrasion
A protector (or protective sleeve) is a tiny U-shaped metal piece with thin hollow channels that takes on all the mechanical load at the junction of the beadwork and the clasp. When the bracelet is worn actively, the clasp is constantly in motion, creating friction.
Using protectors gives the artisan several key advantages:
- Absolute protection against abrasion. The metal connecting ring or carabiner contacts only the strong metal arc of the protector. The fishing line, monofilament, or jewelry wire is securely hidden inside the sleeve's channels and completely isolated from friction.
- Prevention of bending. The protector fixes the smooth curve of the base, preventing the fishing line from bending at a sharp angle, which is often the cause of breakage.
- Professional appearance. The piece looks neat and expensive. The protector hides the working thread, making the transition to the hardware aesthetic.
This simple element guarantees that your jewelry will not break at the most inconvenient moment due to base wear.
Instructions for Mounting the Protector and Connecting Ring
Installing the protector is a simple process that guarantees a professional look for your jewelry. For this work, you will need pliers, round-nose pliers, crimps, the protector itself, and a connecting ring.
Step-by-step mounting:
- Preparation: String a crimp onto the fishing line or monofilament immediately after the last bead of the bracelet.
- Insertion into Protector: Thread the end of the fishing line from the bottom up through one of the protector's holes.
- Loop Formation: Gently lay the fishing line into the protective groove on the protector's arc and bring it out from top to bottom through the second hole.
- Ring Installation: Slide the connecting ring onto the protector's arc. The carabiner or toggle will be attached to this ring later.
- Fixing: Pass the working end of the fishing line back through the crimp in the opposite direction. Pull the fishing line so that the protector sits snugly against the bead, but without excessive tension.
- Crimping: Firmly squeeze the crimp with pliers. Pass the excess tail of the fishing line through several adjacent beads and trim it neatly.
- Clasp Mounting: Using round-nose pliers, slightly spread the ends of the connecting ring apart (without stretching it in width), attach the clasp, and gently close the ring edges back together.
Errors in Clasp Installation and Ways to Prevent Them
Even the highest quality hardware and professional protectors do not guarantee the longevity of the jewelry if technical errors are made during assembly. Beginner artisans often encounter situations where a new bracelet breaks on the first wear, or the clasp starts to loosen. Most often, the cause is not material defects but nuances in working with the base tension and the final knot fixation.
In this part of the guide, we will examine common mistakes crafters make when attaching clasps and learn how to prevent them. Understanding these subtleties will protect your work from accidental unraveling and help you create truly durable accessories that will bring you joy for years to come.
Why the thread breaks at the attachment point and how to adjust tension
Breaking of the core material in the clasp area is the most common problem encountered by beadwork masters. The main reason lies in excessive tension. If the thread or monofilament is pulled too tightly, the finished piece will lose its flexibility. When attempting to fasten a carabiner or toggle on the wrist, critical tension occurs, and the thread snaps.
The second reason is mechanical damage to the core by the hardware. Sharp edges of metal parts (such as a low-quality jump ring or crimps squeezed too tightly with pliers) literally cut the thread from the inside.
To adjust the tension and protect the thread, follow these simple rules:
- Allow for play: When securing a crimp or a toggle, leave a microscopic gap (about 1 mm) between the last bead and the clasp. The bracelet must bend freely.
- Control the clamping force: When using pliers or round-nose pliers to secure crimps, do not compress them to the point of deforming the metal. Too tight a grip turns the crimp into a blade.
- Use protectors: A protective sleeve isolates the thread from friction against the metal loop.
- Hide the knot correctly: Do not tighten it right next to a sharp bead; create a smooth transition and secure it with a drop of glue.
Final bracelet strength check before wearing
After the tension is adjusted and the hardware is in place, do not rush to wear the jewelry out. The final quality control is a mandatory step that guarantees the bracelet will not unravel at the most inopportune moment. Perform a simple but effective test drive of the finished piece according to the following algorithm:
- Soft stretch test. Take hold of the ends of the bracelet near the clasp and gently, without sudden jerks, pull it in different directions. A well-assembled piece should have minimal play (about 1–1.5 mm). This gives the beads the necessary freedom of movement without exposing the thread.
- Check connecting rings. Carefully inspect the ring joints under good lighting. There should be no gap at the point where the metal wire was cut. If even a tiny gap remains, the thin monofilament will eventually slip out. If necessary, gently press the ring with pliers.
- Mechanism testing. Open and close the carabiner or toggle at least 5–10 times. The carabiner spring must engage instantly, and the toggle ring must pass freely through the bar but not fall out with the slightest tilt of the hand.
- Fixation control. Ensure that the covering crimps are closed evenly, with no 'whiskers' of thread sticking out from under them, and that the securing crimps are firmly fixed and do not slip along the core.
This minute check will save your work from an annoying failure and confirm the professional quality of the assembly.
Conclusion
Creating a custom beaded bracelet is an amazing creative process, the final and most responsible chord of which is always the installation of the clasp. A securely fastened clasp not only guarantees that your favorite jewelry won't get lost on the first walk but also gives the entire piece a neat, truly professional look.
Depending on the chosen style, design, and core material used (thread, monofilament, or jewelry wire), you can use various fastening methods. Classic crimps and toggles help conceal technical joints, protectors shield the thread from abrasion, and elegant bead loops are an excellent solution for minimalist designs without excess metal.
No matter which method you use, always remember the three golden rules of the master:
- Control the tension: Avoid excessive stiffness so that the bracelet gently curves around the wrist.
- Choose quality hardware: Strong carabiners, reliable toggles, and tight jump rings are the key to the product's longevity.
- Perform a final test: A light stretch of the finished bracelet will help identify weak points in time.
Mastering these techniques only requires a little patience and practice. Over time, your movements will become precise, and your fastenings impeccable. May your handmade jewelry bring joy and admiration from those around you. We wish you inspiration and pleasant creativity!