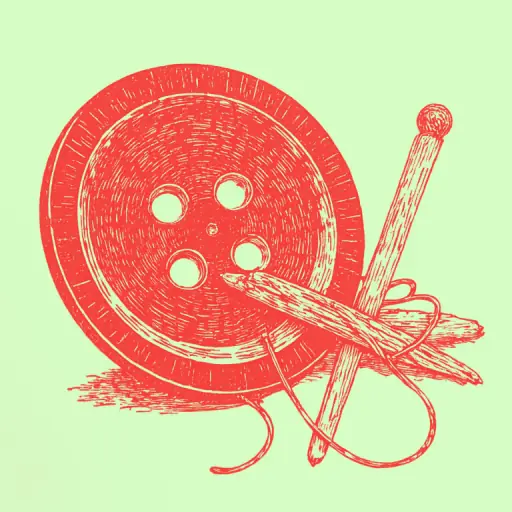
How to Sew a Button on a Shank So It Holds Firmly and Lasts Long?
- 9 min read
- 66
A detached button on a favorite coat or jacket is an annoying problem everyone has faced. Buttons on a shank often suffer the most, as they bear the maximum load when fastening heavy outerwear. It seems like putting it back in place is a quick job, but a regular stitch will quickly tear if you don't know the correct technique.
In this guide, we will cover how to securely sew a button with a built-in shank or how to form a sturdy thread column for a flat button using a simple matchstick or toothpick. You will learn the fastening secrets that will protect the fabric from tears and extend the life of your garments.
Preparing Materials and Tools for the Job
For a sewn-on button to last for years and withstand daily wear, it is important to prepare your workspace correctly. The quality and durability of the repair directly depend on the tools you use. Before making the first stitch, let's review the basic set every home crafter will need. Proper preparation will save you from annoying mistakes and significantly speed up the entire process.
Choosing Strong Thread, the Right Needle, and Auxiliary Tools (Matchstick, Toothpick)
Ordinary thin threads are not suitable for a secure button attachment—it is better to choose strong reinforced threads (such as LL or LX markings) or special threads for edging loops. The thread color for a shank button is always matched to the fabric color of the garment.
The needle must strictly match the material density. For coats, fur coats, and heavy jackets, a thick, sharp needle with a long eye is needed, while for light suit fabrics, a thinner one is required so as not to damage the fiber structure.
As auxiliary tools, prepare a regular matchstick or toothpick. They will serve as a temporary template-support, helping to form an ideal thread column (shank) height and preventing excessive tightening of the seam.
Difference Between a Button with a Pre-made Shank and a Flat Button Requiring a Shank
The main difference lies in their construction and purpose:
- Button with a pre-made shank has a cast metal or plastic loop on the reverse side. It is initially raised above the fabric, so it is sewn on almost flush. This is an ideal choice for outerwear where you do not want to spend time winding a thread column.
- Flat button (with 2 or 4 holes) requires the artificial creation of a "shank" from thread if it is used as a functional closure. Without this thread gap, it will be impossible to fasten thick coat or jacket fabric—the edge will deform, and the threads will quickly wear out.
Step-by-Step Guide: Quickly Sewing a Button with a Built-in Shank
Sewing a button with a pre-made metal or plastic shank is the fastest way to restore a neat appearance to a favorite item. Since the manufacturer has already provided the necessary gap for the garment edge, you will not have to spend time constructing a complex thread stand. This express method is ideal for beginners and allows you to securely fasten the hardware on a coat, blazer, or jacket in just five minutes. Let's break down this simple process step-by-step, starting from preparing the base and ending with the final thread securing.
Starting the Work: Marking the Attachment Spot, Securing the Knot from the Inside, and First Stitches
First, determine the exact attachment spot. Mark it with chalk or soap, referencing the loop on the opposite edge of the garment.
Take the prepared needle and thread (it is best to fold the thread in half for strength). To prevent the knot from popping through the fabric fibers when pulled, start the work from the inside. Pierce the fabric through, bringing the needle out onto the right side exactly at the marked point.
Make the first tiny stitch on the right side (literally 1–2 mm) and return to the wrong side. Repeat this step one more time—this anchoring will help secure the thread firmly at the base. Now everything is ready to put the button on the needle.
Reinforcing the Seam: Creating a Dense Wrap Under the Shank and Securely Fixing the Thread at the End
After making 4–5 strong stitches through the button's shank, bring the needle with the thread out onto the right side, but do not pass it through the shank; stop right under it.
Wrap the thread tightly around the resulting base 3–4 times. This will create a miniature thread column that protects the threads from rubbing against the edges of the shank and ensures the button has the necessary mobility when fastening.
To securely fix the thread, bring the needle to the wrong side. Make a small stitch, form a loop, thread the needle through it, and tie a strong knot. Repeat this action twice, then carefully trim the thread close to the fabric.
Maximum Strength Method: Using a Backing Button
Simple button sewing may not be enough when dealing with heavy fabrics—drape, leather, or fur. Under constant tension, the thread can pierce the material fibers, leading to damage to the garment. To avoid this, professional tailors use the maximum strength method—installing a backing button (counter-button). This simple but effective trick distributes the load evenly and guarantees that the hardware will not tear out "with the flesh" even under strong tension.
Why a Counter-Button is Needed on a Coat, Fur Coat, or Heavy Jacket
When wearing heavy outerwear—coats, fur coats, or thick jackets—the fastenings experience enormous stress. If the button is attached directly to the fabric, a sudden pull can simply rip a piece of material "with the flesh."
To prevent this problem, a counter-button (or backing button) is used. This is a small, flat button placed on the wrong side of the garment directly under the main one. It takes on all the mechanical pressure, distributing the load evenly across the fabric area. Thanks to this technique, the right side of the material does not deform, and the hardware remains maximally secure for years.
Step-by-Step Technology for Simultaneously Sewing the Front Button and the Backing Doubler
For this work, you will need a strong needle with thread folded in half.
- First Pierce. Start the work from the right side of the coat: pierce the fabric through so that the knot is hidden under the future front button.
- Threading. Pass the needle through the shank of the top button, and then bring the needle to the wrong side of the fabric.
- Securing the Doubler. Place the backing button on the needle through one of its holes.
- Stitching. Make 4–5 joint stitches back and forth through all layers of the fabric and both buttons.
- Securing. Bring the needle under the front button, wrap the thread around the base, forming a strong thread column, make a loop to securely tie the thread, and carefully trim it.
How to Properly Form a Thread Column (Shank) for a Flat Button
If an additional height is not required for a button with a pre-made shank, a flat button sewn flush against the fabric will quickly deform the loop and tear off. For the closure to work smoothly and for the fabric not to be strained, it is necessary to manually create an artificial "shank"—a thread column. Its height must exactly match the thickness of the garment edge. Simple tricks can help make this element neat and strong at home, protecting your fingers from unnecessary punctures and the garment from warping.
Using a Matchstick or Toothpick as a Temporary Support for Stitches
For a flat button on a coat or other outerwear to fasten easily and not deform the fabric, it needs a gap. The simplest life hack is to use a regular matchstick or toothpick as a temporary template.
- Preparation: Secure the thread from the wrong side of the fabric and bring the needle out onto the right side.
- Placing the Fixer: Place the matchstick (for dense fabrics) or toothpick (for thinner ones) over the button between the holes.
- Sewing: Lay down each stitch, passing the thread over this wooden restrictor. The needle with the thread must closely encircle it with every puncture.
- Releasing: After making 4–5 strong stitches, carefully pull out the toothpick.
The button will be slightly raised above the fabric, forming an ideal play for subsequent shank formation.
Forming a Dense Wrap of a Thread Column for Button Movement Freedom
After you have carefully removed the toothpick or matchstick, the button will be slightly raised above the fabric. Now your task is to turn these loose threads into a sturdy support.
- Bring Needle Under Button: Pierce the fabric from the wrong side to the right side so that the needle comes out directly under the button, without passing through its holes.
- Make the Wrap: Tightly and neatly wrap the working thread around the resulting bundle of threads 4–6 times. Wind the loop onto the loop to create a smooth and dense column.
- Secure the Shank: Pass the needle through the resulting column right at the base of the fabric and tie a loop into a knot.
- Secure the Thread: Bring the needle to the wrong side, make a couple of securing stitches, and carefully trim the thread.
This thread column will provide the ideal gap for free fastening and protect the fabric from deformation and tears.
Conclusion
Now you know how to properly and securely sew a button on a shank—whether it is a pre-made metal shank or a neat thread column. The main thing is always to choose strong thread, use a helper matchstick to create a gap, and securely fasten the knot from the wrong side.
These simple rules will help you quickly restore a neat appearance to your favorite items, and the buttons on your coat or jacket will no longer come off at the most inconvenient moment!