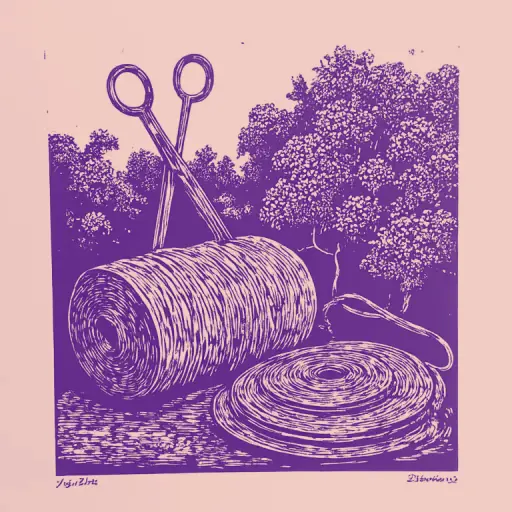
How to Sew Handmade Jute Napkins for Table Setting
- 14 min read
- 63
Creating elegant and cozy jute napkins by hand is not just a fascinating hobby, but also a way to add a natural and warm touch to any interior. Jute, thanks to its natural texture and neutral color, fits perfectly with popular Scandinavian, rustic, and Provençal styles. These napkins will transform an ordinary table into a place full of warmth and artisanal charm.
In this detailed tutorial, we will go through the process from selecting the ideal materials to the final decoration. Whether you prefer sewing on a sewing machine, working with burlap, or weaving with jute twine, you will find step-by-step instructions to help you create perfect coasters.
We will explore various techniques: from classic zigzag stitching with jute cord to creating fringes with burlap. Additionally, we will share tips for caring for jute items and inspire you with decoration ideas so that your napkins become a true work of art.
Preparation for Work: Selecting Materials and Tools
The quality and durability of the finished coaster depend directly on proper preparation. Jute is a material with character: it can be excessively stiff, fray, or have a particular odor, so its selection must be made consciously. Before turning on the sewing machine or picking up the scissors, it is important to gather the correct arsenal of tools. Choosing the right tools and materials will not only facilitate the sewing process but also protect your equipment from breakdowns and save you effort. Let's see exactly what is needed to create a perfect eco-friendly napkin.
How to Choose Quality Jute Cord, Twine, or Burlap
To create durable and aesthetic coasters, it is crucial to choose the correct base. The quality of the jute directly influences the appearance of the final product and the ease of handling it on the sewing machine.
When choosing materials, pay attention to the following criteria:
- Jute cord (twine): For sewing napkins with a zigzag stitch, a three-strand cord with a diameter of 6–8 mm is optimal. It must be flexible, uniform throughout its length, and without coarse knots. Choose a light-toned cord, golden beige. Dark jute often has a strong technical odor of lubricant, which is very difficult to remove.
- Jute twine: For fine tying, hand sewing, or decoration, choose two or three-ply twine (1.5–2 mm thick). The quality thread must be smooth, without fuzz or plant residue.
- Burlap (jute fabric): For woven napkins, look for burlap with a density of 250–400 g/m² and a uniform weave. A fabric that is too loose will fray quickly, and one that is excessively stiff will not lay flat on the table.
Before buying, touch the material: quality jute feels dry to the touch, is moderately soft, and does not leave dark residue on your hands.
Selecting Needles, Strong Threads, and Adjusting the Sewing Machine
Sewing with jute is a serious test for a domestic sewing machine, so the correct selection of tools is fundamental for the quality of the stitch and the preservation of the equipment.
- Needle Selection. Common universal needles dull quickly with stiff fibers. Use specialized needles for jeans (Jeans) or leather (Leather) in sizes №90, №100, or №110. Their sharp point and reinforced shank easily penetrate the dense cord.
- Thread Selection. Threads must be wear-resistant and strong against breakage. Reinforced polyester threads are ideal (e.g., national 45 LL or 70 LL). For discreet seams, choose threads matching the jute color (sand, beige) or transparent monofilament thread.
- Machine Adjustment. Choose the "zigzag" stitch with a width of 4–5 mm and a stitch length of 3–4 mm. Loosen the upper thread tension so that the seam does not constrict the item. If the machine allows, reduce the presser foot pressure or use a sliding feed (top feed).
Step-by-Step Tutorial: Sewing a Napkin with Zigzag Cord
Sewing with jute cord on a sewing machine is a fascinating process that literally allows you to transform a coarse cord into an elegant and practical serving element before your eyes. The "zigzag" technique is considered classic in the creation of eco-friendly coasters: it not only firmly joins the wraps of the cord together but also creates an elastic and dense weave, resistant to deformation and high temperatures.
In this practical guide, we will break down the entire process of creating a handmade round coaster step by step. You will learn to tame the untamable jute, to carefully form a flat shape without unwanted "waves," and to finish the edges professionally so that the finished item looks impeccable both in daily life and at a party table.
Forming the Napkin Center (Spiral) and First Stitches
Forming a neat center is the most important stage, as the symmetry of the entire future coaster depends on it.
- Cutting Preparation. Cut the edge of the jute cord at a 45-degree angle. To prevent fraying, secure the end with a drop of thermal glue or wrap it tightly with strong thread of the same color.
- Rolling the "Spiral." Firmly roll the treated end of the cord into a flat spiral of about 3–4 cm in diameter. Hold the piece firmly so that the wraps do not shift in height. For extra security, you can temporarily hold the center with long sewing pins.
- First Stitches. Carefully place the "spiral" under the sewing machine's presser foot. Set the stitch to zigzag: 4–5 mm width, 2–2.5 mm step. Lower the needle right at the junction between the wraps. Make several securing stitches forward and backward, firmly joining the center.
- Starting the Rotation. Slowly rotate the piece counter-clockwise, ensuring that the needle, when piercing on the left, enters a wrap of the cord and, when piercing on the right, enters the adjacent wrap.
Increasing the Coaster Diameter and Careful Edge Fixing
Once the napkin center is firmly fixed, continue sewing in a spiral. The main secret to a flat coaster is to keep the piece absolutely straight on the sewing machine platform. Do not stretch or lift the jute cord, or the napkin will ripple or become a deep cup. Guide the junction of two adjacent cords just under the center of the presser foot so that the zigzag stitch uniformly captures both wraps.
Gradually increase the diameter to the desired size (generally 30–35 cm for a standard placemat).
How to carefully finish the edge:
- Angled cut. 5–7 cm from the end of the work, cut the cord at a sharp angle (diagonally). This will help smooth the height transition and eliminate excess bulk in the finish.
- End securing. To prevent the cut from fraying, tightly wrap its end with fine jute twine or secure it with a drop of textile glue.
- Final securing. Press the cut edge against the previous turn and sew it several times back and forth with a dense zigzag, using the sewing machine's reverse function. Carefully trim the jute threads and hide their ends on the back.
Alternative option: creating a napkin with jute fabric (burlap)
If working with sewing machines and thick cord seems too laborious, or if you wish to vary the decoration with a different textured textile, an excellent alternative is to use pre-made jute fabric, i.e., burlap. This malleable and accessible material has an expressive natural texture that instantly brings warmth and a rustic, Scandinavian, or Provençal atmosphere to the interior. Creating napkins with burlap does not require complex sewing skills and takes much less time. You just need to master a few simple tricks for working with woven jute to obtain impeccable placemats that will not compare in beauty to expensive store-bought decorations.
Cutting burlap and creating an elegant homemade fringe
Cutting burlap requires care, as it is a mobile material with a loose weave. To obtain a perfectly straight rectangle (for example, the standard size of 30x40 cm), use a professional trick:
- Measure the desired distance from the edge with a ruler.
- Carefully hook a thread with a needle and stretch it completely.
- Cut the fabric with scissors strictly following the empty path that has been formed. Repeat this action on all four sides.
After cutting, we proceed to create the elegant fringe:
- Determine the desired width of the fringe (ideally between 1.5 and 2.5 cm).
- Using a seam ripper or a thick 'gipsy' needle, carefully slide and pull out the outer threads of the burlap one by one.
- Move sequentially from the outer edge toward the center until the desired depth is reached.
Ensure that the fringe on all sides has the same length; this guarantees a neat appearance of the placemat. Do not discard the extracted threads: this durable jute cord will be useful for decoration.
How to treat the fabric edge so the napkin does not fray when used
For the created fringe not to continue fraying during use and washing, it is necessary to firmly secure the edge of the burlap. There are three simple and effective methods to do this yourself:
Machine fastening. Run a normal straight stitch or a small zigzag on the sewing machine along the entire perimeter of the napkin, leaving a margin of only 1-2 mm from the start of the fringe toward the interior of the piece. Use strong, reinforced threads matching the fabric. This is the most durable method, which will withstand even delicate washing.
Textile glue or anti-fray product. Apply a thin line of special fabric glue (or a Fray Check product) strictly along the edge of the fringe. The glue will penetrate the jute fibers and block their movement. Once dry, the quality compound becomes completely transparent and invisible.
Hand decorative stitch. If you do not have a sewing machine, fasten the edge manually. Use fine jute thread or contrasting embroidery floss. A border stitch (in a loop) along the edge of the fringe will not only protect the fabric from degradation but will also serve as an additional rustic decoration.
Comparison of finished placemat creation and decoration techniques
Creating a perfect placemat is always a balance between practicality, speed of work, and aesthetics. After mastering the basic methods of working with cord and burlap, it is important to decide on the general approach, as jute can be machine-sewn, glued, or crocheted. In this section, we will objectively compare the key techniques for creating napkins, helping you choose the most comfortable and fastest method. We will also analyze original ways to decorate the finished items, which will turn a discreet ecological coaster into a sophisticated element of festive decoration.
What is better: machine sewing, hot glue gun, or crocheting?
The choice of technology for creating the placemat depends on your skills, equipment availability, and how you plan to use the finished item. Let's compare the three most popular techniques:
- Machine sewing (zigzag stitch). This is the most reliable and professional method. Jute cord napkins sewn with a zigzag result in flat, flexible, and incredibly durable items. They easily support delicate care and last for years. The drawback is that it requires a sewing machine capable of sewing dense materials and special strong threads for jute.
- Hot glue gun. The fastest method, ideal for beginners. A homemade placemat can be assembled in just 15 minutes. However, thermal glue is sensitive to high temperatures. It is not recommended to use this napkin as a coaster for hot food (the glue may soften) or to wash it.
- Crocheting. This method allows for the creation of soft, textured ecological napkins from fine jute yarn. Crocheted items have a very cozy look but require time and basic knitting skills.
For greater clarity, let's compare the characteristics in the following table:
| Criterion | Sewing (zigzag) | Glue Gun | Crocheting |
|---|---|---|---|
| Durability | High | Medium | High |
| Heat Resistance | Excellent | Low | Excellent |
| Difficulty | Medium | Easy | Medium |
| Care | Allows washing | Dry clean only | Delicate wash |
If your goal is a durable and practical table decoration, choose machine sewing. For a quick decorative effect, glue is suitable, and for creating a cozy home atmosphere, crocheting is the option.
Decoration is the best way to transform a discreet jute placemat into an exclusive serving element. The natural texture of jute combines perfectly with the following decorative techniques:
- Delicate Lace. Cotton or linen lace in an off-white tone, sewn along the outer edge of the napkin, instantly softens the coarse texture of the fiber. For a Provençal or shabby chic style, the lace trim can be lightly gathered to create a slight ruffle.
- Contrasting Embroidery. On burlap napkins, cross-stitch or simple stitches (forward, picot stitch) look very good. Use sturdy cotton threads in white, red, or black. On cord placemats, small accent elements can be embroidered directly onto the twists.
- Stencil Painting. The fastest way to apply a design is with acrylic fabric paints. Secure a stencil with a vegetal or geometric pattern onto the napkin using painter's tape and apply the paint with a semi-damp sponge. After it dries, set the design with a hot iron through a cotton cloth.
Experiment with combinations of these techniques to create a unique set for the festive table.
Jute Care and Table Decor Features
Creating unique decoration with your own hands is only half the job. For your new jute placemats to bring you joy for many years without losing their natural texture and shape, they must be cared for properly. Jute is a forgiving material, but it requires delicate handling, especially when it comes to contact with moisture and food stains.
Furthermore, it is important not only to preserve the original appearance of the pieces but also to integrate them harmoniously into the overall concept of home warmth. Let's analyze the key practical aspects: from the cleaning details of this demanding fiber to the secrets of elegantly presenting finished placemats in different interior design styles.
How to Clean and Dry Jute Placemats Correctly, Can They Be Washed
Jute is a natural, ecological material, but it is quite demanding in its care. For your handmade placemats to last a long time, it is important to follow the key rules of cleaning.
Can jute be washed?
It is not recommended to machine wash jute placemats. Excess water causes the fibers to swell, deform, and the piece to lose rigidity and shape. Additionally, in the washing machine drum, the cord and twine can easily unravel.
Delicate Care Rules:
- Dry Cleaning. Regularly shake off crumbs or clean the placemats with a dry, soft-bristled brush. A low-power vacuum cleaner can also be used.
- Stain Removal. If sauce or coffee spills, it must be dried immediately with a paper towel. Treat the dirt locally with a damp sponge and a soapy solution (you can use liquid soap or dish detergent), trying not to soak the placemat completely.
- Correct Drying. Dry the pieces exclusively on a horizontal surface and spread out (for example, on a dry towel). Do not hang them on a line or place them on a hot radiator, as this will cause deformation.
- Ironing. After drying, iron the placemat with steam through a damp cotton cloth to restore its ideal flat shape.
Integrating Eco-Friendly Placemats into Scandinavian, Rustic, and Provençal Interior Styles
Jute placemats are a universal decorative element that easily adapts to different interior design concepts thanks to their natural texture and neutral tone.
- Scandinavian Style (Scandi). Minimalism and abundance of light are valued here. Jute placemats will soften the cold monochromatic palette (white, gray) and add visual warmth. Combine them with simple white tableware, clear glass, and live vegetation, such as eucalyptus branches.
- Rustic. This style is made for jute. The intentional roughness of the material will highlight the natural beauty of the wooden table without tablecloths. Complement the table with clay or ceramic tableware, thick linen napkins, and simple wildflowers.
- Provençal. To integrate jute into the romantic French aesthetic, combine it with delicate lace, floral-patterned tableware, and pastel textiles. A sprig of lavender tied with a fine jute twine over a textile napkin will harmoniously complete the set.
Experiment with shapes and details so that your handmade pieces become the main decoration for family meals.
Conclusion
Creating handmade jute placemats is not just a fascinating creative process, but also an excellent way to make your home cozier, more elegant, and more eco-friendly. As we have seen, whether machine sewing with a zigzag stitch of sturdy cord or creating an airy fringe on burlap, each method allows you to obtain a unique and practical decorative element.
These placemats will be a beautiful adornment for family meals, festive presentations, or a sincere gift for loved ones. Do not be afraid to experiment with shapes, sizes, and decoration: add delicate lace, colorful embroidery, or combine jute with other natural materials.
We hope our step-by-step instructions and practical tips help you master this technique easily. We wish you endless inspiration, straight stitches, and pleasant creation! May the pieces made by your hands bring warmth and joy to your home every day.