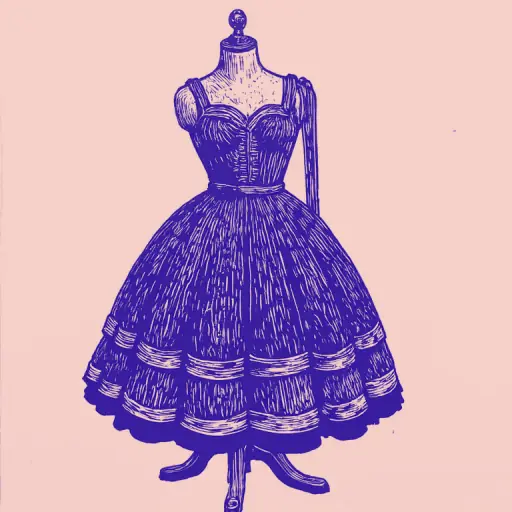
How to sew a voluminous dress by hand that holds its shape
- 15 min read
- 70
A voluminous dress is the embodiment of celebration, whether it is a charming outfit for a little princess at kindergarten graduation or a luxurious evening gown in the new look style for a special occasion. Creating such a masterpiece yourself not only saves the budget but also results in a unique garment that fits the figure perfectly.
The main secret to a flawless ball gown lies in its ability to hold its shape. Without the correct cut and special support, even the most beautiful fabric will quickly sag, robbing the look of its expected magic.
In this practical guide, we will detail the entire process of creating a voluminous dress:
- How to correctly choose and calculate the fabric (satin, tulle, organza);
- How to construct an accurate sun skirt pattern with waist gathering;
- How to design and sew a stiff petticoat that provides a royal volume.
Even if you are a beginner craftswoman, our step-by-step instructions will help you avoid typical mistakes and create the dress of your dreams.
Choosing Materials: What to Sew a Voluminous Dress From
Creating a luxurious silhouette that holds its shape impeccably begins long before you sit down at the sewing machine. The secret to a perfect fit and royal volume lies in the correct selection of textiles. The fabric for a voluminous dress must not only look beautiful but also possess a certain stiffness, elasticity, and the ability to drape without weighing down the construction.
In this section, we will examine which materials will form the reliable foundation for your masterpiece, how to harmoniously combine stiff and pliable textures, and we will learn how to accurately calculate the required yardage to avoid annoying mistakes and unnecessary waste when purchasing.
Which Fabric to Choose for the Lining and Skirt (Satin, Organza, Tulle)
Choosing the right fabric is 80% of the success when creating a voluminous dress. Stiff satin is ideal for the lining (bodice) and the base layer of the skirt. It has a noble sheen, holds the corset shape well, and does not deform under the weight of the multi-layered bottom.
Tulle is indispensable for creating airy volume. It is divided into three types:
- Stiff — used exclusively for the inner layers of the petticoat, as it can prick.
- Medium stiffness — holds its shape well and is suitable for forming the skirt's framework.
- Eurotulle (soft) — ideal for the upper layers, creating a delicate "cloud" effect.
If you want to achieve resilient, shape-retaining folds with a delicate shimmer, choose organza. It is stiffer than chiffon, holds the "bell" volume perfectly, and is often used in festive outfits.
How to Correctly Calculate Material Consumption
Accurate fabric calculation is the key to avoiding the need to urgently purchase material from another batch that might differ in shade. Consumption directly depends on the design, height, and desired volume.
- Consumption for the bodice: For a children's party dress, one bodice length is usually sufficient plus 10–15 cm for seam allowances and finishing. For an adult garment with a fabric width of 150 cm, one bodice length is required (if the bust circumference with allowances fits within this width) or two lengths if sleeves or complex draping are planned.
- Consumption for the sun skirt (satin, organza): To calculate the fabric for one layer of a sun skirt, use the formula:
$$ ext{Consumption} = (R + ext{Skirt Length}) imes 2 + 10 ext{ cm}$$
where $R$ is the radius of the waist cutout. If waist gathering is planned, the waist circumference is multiplied by a gathering coefficient (from 1.5 to 3) when calculating the radius. If the skirt length plus the radius exceeds 70 cm, the fabric must be purchased based on four skirt lengths, as the pieces will not fit within the standard 150 cm width. - Tulle consumption for a multi-layered skirt: Eurotulle often has a width of 300 cm. For one layer of a sun skirt with this width, two skirt lengths plus two waist radii are required. The resulting yardage is multiplied by the number of layers (4 to 8 layers are required for good volume).
Always allow an additional 10–15% for shrinkage of the lining fabric after steaming and for possible cutting inaccuracies.
Preparing the Pattern and Cutting the Pieces
Once the calculations are done and the fabric is carefully prepared for work, the most critical stage begins—creating the accurate pattern and cutting the pieces. It is the correctness of this step that determines how evenly the folds of the finished dress will fall and whether the hem will twist during assembly. Working with voluminous silhouettes requires special attention to detail: the slightest inaccuracy in calculating the waist radius or the direction of the grainline can ruin even the most expensive material.
In this section, we move from theory to practice. We will cover the basic principles of pattern making that allow you to create an ideal foundation for a voluminous bottom, and we will also look at the specifics of working with capricious multi-layered fabrics, such as tulle and organza, so that the cutting process goes smoothly and without annoying mistakes.
Constructing a Sun Skirt Pattern with Waist Gathering
To create a truly voluminous silhouette, a classic sun skirt is constructed taking into account the extra volume needed for waist gathering. This allows for beautiful, dense folds at the waistline and additional volume in the hip area.
Calculating the Waist Radius ($R_1$):
Instead of the standard waist circumference ($W$), we use the value multiplied by a gathering coefficient ($k$). For moderate gathering, a coefficient of $k = 1.5$ is used; for a very voluminous skirt, $k = 2$ or $2.5$.
Radius calculation formula:
- $R_1 = (W \times k) / 6.28$
For example, with $W = 60$ cm and a gathering coefficient of $2$, the calculated circumference is $120$ cm. Then $R_1 = 120 / 6.28 \approx 19.1$ cm.
Step-by-step pattern drafting:
- Fold the pattern paper (or fabric) into quarters.
- From the central angle (the fold point), measure out the calculated radius $R_1$ using a circular fan. Connect the points with a smooth line—this is the future waistline cut.
- From the resulting arc, measure out the desired skirt length ($L$) plus $1.5–2$ cm for the hem allowance. Draw a second, outer arc ($R_2 = R_1 + L$).
The resulting pattern will allow you to quickly cut the base that will fit perfectly into the waist gathering.
Nuances of Cutting a Multi-layered Skirt
Cutting a multi-layered skirt requires extreme precision, as the slightest skewing of thin materials (tulle, organza, or chiffon) will instantly ruin the silhouette of the garment.
Here are the key rules that will help you achieve a perfect result:
- Layer Fixing. Do not use regular pins for thin tulle—they can leave pulls and deform the netting. Instead, press the fabric to the cutting table using special tailor's weights.
- Tools. Cut slippery and airy fabrics with a sharp rotary cutter on a special mat. This prevents layer shifting, which inevitably happens when using scissors.
- Length Difference. To prevent the lower layers from showing beneath the upper ones, make each subsequent inner layer (closer to the body) 1–1.5 cm shorter than the previous one.
- Stretch Direction. Tulle does not have a classic grainline, but it stretches more strongly in one direction. Arrange the pieces so that the maximum stretch runs along the width of the skirt; otherwise, the hem will quickly sag under its own weight.
Secrets to Volume: Sewing a Stiff Petticoat Yourself
Even the most luxurious fabric and the perfect cut for a sun dress will not achieve the desired "cloud" effect without proper internal support. It is the petticoat, or underskirt, that is responsible for the flawless silhouette, preventing heavy satin or multi-layered tulle from drooping sadly while walking. Creating this invisible but crucial detail is the key secret of professional dressmakers, transforming an ordinary dress into a truly royal garment.
To achieve the desired degree of fullness while maintaining comfort during movement, it is important to choose the correct sewing technology. Depending on the intended silhouette—whether it is a light retro volume in the new look style or a majestic ball gown—we will use different approaches to creating the shape-retaining frame.
Sewing a Petticoat from Stiff Tulle and Netting
Combining a dense lining fabric (satin or taffeta) with stiff tulle is ideal for creating a resilient frame. The lining protects the skin from the prickly material, and the tulle creates the necessary volume.
Step-by-step sewing process:
- Cutting the Base: Cut a "trapezoid" or "half-circle" silhouette skirt from the lining fabric. The base length should be 2–3 cm shorter than the main dress skirt.
- Preparing Ruffles: Cut the stiff netting or tulle into strips 20–30 cm wide. The total length of the strips for one tier must exceed the width of the base by 2.5–3 times to create a dense gathering.
- Gathering the Tulle: Sew two parallel seams with a wide stitch along the top edge of each strip and pull the threads to form even pleats.
- Attaching Tiers: Mark horizontal lines on the base. Attach the prepared tulle ruffles to the base, starting with the bottom tier and moving up. Each upper ruffle should slightly overlap the attachment seam of the lower one.
This multi-tiered petticoat holds its shape excellently and gives the dress a classic dome silhouette.
Using a Crinoline and Rings for Maximum Fullness
For a royal volume, especially in heavy ball or wedding dresses, tulle alone is often not enough. In such cases, a crinoline with flexible rings (crinoline or plastic hoops) is indispensable. It takes on the entire weight of the skirt, preventing it from sagging while walking.
How to correctly use rings in a petticoat:
- Choosing the Base: Sew the petticoat base in the shape of a trapezoid or half-circle from dense lining fabric. This prevents the rings from touching the legs.
- Attaching Drawstrings: Mark the lines where the rings will be placed and attach special drawstring tapes to the base, through which the flexible plastic rings are then threaded.
- Masking the Ribs: To prevent the rings from showing through the thin dress fabric, an intermediate layer must be placed over the crinoline—a voluminous ruffle made of stiff netting or tulle that smooths out all sharp transitions.
This construction guarantees a flawless silhouette and freedom of movement.
Step-by-Step Dress Assembly Masterclass
When the voluminous petticoat is ready and holds its shape securely, the most critical stage begins—assembling all the pieces into one luxurious garment. At this stage, we must combine the prepared bodice with the multi-layered skirt, maintaining the balance of the structure and avoiding fabric layer shifting. Accuracy at this stage determines how professional and aesthetic the finished outfit will look. We will break down step-by-step how to correctly join the top and bottom of the dress so that the heavy hem does not deform the bodice, and we will master the subtleties of sewing in a hidden zipper and finishing seams. Prepare your pins, sewing machine, and patience—your perfect dress is already taking its final shape.
Sewing the Bodice and Connecting It to the Skirt
Bodice assembly begins with sewing the darts and contour seams. To ensure the bodice holds its shape under the weight of the voluminous skirt, be sure to double-layer the front and back pieces with fusible interfacing. If you are sewing the dress on a lining, assemble the top and lining pieces separately, and then sew them together at the neckline and armholes.
After preparing the bodice, we move on to joining the pieces:
- Preparing the Skirt: Sew two parallel seams with a wide stitch along the top edge of the skirt and pull the threads to the width of the bodice's bottom edge. Distribute the gathering evenly.
- Aligning Pieces: Fold the bodice and skirt with their right sides facing inward. Align the side seams, center front, and center back, and secure with pins.
- Sewing: Sew a seam 1.5 cm from the edge. To prevent the seam from stretching under the weight of the tulle or satin, reinforce it with silicone tape or piping trim, sewing it directly into the joining seam.
Seam Finishing and Inserting a Hidden Zipper
After joining the bodice to the multi-layered skirt, we move on to one of the most responsible stages—finishing the seams and inserting the hidden zipper. To prevent the closure from deforming delicate fabrics (satin, organza) or puckering, follow this instruction:
- Preparing Seam Allowances. Fuse thin strips of fusible interfacing, 1.5 cm wide, to the back seam allowances in the area where the zipper will be attached. This prevents the delicate materials from stretching.
- Inserting the Zipper.
- Unzip the hidden zipper and carefully iron its coil, slightly bending it with your fingers.
- Pin the zipper with its right side facing the right side of the back seam allowance. The teeth must align exactly with the marked seam line.
- Using a special zipper foot, sew the seam as close to the coil as possible. Repeat the operation for the second side, strictly aligning the waistline.
- Sewing the Back Seam. Close the zipper, align the skirt edges below the closure, and sew the remaining section of the seam using a straight stitch foot.
- Finishing Edges. Since stiff tulle and netting can irritate the skin, close the inner seams with a bias binding or finish them on an overlocker. In children's party dresses, the ideal solution is to completely cover all seams with the lining.
Common Mistakes in Sewing and Care for the Finished Garment
The voluminous dress is practically finished, and it seems the hardest part is behind us. However, it is at this final stage that many beginner crafters make regrettable mistakes that can spoil the silhouette of the garment after the first fitting or wash. The heavy, multi-layered hem, delicate tulle, and stiff petticoat require special care both during final finishing and during subsequent use. To ensure your efforts are not in vain and that the outfit retains its original volume and impeccable fit, it is important to consider several key technical nuances. The right approach to the final touches and careful care guarantee that the dress will look magnificent at any celebration.
How to Prevent Hem Sagging and Loss of Shape
Hem sagging is a common problem with voluminous dresses, especially with a circle skirt. Fabric cut on the bias inevitably stretches under its own weight. To prevent deformation of the bottom and loss of shape, observe three golden rules:
- Let the skirt hang. After cutting and joining the panels (but before final hem finishing), hang the garment on a mannequin or hanger for 24–48 hours. The fabric will take its final shape under the influence of gravity, after which you can perfectly level the hemline by measuring an equal distance from the floor.
- Use a soft crinoline (crinoline tape). Sewing the crinoline along the bottom edge will not only secure a beautiful wave but also prevent the tulle, organza, or satin from twisting and sagging.
- Reinforce the waist seam. A heavy, multi-layered skirt can pull the bodice down. Be sure to sew a dense grosgrain or silicone tape into the fitting seam to fix the waistline and take on all the load.
Rules for Ironing and Storing a Voluminous Outfit
A voluminous dress requires delicate care so that the layers of tulle, organza, or satin do not wrinkle or lose their original volume.
Ironing and Steaming Rules:
- Use a steamer: For multi-layered skirts made of tulle and organza, vertical steaming is the best choice. Steam gently smooths out creases without damaging the delicate netting.
- Temperature setting: If you do not have a steamer, iron with the iron on the lowest temperature setting (silk or synthetic mode) strictly through a dry pressing cloth or cotton fabric.
- Ironing satin: Satin details should only be ironed on the reverse side without using steam to avoid water spots and shiny marks.
Secrets to Proper Storage:
- Only on a hanger: Store the dress on wide, soft shoulder pads that match the bodice size to prevent the shoulder seams from deforming under the weight of the skirt.
- Breathable cover: Use a cover made of non-woven material (spandex). Plastic bags create a greenhouse effect, which can cause the fabric to yellow.
- Petticoat separately: If the petticoat uses hoops, store it folded or hang it separately so that it does not crease the main skirts of the dress.
Conclusion
Creating a voluminous dress by hand is not just a sewing process; it is true creative magic. Now that you know all the professional secrets—from accurately calculating fabric consumption and modeling the circle skirt to assembling multi-layered tulle, creating a stiff petticoat, and properly caring for the finished garment—you are fully ready to bring your dream to life.
Do not be afraid to experiment with the number of netting layers, the combination of satin and organza textures, or the decorative trim. Even if this is your first large-scale project, neatness, patience, and step-by-step adherence to the technology will guarantee a flawless result. A handmade festive outfit for a girl or an elegant evening dress will surely become a source of pride and gather many compliments.
We wish you straight seams, obedient fabrics, and inexhaustible inspiration! May your new voluminous dress hold its shape impeccably and give you the feeling of a true celebration.