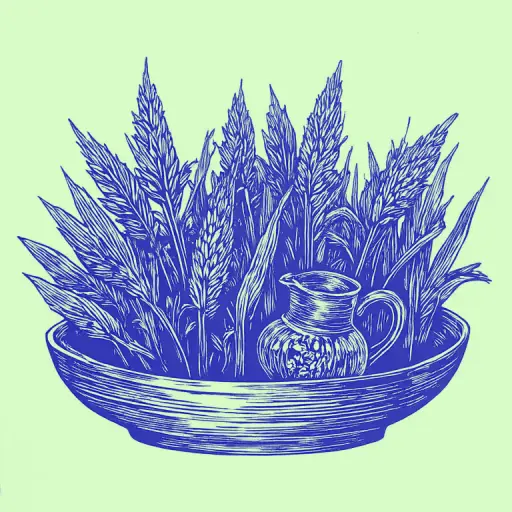
How to Sprout Wheat Seeds at Home Quickly and Correctly
- 8 min read
- 81
Sprouted wheat is a true living superfood, accessible to everyone right in the kitchen. Health-conscious supporters appreciate this product for the enormous benefit of the sprouts: at the time of germination, the concentration of vitamins, enzymes, and antioxidants increases dozens of times. Obtaining this precious dietary element at home is much easier and more economical than buying ready-made supplements.
In this practical guide, we will analyze how to start the seed activation process quickly and correctly. You will discover all the details: from the correct washing of the wheat and soaking of the seeds to growing a juicy wheatgrass (microgreen) on the windowsill.
Preparation for Germination: Choosing Quality Seeds and Equipment
The success of home wheat germination depends directly on a correct start. Even the most careful care will not help if you use old seeds, seeds treated with chemicals, or unsuitable containers where moisture stagnates.
To obtain juicy and healthy sprouts, it is essential to pay attention to two key factors: the quality of the seed material and the cleanliness of the equipment. Let's see how to correctly choose the wheat and what simple tools you will need in the kitchen for a quick and hygienic process.
Which Wheat to Buy for Germination
To obtain healthy and safe sprouts, common forage wheat or seeds from garden stores are not suitable, as they are often treated with chemicals against pests and molds.
Choose wheat marked with the special designation "for germination" or "organic". It can be found in the healthy food sections, in ecological stores, or in large supermarkets.
Criteria for quality wheat:
- Appearance: The seeds must be whole, golden in color, without dark spots, chips, or impurities.
- Harvest Period: Annual storage wheat germinates best. Biennial seeds lose viability.
- Odor: Clean, natural, without signs of mold or rancidity.
What You Need to Work: Preparing Containers and Water
For successful wheat germination, prepare the simple equipment:
- Containers: Use glass, ceramic, or terracotta plates and shallow containers. Avoid aluminum utensils or other metals to prevent oxidation. A wide, flat bottom to the container will allow the seeds to be distributed in a thin and even layer.
- Fabric: You will need a clean gauze (folded into 2-3 layers) or a thin cotton cloth to retain moisture.
- Water: Use only filtered, bottled, or room-temperature decanted water (20-22 °C). Chlorinated tap water can slow down sprout activation.
Quick Step-by-Step Method for Wheat Germination on Gauze
The classic quick method using common gauze is the simplest, most reliable, and most accessible way to obtain the first sprouts in just 24-36 hours. It does not require expensive equipment and is ideal for beginners. Thanks to excellent aeration and moisture retention, this method minimizes the risk of seed acidification.
Let's see step-by-step how to correctly start the wheat awakening process and create ideal conditions for it on a common plate.
Washing and Soaking the Seeds: First Activation Phase
The first step toward obtaining a superfood is the thorough washing of the wheat. Pour the seeds into a deep container and cover them with fresh filtered water. Mix them by hand: immediately remove all floating debris, empty husks, and damaged seeds, as they will not germinate and may cause mold. Repeat the procedure 2-3 times until the water becomes completely clear.
After washing, cover the wheat with clean room-temperature water in a 1:3 ratio (the water must completely cover the seeds with a margin of a couple of centimeters). Leave the container in a dark place at a temperature of 20-22 °C for 8-10 hours (it is convenient to do this at night). During this time, seed activation will begin: they will swell, "wake up," and prepare for rapid growth.
Germination on the Plate: Temperature and Humidification Regime
After soaking, distribute the swollen wheat seeds on the bottom of a flat plate in a thin layer (no more than 1-2 rows) to prevent putrefaction. First, line the bottom with gauze folded into 2-3 layers and cover the seeds with another moist layer of gauze.
For rapid germination, maintain optimal conditions:
- Temperature Regime: The ideal range is +20 °C to +24 °C. At lower temperatures, the process will slow down, while with heat above +25 °C, the seeds can acidify.
- Humidification: The gauze must remain moist, but not soaked. Spray it periodically with a spray bottle.
- Aeration: Gently wash the wheat with clean water twice a day to refresh it and prevent mold formation.
After just 12-24 hours, the first white sprouts of 1-2 mm will appear; at this moment, the sprouted wheat is optimal for health.
Alternative Methods of Home Germination and Wheatgrass
The classic gauze plate is not the only, nor often the most practical, path. Modern home agriculture offers more technological and cleaner methods that minimize the risk of seed acidification and save time. Depending on your goals—whether it is to obtain juicy young sprouts for a morning smoothie or to grow a dense green carpet for a juice—you can choose the optimal device or learn a simple substrate cultivation technique.
Using Jars, Plastic Containers, or Automatic Sprouters
If the classic plate method seems too laborious, use more technological alternatives:
- Jar Method: Fill a glass jar with washed seeds up to a quarter of the volume, cover with water overnight. In the morning, secure a gauze or a special mesh lid to the neck with an elastic band, drain the water, and place the jar upside down on an inclined support at 45°. This ensures ideal drainage and ventilation. Wash the wheat twice a day directly through the mesh.
- Plastic Container: Place the moist seeds in a food container, close the lid with ventilation holes, and place it in a cool place, washing every 12 hours.
- Automatic Sprouter: The most reliable option for regularly obtaining superfoods. The device irrigates the seeds with water and maintains an optimal microclimate, completely excluding the risk of acidification.
Growing Wheat in Soil as Microgreen
Growing wheat in soil is the best way to obtain juicy microgreen (wheatgrass) to prepare a healing juice.
- Soil Preparation: Take a shallow tray with drainage holes and fill it with 3-5 cm of quality potting soil or coconut substrate.
- Sowing: Distribute the previously soaked wheat seeds uniformly on the surface of the soil in a single layer. There is no need to cover them with soil.
- Care: Spray the seeds abundantly with a spray bottle, cover the tray with plastic wrap for 2-3 days before the first sprouts appear. Then, remove the cover and transfer the microgreens to a bright windowsill. Water daily, avoiding water stagnation.
After 7-10 days, when the sprouts reach a height of 10-12 cm, cut this superfood at the base with scissors for consumption.
Consumption, Storage, and Common Troubleshooting Rules
Obtaining healthy green sprouts or tender sprouts is only half the battle. For the homemade superfood to provide maximum benefit to the body and remain absolutely safe, it is important to learn how to use it correctly. At this point, beginner urban farmers often encounter difficulties: from rapid crop deterioration to the appearance of unpleasant odors. We analyze the key storage details and common mistakes to avoid.
How to Store and Consume Sprouted Wheat Correctly
The maximum benefit of sprouted wheat is obtained when the sprouts are 1-2 mm long.
How to Consume:
- Raw: Chew the seeds thoroughly for better nutrient assimilation.
- In Dishes: Add this superfood to smoothies, fresh salads, and ready-made porridge. Do not heat the product to preserve vitamins.
- Dosage: Start with 1 teaspoon per day, gradually increasing the portion up to 2-3 teaspoons.
How to Store in the Refrigerator:
Transfer the sprouts to a glass jar, cover with damp gauze or a non-airtight lid. Store at a temperature of +2...+5 °C for no more than 2-3 days, washing daily with fresh water.
Why Seeds Mold, Smell Sour, and Don't Sprout: Troubleshooting
If the wheat is moldy, smells sour, or does not sprout, you have encountered typical errors:
- Sour odor and mold result from excess moisture and poor ventilation. Always drain the water thoroughly after soaking and washing, and do not cover the container with an airtight lid.
- Absence of sprouts indicates that the seeds are too dry or that low-quality, chemically treated raw material was used.
Wash the seeds regularly with clean water every 12 hours and monitor the ambient temperature (20-24 °C).
Conclusion
Growing wheat at home is a simple and accessible way to enrich your diet with a precious superfood. By following our step-by-step instructions, you can easily avoid common mistakes and obtain fresh, vitamin-rich sprouts or succulent wheatgrass all year round. Start with a small portion, and this healthy process will soon become a habit!