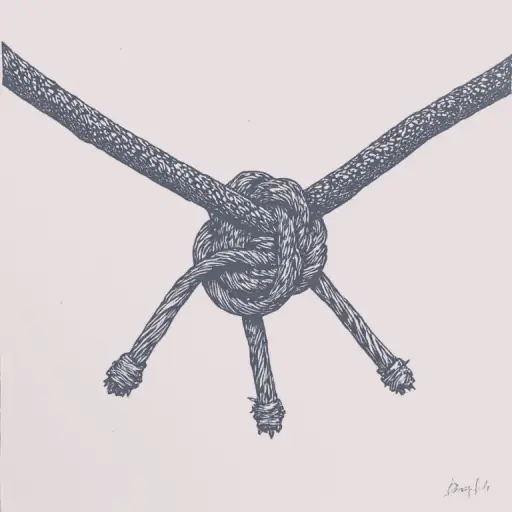
How to Tie a Knot Correctly and Safely for Rope Joining
- 8 min read
- 63
When working with ropes and webbing in mountaineering, hiking, or daily life, the reliability of the connection is crucial. One of the most popular and time-tested methods for joining two ends is the crossing knot (also known as band knot or cross guide). This simple yet effective alpine knot is ideal for joining ropes of the same diameter and flat webbing.
In this practical guide, we will detail the step-by-step schema for tying it, the safety regulations, typical beginner mistakes, and examine a more resilient alternative: the crossing eight.
Nature and Application of the Crossing Knot
The crossing knot, also known as a band knot or Water Knot, holds a special place in the arsenal of mountaineers and hikers thanks to its unique geometry. Understanding the physics of this connection helps determine exactly in which situations its use provides the greatest benefit and where special caution is required. Let's analyze in which areas this knot has become a standard of reliability and why its properties are so valued when working with specific equipment.
What is the Crossing Knot Used For in Mountaineering and Hiking?
In sport mountaineering and hiking, the crossing knot (also known as a band knot or Water Knot) is primarily used to securely join flat webbing and straps. It is one of the few knots that holds well in flat material, making it indispensable for creating stations, anchors, and textile pull lines.
It is also used to extend ropes of the same diameter (for example, for a rappel). However, due to its tendency to untie on its own with modern, stiff, and slippery ropes, its application requires strict adherence to safety regulations.
Advantages of Working with Flat Webbing and Ropes of the Same Diameter
The crossing knot (also known as a band knot) unleashes its maximum safety potential precisely when working with flat webbing and ropes of the same diameter.
Main advantages of this combination:
- Even load distribution. The flat webbing lies flat in the knot without twisting, minimizing internal friction and wear on the textile fibers.
- Connection stability. Ropes of the same diameter ensure symmetrical friction between the working ends and prevent dangerous slippage under load.
- Compactness. The finished knot is flat, neat, and practically does not snag in rocky terrain when passing through.
Using materials of different thicknesses or stiffness for this knot is not permitted, as this drastically reduces the strength of the connection.
Step-by-Step Instructions for Tying the Classic Crossing Knot
The step from theory to practice is fundamental to mastering any alpine equipment. The classic crossing knot, also called the band knot, is appreciated for its simplicity, but its reliability depends directly on the precision of every movement. Any carelessness in forming the wraps can critically reduce the strength of the connection.
We will detail the step-by-step algorithm that allows you to join ropes or flat webbing flawlessly.
Basic Schema for Forming the Cross Guide
The classic crossing knot (or band knot) is tied based on a simple basic knot. Tying consists of three simple steps:
- Base Formation: At the end of the first rope or flat webbing, tie a loose simple knot and leave the working end free with a length of at least 10–15 cm. Do not pull it tight.
- Cross Movement: Take the working end of the second rope of the same diameter. Begin guiding it through the tied knot from the opposite side, running strictly parallel to the wraps of the first rope (which creates the cross guide).
- Symmetrical Exit: Pass the second rope through all the wraps of the first knot so that its working end exits on the opposite side. Ensure that the webbing does not twist.
Correct Tightening and Smoothing of the Wraps
Once the working end of the second rope has completely replicated the pattern of the first knot, all wraps must be carefully smoothed. The crossing knot (or band knot) is extremely sensitive to overlaps. This is particularly critical when using flat webbing: the straps must lie strictly parallel to each other and without twisting.
To tighten correctly, alternately pull on all four ends (two working ends and two knot ends) and then pull the entire knot tight. Ensure that the length of the free working ends is at least 10–15 cm (up to 20 cm for slippery ropes of the same diameter). A correctly smoothed alpine knot is absolutely flat and symmetrical.
Safety Regulations: Check Knots and Typical Errors
Knowing how to tie the crossing knot correctly is only half the battle. True mastery is shown in knowing the safety regulations and the ability to avoid errors. When working with alpine equipment, one cannot rely solely on memory or intuition. Therefore, it is crucial not only to know the tying schema but also to understand what additional precautions are necessary to ensure the maximum reliability of the connection.
In this section, we analyze critical aspects: from the necessity of check knots to the most common errors that can reduce the strength of your connection. Studying these regulations helps you not only in tying the knot but also in ensuring your safety under real conditions.
Is it Necessary to Use Check Knots and How to Protect the Knot from Untying?
The crossing knot (or band knot) tends to untie on its own under variable loads ("slip"), especially with stiff or slippery synthetic ropes. Therefore, using check knots on both free ends is a mandatory safety requirement.
To reliably protect the connection, follow these rules:
- Length of free ends: Leave the working ends free with a length of at least 10–12 rope diameters (or the width of the flat webbing).
- Check knot: Tie a simple figure-eight knot directly next to the main knot.
- Attachment to webbing: With flat webbing, the free ends can additionally be secured with an elastic band so that they do not snag in the terrain.
Common Tying Errors That Reduce Connection Strength
Even experienced mountaineers make mistakes that can render a safety rope unreliable. These are the main errors when tying knots:
- Twisting the webbing. When working with flat webbing, the wraps must run strictly parallel. Twists reduce strength and accelerate wear.
- Different rope diameters. The band knot is only reliable for ropes of the same thickness. The difference in thickness leads to dangerous slippage.
- Too short tails. Leave the tails free with a length of at least 10–15 cm, otherwise, they will retract inward under load.
- Insufficient tightening. A knot that is not tensioned slips easily.
The Eight-Fold Knot as a More Resistant Alternative
Although the classic crossing knot is indispensable for flat webbing, mountaineers and rescue teams often prefer safer connections in critical situations. The eight-fold knot (or flame knot) is a high-strength alternative that significantly surpasses the simple crossing knot in terms of safety. It is ideal for joining ropes of the same thickness, practically does not reduce equipment strength, and is not prone to spontaneously loosening under variable loads.
Safety Differences Between Crossing Knot and Eight-Fold Knot
The eight-fold knot (flame knot) significantly outperforms the classic crossing knot in important safety parameters:
- Strength Retention: The eight-fold knot retains up to 75–80% of the original rope strength, whereas the ordinary crossing knot reduces this percentage to 60–65%.
- Resistance to Friction and "Slippage": The classic crossing knot tends to loosen under variable loads on slippery synthetic ropes. The eight-fold knot remains stable under similar conditions.
- Behavior Under Load: After a strong pull, the crossing knot tightens firmly and requires enormous effort to untie. The eight-fold knot is much easier to untie.
- Visual Inspectability: The symmetrical pattern of the eight-fold knot allows for immediate detection of an error during connection inspection.
Eight-Fold Knot Schema for Maximum Reliability
To tie the eight-fold knot (flame knot) correctly, follow this simple schema:
- Establish the Base: Tie a loose, untensioned classic figure-eight knot at the end of the first rope.
- Crossing Step: Take the working end of the second rope and begin feeding it into the first rope, exactly repeating all the curves and loops of the first figure-eight knot.
- Parallelism Check: Ensure that both ropes run strictly parallel to each other, without twists or crossings within the knot.
- Final Tightening: Pull all four rope ends evenly tight. Ensure that the working ends are left free with a length of at least 10–12 rope diameters to guarantee safety.
Conclusion
Mastering the knot-tying technique of the crossing knot and its modifications is a fundamental skill for every mountaineer, hiker, or caver. A correctly tied crossing knot or eight-fold knot ensures the reliability of the connection between ropes of the same thickness and flat webbing.
Final Safety Recommendations for You:
- Always check the knot before applying load: The wraps must run strictly parallel, without dangerous crossings.
- Leave sufficient free tails (no less than 10 rope diameters) and tie safety knots if necessary.
- Practice regularly in a calm environment to automate knot-tying ability.
Safety on the route begins with attention to detail. Practice at home so you can apply the knots confidently in any extreme situation!