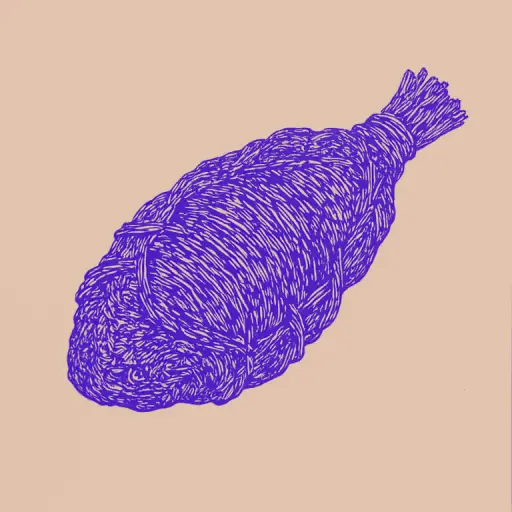
How to Tie a Meat Roll with Culinary Twine to Maintain Its Shape
- 8 min read
- 60
Preparing a juicy meat roll is a true culinary art. However, even the most exquisite recipe can suffer if the dish loses its shape, falls apart, or all its juices leak out during baking in the oven or boiling. This is precisely why proper shape fixation is crucial.
Using culinary twine or food-grade string allows for even pressure distribution, ensuring the meat cooks uniformly and retains its juiciness. In this guide, we will cover how to professionally wrap the meat, which materials to choose, and how to tie a secure culinary knot, even if you are doing it for the first time.
Choosing Materials: Which Twine to Use for Wrapping Meat
Before moving on to mastering culinary knots and wrapping patterns, it is necessary to select the correct material. Not every string can withstand the high temperature of the oven or prolonged boiling while maintaining strength and safety for health.
Choosing the right wrapping directly affects the juiciness of the finished dish and the ease of removing the strings before serving. Let's find out which materials will be your reliable kitchen helpers and which ones might hopelessly ruin your meat masterpiece.
Culinary Twine and Food String: Why They Are Indispensable
A specialized culinary twine (or food-grade string) is the foundation of successfully baking any meat roll. Made from natural cotton or linen, it has key advantages:
- High Heat Resistance: Natural fibers easily withstand oven baking temperatures (up to 220 °C) without the risk of melting or charring.
- Ecological Safety: Quality twine does not contain dyes or chemical treatments, so it does not release toxic substances into the food.
- Strength and Elasticity: The string securely fixes the roll's shape, does not cut into the fibers, and prevents juices from leaking out.
Thanks to its rough texture, cotton twine does not slip when tightening the culinary knot, ensuring an ideal wrapping density.
Can You Use Regular Sewing Thread and Dangerous Alternatives
It is strongly discouraged to use regular sewing thread to wrap a meat roll. Thin sewing thread, under the pressure of meat expanding when heated, easily cuts through delicate fibers, causing juice loss. Furthermore, colored household threads contain chemical dyes that easily migrate into the product when heated.
The main danger lies in the composition of alternative materials. Most household strings and threads contain synthetic fibers (capron, nylon, polyester). When baked in the oven, they begin to melt at temperatures as low as 160–180 °C, releasing toxic substances directly into the meat and leaving an unpleasant chemical odor. For safe cooking, only 100% natural, undyed materials are suitable.
Classic Method: Step-by-Step Continuous Wrapping with Loops
The classic method of continuous wrapping with loops is a basic culinary skill that elevates a homemade meat roll to a restaurant-level masterpiece. This method not only holds the product's shape but also ensures even baking in the oven, keeping all juices inside. By using one continuous string, you create a secure and aesthetic framework that will not allow the roll to fall apart during thermal processing.
Mastering this technique is much easier than it seems. Let's break down the entire process step-by-step, starting with the very first movement that sets the correct tension for the entire structure.
How to Make the Starting Culinary Knot and Begin Wrapping
To start wrapping, step back about 2 cm from the edge of the prepared meat roll. Wrap the culinary twine around the meat and tie a secure starting knot. It is best to use a classic butcher's knot or a simple double knot:
- Wrap the working end of the twine around the roll.
- Make a double overlap of the string ends (like tying a surgical knot) so the string does not slip on the moist meat.
- Tighten the loop firmly, fixing the shape of the roll's edge.
Be sure to leave a free tail of twine 5–7 cm long—it will be needed at the very end for the final securing of the entire structure. Now the foundation is laid, and you can proceed to forming the loops.
Forming Sequential Loops and Final Securing of the Twine
From the starting knot, step back 2–3 cm along the roll. Press the twine with your finger, wrap it around the meat, creating a ring. Pass the free end under the taut longitudinal twine from bottom to top, forming a loop, and gently tighten. Repeat this step at equal intervals until the end of the preparation.
When you reach the opposite edge, flip the roll over. Run the twine along the back side, passing it under each transverse ring to create a secure longitudinal "seam." Returning to the beginning, tie the working end to the remaining short tail of the starting knot with a double knot and trim the excess.
Alternative Methods for Fixing the Roll's Shape
Although the classic continuous loop is considered the standard of culinary mastery, it requires a certain dexterity and time. If you are just starting your culinary journey or find that you do not have specialized twine on hand, do not give up on making a juicy meat roll.
There are simpler and faster alternative fixing methods that will reliably hold the dish's shape during baking or boiling using household items.
Simple Method of Wrapping with Single Knots for Beginners
If the classic continuous wrapping seems too complicated for you, use the single-knot method. It is ideal for beginners because it forgives mistakes: even if one knot is tied loosely, the others will securely hold the roll's shape.
Step-by-step process:
- Cut the food-grade twine into several equal segments, about 20–25 cm long.
- Wrap the first segment around the center of the roll and tie a simple double (surgical) knot. Tighten firmly but gently so the string does not cut the meat.
- Repeat the procedure, tying the strings from the center toward the edges with a spacing of 2–3 cm.
- Trim any excessively long ends of the strings with scissors.
This method guarantees a secure shape fixation and preserves the meat's juiciness during oven baking.
How to Tie a Meat Roll Without Twine: Using Skewers and Silicone Bands
If culinary twine is not available, alternative tools can reliably fix the meat roll:
- Wooden skewers or toothpicks. Ideal for small rolls (such as those made from poultry). Roll the meat and pierce the edges crosswise, mimicking a seam. Before baking in the oven, soak the wooden skewers in water for 10–15 minutes so they do not burn.
- Silicone culinary bands. This is a modern, reusable alternative. They are elastic, withstand high temperatures, and are easily tightened using special grooves. Bands excellently hold the shape of large rolls during baking without cutting into the meat.
After cooking, the alternative fixators are removed just as easily as regular food twine.
Features of Preparing and Wrapping a Pork Shank Roll
Preparing a roll from a pork shank is the pinnacle of home culinary mastery, requiring a special approach. Unlike tender fillet or flat loin, the shank has a complex structure with abundant connective tissue, fat, and tough skin. To transform this tough cut into a juicy, monolithic delicacy that will not fall apart when sliced, it is important to prepare the meat correctly and ensure maximum fixation at all stages of thermal processing.
How to Properly Disassemble and Tightly Roll the Shank
To begin, thoroughly wash and dry the shank. Make one deep longitudinal cut along the bone to the base. Carefully, using the tip of a sharp knife, cut the meat around the bone, trying not to damage the outer skin—this will serve as the strong framework of the future dish. Remove the bone.
Unfold the resulting piece with the skin facing down. To ensure the roll is uniform in thickness and rolls easily, make cuts on the thicker parts of the meat, unfolding them like a "book," or lightly pound the piece through plastic wrap. Evenly distribute spices, salt, and garlic over the entire surface. Begin rolling the shank into the tightest possible roll, moving from the meat edge toward the skin, so that the skin ends up on the outside and securely holds the shape.
Specifics of Fixing and Pressing the Roll During Boiling and Baking
The method of thermal processing determines the nuances of fixing the shank:
- When Boiling: Pork shank contains a huge amount of collagen, which softens when heated. To prevent the roll from losing its shape in the broth, wrap it as tightly as possible. It is recommended to first tightly wrap the preparation in plastic wrap or place it in a roasting bag, and then tie it with twine. After boiling, be sure to place the hot roll under a heavy press (weight) in the refrigerator for 8–12 hours—this ensures perfect slicing density.
- When Baking: When baking in the oven, the meat fibers expand, so the twine tension must be tight, but without excessive compression. If you are using a roasting bag, cut it 20 minutes before the end of cooking to get a browned crust, taking care not to nick the culinary twine with the knife.
Conclusion
Mastering the technique of wrapping a meat roll is a simple way to elevate your culinary skills to a new level. The correctly chosen culinary twine and neat knot guarantee that the dish will maintain its shape, juiciness, and presentable appearance both when baked in the oven and when boiled.
Do not be afraid to experiment with the classic loop or single knots: with each attempt, your rolls will become denser, neater, and more appetizing. A little practice—and this culinary art will be conquered by you effortlessly!