How to Weld Angle to Angle at a Right Angle Without Metal Deformation
- 14 min read
- 70
Welding a metal angle is a basic operation when creating sturdy frames, doors, workbenches, and gates yourself. However, even experienced craftsmen know that joining two pieces at a 90-degree angle so that the structure doesn't 'skew' is not a simple task. When steel is heated, it inevitably expands, and when it cools, it contracts, causing metal deformation and compromising the geometry of the entire frame.
In this practical guide, we will cover how to correctly weld angle to angle while preserving a perfect right angle. You will learn which jointing method to choose—a 45-degree bevel or a shelf cutout—how to use clamps, a square, and tack welds for rigid fixture of the parts, as well as how to compensate for shrinkage during the process. With simple tips, you can assemble a reliable structure without warping, even in a home workshop.
Preparation Stage: Selecting Equipment, Electrodes, and Preparing Metal
Quality welding of angle stock begins long before the first arc is struck. To achieve a perfect right angle without skewing or deformation, it is necessary to thoroughly prepare the workspace, tools, and the metal itself. Even the most experienced craftsman cannot compensate for defects in a dirty surface or an incorrectly chosen welding mode.
In this stage, we will cover two key steps: the correct selection of equipment and consumables, and the mechanical preparation of the parts. This will lay a solid foundation for a strong and aesthetically pleasing weld.
Choosing the Welding Machine, Electrode Diameter, and Current
For quality welding of steel angle in a home setting, it is optimal to use an inverter welder (MMA). It provides a stable arc, has smooth parameter adjustment, and forgives minor mistakes by beginners.
The choice of consumables and the machine's operating mode directly depends on the thickness of the angle shelf. Most often in domestic use, angle stock with a thickness of 3 to 5 mm is used.
| Angle Shelf Thickness (mm) | Electrode Diameter (mm) | Recommended Current (A) | Recommended Type |
| :--- | :--- | :--- |
| 2 | 2.0 | 50 – 70 | MR-3, ANO-21 |
| 3 – 4 | 3.0 | 80 – 110 | MR-3, UONI-13/55 |
| 5 and above | 4.0 | 120 – 160 | UONI-13/55 |
For performing tack welds on parts and welding in hard-to-reach places, electrodes with rutile coating (MR-3) are excellent—they provide easy initial and re-ignition. If the structure requires higher strength requirements, the final weld should be performed with basic coating electrodes (UONI-13/55).
Marking, Rust Removal, and Edge Preparation of Parts
Quality surface preparation is the key to a strong weld free of pores and cracks. Start with marking: use a precision square and a sharp metal scribe. Marking accuracy down to the millimeter will save you from unnecessary gaps that provoke deformation when filled with molten metal.
The next step is cleaning. The area of the future joint (at least 15–20 mm on each side of the weld) must be cleaned until it has a bright metallic shine. For this, use an angle grinder (AG) with a flap disc or a wire brush. The following must be removed:
- Rust and scale
- Traces of oil and grease
- Old paint and primer
If the angle shelf thickness exceeds 3–4 mm, be sure to perform edge preparation—remove a bevel at a 30–45-degree angle. While doing this, leave a small chamfer of about 1–1.5 mm at the base. This ensures deep penetration of the weld root without the risk of burning through the metal.
Methods for Joining Angles at 90 Degrees and Butt Welding
Choosing the correct method of joining parts determines not only the aesthetics of the finished product but also its strength characteristics and its tendency to warp when heated. When assembling frame structures and frameworks from angle stock, craftsmen most often face two tasks: forming a rigid right angle and linearly increasing the length.
Each of these cases requires its own technological approach. Depending on the available tools—whether it is a high-precision miter saw or a standard angle grinder—the joint geometry can be prepared in different ways. Let's examine in detail the most effective cutting methods for achieving a flawless right angle, as well as the rules for securely joining angles along their length.
Comparison of Methods: 45° Bevel vs. Shelf Cutout (Without a Miter Saw)
When joining angles at 90 degrees without using a professional miter saw, the choice of cutting method determines the quality of the assembly.
Method 1: 45° Bevel
The traditional method, which provides an aesthetically pleasing closed contour. However, achieving a perfect angle manually with a standard angle grinder is extremely difficult. The slightest deviation of the disc leads to the formation of wedge-shaped gaps. Welding these gaps inevitably causes severe weld shrinkage, which shifts the frame's geometry.
Method 2: Joining with a Shelf Cutout
For craftsmen without a miter saw, this is the most reliable option. On one of the angles, only one shelf is cut out to the width of the adjoining profile.
Advantages of the method:
- Ease of marking: it is enough to place the second angle and trace its contour.
- It is much easier to make a straight 90° cut with an angle grinder than a 45° cut.
- The contact surface is larger, which facilitates positioning and reduces the risk of through-burning.
| Criterion | 45° Bevel | Shelf Cutout |
|---|---|---|
| Marking Difficulty | High | Low |
| Sensitivity to Gaps | High (moves metal) | Low |
| Joint Strength | Excellent | Excellent |
| Weld Aesthetics | High | Medium |
For most domestic structures (workbench frames, gates), the shelf cutout method is preferred because it tolerates manual cutting inaccuracies.
Features of Butt Welding Angles for Structure Extension
Butt welding two angles to increase length is a task that requires special precision, as the metal easily shifts from the central axis during longitudinal heating. To achieve a perfectly straight and strong piece, follow this technology:
- Using a Jig: Never weld the joint 'in the air.' Place both angles inside a third, larger angle or channel that will serve as a rigid guide. Clamp the parts with clamps.
- Edge Preparation: On the ends of the joined shelves, be sure to remove bevels at a 30–45-degree angle (V-groove preparation) with a 1–2 mm chamfer. This ensures penetration through the entire thickness of the metal.
- Technological Gap: Leave a gap of 1.5–2 mm between the ends to allow the liquid metal to flow freely into the joint.
- Welding Tacks: Perform short tacks along the edges of the shelves and at the base (inner bend), then check the straightness with a rule.
- Strengthening the Joint: For heavily loaded structures, use sheet plates (plates) by welding them along the shelves. Avoid continuous transverse welds on the angle itself to prevent creating stress concentration zones.
Technology for Preventing Deformation During Welding
Even perfectly fitted and joined blanks can become scrap if the laws of metal thermal expansion are ignored. During arc welding, localized heating to extremely high temperatures inevitably causes internal stresses: steel expands when heated and contracts when cooled, pulling the joint tight and distorting the calibrated 90-degree geometry.
Preventing structural warping and maintaining assembly accuracy is the primary task of the craftsman. To achieve this, professionals use a comprehensive approach that combines rigid mechanical clamping of the parts and a strictly defined sequence of welding operations. Understanding these physical processes will allow you to avoid deformation even when working with thin-walled angle stock.
Clamping Blanks with Clamps and the Role of Tack Welds
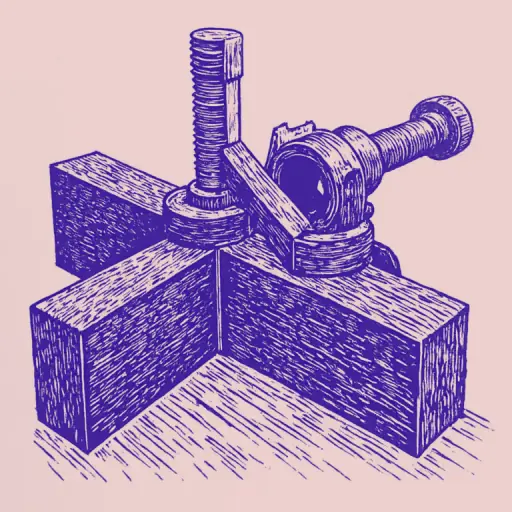
To minimize thermal stresses, rigid clamping of the parts before welding is mandatory. Using angle clamps (at 90 degrees) or classic F- and G-shaped clamps allows you to securely fasten the blanks to the welding bench or jig. Metal expands when heated and contracts sharply when cooled, and without mechanical resistance, the angle will inevitably shift inward.
However, clamps alone are not enough—tack welds (short spot welds) play a decisive role:
- Tack Weld Size: For a standard angle with a shelf thickness of 3–4 mm, points of 5–8 mm in length are sufficient.
- Placement: Tack the parts at two or three points on each joint. On an angle joint, be sure to tack along the edges of the shelves—on the 'tongue' (thin edge) and the 'flange' (inner bend).
- Sequence: Clamp the parts, check the 90-degree angle with a square, place the first tack on the flange, recheck the geometry, and only then place the tack on the tongue.
After cooling, check the angle again: if it has shifted slightly, the position can be gently adjusted with light hammer taps before applying the main weld.
Order and Direction of Weld Application to Compensate for Shrinkage
The correct order of weld application is the main secret to combating thermal deformation. Metal always contracts when cooling, pulling the shelves of the angle inward. To compensate for this stress, follow these rules:
- Side Sequence: Never fully weld one joint in a single pass. If you are welding an angle, first apply a short weld on the outer side of the joint (on the flange), then move to the opposite side and weld the inner shelves. Cross-distribution of heat minimizes geometric shift.
- Direction of Movement: Guide the weld from the flange (the thicker, stiffer part of the angle) toward the edges of the shelves (the tongues). This allows the metal to expand freely toward the free ends, reducing internal stress in the weld zone.
- Symmetry in Frame Assembly: Weld the joints diagonally. After welding one corner, move to the opposite diagonal corner, not the adjacent one. This evenly distributes the thermal load across the entire perimeter of the structure.
Using this tactic in combination with strong tacks ensures that the frame geometry remains perfect and the angles are exactly 90 degrees.
Step-by-Step Guide to Assembling a Rectangular Frame from Angles
The theoretical foundations of shrinkage compensation and part clamping rules only gain true meaning in practice—when assembling the finished product. Manufacturing a rectangular frame from metal angle stock is a classic task that requires extreme precision. Even a minor deviation at the initial stage will lead to the entire structure being skewed, which will be almost impossible to correct after final welding.
In this section, we will move to the step-by-step assembly algorithm. We will combine all the studied techniques—from part positioning to geometry control—into a single technological chain that will allow you to obtain a perfectly straight frame with precise 90-degree angles without metal deformation.
Aligning Geometry, Preliminary Assembly, and Diagonal Control
Start the frame assembly by laying out the prepared parts on a flat horizontal surface—a welding table or a level concrete floor.
The geometry alignment process is performed in the following order:
- Preliminary Layout. Lay out the blanks of the future frame in the shape of a rectangle. Use a machinist's square to set the preliminary 90 degrees at each corner.
- Diagonal Check. This is the most reliable way to check the frame geometry. Measure the distance between opposite corners across the diagonals. The difference between the values of the two diagonals must be zero. A tolerance of no more than 1–1.5 mm is allowed. If there is a discrepancy, gently tap the corners with a wooden or rubber mallet.
- Clamping. Once the ideal dimensions are achieved, rigidly clamp the joints to the workbench or mounting plate.
- Applying Tacks. Apply short spot tacks (5–10 mm long) at the outer corners of the joints. After this, recheck the diagonals, as the metal may slightly 'pull' even from a single weld point.
Phased Welding of Joints and Final Structure Size Check
After the frame is assembled with tacks and the geometry is checked, you can proceed to the final welding. To prevent the structure from warping due to thermal stress, follow a strict sequence:
- Diagonal Welding Method. Do not weld all the joints at one corner at once. Move from one corner to the next diagonally (e.g., first the top left, then the bottom right).
- Symmetrical Passes. Apply short welds, alternating between the outer and inner sides of the angle shelf. First, weld the joints on the plane of the frame, then flip it over and perform the welds on the reverse side.
- Overheating Control. Avoid long, continuous welds. Allow the metal to cool slightly between passes to minimize shrinkage.
After completing the welding, do not rush to remove the clamps. Allow the frame to cool completely while clamped. Only then should you release the structure and perform a final measurement of the diagonals with a tape measure and the corners with a construction square. The allowable deviation for household structures is no more than 1–2 mm.
Finishing the Joints and Troubleshooting Common Errors
When the frame geometry is checked and all joints are securely welded, the work is not considered completely finished. The strength and durability of a structure made from angle stock depend not only on the quality of the weld itself but also on the correctness of its subsequent treatment. Residual slag, scale, or hidden defects can quickly lead to corrosion and metal failure under load.
In this final section, we will cover how to bring the welded joints to a perfect state, protect them from rust, and give the product an aesthetic, marketable appearance. We will also analyze common mistakes made by novice craftsmen that often negate all the effort put into assembling angle structures.
Slag Removal, Weld Bead Cleaning, and Anti-Corrosion Treatment
After completing the welding work and allowing the structure to cool completely, a finishing treatment must be performed. This will not only give the product an aesthetic look but also protect the metal from corrosion.
- Slag Removal. Use a chipping hammer (chisel) to chip away the slag crust from the weld. Be sure to wear safety goggles, as slag fragments can fly off at high speed. After this, thoroughly clean the weld with a stiff wire brush.
- Weld Bead Cleaning. To level the surface, use an angle grinder (AG) with a cleaning or flap disc (grit P40–P80). If the corners were welded at a 45-degree angle for the frame, clean the joint flush with the plane of the shelves to ensure tight contact between the mating parts. Avoid excessively thinning the base metal near the weld boundaries.
- Anti-Corrosion Treatment. Degrease the treated area with a solvent. Apply a layer of metal primer (a zinc-filled primer or classic GF-021 works well). After the primer dries, coat the structure with protective enamel in two layers.
Typical Mistakes of Beginner Welders When Working with Angle Stock
Even after quality cleaning and finishing, the finished structure may be unusable if technical oversights were made during the assembly and welding stages. Novice craftsmen most often make the following typical mistakes when working with angle stock:
- Skipping Tack Welds. Attempting to weld a joint "all at once" in a single pass inevitably causes the metal to pull toward the weld, disrupting the right angle. Tack welds at multiple points are mandatory for fixing the geometry.
- Neglecting Rigid Fixturing. Welding parts "in the air" or without using clamps and jigs guarantees frame deformation due to thermal expansion of the metal.
- Ignoring Edge Preparation and Gaps. Welding butt joints without a technological gap prevents deep penetration, causing the joint to crack under the first load.
- Incorrect Thermal Regime. Too high an amperage on the welding inverter leads to burn-through of the angle shelves, and excessive heating of one node without cooling severely deforms the entire structure.
- Lack of Diagonal Control. If the equality of the frame diagonals is not checked after every tack weld, correcting the skew on the finished product will be impossible.
Conclusion
Welding angle metal stock is a basic but extremely important skill for any DIY craftsman. Creating a sturdy rectangular frame, a gate, or simply extending an angle butt-to-butt requires not so much expensive equipment as accuracy, patience, and strict adherence to the technology.
To summarize our guide, let's highlight three golden rules for welding angles without deformation:
- Thorough Preparation: Always clean the metal until it shines, perform proper edge preparation, and accurately mark the blanks before cutting (whether it's a 45-degree cut or cutting out a shelf).
- Rigid Fixturing: Never neglect clamps, jigs, and tack welds. These are what hold the structure's geometry during the moment of maximum thermal expansion and weld shrinkage.
- Thermal Balance: Weld with short beads, observe a checkerboard pattern or a "center-to-edge" direction, and always allow the metal to cool naturally.
A welding inverter in a craftsman's hands is a tool of creation. Don't be afraid to practice: with every new joint, your movements will become more confident, and your welds will become straighter and stronger. Observe safety precautions, control the diagonals at every stage, and your metal structures will last for decades!