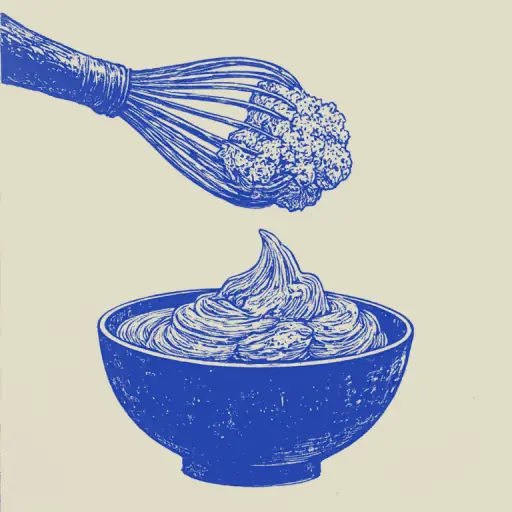
How to Whip Soap Base for Fluffy Soufflé Soap?
- 14 min read
- 63
Have you ever held a soap that doesn't sink in water, but whose texture resembles the most delicate marshmallow or airy soufflé? Whipped soap (or soufflé soap) is a real hit in the world of home cosmetics and SPA products. Unlike a classic solid bar, this soap has a porous, velvety structure that gently cleanses the skin and provides incredible tactile sensations.
Creating this little miracle at home is much easier than it seems. You won't need complex chemical laboratories—just a quality soap base (solid or creamy), a regular kitchen mixer, and a little inspiration.
In this practical guide, we will thoroughly cover the technology of whipping the soap base, share proven recipes with nourishing oils, and reveal the secrets that will help you prevent the foam from settling. You will learn to create perfect marshmallow soap with your own hands on the first try!
Preparing Tools and Choosing the Soap Base
Creating delicate soufflé soap is a captivating creative process, reminiscent of confectionery art. To achieve the perfect airy texture that won't settle over time, it is important to prepare your workspace correctly. The success of the experiment depends directly on two factors: the quality of the raw materials and the reliability of your tools.
Before starting to whip, you need to figure out which type of soap base best retains air bubbles and gather simple equipment that you can surely find in any kitchen. A proper start will save you from typical beginner mistakes and make the soap-making process easy and enjoyable.
Which Base is Better: Solid or Creamy
Choosing the soap base is the first and most important step, determining the texture of the future soufflé soap. Two types of raw materials are suitable for whipping, and each yields a completely different result:
- Solid soap base. When whipped, it forms a porous, airy structure that retains its shape after setting. This whipped soap is light, literally floats on the surface of water, and resembles dense marshmallow. However, you must work quickly with it: it sets rapidly, and if the process is disrupted, it may crumble. To make it more pliable, water and base oils are added to the recipe.
- Creamy base. Ideal for creating classic soft soap mousse, which is packaged in jars. It mixes easily with a mixer, does not harden over time, and excellently retains nourishing components.
Soapmaker's Secret: To obtain perfect soufflé soap that holds its shape yet remains delicate, mix melted solid and creamy bases in a 1:1 ratio.
Necessary Equipment: Kitchen Mixer, Heat-Resistant Dishes, and Molds
To create perfect soufflé soap, you will need a simple but specific set of tools. The correct choice of equipment guarantees that the mass will whip into a fluffy foam and be easily removed from the molds.
- Kitchen mixer. A standard hand mixer with whisks is your main working tool. A blender with blades is not suitable here, as it chops rather than saturating the mass with air. It is advisable to dedicate a separate appliance for soap making or to thoroughly sterilize the attachments after use.
- Heat-resistant dishes. Choose deep containers made of heat-resistant glass or high-quality thick plastic. The dishes must withstand heating in a water bath or in a microwave. High sides are mandatory: the soap mass increases in volume by one and a half to two times when whipped.
- Soap molds. Since whipped soap is porous and fragile, use soft silicone molds. The finished soufflé can be removed from them without damage. Avoid plastic molds with complex fine relief—the thick airy mass simply won't fill the small details.
Recipe and Ideal Ingredient Proportions
Creating perfect soufflé soap is like confectionery art: not only is the whipping technique important, but also the jeweler's precision in proportions. Unlike classic bar soap, the airy texture of the "marshmallow" is extremely sensitive to an excess of heavy oils or moisture. If the balance is disturbed, the foam will quickly settle, and the finished product will turn into an shapeless mass or begin to crumble.
To make the soufflé soap stable, delicate, and pleasant to use, you must strictly adhere to a proven recipe. Next, we will examine the basic ratio of components that guarantees a stable porous structure, and we will also learn how to correctly select nourishing additives that do not weigh down the airy foam.
Basic Soufflé Soap Recipe: Ratio of Base, Water, and Oils
For creating classic soufflé soap from a solid base, it is crucial to maintain a balance between hardness and pliability. An excess of liquid will make the finished product too soft and prone to severe shrinkage, while a lack of it will prevent the mass from being whipped to the desired volume because it will set too quickly.
Here is a proven basic proportion for achieving a perfect airy texture:
- Solid soap base (white or clear) — 100 g;
- Purified or distilled water — 40 g (about 40% of the base weight);
- Base nourishing oil (e.g., jojoba or almond) — 10 g;
- Glycerin — 5 g (adds extra pliability to the foam mass);
- Cosmetic fragrance — 10–15 drops.
Water in this recipe acts as a plasticizer: it thins the melted base, allowing the mixer to easily saturate the mass with air bubbles before crystallization begins. The base oil enriches the composition, but its dosage should not be exceeded to avoid degrading the foaming properties of the finished soufflé.
Choosing Nourishing Oils and Essential Oils to Enrich the Composition
Enriching soufflé soap with nourishing components requires a delicate approach: an excess of fats can weigh down the foam and deprive the whipped soap of its main advantage—airiness.
Light base oils are ideal for creating a delicate texture:
- Jojoba oil — absorbs quickly, excellently nourishes the skin, and maintains the stability of the whipped mass.
- Sweet almond oil or peach kernel oil — gives the soufflé soap a silky feel and is suitable even for sensitive skin.
- Coconut oil — increases foaming, but it must be added in melted form and in minimal quantities.
The recommended dosage for base oils is no more than 1/3 of a teaspoon (about 1.5–2 g) per 100 g of soap base. Exceeding this norm will degrade the soaping properties of the product.
For scenting, use natural essential oils (lavender, tea tree, orange) at a rate of 3–5 drops per 100 g of base. Remember that some essential oils can thin the mass, so add them at the final stage of whipping.
Step-by-Step Guide to Whipping the Base at Home
Once the perfect proportions are calculated and the care components are prepared, the most captivating stage of creativity begins—transforming the dense soap base into an airy, weightless cloud. The process of making soufflé soap at home requires not so much complex equipment as carefulness and precise adherence to temperature control.
In this practical guide, we will break down the entire technological cycle step by step. You will learn how to properly prepare and melt the raw materials, when to engage the mixer, and how to incorporate active additives to maintain the maximum fluffiness and tenderness of the finished marshmallow soap.
How to Properly Melt the Base in a Water Bath
Melting the soap base in a water bath is a delicate process that directly affects the texture of the future soufflé. If you are using a solid base, cut it into small cubes with sides of about 1–1.5 cm beforehand. This will ensure quick and even melting. When working with a creamy base, you can place it whole in a heat-resistant container.
Place the container with the raw material over the water bath. Ensure that the bottom of the upper bowl does not touch the boiling water in the lower pot—the heating must occur solely through steam. If your recipe calls for adding purified water (for example, to soften a solid base), pour it at this stage.
Stir the mixture slowly with a silicone spatula. The main rule is to prevent the base from boiling. The optimal melting temperature is around 50–60 °C. Overheated mass will lose moisture, become brittle, and will mix poorly. As soon as the last lumps have melted, immediately remove the container from the heat.
Mixing Technique and Adding Active Components
Immediately after the base is melted, let it cool slightly to about 55–60 °C—a thin film should appear on the surface. This is the ideal moment to start.
Take a kitchen mixer for soap with whisk attachments (a hand blender with blades is not suitable, as it will not oxygenate the mass). Start mixing on the lowest speed, gradually increasing the revolutions to the maximum. The mass will begin to whiten, increase in volume, and acquire an airy texture similar to dense meringue.
During the mixing process, when the foam becomes stable, add the active components:
- Base oil: add warm jojoba oil (about 1/3 tsp per 100g of base). Excess oil can cause the foam to settle.
- Essential oils or fragrances: drop in 7–10 drops for a pleasant aroma.
- Colorant: optionally add a couple of drops of liquid pigment.
After adding the actives, mix the mixture for another 10–15 seconds on medium speed. Act quickly: the whipped soap cools and sets much faster than usual.
Secrets to Perfect Texture and Troubleshooting
Creating perfect soufflé soap is a true creative experiment where the physics of the process is closely intertwined with the chemistry of the ingredients. Even experienced masters sometimes struggle with the airy mass: it settles during whipping, becomes too brittle after setting, or sets faster than you can transfer it to the mold.
The secret to a flawless result lies in temperature control, the correct balance of moisture, and the precise calculation of care additives. Let's examine the main technical nuances that will help you notice an error in time, correct the marshmallow soap texture, and achieve that coveted, weightless, and stable foam.
What to Do If the Soap Settles, Crumbles, or Sets Too Quickly
In the process of making soufflé soap, masters often encounter three main problems. Here are simple ways to solve them:
- Soap settles after whipping. This happens if you started whipping a base that was too hot or if you used too much heavy liquid oil. Let the base cool to 50–55 °C (it should start to develop a thin film on the edges) and only then turn on the mixer. Also, try slightly reducing the amount of added water.
- Soufflé crumbles when cutting. The reason lies in excess air combined with a lack of plasticizers. To restore elasticity to the mass, add a little base oil (such as jojoba oil) or glycerin to the recipe. If you are using a solid soap base, try mixing it with a creamy base in a 1:1 ratio.
- The mass sets too quickly. If the base hardens right under the mixer blades, it means the room temperature is too low. Place the mixing container in a bowl of warm water to maintain the optimal base temperature during work.
How to Achieve a Stable Airy Foam
To obtain a truly stable airy texture that does not settle after cooling, it is important to strictly adhere to the temperature regime and ingredient balance.
Here are the main secrets to stable marshmallow soap foam:
- Temperature control. Start whipping when the melted solid soap base has cooled to about 50–55 °C. A base that is too hot will not hold air, and one that cools below 45 °C will start to set in lumps during the process.
- Correct mixer. Use a powerful kitchen mixer with two whisks. Mini cosmetic mixers cannot handle the dense mass, and a hand blender creates bubbles that are too large and burst quickly.
- Oil dosage. Excess liquid care components (such as jojoba oil) weigh down the foam and degrade the lather. Stick to the ratio: no more than 1/3 teaspoon of base oil per 100g of base.
- Secret stabilizer. Add a pinch of cornstarch during whipping. This will not only fix the air pores but also give the finished product a pleasant silkiness.
Whip the mass until stiff peaks form, like for pastry meringue. Properly whipped soufflé soap does not drip from the whisk and holds its shape well.
Pouring into Molds and Subsequent Care of the Finished Product
Achieving a fluffy, stable foam is only half the battle in creating perfect soufflé soap. Now, the soap maker faces an equally important task: transferring this delicate, air-rich mass into molds while preserving its porous structure, and properly preparing the finished product for use. Unlike classic base soap, the whipped mass behaves completely differently—it cools quickly, is reluctant to take the shape of small details, and requires delicate handling.
Proper selection of molds and adherence to curing and storage conditions will help you avoid deformation of the marshmallow soap and extend its shelf life. Let's examine how to carefully distribute the airy mass and what care tips will help preserve its unique properties.
Features of Pouring Porous Soap into Molds
Unlike classic hot pouring, the whipped soap mass has a thick, airy consistency, resembling pastry cream or marshmallow. It does not flow, but cools quickly and loses plasticity right during the process due to the abundance of micro-air bubbles. Therefore, the traditional method of filling molds will not work here—the mass must be carefully spread.
Here are the key rules for working with porous soufflé soap:
- Choosing the right mold. Use only soft silicone molds. It is practically impossible to remove the fragile, porous soap from hard plastic without damaging its delicate edges and airy texture.
- Spreading tools. Transfer the mass into the molds using a spoon, a silicone spatula, or a piping bag with a decorative nozzle. The latter option is ideal for creating beautiful "marshmallow" domes and appetizing peaks.
- Preventing voids. To prevent unsightly voids from forming inside the finished bar, firmly compact each layer with a spoon and gently tap the filled mold against the table several times. Do this carefully to maintain overall fluffiness.
- Time factor. Act without delay. If the mass begins to set during the spreading process, gently warm it in a water bath (literally for 5–10 seconds) and briefly whip it again with the mixer.
Storage and Use Rules for Marshmallow Soap
Marshmallow soap (or soufflé soap), due to its porous and airy structure, requires delicate handling after setting. Unlike classic bar soap, the whipped base is more sensitive to environmental humidity and temperature fluctuations.
Rules for storing the finished soufflé:
- Airtight packaging. Immediately after removing it from the molds, wrap the soap in plastic wrap or place it in airtight jars. This prevents moisture evaporation, which can cause the airy texture to dry out, shrink, and lose its original volume.
- Dry and cool place. Store supplies away from direct sunlight and heating radiators. Excessive humidity will cause the soap to "weep" small droplets of glycerin, and heat will accelerate the rancidity of added care oils. The shelf life of such a product is usually from 3 to 6 months.
Usage features:
- Proper soap dish. In the bathroom, use a soap dish with a quality drain or grate. The porous structure instantly absorbs water, and without drying, the marshmallow soap will quickly become soggy.
- "Non-sinking" effect. Thanks to the abundance of air bubbles, this soap holds up well on water and does not sink. This turns ordinary hand washing or bathing children into an engaging game.
Conclusion
Creating soufflé soap at home is an amazing creative process that allows you to transform ordinary soap making into true art. By mastering the simple technique of whipping the soap base, you can create unique cosmetic products with an incomparable airy texture, reminiscent of delicate marshmallow or light soufflé. This process opens up vast possibilities for imagination, allowing you to combine the benefits of natural oils with the aesthetics of airy foam.
To summarize our practical guide, let's highlight several key rules for achieving a perfect result:
- Temperature control: Never overheat the base when melting in a water bath to maintain its plasticity and avoid unpleasant odors.
- Precise ingredient balance: Strictly adhere to the proportions of the base, water, and base oils (such as jojoba or almond) so that the soap whips well and retains its cleansing properties.
- Correct tool: A standard kitchen mixer on medium and high speeds is your main helper in saturating the mass with air bubbles.
- Gentle handling: Choose flexible silicone molds, as the finished porous marshmallow soap is more fragile than a classic solid bar.
Don't be afraid to experiment with soft pastel dyes, exquisite essential oils, and textures. Every new batch of whipped soap is a step toward perfecting your craft. Create your unique SPA masterpieces, treat yourself to gentle care, and surprise loved ones with original handmade gifts that can beautifully float on water!