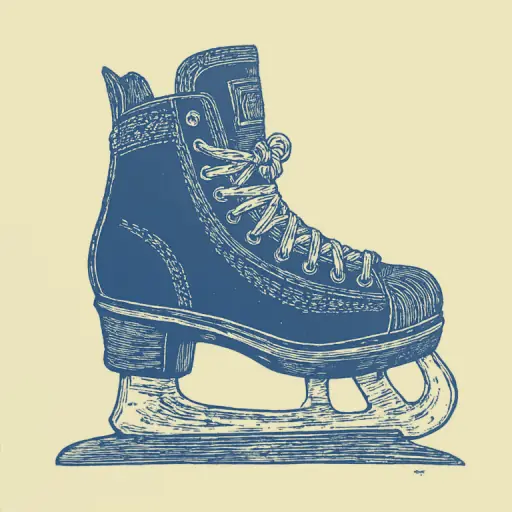
How to lace skates tightly so feet don't buckle on ice
- 15 min read
- 60
Imagine: you step onto the ice, anticipating speed and smooth gliding, but instead, you feel your legs treacherously collapsing inward, and your heel 'wandering' with every step. Familiar sight? Statistics show that over 80% of skating problems—from rapid fatigue and foot pain to loss of control and injuries—are related not to the quality of the boots themselves, but to incorrect foot fastening technique.
Proper skate lacing is a delicate balance. If you tie the laces too loosely, you will lose stability and control over the blade. If you overtighten, foot numbness coupled with impaired blood circulation will force you off the rink within ten minutes.
In this practical guide, we will break down how to lace your skates correctly so they fit like a glove. You will learn how to distribute lace tension across different zones, the difference between preparing hockey and figure skates, and how to permanently solve the problem of collapsing legs.
Preparation for Lacing: Choosing Laces and Correct Foot Position
Before moving to active actions on the ice, it is necessary to prepare a solid foundation. Even the most precise lacing technique will be ineffective if you use unsuitable accessories or secure your foot in the wrong position.
Safety and blade control begin with two basic steps: choosing the right lace material capable of holding the desired tension, and achieving the ideal heel fit inside the boot. By mastering these preparatory nuances, you will prevent the fixation from weakening quickly and protect your ankle from collapsing while skating.
Waxed or Regular: Which Laces Hold Tension Better
Choosing laces is the first step toward secure ankle fixation. Two main types are available on the market: regular (cotton or nylon) and waxed (impregnated with a special composition based on wax or paraffin).
- Regular laces are soft and comfortable to handle; they are easy to tighten. However, under load, they stretch quickly, and they become heavy when they get wet. As a result, the tension weakens after only 15–20 minutes of skating, the heel starts to shift, and the legs begin to collapse inward.
- Waxed laces are stiffer due to the impregnation. Their main advantage is that they securely grip the eyelets and do not slip back when tightened. This allows you to secure each zone of the boot with the necessary force. They do not absorb moisture and maintain tension throughout the entire training session.
For firm fixation and preventing foot collapse, experts recommend choosing waxed laces. They will save you from the need to constantly re-lace your skates on the ice.
How to Position Your Foot in the Boot Before Starting to Tighten
Choosing the right laces is only half the battle. Before making the first crossover, you must correctly position your foot inside the boot. If you fix your foot in the wrong position, even the tightest lacing will not prevent ankle collapse or rapid fatigue.
Follow the preparation algorithm below:
- Sit on a bench. Never lace up standing or while balancing—this will prevent you from distributing your weight correctly.
- Push the heel back. Put on the skate, slightly bend your knee, and firmly push your foot back. The heel must press firmly, without gaps, against the back of the boot. For extra security, you can gently tap the back of the blade on the floor.
- Align the tongue. Straighten the skate tongue exactly in the center of the shin. It must not shift to the side or crease, otherwise the stiff edges of the boot will rub your leg.
- Place the skate on the heel. Before starting to tighten, lift the toe of the skate up, keeping the support on the back of the blade. This naturally presses the foot against the back wall and frees up the lift for proper lace tensioning.
Step-by-Step Zonal Lacing Technique for Skates
Once the foot is correctly positioned inside the boot and the heel is firmly pressed against the back, the most critical stage begins—the actual lacing. The main mistake many amateurs make is trying to tighten the entire boot with the same, often excessive, force from the toe to the top eyelets. A professional approach requires a completely different tactic—zonal tension distribution.
Zonal lacing divides the boot into three functional areas, each solving a specific problem: maintaining circulation in the toes, providing firm fixation to the midfoot, and ensuring necessary ankle flexibility during squats. Understanding this mechanism is the key to preventing leg collapse and ensuring skating is purely enjoyable.
Lacing from Bottom to Top: Distributing Pressure Across Three Main Zones
For a perfect boot fit, divide the lacing process into three key zones, moving strictly from bottom to top:
- Toe Zone (first 2–3 pairs of eyelets): Moderate tension is required here. The laces should lie snugly, without sagging, but without compressing the toes. This maintains normal blood circulation and prevents the foot from getting cold.
- Instep Zone (middle part of the boot): This is the zone of maximum fixation. This is where the laces are tightened with the greatest force to firmly press the heel against the back of the boot and eliminate any play.
- Ankle Zone (top eyelets or hooks): The tension becomes moderate again here. The ankle must be secured against sideways collapse but must also retain freedom to lean forward during a deep squat.
This pressure distribution guarantees excellent blade control without foot pain or numbness.
Rules for Working with Eyelets and Features of Figure Skate Lacing with Hooks
The transition from eyelets to hooks is a critical moment in figure skate lacing, determining the balance between fixation and mobility.
When working with eyelets in the instep zone, use the "outside-in" lacing method. With this crossover method, the laces lie directly over the tongue of the boot, ensuring a tighter fit and preventing foot slippage.
When moving to hooks, observe the following rules:
- Loop from top to bottom: Drape the lace over the hook from the top, looping around it and tucking it underneath. This grip creates a self-tightening lock that will not allow the lacing to loosen during movement.
- Pyramid Principle: Tighten the first (bottom) hook as firmly as possible to fix the ankle. Lace each subsequent hook upward slightly looser than the previous one. This preserves the necessary range of motion for deep squats and jumps.
- Freedom Check: When laced, the top edge of the boot must allow the shin to lean forward. If you cannot squat freely, the top hooks are overtightened.
Special Techniques: How to Lace Skates So the Heel Doesn't 'Wander'
Even with ideal zonal tension distribution, many figure skaters and hockey players encounter the issue of their heel slightly shifting or lifting inside the boot during a deep squat. This not only reduces blade control but also leads to rapid shin muscle fatigue and painful blisters. To solve this problem, professional athletes use special ankle fixation tricks.
There are time-tested mechanical lacing techniques that allow you to securely "lock" the foot in the correct position without excessively compressing the instep. Let's examine the special techniques that will help firmly secure the back of the foot and ensure your knots do not loosen until the very end of practice.
Creating a Mechanical "Heel Lock"
To prevent the heel from lifting off the insole with every stride, professional athletes use a technique called the "Heel Lock." This method creates an additional pressure lever that literally pushes the foot back into the heel pocket of the boot.
Step-by-step algorithm for creating the "lock":
- Lace up to the second-to-last pair of eyelets before the ankle.
- Instead of crossing the laces, thread each lace through the top eyelet on the same side, moving from the outside inward.
- Do not tighten the laces completely—leave small loops on the outside of the boot.
- Cross the free ends of the laces and thread the right lace into the left loop, and the left lace into the right.
- Pull the lace ends down and outwards. You will feel the loops tighten, securely fixing the ankle and pressing the heel against the boot's rear.
This simple trick completely eliminates foot play, protects against blisters, and significantly improves blade maneuverability in turns.
Final Knot and Loops to Prevent Self-Untying
Once the heel is securely fixed with the "lock," it is necessary to properly secure the result so that the lacing does not loosen after five minutes of skating. A standard bow quickly comes undone due to constant vibration and dynamic stress on the ankle.
For a secure fixation, use the following technique:
- Surgeon's Knot: Before forming the final bow, make two turns of the laces around each other instead of just one. This simple trick creates extra friction that locks the tension firmly and prevents the lower part of the lacing from loosening as you finish the process.
- Double Bow (Safety Loop): Form the standard loops ("ears"), cross them, and thread one loop under the other twice before tightening. This knot is guaranteed not to come undone on its own, yet it is easy to untie by hand—just pull firmly on the lace ends.
Important tip: If the laces are too long, do not wrap them around the boot shaft. This compresses the Achilles tendon and disrupts blood circulation. It is better to tuck the free loops under the lacing on the tongue or tie them in an extra knot.
How to Check Lacing Tightness Before Stepping onto the Ice
Even if you have applied all the professional tricks of zonal lacing and tied a secure knot, do not rush out onto the ice. Excessive pressure or, conversely, hidden play in the boot can manifest in the first few minutes of skating, ruining the entire practice. Before stepping over the rink boards, you must conduct a quick diagnostic check right on the bench in the locker room.
The correct balance of lace tension is a fine line between firm ankle fixation and maintaining its natural mobility for a deep squat. There are a couple of simple but effective tests that will instantly determine whether your skates are ready for the load or if the boots require immediate re-lacing.
Squat Test: Checking the Balance Between Ankle Support and Mobility
After tying your skates, do not rush out onto the ice. The best way to check the balance between ankle fixation and mobility is to perform a simple squat test.
Stand on a flat surface (preferably rubber flooring in the locker room or without removing protective covers from the blades) and perform a deep squat, directing your knees forward.
What to look for during the test:
- Ankle Mobility: You should be able to bend your knees freely and lean your shin forward. If the boot restricts this movement and you tip backward, the upper zone (hooks or top eyelets) is too tight.
- Heel Stability: During the squat, the heel must not lift off the insole or "wobble" inside the boot. If you feel play, the mid-zone lacing is loose.
- Absence of Pain: If you feel a sharp pulling pain in the Achilles tendon area or the instep, the lacing must be loosened.
Ideal lacing allows you to assume a low figure skater or hockey player stance without feeling like your legs are encased in plaster.
Signs of Too Loose Lacing Causing Legs to Collapse
If the squat test passes, but you still have doubts, pay attention to the characteristic signs that your skate lacing is too loose. It is due to insufficient lace tension that the legs begin to collapse inward or outward, depriving you of control over the blade.
Main symptoms of poor ankle fixation:
- Ankle Collapse: When trying to stand evenly on both skates, the blades do not stand perpendicular to the ice but tilt onto the edge. You are forced to expend enormous shin muscle effort just to maintain balance.
- Heel Play: When walking or mimicking a stride, the heel freely lifts off the boot insole and "wobbles" up and down.
- Excess Space at the Calf: If more than one finger can easily fit between the skate tongue and your calf, the boot will not provide the necessary lateral support.
- Boot Creasing: On soft or semi-rigid boots, deep creases form in the instep area, indicating a complete lack of fixation in the middle of the foot.
If you notice even one of these signs, do not go onto the ice. Loose lacing is a direct path to ankle strains and rapid muscle fatigue. Re-lace your skates, paying special attention to the mid-zone (instep) and heel fixation.
Troubleshooting: What to Do When Experiencing Pain, Numbness, or Loose Laces
Even if you have perfectly positioned your foot and checked the tension before going onto the ice, unforeseen difficulties can arise during skating. Physical discomfort, sharp pain in the instep, or sudden numbness in the toes are common companions for both beginners and experienced amateur athletes. Often, these problems are not caused by boot defects but by minor errors in lace pressure distribution or the properties of the materials themselves.
In this section, we will cover how to quickly eliminate discomfort right at the edge of the blade without interrupting training for long. We will examine the anatomical features of lacing and practical tricks that will help you regain control of your skate and relieve excess pressure on your feet.
Why Do Feet Go Numb in Skates and How to Apply the "Window" Technique (Window Lacing)
Foot numbness while skating is a common problem faced by both beginners and experienced athletes. The main cause of this unpleasant sensation is excessive lacing pressure on the top of the foot. Major blood vessels and nerve endings run through this area. If the laces are pulled too tight, blood flow is disrupted, and the toes or the entire foot begin to go numb.
To solve this problem without losing ankle fixation, the orthopedic lacing technique "Window Lacing" is used. It allows for localized pressure reduction at the point of maximum foot arch.
How to perform the "Window" technique:
- Lace the skate using your usual crisscross method from the toe up to the area where you usually feel the most pressure or pain.
- Instead of crossing the laces at the next level of eyelets, thread each end vertically up into the next eyelet on the same side. This creates a free "window" directly above the sensitive area.
- After this, return to standard crisscross lacing and tightly secure the upper part of the boot for firm ankle fixation.
This simple trick maintains the stiffness of the boot on the sides but completely removes point pressure on the nerve endings, restoring sensation and warmth to the foot.
What to Do If Laces Stretch Quickly While Skating
If you find yourself having to leave the ice every 15–20 minutes to re-lace your skates, the problem lies with the lace material or the fixation technique. Here are three effective ways to solve this problem once and for all:
- Switch to waxed laces. Ordinary cotton or nylon laces quickly absorb moisture and start to slip in the eyelets. Waxed laces are impregnated with a special wax (paraffin). They feel stiffer but lock firmly into each eyelet, preventing the tension from loosening even during aggressive ankle flexion.
- Use the "outside-in" method. Thread the laces into the eyelets from top to bottom (from the outside of the boot inward). With this method, the lace presses against the leather cuff of the skate, creating additional friction that blocks spontaneous loosening.
- Create intermediate lock loops. At the junction of the foot arch and the ankle, make a double twist of the laces before continuing them further. This simple knot will secure the lower area and prevent it from loosening, even if the upper lacing slightly stretches.
If your fingers get tired from tightening stiff laces, use a special plastic tightening hook—it will help achieve maximum density without calluses on your fingers.
Conclusion
Proper skate lacing is not just a technical routine before stepping onto the ice; it is a key factor in your safety, maneuverability, and comfort. Understanding how to properly distribute tension across zones, secure the heel with a "lock," and prevent foot numbness distinguishes an amateur from a confident skater or hockey player.
Don't be afraid to experiment at first. Every foot is unique, and the ideal balance between firm ankle support and necessary joint flexibility is always tailored individually. The main thing is to remember three basic guidelines:
- Toe freedom: Toes must not be compressed to prevent circulatory disruption.
- Maximum fixation in the arch: This area is responsible for preventing the heel from "slipping."
- Flexibility in the calf: The top of the boot must allow you to perform a deep squat.
By spending an extra five minutes in the locker room on conscious and quality lacing, you protect yourself from falling over and painful sensations. Now you are fully ready for confident and safe skating. See you on the ice!