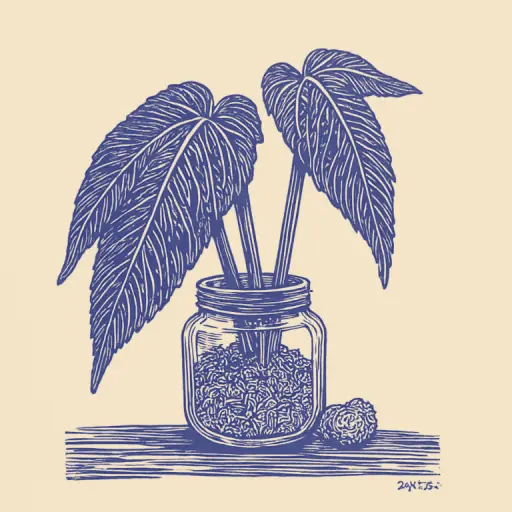
How to Propagate Aglaonema from Leaves Indoors and Is It Possible?
- 8 min read
- 28
Aglaonema is one of the most striking plants in the indoor aroid family, valued for its magnificent decorative foliage. The desire to expand one's home collection or share its beauty with loved ones often leads plant enthusiasts to consider acquiring new specimens. But is vegetative propagation of Aglaonema possible using a leaf cutting? There are many debates and misconceptions surrounding this topic. Let's find out if it is truly possible to grow a lush bush from a single leaf blade, and what nuances are important to consider for success.
Is it Possible to Propagate Aglaonema from a Leaf: Debunking Myths
Among plant enthusiasts, there are frequent arguments about whether a new Aglaonema can be grown from a single leaf. The internet is full of tempting videos where a regular leaf roots in a glass of water and turns into a lush bush. However, in practice, lovers of indoor aroids often face disappointment: the cutting either rots or sits in water for months without any signs of growth.
Let's examine the anatomy of this plant and debunk popular myths to understand why classic vegetative propagation using a leaf blade does not work here and what secret element is necessary for success.
Why a Pure Leaf Without an Axillary Bud Will Not Yield a New Plant
Many beginner plant enthusiasts make the mistake of trying to grow Aglaonema from a single cut leaf. Indeed, if such a cutting is placed in water, it may develop roots after some time. However, vegetative propagation will stop there.
Like other indoor aroids, Aglaonema is incapable of forming new shoots directly from the tissues of the leaf blade or petiole. They simply lack the meristematic cells responsible for bud formation. Without a tiny fragment of stem containing a dormant bud, a rooted leaf is doomed: it may survive in a pot for several months but will never produce new leaves and will eventually die.
The Secret to Success: What is a Leaf with a "Base" (Stem Section)
The secret to successfully propagating Aglaonema "from a leaf" is the use of what is called the "base." The "base" is a thin longitudinal cut of the main stem tissue, which is separated along with the leaf petiole.
It is in this microscopic part of the stem, right at the base of the petiole, that the dormant axillary bud is located. Without this tiny fragment of stem tissue, the leaf can only produce roots, but it will never sprout new shoots. Thus, by cutting the leaf with its "base," you are effectively obtaining a miniature single-bud cutting capable of full vegetative propagation.
Preparing for Rooting: Tools, Cutting, and Substrate
To successfully root a prepared leaf with a "base," it is important to organize the entire process correctly from the start. Vegetative propagation of indoor aroids requires sterility and precision, as any infection on the cut can destroy the cutting even before the first roots appear. The success of this delicate procedure depends directly on three components: perfectly clean tools, the correct technique for separating the leaf, and creating an optimal microenvironment for rapid root formation.
How to Properly Cut a Leaf Cutting for It to Take Root
For vegetative propagation to be successful, it is important to correctly separate the planting material. A regular leaf cut along the petiole does not have growth points and will quickly rot. We need a leaf with a "base"—a small piece of stem carrying a dormant bud.
- Leaf Selection. Choose a healthy, firm adult leaf from the lower or middle part of the stem.
- Tool. Use a sharp blade or a utility knife, disinfecting it with alcohol beforehand. Scissors are not recommended as they crush the delicate vascular tissues of indoor aroids.
- Cut. Make a neat, smooth cut from top to bottom, capturing a thin strip of the main stem (about 0.5–1 cm) along with the base of the petiole.
- Drying. Leave the resulting cutting exposed to air for 15–20 minutes so that the wound surface dries slightly, and then cover the cut with crushed wood or activated charcoal to prevent infections.
Choosing Substrate, Growth Stimulants, and Preparing the Greenhouse
For the successful rooting of a capricious leaf cutting, ordinary garden soil is not suitable. Indoor aroids require a maximally loose, sterile, and breathable medium.
Optimal Substrate for Aglaonema:
- A mixture of forest peat and perlite (in a 1:1 ratio);
- Pure moist sphagnum moss;
- Coarse river sand or pure vermiculite.
Before planting, be sure to treat the "base" cut with a root growth stimulant powder (such as 'Kornevin' or 'Heterauxin')—this will accelerate the appearance of the first roots and protect the tissues from rotting.
Since a leaf without roots cannot absorb water properly, moisture evaporation must be minimized. To achieve this, a simple plant greenhouse is set up: cover the container with a transparent plastic cup, a cut-off bottle, or place the pot inside a sealed zip-bag. Be sure to ventilate the greenhouse for 10–15 minutes once a day to prevent air stagnation.
Step-by-Step Guide to Rooting an Aglaonema Leaf
Once the tools are disinfected and the nutrient substrate and growth stimulants are ready, you can proceed to the most critical stage—rooting. Vegetative propagation of Aglaonema from a leaf cutting requires care and patience.
In practice, plant enthusiasts use two proven methods: classic rooting in water and direct planting in light soil. Let's examine each of these options in detail so you can choose the one most convenient for you.
Method 1. Rooting a Leaf with a "Base" in Water
Rooting a leaf with a "base" in water is the most visible method of Aglaonema vegetative propagation.
Step-by-step algorithm:
- Water Preparation: Use room-temperature, settled water. Add a tablet of activated charcoal to protect against rot.
- Stimulation: Apply a root growth stimulant (such as 'Kornevin') according to the instructions.
- Placement: Submerge the "base" in water by 1.5–2 cm. The leaf blade must not touch the water.
- Conditions: Place the container in a warm (+22…+25 °C) location with diffused light.
Roots on this indoor aroid will appear in 3–5 weeks.
Method 2. Planting the Cutting Directly in Light Soil
Planting a leaf with a "base" directly into the soil minimizes stress for the plant and eliminates the stage of root adaptation to the soil after the aquatic environment.
- Substrate Preparation: Mix forest peat with perlite or coarse sand in equal proportions. This substrate for Aglaonema will be maximally loose and breathable.
- Cut Treatment: Dust the dried cut with dry root growth stimulant (such as 'Kornevin').
- Planting: Make a small hole in the soil and place the "base" there to a depth of no more than 1–1.5 cm. It is important not to bury the base of the petiole too deeply to prevent it from rotting.
- Creating a Microclimate: Cover the container with a transparent plastic cup or bag to create a sealed plant greenhouse.
Place the pot in a warm location (+22…+25 °C) with diffused light. Ventilate the greenhouse for 10–15 minutes daily and gently moisten the soil with a spray bottle only after the top layer has dried.
Alternative and More Reliable Propagation Methods
Although rooting a leaf with a "base" is an interesting experiment, this method requires patience and meticulous precision. If you want to guarantee a strong young plant in a short time, you should turn to classic methods of vegetative propagation. These time-tested methods are much simpler to execute and forgive minor care mistakes by beginner plant enthusiasts.
Classic Tip and Stem Cuttings
Classic Aglaonema cuttings are the most reliable way to obtain a strong plant. Unlike the capricious leaf, stem cuttings already contain viable buds.
- Tip Cuttings: Cut the top section with 3–5 leaves, dust the cut with charcoal, and let it dry. Place it in water or light substrate for Aglaonema.
- Stem Cuttings: Cut the remaining leafless stem into 5–10 cm pieces. Lay them horizontally in moist sphagnum or peat-sand mixture.
For guaranteed rooting, cover the container with a bag, creating greenhouse conditions.
Dividing an Adult Bush During Repotting
Dividing the bush is the most reliable way to propagate Aglaonema with almost 100% success rate. This procedure is carried out in spring during the repotting of an adult plant (older than 3 years).
How to properly divide the bush:
- Carefully remove the plant from the pot and free the roots from excess soil.
- Separate the daughter rosettes (pups) that have at least 3–4 leaves and their own root system. Use a sharp, sterile knife if necessary.
- Treat the cuts with crushed charcoal to prevent rot.
- Transplant the divisions into small pots with light aroid substrate.
This method provides a ready-to-go viable plant immediately, without the long wait for rooting.
Conclusion
Propagating Aglaonema is a fascinating process that requires an understanding of the biology of this indoor aroid plant. Although it is impossible to grow a new specimen from a pure leaf without a bud, the method of rooting a leaf with a "base" is quite viable when using growth stimulants and creating a greenhouse.
Nevertheless, for quick and guaranteed results, beginner plant enthusiasts are better off using classic stem cuttings or bush division. Choose the method that suits your experience, and may your green plants delight you with lush growth!