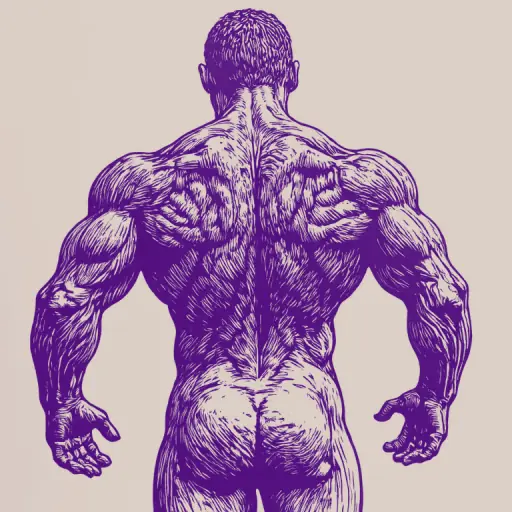
How to Show Back Muscles: Step-by-Step Guide to Proper Display
- 16 min read
- 62
The ability to properly demonstrate your back muscles is not just a posing element for beautiful photos, but an important skill that combines aesthetics, health, and control over your own body.
Here is why you should master this technique:
- Objective Progress Assessment: The correct posture allows you to clearly see the results of your training, assess the hypertrophy of the latissimus dorsi and rhomboid muscles, and notice muscle imbalances in time.
- Posture Improvement: By learning to consciously "engage" and straighten your back for demonstration, you automatically transfer this skill to daily life, eliminating slouching.
- Expressiveness and Presentation: In sports, dance, and acting, it is the back that conveys confidence, strength, and inner tension.
Section 1: Anatomy Basics and Correct Posture (Preparation for Demonstration)
A beautiful and defined back starts not with posing in front of a camera, but with understanding its structure and the ability to control your body. Before moving on to active training and demonstration, it is necessary to lay a solid foundation. This includes basic knowledge of the target muscle groups, establishing the correct spinal alignment, and timely identification of hidden tightness.
Conscious preparation not only helps prevent injuries but also instantly improves the visual silhouette. By learning to feel every muscle and maintain a neutral body position, you take the first and most important step toward the perfect presentation of your back.
1.1. Anatomical Muscle Groups of the Back: What Exactly Are We Showing?
To demonstrate the back effectively, you need to understand its visual architecture. We are not showing a monolithic slab, but a harmonious combination of several key areas:
- Latissimus Dorsi ("Wings"): These are responsible for the desired V-shaped silhouette. When properly flared, they visually widen the shoulder girdle and narrow the waist.
- Trapezius Muscle: Covers the upper back. Its development provides the necessary volume, bulk, and emphasizes the transition from the neck to the shoulders.
- Rhomboid and Posterior Scapular Muscles: Located in the shoulder blade area. They create beautiful depth, detail, and definition when the shoulder blades are retracted.
- Erector Spinae: The muscular "pillars" along the spine. In the lower part, they form an aesthetic pattern known in fitness as the "Christmas tree" (or 'elf shape').
Understanding this anatomy will help you consciously direct your mental focus to the right points during posing.
1.2. The Ideal "Neutral" Pose: From Standing to Sitting
The ideal neutral pose is the foundation upon which any back demonstration is built. It allows you to align the spine and instantly improve muscle visual tone.
In a standing position:
- Stand with feet shoulder-width apart, distributing weight evenly.
- Tuck the tailbone slightly downward, avoiding excessive lower back arching (hyperlordosis).
- Drop the shoulders down and gently pull them back, opening the chest. Imagine your crown reaching upward.
In a sitting position:
- Sit on your ischial tuberosities, maintaining a 90-degree angle in your knees.
- Maintain the natural curves of the spine, preventing the shoulders from rounding and the shoulder blades from spreading outwards.
This base prepares the muscles for safe and aesthetic demonstration.
1.3. Diagnosing Problems: How to Notice and Correct Early Signs of Poor Back Tone
For your back to look impressive during a demonstration, it is important to identify hidden tone issues in time. Perform a simple wall test: stand with your back against the wall, pressing your heels, buttocks, shoulder blades, and the back of your head against it. If you find it difficult to hold this position or if your shoulders slump forward significantly, your stabilizing muscle tone is low.
The main signs that spoil the visual picture:
- Slouching (Kyphosis): Visually narrows the shoulders and "hides" the latissimus dorsi muscles.
- Scapular Asymmetry: One shoulder blade appears higher than the other, breaking the frame's geometry.
- Text Neck Syndrome: Forward head posture obscures the volume of the trapezius muscles.
To quickly correct this before a shoot or appearance, perform light chest stretches (as they often "pull" the shoulders forward) and do 10–15 circular shoulder rolls backward, retracting the shoulder blades at the end. This will restore muscle tone and open the chest.
Section 2: Strengthening Techniques: Exercises for Demonstrating Strength (Fitness Approach)
A beautiful posture is just the foundation. For the back to look truly impressive, defined, and powerful in any pose, the muscles require working tone and developed musculature. Moving from static preparation to active training, we will review fitness methodologies that help "draw out" every detail of your muscle corset.
Within this practical block, we will examine key movement patterns. You will learn how to properly awaken deep stabilizers, work the superficial muscle groups to create an aesthetic V-shape, and strengthen the back even at home without complex equipment.
2.1. Stabilizer Exercises: Activation and Isolation (e.g., Glutes and Core)
Before demonstrating the definition of the lats, you must "engage" the deep stabilizers. Without a strong core and active glutes, it is impossible to maintain a straight posture and safely arch the back for a shot.
To activate these areas, use three simple exercises:
- Glute Bridge. Lie on your back, bend your knees, and lift your pelvis, squeezing your glutes at the top for 2 seconds. This stabilizes the pelvis and relieves strain on the lower back.
- Bird-Dog. Starting on all fours, alternately extend the opposite arm and leg parallel to the floor. This exercise isolates the spinal extensors and improves balance.
- Classic Plank. Hold the body in a straight line for 30–45 seconds, actively tensing the abs and glutes. This creates a rigid muscle corset.
These movements will prepare the body for heavier loads and help you hold your back straight confidently during posing.
2.2. Basic Movements for Working Latissimus Dorsi and Rhomboid Muscles
To create an impressive V-shape and define the center of the back, you need to focus on two key groups: the latissimus dorsi and the rhomboid muscles.
- Lat Pulldown or Pull-ups with a Wide Grip. This is a fundamental movement that maximally stretches and contracts the latissimus dorsi, visually widening the back. When performing, pull the bar toward the upper chest, concentrating on the movement of the elbows downward, rather than relying on arm strength.
- Bent-Over Barbell or Dumbbell Row. This is the ideal exercise for the rhomboids and mid-trapezius. At the peak contraction, make sure to squeeze the shoulder blades together and hold the tension for 1–2 seconds. This gives the back the necessary depth and highlights muscle definition during demonstration.
Regularly performing these pulling movements will form an aesthetic muscle corset that will look great from any angle.
2.3. No-Equipment Exercises: How to Train Your Back at Home for Beginners
For at-home workouts without equipment, exercises that use body weight and the force of gravity are excellent. They help activate target areas and improve neuromuscular connection, which is critically important for a beautiful back demonstration.
- 'Bridge' (Superman): Lie on your stomach, extending your arms forward. Simultaneously lift your chest and hips off the floor, holding at the top for 2 seconds while tensing your lower back.
- Y-T-W Raises: Lying on your stomach, raise your arms, moving them sequentially in the shape of the letters Y, T, and W. This excellently works the rhomboids and trapezius muscles.
- Floor Angels: Lying on your stomach, smoothly move your elbow-bent arms along your body, mimicking a gliding motion. This exercise engages the latissimus dorsi.
Perform this complex regularly to prepare your muscles for posing.
Section 3: Demonstration in Action: Conveying Tension and Form (Acting/Everyday Approach)
After strengthening the muscle corset through training, it is important to learn how to manage it correctly in real life and in front of the camera. A beautiful back is not just about dry anatomical volume, but about dynamics, posture, and the ability to convey emotions through movement.
In this section, we move from purely athletic preparation to the art of presentation. You will learn how to bring your muscles to life, make your posture natural, and use body language to demonstrate strength, tension, or slight fatigue in any scenario.
3.1. How to 'Hold' Your Back: From Conscious Posture to Natural Movement
The transition from static tension to natural grace is the key to an effective back demonstration in motion. To avoid the effect of a 'wooden' posture, use the dynamic control method:
- Axial Elongation: Imagine that your crown is being gently pulled upwards. This instantly straightens the spine and activates deep stabilizers.
- 'Shoulder Blades in Pockets': Lower your shoulders down and slightly spread them outwards, directing the lower angles of your shoulder blades toward the back pockets of your trousers. This opens up the latissimus dorsi without unnecessary spasm.
- Free Breathing: Do not hold your breath. Direct your inhale into your lower ribs while maintaining a light abdominal tone.
This approach allows the back muscles to look defined and strong with every step or turn, eliminating slouching and excessive lower back arching.
3.2. Demonstrating Fatigue, Tension, or Strength: Facial Expressions and Body Movements
For the back demonstration to look alive and convincing, incorporate facial expressions and acting plasticity. Each state requires its own balance of tension:
- Strength and Triumph: Roll your shoulders back, slightly retract your shoulder blades, and lift your chin. On your face, maintain a confident half-smile or calm concentration. This visually widens the upper back and emphasizes the latissimus dorsi muscles.
- Peak Tension: Slightly clench your teeth, tense your neck (but do not tuck your head in). Bend your arms at the elbows, clenching your fingers into fists. This movement instantly reveals the definition of the trapezius and rhomboid muscles.
- Aesthetic Fatigue: Drop your shoulders, slightly round your thoracic spine, and tilt your head forward. Take a deep exhale. This contrast of relaxation emphasizes the depth of the longitudinal muscles along the spine.
3.3. Using an Object or Scenario to Accentuate Back Muscle Work
Using physical objects and simple daily scenarios helps naturally and effectively highlight the back's contours without artificial posing.
- Leaning on Verticality: Hold onto a door frame or a sturdy frame at chest height with your hands and gently push your pelvis backward. This movement stretches the latissimus dorsi muscles of the back, visually widening the silhouette into a 'V' shape.
- Weight Work: Pick up any household item (such as a heavy book or a bag) and hold it in front of you with bent arms. The static tension instantly carves out the trapezius and rhomboid muscles.
- Interactive Scenario: Mimic lifting an object from the floor with a straight back. In this dynamic, the spinal erectors will look maximally powerful and defined.
Section 4: Visual Presentation: How to Photograph or Film the Back Effectively
Even the most developed and defined back can be lost in the frame if basic shooting rules are ignored. Visual presentation is the bridge between your physical achievements and how others will see them. Whether you are preparing an aesthetic photo for social media, filming a dynamic workout video, or documenting intermediate progress for a personal archive, the laws of optics, body geometry, and proper positioning play a key role here.
In this section, we will examine professional visualization techniques that will help maximally emphasize the depth of the rhomboid muscles and the width of the latissimus dorsi muscles. You will learn how to control light, set up the camera, and capture changes so that every shot looks as effective and aesthetic as possible.
4.1. Tips for the Photographer: Angles, Light, and Body Geometry
To maximally emphasize the back's contours in a photograph, the photographer must work with three key elements:
- Directional Light: Use hard side or top-side lighting (for example, in semi-darkness with a single source). This creates deep shadows in the intermuscular depressions, highlighting the detail of the latissimus dorsi, rhomboid, and trapezius muscles. Avoid direct 'frontal' flash—it will flatten the back.
- Low Angle: Shooting from a point slightly below waist level (approximately at the level of the sacrum) visually widens the shoulder girdle and narrows the waist, enhancing the aesthetic V-shape silhouette.
- Geometry and Posing: Ask the model to slightly push the shoulders forward and down (to open the latissimus dorsi), while simultaneously maintaining a light tension in the lower back. This creates ideal skin tension and emphasizes muscle volume.
4.2. Tips for the Videographer: Dynamics, Movement, and Frame Smoothness
Videography allows you to convey the living work of the back muscles in motion, revealing their volume and definition. To make the shot look professional, use the following techniques:
- Slow Motion (Slow-mo): Record video at 60 or 120 frames per second. This will allow you to detail the phases of contraction and stretching of the latissimus dorsi and rhomboid muscles during movement.
- Smooth Panning: Move the camera along with the amplitude of the exercise. A slow upward zoom during the peak muscle contraction visually increases the back's volume. To prevent shaking, be sure to use a stabilizer.
- Dynamic Lighting: Set up constant side lighting so that as the shoulder blades move, shadows glide across the skin's contours, emphasizing the depth of the muscle fibers.
4.3. What to Show in the Frame to Demonstrate Progress (Before/After)
To clearly document changes, it is important to maintain strict identity in the shooting conditions for 'before' and 'after.' The slightest change in light or angle can distort the real result.
What to look for when comparing shots:
- Posture and Shoulder Position: Compare shoulder height and scapula position when relaxed. Improving tone will eliminate hunching and level the shoulder girdle line.
- Width and V-Shape: Take a shot from behind with your latissimus dorsi muscles flared out to assess muscle mass gain and proportional changes.
- Definition Depth: Shoot under the same top or side lighting. This will allow you to honestly assess the definition of the rhomboids and erector spinae.
Always use the same clothing, angle, and distance from the camera for reshoots.
Section 5: Safety and Error Correction Tips (Skill Consolidation)
A beautiful and defined back is the result not only of diligent training and correct posing but also of taking good care of your body. The desire to quickly achieve the perfect shot or to overexert yourself in the gym often leads to frustrating injuries that can knock you off track for a long time.
To ensure that the demonstration of strength and posture remains safe, it is important to solidify correct motor habits. In this final part, we will discuss how to properly dose the load, avoid critical technical errors, and recognize the body's signals that require professional attention.
5.1. Load Progression: How Not to Injure Your Back During Training
Safety in sports is not just a recommendation; it is a mandatory condition for achieving results. When working on back posture and muscle strength, it is crucial to follow the principle of gradualness to avoid overload and injury. Here are several key rules for load progression:
- Start Small: If you are a beginner, do not try to lift maximum weight or perform a set of 50 push-ups immediately. Start with a minimal number of repetitions (e.g., 8-10) and use your body weight. Gradually increase the volume of work, not the intensity.
- The 10% Rule: Do not increase the load (weight, number of repetitions, hold time) by more than 10% from the previous training volume. This gives the muscles and ligaments time to adapt and recover.
- Listen to Your Body: Pain is a warning signal. Muscle burning or slight fatigue is normal. Sharp, stabbing, or joint pain requires immediate cessation of the exercise and a review of your technique.
- Incorporate Warm-up and Cool-down: Never skip a dynamic warm-up before training (joint exercises, light cardio) and static stretching afterward. This will prepare the body for the load and accelerate recovery.
- Recovery is Training: Lack of sleep, improper nutrition, and lack of breaks between workouts reduce effectiveness and increase the risk of injury. Pay attention to quality nutrition and sleep schedule so that muscles have time to recover and become stronger.
5.2. Common Exercise Errors (Lower Back Rounding, Shoulders Slouching)
Even with the correct weight selection, technical errors can negate all efforts and spoil the visual effect. Two of the most common problems when training and posing the back are:
- Lumbar Rounding: Occurs due to weak core or excessive weight. This overloads the intervertebral discs and "shuts down" the target latissimus dorsi muscles. Solution: Keep the pelvis in a neutral position, slightly arch the lower back, and always engage your core.
- Forward Slouching Shoulders: Steals the visual width of the back and overloads the neck. Solution: Before starting any movement, pull the shoulder blades back and down, opening up the chest.
Control these points in the mirror to fix the correct muscle pattern.
5.3. When to See a Specialist (Massage Therapist, Rehabilitation Specialist)
Remember that the ability to hold your back correctly is not just a matter of aesthetics but also an indicator of your physical health. If you notice that the following symptoms persist or worsen despite your efforts, it is time to see a specialist. Do not try to "tough out" pain or discomfort, as this can lead to chronic problems.
Red Flags Requiring Medical Attention:
- Sharp, Shooting Pain: If the pain is localized in the lower back and radiates to the buttocks or leg (sometimes accompanied by numbness or tingling), this may be a sign of nerve impingement (e.g., sciatica). In this case, a neurologist consultation is necessary.
- Loss of Sensation: If you notice that certain areas (e.g., groin or buttocks) are less sensitive than before, this is a signal of nerve function impairment. Consult a general practitioner or neurologist.
- Morning Stiffness: If it is very difficult to "warm up" your back after sleep, and this is accompanied by severe pain, this may indicate inflammatory processes or joint problems.
- Pain Not Resolving After Rest: If the pain persists for a long time despite changing activity, this requires comprehensive diagnostics.
Which Specialist to See First?
- General Practitioner/Therapist: They will conduct an initial examination, gather a medical history, and refer you to a specialist. This is your first point of contact.
- Neurologist: A specialist in the nervous system. They will help determine if your pain is related to nerve compression or irritation.
- Orthopedist-Traumatologist: A specialist in the musculoskeletal system. They will assess the condition of the vertebrae, joints, and ligaments.
- Physiotherapist/Rehabilitation Specialist: This is a specialist who will develop an individual exercise program to restore lost mobility and strength. They will teach you how to "pose" your back correctly based on actual anatomy.
Important: Do not self-diagnose or self-medicate. A professional approach will not only eliminate pain but also restore your natural, strong, and beautiful posture, which you can confidently display in any situation.
Checklist: Readiness for the Perfect Back Display
Before taking the final shot, recording a video, or going on stage, quickly check this checklist:
- Posture: Shoulders are dropped, neck is elongated, scapulae are spread apart (not squeezed together).
- Activation: Latissimus dorsi muscles are "opened," core and glutes are lightly toned.
- Body Position: Weight is distributed evenly on both legs, pelvis is slightly tucked back without excessive lumbar arching.
- Light and Angle: The camera is set at shoulder blade level, and side or top lighting emphasizes definition.
- Feeling: There is controlled muscle tension in the body; there is absolutely no sharp pain or discomfort.