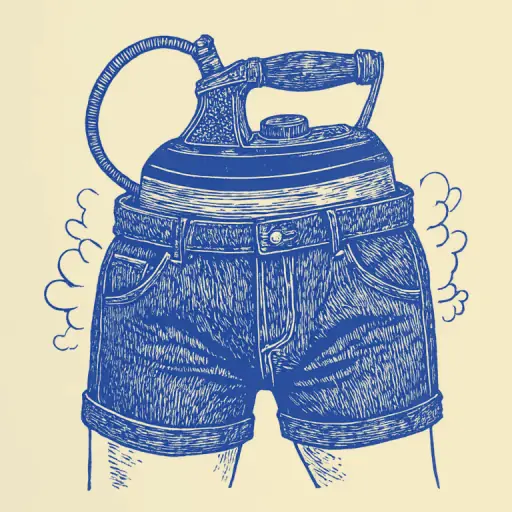
How to Stretch Elastic on Shorts Yourself for Beginners and Widen the Waistband
- 8 min read
- 90
New stylish shorts fit the figure perfectly, but the tight waistband digs into the skin? Or has your favorite loungewear become too tight in the waist after washing? Don't rush to get rid of the clothes or take them to a tailor. You can loosen a tight elastic band on shorts and widen the waistband yourself at home.
In this guide, we will cover simple and effective life hacks to help stretch the elastic band without damaging the fabric. You will learn how to increase the waistband on shorts using household items—from a regular hot iron and steam to mechanical stretching on the back of a chair. Most methods do not require sewing skills and will take minimal time!
Express Mechanical Stretching Methods Without Sewing
If the tight waistband of new shorts is causing discomfort, do not immediately reach for a needle and thread or take the item to a tailor. Comfort can be restored using simple mechanical methods that do not require sewing skills. These express methods are based on physical action on the elastic fibers, allowing you to delicately loosen a tight elastic band and increase the waistband on shorts at home. For this, you only need household items and a little patience.
Long Stretching on a Chair Back or Large Object
The simplest and safest way to loosen a tight elastic band is to use a chair back or another suitable large object (such as a wooden hanger, ironing board, or stack of books).
Step-by-step algorithm:
- Slightly dampen the shorts waistband with warm water.
- Stretch it over the chair back. If the tension seems insufficient, place several thick books under the fabric.
- Ensure the elastic band is stretched evenly, without twisting.
- Leave the garment in this position for 12–24 hours until completely dry.
This passive stretching of the clothing delicately increases the shorts waistband without risking damage to the fiber structure.
Using Hot Water and Physical Force
If passive stretching on a chair takes too much time, combining high temperature with physical force will speed up the process. Hot water effectively softens the synthetic fibers that make up the elastic band, making it pliable to deformation.
Step-by-step algorithm:
- Submerge the shorts waistband in a container of hot water (at about 60 °C) for 10–15 minutes.
- Gently squeeze out excess moisture by hand, taking care not to twist the delicate fabric too much.
- Strongly stretch the wet shorts waistband in different directions by hand or secure it in a maximally stretched state on a solid object of appropriate size until completely dry.
This express clothing stretching allows you to quickly and without sewing increase the waist circumference by several centimeters.
Thermal Treatment with Iron and Steam
If mechanical stretching did not yield the desired result, thermal treatment comes to the rescue. High temperature combined with moisture can work wonders on elastic fibers. Under the influence of heat, the latex threads inside the elastic temporarily soften, lose excess elasticity, and are more easily fixed in a stretched position. This allows you to quickly and effortlessly increase the shorts waistband by several centimeters, making the fit as comfortable as possible.
Step-by-Step Method for Stretching with a Hot Iron Through Damp Fabric
This classic method allows you to quickly loosen a tight elastic band using high temperature and moisture.
Step-by-step algorithm:
- Stretching. Stretch the shorts waistband over a narrow part of the ironing board or a chair back to the desired width.
- Protection. Completely cover the stretched elastic with a damp cloth (gauze or cotton napkin).
- Heating. Heat the hot iron to maximum (considering the heat resistance of the shorts fabric). Press it onto the damp cloth for 10–15 seconds, then slowly move it along the entire length of the waistband.
- Fixing. Repeat the heating for 5–7 minutes. Allow the waistband to cool completely in the stretched position to set the new size.
Features of Working with Sewn Elastic Using a Steamer
If the elastic is firmly sewn into the shorts waistband with several stitches, a regular iron might damage the outer fabric. In this case, a steamer is the ideal solution. Hot, moist steam penetrates deep into the fibers of the elastic band, softening the latex threads without direct contact with the appliance's soleplate.
Step-by-step algorithm:
- Stretch the shorts waistband over a rigid frame (such as an ironing board or a chair back) to the desired size.
- Direct the steam jet onto the stretched elastic band, keeping the steamer nozzle 2–3 cm away.
- Slowly move the appliance along the entire perimeter of the waistband for 2–3 minutes.
- Let the shorts cool and dry directly on the frame to fix the shape.
Radical Methods with Minimal Sewing
If thermal treatment and mechanical stretching have not brought the desired result, it is time to move to more effective measures. When the shorts waistband is too tightly compressed and the internal elastic band is firmly sewn into the fabric, simple tailoring tricks can solve the problem. Don't be afraid: you don't need to be a professional seamstress for this. Basic skills with a needle and scissors are enough to neatly correct the waistband volume without harming the garment's appearance.
How to Carefully Unpick the Side Seam and Make a Cut
If mechanical methods have not yielded the desired result, we move to delicate "surgical" intervention. This method is ideal for sewn elastic bands that cannot simply be pulled out.
Step-by-step action algorithm:
- Preparation. Turn the shorts inside out and find where the side seam crosses the shorts waistband.
- Seam Release. Using a seam ripper or sharp nail scissors, carefully lift and remove the seam threads on the inside of the waistband. It is enough to free up a section of 1.5–2 cm.
- Elastic Cut. Gently pull the freed elastic band and make a vertical cut in it. To avoid completely destroying the fixation, cut the elastic band about halfway across its width.
This trick instantly loosens the tight fit and adds up to 3 cm of extra volume to the waistband.
Sewing in an Additional Fabric or Elastic Wedge
After we have carefully loosened the elastic by creating a controlled cut, the next step is to fix this expansion. To make the seam look not only functional but also aesthetic, it is necessary to sew in an additional element—a fabric or elastic wedge. This wedge performs two key tasks: it not only covers the cut area but also provides extra elasticity that was lost during the cut.
Step-by-step guide for sewing in the wedge:
- Wedge Preparation: Choose a material that matches the shorts fabric (e.g., dense cotton or thin knitwear). If you want to maintain elasticity, use an elastic band or a matching colored elastic. The wedge should be slightly wider than the cut to provide a safety margin.
- Marking: Carefully mark the edges of the cut and the place where the wedge will be sewn in. If you are using fabric, make small cuts along the edges of the cut so the wedge can pass through freely.
- Sewing: Start sewing, using a seam that runs through the entire cut. If you are using an elastic wedge, stitch it along the edges of the cut so it fills the gap and restores the volume. If you are using fabric, stitch the wedge, and then secure it on the inside of the shorts so it looks as natural as possible.
A properly sewn seam with a wedge not only increases the waistband but also gives the shorts the appearance of having been made with that size from the start, while maintaining wearing comfort.
How Not to Ruin the Item: Common Mistakes and Prevention
Even the most careful repair or gentle stretching can go wrong if you make unfortunate mistakes during the process or in subsequent garment care. To prevent the elastic band in the waistband from losing its properties and turning into a lifeless stretched strip, it is important to maintain a balance between fiber deformation and preserving their structure.
Mistakes in Thermal Treatment That Cause Elastic Loss
It is easy to make critical mistakes during thermal treatment that will permanently ruin the elastic band:
- Direct Contact with Iron: Never apply a hot iron directly to the waistband. Without damp fabric, synthetic fibers (latex, spandex) melt instantly, completely losing their elasticity.
- Overheating: Excessive heat from the steamer destroys the structure of the elastic threads. They become brittle and tear upon the first stretch.
- Boiling Water: Water that is too hot deforms the elastic unevenly, turning it into a stretched "wave" that cannot be restored.
Proper Shorts Care to Maintain Comfortable Fit
To fix the comfortable fit and prevent the elastic from deforming again, follow simple care rules:
- Gentle Washing: Use water no hotter than 30–40 °C. High temperatures cause elastane to contract and lose properties.
- Natural Drying: Avoid machine drying. Dry the shorts laid flat, avoiding hanging them by the waistband so it does not stretch unevenly.
- Appropriate Detergents: Avoid aggressive chlorine bleach, which quickly destroys the structure of latex threads.
Conclusion
Restoring comfort to your favorite shorts is much easier than it seems at first glance. Whether it is delicate thermal treatment with an iron, mechanical stretching on a chair back, or a careful pinpoint cut—any of these methods will help eliminate the tightness in the waistband. The main thing is to act carefully, moving from simple methods to radical ones, to preserve the elasticity of the fabric and the neat appearance of the item. Now your shorts are ready for comfortable wear!