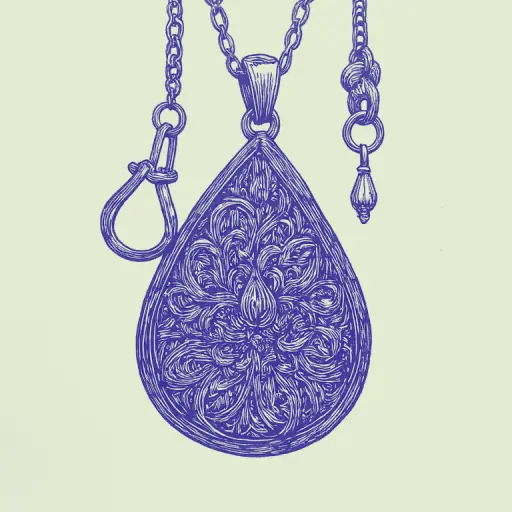
How to Thread a Pendant onto a Chain Using Simple Home Methods
- 8 min read
- 65
When buying a new piece of jewelry, we often encounter an annoying problem: the elegant pendant simply won't fit onto your favorite chain. The main reason for this incompatibility lies in the difference in the dimensions of the hardware.
Usually, the following elements are the obstacle:
- Chain end cap — a metal loop or plate at the end of the chain that is wider than the pendant's bail.
- Carabiner clasp or round spring clasp, whose dimensions physically prevent it from passing through the narrow bail for the pendant.
- Chain thickness — a massive or bulky weave simply won't fit into the miniature opening of the pendant.
Understanding exactly which element is blocking the movement will help you quickly find the right solution.
Analyzing the Problem: Diagnosis and Selecting the Right Components
Before grabbing tools or trying to force the jewelry through, it is necessary to perform a precise diagnosis. Random attempts can damage the delicate pendant bail or break the chain links. A systematic approach will protect your jewelry from scratches and deformation.
In this section, we will discuss how to correctly match the dimensions of the elements and locate the problem. Arm yourself with attention: correct measurements are already half the battle in solving our task.
Step 1: Assessing Sizes (Comparing Bail and Chain)
The first thing to do is compare the inner diameter of the pendant bail (or eyelet) with the widest elements of your chain. A common mistake is only considering the thickness of the chain itself. In practice, the main obstacle is often the chain end cap or the connecting ring near the carabiner clasp.
For an accurate assessment, perform the following actions:
- Measure the inner width of the pendant bail at its narrowest point.
- Measure the maximum width of the end loop and the clasp using a ruler or calipers.
- Compare the parameters: for free passage, the bail gap must be at least 0.2–0.5 mm larger than the widest part of the chain end piece.
Step 2: Identifying Bottlenecks (Clasp or Bail Too Small)
To successfully thread the pendant onto the chain, it is important to accurately determine which specific part is blocking the way. Most often, the problem is not the chain thickness but its end elements.
Carefully examine the construction. The main "culprits" are usually:
- Carabiner clasp or round fastener — their protruding parts and levers are often wider than the internal opening of the bail.
- Chain end cap — the metal loop or connecting ring at the end that is larger than the links themselves.
- Pendant bail (eyelet) — its anatomical shape may be too flat or curved, causing the hardware to get stuck at the entrance.
By identifying this bottleneck, you will know whether you can manage with home methods or if delicate intervention by a jeweler is required.
Method 1: Quick Home Life Hacks for Emergencies
When you need to put on your favorite jewelry right now, and the pendant bail stubbornly refuses to pass through the chain end cap, handy household items come to the rescue. You won't have to run to a jeweler or damage the metal with pliers. Simple everyday items found in every home can help gently narrow or guide the hardware.
Let's look at express methods that can solve this delicate problem in just a couple of minutes, preserving the integrity and shine of your jewelry.
Threading Through Additional Material (Using Thread or Fishing Line)
If the chain end cap or carabiner clasp is literally a fraction of a millimeter wider than the pendant bail, do not try to push them through by force—you could easily scratch the precious metal. A common strong sewing thread or thin fishing line will help.
Step-by-step algorithm:
- Fold the thread or fishing line in half and thread the resulting loop through the pendant bail.
- Pass the chain end cap through this loop and secure it.
- Gently but firmly pull on the free ends of the thread from the back of the pendant.
The slippery fishing line or thread will smooth out the protruding parts of the hardware and help smoothly "pull" the clasp through the narrow opening without damage.
Express Method: Creating Temporary Expansion (Using Tape or Springs)
If the carabiner clasp or chain end cap catches the pendant bail with its protruding parts, regular narrow tape can help. This method temporarily "smooths out" the dimensions of the hardware:
- Wrap the clasp: Tightly wrap the connecting ring or carabiner with a small piece of tape, forming a thin, streamlined cone.
- Thread through the bail: Carefully push the resulting smooth tip through the pendant bail. The tape will act as a guide, eliminating friction.
- Remove the fastener: As soon as the clasp passes through the opening, carefully remove the tape without leaving glue residue on the metal.
Method 2: The Professional Approach (If Home Methods Don't Help)
If delicate home tricks haven't yielded the desired result, and the chain clasp stubbornly refuses to pass through the miniature bail, it's time to turn to tools. A professional approach to jewelry hardware allows you to solve the incompatibility problem once and for all without damaging the precious metal.
For this, we will need basic tools, precision, and an understanding of how jewelry connecting elements work. Let's look at how to safely modify fittings at home using proven jewelry techniques.
Working with Clasps and Connections (How to Open and Close a Connecting Ring)
If the chain end cap or carabiner clasp does not pass through the pendant bail, the best solution is to temporarily remove the connecting ring. For this, you will need two tools: needle-nose pliers and flat-nose pliers with smooth jaws so as not to scratch the precious metal.
Step-by-step technique:
- Clamp the connecting ring with the tools on both sides of the cut point.
- Spread the ends apart (one towards itself, the other away from itself)—perform a rotational movement in the plane of the ring. Never stretch the ring sideways (left and right), or you will deform its circular shape.
- Remove the clasp, carefully thread the chain through the pendant bail.
- Return the clasp to its place and close the ring with the reverse movement until the ends meet tightly.
Replacing or Adapting the Bail (When You Need to Widen the Bail or Replace the Connecting Element)
If the pendant bail physically does not allow the chain end cap to pass through, the best solution is to replace or adapt it:
- Replacing the bail. Using needle-nose pliers, gently loosen the connecting ring holding the bail to the pendant. Remove the old element and install a new, wider pendant bail that will freely allow the carabiner clasp to pass through.
- Adding an adapter ring. If you do not want to replace the original bail, attach an additional removable connecting ring of increased diameter to it. This will solve the compatibility issue when the chain thickness prevents the pendant from threading directly.
Compatibility Guide: How to Choose Everything Correctly from the Start
To avoid resorting to emergency hacks and jeweler's tools in the future, it is important to learn how to assess the compatibility of jewelry even at the point of purchase. A harmonious pair is formed from the correct ratio of size, weight, and structural features of each element.
Understanding the technical nuances of fittings will save you from annoying mistakes in the jewelry store. Let's look at the key parameters you need to pay attention to so that the pendant glides smoothly on the chain and is securely fastened.
Choosing a Chain for a Pendant: Considering End Cap Diameter
The biggest mistake when choosing a chain is focusing only on its thickness. In reality, the "bottleneck" is almost always the chain end cap—the metal loop or crimp piece at the end where the clasp is attached.
For the pendant to glide freely on the chain, the inner diameter of its bail must be at least 0.5–1 mm larger than the widest part of the end cap.
Expert Tip: Before buying, measure not only the chain thickness with calipers but also the maximum width of the end loop along with the connecting ring.
Choosing the Right Clasp: Carabiner or Ring? A Fastening Guide
The type of fastener directly determines whether you can easily put the pendant on the chain.
- Carabiner clasp — a reliable and strong option for heavy pendants. However, its teardrop shape and large connecting ring often become an insurmountable obstacle for a narrow pendant bail.
- Spring (round) clasp — more miniature. Chains with this type of clasp pass through the pendant bail more easily, but they are less durable and only suitable for light jewelry.
Tip: If the pendant bail is very tiny, choose a chain where the end cap and clasp are connected by a removable ring. If necessary, you can carefully open it with needle-nose pliers, thread the chain onto the pendant, and put the ring back in place.
Checklist: Safe Fastening and Jewelry Care
To ensure your favorite jewelry delights you for years to come and doesn't get lost, follow this simple checklist:
- Strength Check: Before every outing, gently pull on the pendant to check the security of the connecting ring and the clasp.
- Cleaning Residue: If you used tape or thread for threading, wipe the pendant bail and chain with a soft microfiber cloth to remove any glue residue.
- Careful Storage: Store the chain with the pendant in an unfolded state to avoid creasing the thin links.
- Timely Care: Remove the jewelry before going to sleep, showering, or exercising.