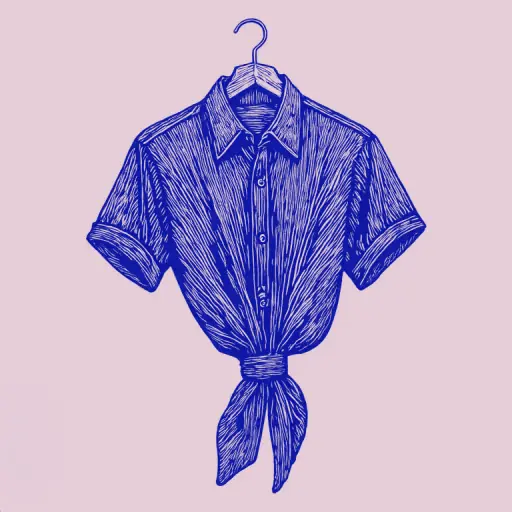
How to tie a knot in a shirt: 5 simple techniques for any occasion
- 25 min read
- 66
A regular shirt is perhaps the most versatile and underrated item in our wardrobe. We are used to wearing it buttoned up to the top in the office or casually draped over a T-shirt when out for a walk. But what if just one simple gesture can completely change your silhouette, transforming a basic piece into a trendy crop top, a romantic off-the-shoulder blouse, or even a chic mini-dress?
In 2026, individuality and the ability to creatively style familiar items remain key trends in women's fashion. A shirt knot is not just a quick social media hack; it is a complete tool for professional styling. It helps instantly create focal points: accentuate the waist, visually lengthen the legs, and add a light, effortless French aesthetic to your look. Whether it's a voluminous oversized shirt, a light silk blouse, or a classic cotton model—the right knot can adapt the piece for any occasion, from a romantic date to an informal business meeting.
Many women avoid this technique, fearing that the knot will look too messy, constantly unravel, or bunch up under outerwear. In this practical guide, we will cover all the subtleties: from choosing the right fabric to secret fixing techniques. You will learn how to tie a shirt beautifully in a knot or an elegant bow, what to pair with the resulting silhouette (from favorite jeans to flowing midi skirts), and how to keep the structure in place all day.
Ready to try new outfit ideas and learn to wear your shirt in a new way? Let's start with the basics and explore 5 simple yet effective techniques that will diversify your everyday style.
Preparation and Styling Basics: How to Choose the Right Shirt for Tying
A beautiful and durable knot is not just a matter of dexterity; it is also about choosing the right "base material." Not every shirt in your closet will serve as the perfect foundation for a stylish knot: overly stiff fabric will create a bulky look at the waist, and a hem that is too short simply won't allow for a secure overlap.
To ensure your look appears effortless and current, it is important to consider several key parameters—from the material's plasticity to the construction features of the cut. Let's look at what to pay attention to when selecting and preparing a shirt so that the resulting knot fits flawlessly and harmonizes with your outfit.
Fabric and Fit Selection: Why Oversize and Soft Cotton are Ideal for Knots
Let's start with the main secret to a flawless knot—the correct choice of fabric and silhouette. Not every item in your closet is suitable for this purpose. For the knot to look effortless and stylish, the shirt must possess a certain plasticity and volume.
Why is oversize the base?
A loose fit (oversize) is a key factor in success. If you try to tie a classic fitted shirt, you will run out of fabric length. The knot will turn out tiny and tight, and the fabric itself will be strained, creating unsightly wrinkles on the back and under the armpit. An oversized model, conversely, provides the necessary fabric allowance. This allows you to:
- Adjust the height of the knot (at the waist, under the bust, or on the hips);
- Create a beautiful, soft drape;
- Maintain freedom of movement without risking damage to the seams.
Ideal Fabrics for a Beautiful Knot
The texture of the material directly affects how well the knot holds up throughout the day.
| Fabric Type | Why it Works | Knot Characteristics |
|---|---|---|
| Soft Cotton | Has sufficient density and does not slip. | The knot becomes voluminous, holds its shape well, and does not unravel. |
| Blended Linen | Softer than pure linen, drapes beautifully. | Ideal for relaxed summer looks with a touch of nonchalance. |
| Viscose and Tencel | Flowing, very plastic materials. | The knot settles into soft folds, creating a feminine silhouette. |
What to Avoid?
Avoid stiff, heavily starched office shirts. A knot on them looks too rigid, bunches up, and visually adds unnecessary volume around the abdomen. Also, be careful with slippery satin and polyester: without extra fixation (such as a thin silicone band), such a knot will quickly unravel.
When choosing a shirt for stylish experiments, opt for soft, breathable, loose-fitting materials. This will allow you to easily bring any outfit idea to life.
Shirt Preparation: How Hem Length and Buttons Affect the Final Look
The length of the hems (front panels of the shirt) is a key factor determining the shape, volume, and stability of the future knot. If you want to create a neat, subtle knot, you will need a standard-length shirt. Short hems yield a small, dense knot that pairs perfectly with high-waisted jeans and skirts. However, if your goal is a voluminous, statement bow or complex draping, choose elongated or oversized models. Long ends allow you to create a double knot, wrap them around the waist, or tie the shirt like a dress. Before tying the shirt beautifully, be sure that the left and right hems are symmetrical in length; otherwise, the knot will shift to one side, disrupting the figure's proportions.
Buttons play the role of a structural "limiter" in this process and fix the knot's height. The main styling rule: unbutton the shirt from the bottom up exactly to the point where you plan to place the knot (at the waistline, under the bust, or on the hips).
To ensure the knot looks harmonious, consider the following nuances:
- Tension Point: The last button fastened takes all the tension on the fabric. To avoid an unsightly pull on the chest placket, leave one button directly above the knot unbuttoned—this adds a touch of effortless nonchalance to the look.
- Knot Height: To create a neat crop silhouette, unbutton 3–4 bottom buttons. For a classic relaxed knot at the belt level, it is usually enough to unbutton just 2 buttons.
- Freedom of Movement: Do not pull the knot too close to the last fastened button; leave 2–3 centimeters of free space so that the fabric drapes beautifully when you walk.
Proper preparation of the length and buttons guarantees that the shirt will not bunch up, and the knot itself will remain in perfect condition all day.
2026 Fashion Trends: What to Pair with a Tied Shirt (Jeans, Crop Tops, Skirts)
In 2026, a tied shirt has stopped being just a hack to mask volume—it has become a full fashion statement. Designers and stylists are boldly integrating this element into the season's key trends, allowing classic pieces to be worn in completely new ways. The main principle remains unchanged: the knot must serve as an accent, not just a "tie."
What to pair with a tied shirt in 2026:
- With Jeans (Denim Focus): This is a timeless yet always relevant combination. To prevent the look from appearing too 'outdoorsy,' choose jeans with an interesting texture (such as a distressed effect or a wide-leg style). If you tie the shirt in a casual knot, pair it with cargo jeans or straight-leg models. The contrast between the relaxed knot and the structured cut of the jeans creates the perfect casual look.
- With Crop Tops and Bodysuits (The Layering Trend): This trend is gaining momentum. If you use the "Secret Knot" technique (where the shirt is tied at the waist, but the upper part remains loose), a minimalist crop top or bodysuit is ideal. Choose monochrome or neutral tones so that the knot and the jeans become the main focus. This is perfect for daytime outings and festivals.
- With Skirts (Feminine Edge): Here you can play with volume contrast. If the knot on the shirt creates volume at the waist, pair it with a midi or maxi skirt made of flowing, soft fabrics (silk, viscose). For a bolder look—a mini skirt made of eco-leather. In this case, the knot should be more structured so it doesn't get lost in the draping.
Color and Texture Accents:
- Monochrome Chic: The safest and always elegant option. Choose the shirt and bottom in the same shade (e.g., beige, olive, or dark blue). This visually elongates the silhouette and makes the knot maximally sophisticated.
- "Bright Top — Neutral Bottom" Contrast: If you want the knot to be the main character of the outfit, make it bright (e.g., in pastel tones or with a print). In this case, the bottom should be as neutral as possible—black, beige, or gray jeans/skirts.
- Textural Contrast: Combine the soft, airy cotton of the shirt with stiff, structured bottom materials (leather, heavy denim). This adds depth and modernity to the look. Remember: a tied shirt is not just a piece of clothing; it is your personal styling tool that allows you to instantly refresh any basic wardrobe.
5 Step-by-Step Shirt Tying Techniques: From Classic to Creative
Now that you know what to pair a tied shirt with, it's time to move from theory to practice. A properly executed knot can instantly transform a silhouette: emphasize the waist, create a stylish crop effect, or add a touch of effortless street style vibe for 2026. The secret to a flawless look lies in the details—the direction of fabric tension, securing the loose ends, and proper volume distribution.
Below, we will break down five proven techniques that will turn an ordinary shirt into the main accent of your outfit. From simple classic methods to hidden life hacks and creative use of accessories—these methods will help you look new every day using just one basic item.
Technique 1 and 2: Classic Waist Knot and Feminine Bow Knot
Let's start with the basics that never go out of style. These two methods are fundamental, allowing you to instantly transform a formal or oversized shirt into a charming element of a casual or romantic look. They help you tie the shirt beautifully without overwhelming the silhouette.
Technique 1: Classic Waist Knot
This method is perfect for creating a relaxed, everyday look. It excellently emphasizes the waist and harmonizes with high-waisted jeans, shorts, or a midi skirt. It is best to use shirts made of thick cotton or linen.
Step-by-Step Instructions:
- Put on the shirt and button it up to about the level of your navel (or slightly higher, depending on the desired rise).
- Take the two loose bottom ends (plackets) of the shirt.
- Cross them over each other.
- Tie a simple single knot, tightening it neatly at waist level.
- Make a second knot over the first one to securely fix the structure.
- Smooth out the resulting tails and slightly roll up the shirt fabric on top to create a beautiful, soft puff.
Stylist's Tip: To prevent the knot from looking too bulky, do not pull it too tight. Leave a slight airiness—this will give the look a French chic and relaxed feel.
Technique 2: Feminine Bow Knot
If the classic option seems too simple or sporty, try tying a bow from the shirt. This technique adds romance to the look and works perfectly with soft, flowing fabrics such as silk, viscose, or thin denim.
Step-by-Step Instructions:
- Leave the bottom 2–3 buttons of the shirt undone.
- Fold the left and right ends of the shirt in half lengthwise so they resemble neat, flat ribbons.
- Tie a regular single knot at the desired height.
- Form a loop (a bow loop) from one end.
- Wrap the second end around this loop and thread it through the opening created, forming a second loop—just like tying shoelaces.
- Gently smooth out the "wings" of the bow and tighten the knot in the center.
This bow will become the main accent of your outfit. It pairs wonderfully with flowing skirts, palazzo pants, and delicate jewelry, allowing you to wear the shirt in a new way every day.
Technique 3: Secret Knot (Hidden Method for a Neat Crop Silhouette)
If classic knots with visible tails seem too informal or beachy, the secret knot will become your favorite trick. This hidden method is a real hit in styling oversized shirts. It allows you to instantly transform a voluminous piece into a neat, minimalist crop top without excess bulk at the waist.
This method is ideal for creating elegant looks with high-waisted trousers, jeans, or silk midi skirts. Externally, the shirt looks neatly tucked, but unlike regular tucking into pants, this method does not create unsightly bulges under the clothing and stays securely in place all day.
Step-by-Step Instructions: How to make the secret knot
- Determine the height. Put on the shirt and button it up to the level where your crop top should begin. Leave all bottom buttons undone.
- Gather the ends. Take the two loose bottom ends of the shirt plackets. If the fabric is very thick, you can use a thin silicone hair tie.
- Tie the knot. Tie the ends with a simple single knot right under the last button fastened. If you are using a hair tie, simply gather the ends together and secure them with the tie, forming a small tail.
- Turn inward. Take the resulting knot (or the tail with the tie) and carefully wrap it inside, under the hem of the shirt.
- Form the drape. Smooth out the resulting fold around the entire waist perimeter. The fabric should gently drape over the seam line, completely hiding the knot.
Stylist's Hack: If you want to wear the shirt in a new way and achieve maximum structural stability, wear a thin bandeau or sports bra underneath. Tuck the knot directly under the bandeau's elastic—this ensures the structure will not shift even with active movement.
This style is an excellent idea for an office-style shirt look. It allows you to maintain a balance between a strict dress code and fashion trends, emphasizing the waist and visually lengthening the legs.
Techniques 4 and 5: Creative Knot Through Jeans Loop and Elegant Single-Button Style
If the secret knot appeals to you with its simplicity, the following two methods are designed for those who want to add a touch of boldness and architectural tailoring to their look. These techniques allow you to style a shirt in a completely new way, turning a basic item into the main accent of the outfit.
Technique 4: Creative Knot Through Jeans Belt Loop (Casual Asymmetry)
This method is perfect for relaxed city looks. Using the belt loop as a fastener allows you to create an unusual drape and securely fasten the shirt tails so they don't come undone while walking. Styling an oversized shirt this way looks particularly striking.
Step-by-step instructions:
- Put on jeans or trousers with belt loops. Leave the shirt unbuttoned from the bottom down to the navel level.
- Take the left half of the shirt and carefully thread its tip through the front right belt loop of the jeans (from outside to inside).
- Take the right half of the shirt and thread it through the left loop, creating a beautiful cross-over of fabric on the abdomen.
- Gently pull the ends to adjust the tension and volume.
- Tie the remaining ends in a small, neat knot or simply tuck them into the waistband of the jeans.
This technique creates a stylish "balloon" effect and visually narrows the hips due to the diagonal lines of the drape.
Technique 5: Elegant Single-Button Style (X-Silhouette)
If you are looking for shirt look ideas that combine strictness and sensuality, this method is for you. It allows you to emphasize the waist without creating bulky knots, resulting in a refined silhouette.
Step-by-step instructions:
- Unbutton the shirt completely. Find the button that is exactly at your waistline (or slightly above).
- Button only this single button.
- Take the left free edge of the shirt and bring it to the right, and the right edge to the left, crossing them under the fastened button.
- Thread the ends back towards the waist.
- Secure them at the back: you can tie them in a small flat knot under the shirt or simply tuck them neatly into high-waisted trousers or a skirt.
As a result, you get a deep V-neck in the front and an elegant fabric crossover reminiscent of a designer top. This is a great way to wear a shirt in a new way on a date or evening event.
Bold and Unusual Experiments: Shirt as a Dress and Off-the-Shoulder Top
Once you have mastered basic waist knots, it's time to step beyond conventional street style and view a regular shirt as a malleable art object. Oversized pieces from men's wardrobes or thick cotton shirts are capable of true fashion magic. Just a few movements, a couple of hidden pins, or correctly crossed sleeves—and your shirt transforms into a trendy mini-dress, a deconstructed skirt, or a seductive top for an evening out.
Such experiments are an ideal way to refresh your wardrobe without unnecessary spending and to declare your impeccable sense of style. Let's explore the most striking runway techniques that are easy to replicate at home in front of the mirror, as well as the stylists' secrets that ensure these complex constructions stay in place all day.
How to Tie and Style a Shirt to Look Like a Dress or Skirt
Turning a regular shirt into a dress or skirt is the pinnacle of fashion upcycling and creative styling. If you have an oversized men's shirt in your wardrobe (or your partner's closet), you can easily create a trendy outfit from it without a single seam. In 2026, deconstruction and unusual silhouettes remain at the height of popularity, so such experiments look incredibly relevant, fresh, and bold.
How to Turn a Shirt into a Bustier Dress
For this experiment, a thick cotton or denim shirt that is 2–3 sizes larger than your usual size is ideal. It should be long enough to cover the hips.
- Preparation: Place the shirt against your chest so that the collar and top button are at the back level of your shoulder blades, and the shirt plackets cover the body in the front.
- Fastening: Button the chest buttons to a comfortable level. The shirt should fit snugly over the bust without slipping, but without restricting breathing.
- Creating the Waist: Take the loose sleeves of the shirt, bring them back, cross them on the back, and bring them forward to the waist.
- Final Knot: Tie the sleeves in a beautiful, neat double knot or bow in the front. This technique not only securely fastens the improvised dress but also creates a striking accent at the waist, mimicking a belt.
- Details: Smooth the collar at the back and neatly fold it inward for a cleaner, more minimalist silhouette.
How to Tie a Shirt as a Wrap Skirt
If a dress seems too bold a step, start with a skirt. This is a great way to give an old shirt a second life and create an unconventional casual look.
- Positioning: Start putting the shirt on your hips. The shirt's waistband (collar area) should be at your waist level at the back.
- Fastening: Button the front buttons up to mid-thigh or slightly higher, forming a stylish slit of the desired depth.
- Sleeve Draping: Spread the shirt sleeves to the sides, wrap them around the waist (back to front), and tie them in a tight knot in the front.
- Concealment: The remaining sleeve ends can be hidden under the knot or left to hang freely, creating an asymmetrical drape.
Choosing Material for Experiments
| Fabric Type | Look Effect | Pros of Use |
|---|---|---|
| Thick Cotton | Holds shape, creates a sharp silhouette | Ideal for a bustier dress |
| Soft Linen | Relaxed, boho-chic | Drapes excellently for a skirt |
| Silk or Viscose | Flowing, evening look | Falls beautifully, looks expensive |
To ensure the look doesn't appear as if you simply forgot to get dressed, it is important to place accents correctly. Use a wide leather belt over the sleeve knot to cinch the silhouette. If you are afraid the shirt dress will open while walking, wear bike shorts or ultra-short denim shorts underneath and a simple bandeau top. Balance the relaxed top with rugged footwear (boots or tractor-soled loafers)—this will complete the outfit and give it a city edge.
Date Night Options: Styling with Off-the-Shoulder or Backless Looks
A romantic date is the perfect occasion to step outside your usual everyday style and add a touch of sensuality to your look. If bustier dress experiments seem too bold, try more refined yet equally intriguing options: a cold-shoulder shirt or a seductive back cutout. These techniques allow you to view the classic oversized model in a new light, transforming it into an exquisite evening top.
"Angelica" Neckline and Open Shoulders
This method creates an incredibly delicate and feminine silhouette, drawing attention to the collarbones, neck, and shoulders. The look becomes airy and romantic.
Step-by-step instructions:
- Put on the shirt (a model made of soft cotton, viscose, or silk is best) and fasten it, starting from approximately the third or fourth button from the bottom.
- Pull down the collar and the upper part of the shirt off the shoulders, forming a beautiful neckline. You can bare both shoulders or create a coquettish asymmetry by letting the fabric drop only on one shoulder.
- Tie the loose bottom hems of the shirt at the waist with a neat double knot or a soft bow.
- Slightly gather or carelessly roll the sleeves up to the elbow to balance the volume and add a sense of lightness to the look.
What to pair it with: This improvised top pairs perfectly with a silk midi skirt, high-waisted jeans, or tailored palazzo pants. Add a delicate pendant necklace or sleek hoop earrings.
Intriguing Back Cutout (Backless Effect)
One of the most stylish tricks is wearing a classic shirt backward. It looks incredibly mysterious, expensive, and eye-catching.
Step-by-step instructions:
- Put on the shirt with the buttons facing backward. The front part will softly drape over the chest, creating an elegant sweetheart neckline.
- Fasten only one or two buttons at the neck level in the back (or leave the collar completely unbuttoned, securing its edges with invisible pins to your bra straps).
- Bring the bottom edges of the shirt back and tie them at the waist in a voluminous knot or bow. This beautifully emphasizes the curve of the back and a slender waist.
- If the shirt is very long, you can neatly tuck the front part into high-waisted pants or a skirt, leaving the dramatic deep cutout at the back.
What to pair it with: To keep the look elegant, choose a streamlined bottom—such as straight trousers with pleats or a pencil skirt. It is best to wear your hair in a high ponytail or a messy bun to fully expose your back.
Important Detail: Choosing Undergarments
For looks with open shoulders or a bare back, it is critically important to choose the right underwear. Silicone pads, strapless bras (bandeau), or special transforming models with a low backline are ideal choices. The underwear should not be visible so as not to disrupt the aesthetic of exposed skin and the elegant draping of your shirt.
How to Make Sure the Knot Doesn't Untie and Stays Neat All Day
Even the most beautiful and trendy knot will lose its charm if it loosens, slips, or turns into an shapeless lump of fabric after half an hour of walking. This is especially true for slippery materials (silk, satin, viscose) and complex draping that mimics open-shoulder dresses or tops. To keep your look flawless from morning till late evening, professional stylists use several simple but foolproof life hacks.
1. Secret Weapon: Clear Silicone Hair Ties
This is the main secret of fashion bloggers. Instead of tying the fabric itself into a tight knot (which often deforms the fibers and creates unnecessary volume), use small silicone hair ties:
- Gather the ends of the shirt in the desired spot and secure them with a tie, creating a neat tail.
- Twist the tail inward or form a beautiful bud from it.
- This method is ideal for thin, flowing fabrics, as the tie prevents slippery silk from coming undone.
2. Fashion Tape
If you are styling the shirt as a cold-shoulder top or a deep neckline, a regular knot might shift while moving.
- Apply a strip of special hypoallergenic tape to the inside of the collar or placket of the shirt and secure it to the skin or to your undergarments.
- Tape can also be used to secure the loose edges of the knot so that they lie beautifully along the body and do not bunch up.
3. Safety Pins from the Inside
A small safety pin can save any complex knot.
- Tie the knot (for example, a hidden or classic front knot).
- From the inside, pin the layers of fabric with the pin right at the base of the knot. This locks the fabric movement, and the knot will not loosen, even if you are moving or dancing actively.
- Choose pins that match the fabric color or classic silver/gold mini-pins.
4. The Correct "Flat" Knot (Reef Knot)
Knots often come undone simply because they are tied incorrectly. Instead of a regular "grandma's" knot, use a flat (reef) knot:
- Cross the right end over the left and tuck it under (the first half-knot).
- Now cross the left end over the right and tuck it under.
- Tighten. This knot becomes flat, neat, and self-tightening—the tighter the tension, the more securely it holds, but it is still easy to untie by hand.
5. Texturizing Spray or Dry Shampoo
If the shirt is made of very slippery silk or polyester, the knot will constantly slip. Stylists recommend lightly spraying the area where the knot will be with dry shampoo or hairspray for light hold from a distance of 20-30 cm. This gives the fabric the necessary texture and grip without leaving marks.
Quick Guide to Knot Fixing Depending on Fabric
| Fabric Type | Best Fixing Method | Why It Works |
|---|---|---|
| Silk, Satin, Viscose | Silicone tie + texturizer | Prevents slipping, preserves the delicate structure of the fabric |
| Stiff Cotton, Linen | Flat reef knot | The fabric holds its shape well on its own; the knot does not look bulky |
| Blends, Oversize | Safety pin from inside | Reliably fixes heavy folds and voluminous draping |
By using these tricks, you can confidently experiment with any, even the most complex and asymmetrical draping, without worrying about the integrity of your outfit throughout the day.
Conclusion
Inspiration for tying shirt knots is not just a fashion trend, but a true universal tool in every woman's arsenal. By mastering these techniques, you gain the ability to transform the most ordinary item, turning it from a wardrobe piece into a standalone statement look. But how to integrate this skill into your daily wardrobe so that it looks like a thoughtful, stylish look, rather than an attempt?
Secrets to Integrating Knots into Everyday Wardrobe
Remember that a knot on a shirt is not an end in itself, but a styling technique that should complement your overall look. For a tied shirt to look harmonious, pay attention to the following details:
- Volume Balance: If you choose an oversized shirt that creates volume on its own, do not add too many voluminous elements to the bottom (such as wide trousers or bulky boots). Use the knot to visually "cinch" the silhouette at the waist, creating a contrast between the freedom of the top and a clearly defined bottom.
- Playing with Proportions: A tied knot at the waist works perfectly with mini-skirts or crop tops, as it visually lengthens the legs, drawing attention to the narrowest part of the body. If you are wearing long dresses or maxi skirts, consider tying the knot on the shoulders or using the shirt as a dress entirely to maintain a vertical silhouette line.
- Accessory Focus: A shirt knot can replace a belt. Instead of buying a belt, use the tied ends of the fabric to add an unexpected yet very fashionable accent to the look. This is especially relevant in casual style when you want to add a flair without resorting to extra accessories.
Styling for Different Occasions
- For the Office (Smart Casual): Choose shirts made of dense yet soft cotton or viscose. Use a classic front knot or a button-through knot, tucking the bottom part into cigarette pants or a pencil skirt. This will give the look a relaxed yet put-together elegance. Avoid overly bright prints so that the knot looks professional.
- For a Date (Romantic Evening): Here you can allow for maximum creativity. The "shirt-dress" technique or an off-the-shoulder knot is ideal. Pair it with minimalist jewelry and focus on makeup. Choose silky or sheer fabrics that drape beautifully.
- For Strolls (Weekend Casual): This is the perfect occasion for experimentation. Pair an oversized shirt tied at the waist with distressed jeans and sneakers. Don't be afraid to mix textures—denim, cotton, light chiffon. The main rule: the more relaxed and casual the knot is, the more relaxed the entire look should be.
Expert Final Tip:
Remember that the main thing in fashion is confidence. Don't be afraid to experiment with knots and tying. If you feel comfortable in an unusual look, it will look stylish, no matter how complex the technique was. Practice, and soon the tied shirt will become as natural an element of your wardrobe as your favorite jeans.