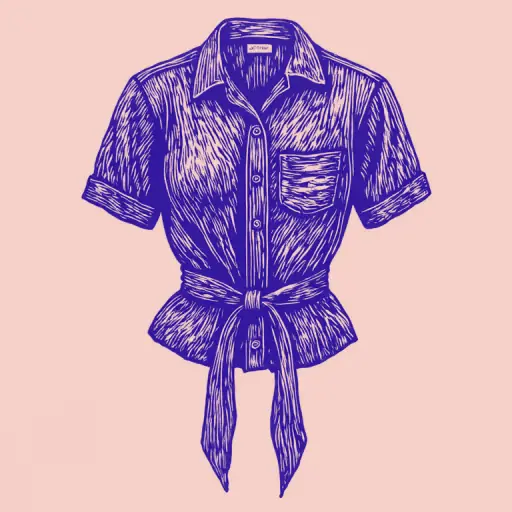
How to tie a shirt in the front beautifully and originally for a stylish look?
- 15 min read
- 69
The secret to the perfect look in 5 minutes lies in choosing the correct knot, which must harmonize with your body type and the planned event. We have gathered the fastest and most effective techniques that will transform a basic shirt into a fashion statement.
⚡️ To create a slim waist effect: Use the classic "Front Tie." Simply bring the bottom hems of the shirt together at the center and tie them in a neat, but not tight, knot. This instantly slims the silhouette and gives a feminine touch to the look. It pairs perfectly with high-waisted jeans or midi skirts.
✨ For a bohemian and relaxed charm: Try the "Hidden Knot." Instead of tying the ends, simply cross the bottom hems and tuck them into your waist or a belt. This creates an effortless, yet very stylish, volume that looks natural and doesn't require perfect precision. It is great for beach looks and outings.
🎀 To highlight the décolletage: If you want the focus to be on the upper body, tie the shirt not at the waist, but slightly below the bust. This will create a cropped effect and highlight the collarbones. For maximum elegance, use a silk or sheer blouse so that the knot looks airy.
💡 Speed Tip: If time is short, simply unbutton the shirt at the top buttons and tuck it diagonally into your pants. This trick does not require a knot but instantly gives structure and a finished look to the outfit, making it an ideal substitute for complex manipulations.
🎨 I. Fundamentals: Choosing the ideal shirt and the basics of tying
Before moving on to practice and tying stylish knots, it is crucial to prepare the correct base. Not every shirt will serve as the perfect canvas for fashion experiments: a very tight model will restrict movement, and an excessively thin fabric simply will not maintain the shape of a beautiful drape.
In this section, we will analyze the fundamental preparation rules. You will discover how the texture and cut of the piece influence the final silhouette and learn to define the focal point of your look in advance—whether it is a slim waist highlight, a delicate neckline, or the creation of an elegant optical illusion.
Sketch 1. Choosing the shirt type for the knot (Oversize vs. Classic)
The choice between oversize and classic defines not only the shape of the future knot but also the overall mood of your look.
- Oversize shirt (loose fit): This is the ideal canvas for casual, relaxed, and beach looks. Thanks to the fabric's volume, the hems are easily tied into voluminous and textured knots without excessive tension. Oversize models in linen, soft cotton, or denim look great paired with cropped tops and high-waisted jeans.
- Classic shirt (fitted or straight cut): Requires a more delicate approach. There is no excess fabric, so a voluminous knot can distort the silhouette and strain the buttons. For the classic look, choose fine and fluid materials (silk, viscose, fine poplin) and make small, neat knots at the waist level.
The stylist's main rule: the denser the clothing, the looser the shirt cut should be to create a beautiful and natural drape.
Sketch 2. Understanding the objective: Where should the focus be (Waist tie, Décolletage highlight, or Camouflage)
Before tightening the first knot, define the silhouette's architecture. The correct focus will establish the necessary accents and instantly adjust the body's proportions:
- Waist Focus (Classic Knot): Ideal for creating the "hourglass" silhouette. By tying the shirt hems at the navel level or slightly above, you visually shorten the torso and lengthen the legs. This trick works perfectly with high-waisted jeans or midi skirts.
- Décolletage Highlight (Relaxed Charm): If you want to draw attention to your neck and collarbones, unbutton the top 3 to 4 buttons, gently pull the collar back to expose the shoulders, and tie the knot as low as possible. This is a great option for a relaxed beach look or a sensual evening look.
- Camouflage (Hidden Knot): An option for those who value minimalism. With the help of a discreet silicone elastic or a special fabric twist, the illusion of a well-fitted blouse is created without extra volume on the stomach and hips.
The choice of focus dictates not only the mood of the look but also the choice of specific tying technique.
🛠️ II. Step-by-Step Masterclass: The Most Stylish Knots
We move from theory to practice! Transforming a common basic shirt into an ultra-modern element of the look is a true art that anyone can master. A well-tied knot can instantly correct the silhouette, visually slim the waist, and add relaxed charm or refined elegance to the look.
In this practical masterclass, we will detail the step-by-step techniques to create flawless knots. You will learn to handle the shirt hems with mastery, to use hidden tricks and hand accessories so that the construction looks neat and stays firm throughout the day. Prepare your favorite shirt—we begin the stylish transformation!
Classic: How to tie a waist knot (Simple and quick instruction)
The classic waist knot is the base that instantly transforms the silhouette, creating feminine "hourglass" proportions. This method is ideal for cotton, silk, and linen models.
Step-by-step instructions:
- Preparation. Unbutton the bottom 2 to 3 buttons of the shirt. Adjust the height of the future knot to your liking.
- First knot. Take the shirt hems, cross them, and make a simple, single knot. Ensure the fabric at the base is not too twisted.
- Forming the bow. Fold the right tip of the shirt into a bow ("ear"). Wrap the left tip around this bow and carefully pass it through the formed hole.
- Final touch. Tighten the knot with medium force, adjust the formed bows so they look voluminous and symmetrical.
Style tip: If you are using a voluminous oversize shirt, pair this bow with high-waisted jeans. This will transform the loose piece into a neat cropped top and visually lengthen the legs.
The Art of Layers: Knots with accessories (Top, belt, bra)
- Method 1: Tying Over the Top or Bra. Wear a fitted top or a sports bra underneath the shirt. Leave the bottom buttons open. Take the shirt tails, twist them once around each other at the waist level, and carefully tuck the ends up under the top band. This will create an elegant drape and securely fasten the fabric.
- Method 2: Hidden Knot with Silicone Elastic. Gather the loose shirt tails in the front at the desired height and secure them with a thin, transparent hair elastic. The resulting "tail" should simply be turned inside out and hidden under the shirt. This trick is ideal for oversized shirts paired with high-waisted pants.
- Method 3: Drape Under the Belt. Use a thin belt over the open shirt. Gently pull the fabric upwards to create volume, and cross the bottom tails, securing them to the belt on the sides.
🌟 III. Advanced Trends: Unexpected and Original Styling
If you have mastered the basic knots and accessory usage, it is time to move on to truly bold and creative experiments. At this stage, we stop thinking of the shirt merely as a top piece; it becomes a canvas for your personal fashion statement. Advanced trends allow you to go beyond the standard "tie at the waist" and create a truly unique and memorable look.
Here, we will reveal the secrets used by professional stylists: how to create the illusion of a knot where none exists and how to completely transform the silhouette, converting a classic blouse into a totally different garment. Ready for your favorite shirt to become the focal point, and not just an accessory to the look?
Secret Tricks: Invisible Knots (Secrets for Maximum Elegance)
When it seems like all tying methods have been studied, "secret tricks" come into play—styles that create the effect of a knot or drape without requiring a visible and obvious knot. These secrets are ideal for those who want to look as elegant as possible while maintaining a relaxed and casual vibe.
- The Tuck Illusion: Instead of tying the tails, use the "diagonal tuck" technique in combination with a high belt or sash. Carefully bring the two corners of the shirt diagonally and secure them to the waist accessory. The main secret: do not tighten the knot, but allow the fabric to remain slightly voluminous. This creates the effect that there is a knot there, but it is "hidden" under the accessory, lending a high-end and minimalist air.
- Hidden Knot Under a Layer: If you are wearing the shirt over another top (such as a bodysuit or bra), do not tie the tails. Instead, use the "wrapping" technique. Wrap the loose shirt tails around the waist, as if it were an extra belt, and secure this "wrap" with a wide, decorative belt. The knot remains invisible, and the focus shifts to the accessory, giving the look a sophisticated finish.
- "Diagonal" Drape: This trick is perfect for oversized shirts made of thicker fabrics. Instead of a knot, create a draping effect by passing one corner over the other, but without tying them. Just let the fabric fall in folds, imitating a knot. This adds volume and architecture to the look without compromising overall elegance. This trick is especially good for creating a natural-looking "false waist."
- Shoulder Emphasis: For maximum delicacy, if you do not want to draw attention to the waist, use the "shoulder drape" technique. Gather the two corners of the shirt and pass them over one shoulder, letting them hang freely. It is not a knot, but it visually transforms the silhouette, making the look more romantic and refined. It is an ideal way for evening outings or to create a soft and airy look.
Reimagining the Piece: Shirt as Dress/Skirt/Belt
Deconstruction and no-cut upcycling are hot trends. A common oversized shirt can easily be transformed into a super modern skirt or dress with the right knots.
- Elegant Shirt Skirt. Wrap the shirt around the waist (back facing back). Button it up to the desired length and tuck the collar inside. Tie the sleeves in the front with a firm decorative bow. The result is an original pencil skirt with waist emphasis.
- Bohemian Hip Chic. Tie a denim or plaid shirt around the hips over bike shorts or high-waisted pants. Tie the sleeves with a light asymmetrical knot on the side. This will add dynamism and relaxation to the look.
- Statement Dress. A long men's dress shirt can be used as a mini-dress. To define the silhouette, cross the sleeves in the front at the waist and tie them at the back of the lower back with a discreet knot.
💡 IV. Fashion Scenarios: Which Knot for Which Look?
After mastering the bold shirt transformation methods, it is important to understand how to integrate these tricks into real life. The right knot can instantly adapt a basic piece for a specific occasion, whether it is a relaxed day off or a social event.
In this section, we will analyze ready-made style formulas. You will discover how to combine a tied shirt with traditional jeans to create a relaxed urban chic, and how the same silhouette can transform to suit your mood—from a lazy beach rest to a dazzling party.
Ready-to-Wear Looks: Tied Shirt with Jeans and Shorts (Casual Style)
The casual style demands a balance between comfort and effortless elegance. The combination of a tied shirt with jeans is a time-tested classic that always looks current.
Urban Chic: Shirt + Jeans
To create a harmonious silhouette, use an oversized shirt and high-waisted pants. Tie the shirt tails in an elegant asymmetrical knot at the waist level. This will highlight the waist and remove excess volume from the look. If you prefer a more minimalist look, use the hidden knot with a thin elastic, visually transforming the shirt into a stylish cropped top.Summer Casual Look: Shirt + Shorts
On hot days, denim or linen shorts are essential. A loose shirt, tied at the waist over a basic tank top, instantly transforms a simple set into something ultra-modern. Such styling methods are ideal for long walks: you can easily adjust the knot height, creating a relaxed beach look or a more polished urban look. This is a key trend dictated by contemporary summer fashion.
From Beach to Party: Adapting the Knot to the Mood (Beachy, Elegant, Extravagant)
The transition from relaxed days to special occasions requires a shift in styling points. The same shirt can instantly adapt to any mood you have:
- Beach Chic: Throw a light linen shirt directly over your swimsuit. Tie the ends in a loose, casual knot at the hip level, leaving the buttons open. This relaxed beach look is an essential item for summer fashion.
- Night Elegance: For dinner or a social event, choose a silk model. Make a neat, asymmetrical knot at the waist, pairing the shirt with a slip skirt or palazzo pants. This style lends a sophisticated and refined air.
- Daring Going Out: Transform the shirt into a bold crop top for the party. Twist the ends in the front into a bow and secure them at the back, or lower the shoulder line to create a sensual neckline.
⚠️ V. Style Tips: Anti-Mistakes and Bonuses
Even the most stylish knot can instantly lose its charm if the small details of fit, fabric density, or body proportions are not considered. When we experiment with styling a basic shirt, the line between the relaxed charm of Pinterest and obvious sloppiness becomes very thin. How do we make the piece last all day, without deforming the silhouette and looking truly elegant?
In this section, we will analyze the essential style rules that will protect you from frustrating fashion mistakes. You will discover which mistakes most often ruin the tied shirt look and also learn secret tricks with the use of additional accessories, capable of instantly elevating the style level of your outfit.
What to Avoid: Common Knot Mistakes and How to Fix Them
Even the trendiest knot can ruin the look if we make slips. Here are the main style mistakes and simple ways to correct them:
- Exposed belly with low waist. A knot tied high on the chest combined with low-rise jeans often looks dated and unbalances body proportions. Solution: Combine short variations of the knot exclusively with high-waisted pants, jeans, or skirts. This will visually lengthen the legs.
- "Messy" or too voluminous knot. If the shirt fabric is too dense, the knot turns into a bulky mass on the stomach, adding unwanted volume. Solution: Use a thin silicone elastic. Pinch the shirt ends from the back and fold them inside—this will result in a discreet and neat knot.
- Wrinkled and deformed fabric. Thin, cheap cotton wrinkles instantly in the knot, making the look appear sloppy. Solution: Choose shirts made of blended fabrics with viscose, silk-linen, or sturdy denim, which drape beautifully.
Bonus Tips: Additional Accessories That Will Intensify Your Look (Scarves, Belts)
For your knot to look not just "tied," but like a thoughtful styling solution, use additional accessories. They not only accentuate the waist but also give the look a finished and expensive appearance.
- Statement Belt: If you are tying the shirt at the waist, use not just a belt, but one that has an expressive element—a large buckle, decorative metallic details, or a contrasting texture. The belt should "anchor" the knot, giving it structure. Leather belts with robust buckles are ideal, as they visually "finish" the look.
- Waist Scarves (Scarf): A scarf tied around the knot or the waist instantly elevates the level of complexity and elegance of the look. Choose scarves with prints that harmonize with the shirt color but do not repeat it. Tie the scarf over the knot so that it looks like an additional decorative layer. This is especially relevant for beach and boho looks.
- Chains and Bodychains: For bolder and nighttime looks, you can use thin decorative chains. They can be wrapped around the knot or the waist, mimicking the effect of a bodychain. This will add shine and "weight" to the upper part of the look, especially if you are wearing sheer or silk fabrics.
- Fastening Accessories: If the knot looks too sloppy, but you want to maintain the relaxed look, use decorative clasps or even decorative pins. They will help to "secure" the knot, adding a special touch and preventing it from falling apart throughout the day. This is an ideal trick for creating an "accidentally" perfect look.
✨ Your Personal Checklist: The Final Touches of the Perfect Look
Before leaving the house, check this list:
- High Waist: Pants or skirt harmonize with the cropped top.
- Symmetry: Is the knot positioned straight in the center or aesthetically offset to the side.
- Comfort: Is the fabric not tight across the chest, are the buttons not opening.
- Details: Do the accessories (belt, chain) complement, and not overwhelm, the look.