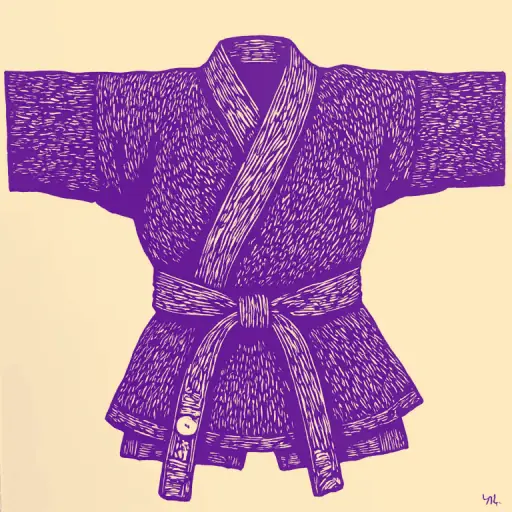
How to tie a taekwondo belt step by step with a correct and firm knot
- 24 min read
- 61
For everyone who crosses the threshold of the dojang, the ability to tie the belt correctly in taekwondo is the first and most important step in the world of oriental martial arts. The belt (ti) is not just a utilitarian piece of equipment that holds the dobok. It is a profound symbol of your perseverance, respect for traditions, and current level of mastery. The meaning of the belt in taekwondo goes far beyond mere aesthetics.
A carelessly tied or constantly unraveling belt is distracting during sparring, hinders the execution of complex aerial kicks, and shows disrespect to the instructor and opponents. On the other hand, an impeccable, flat, and firm knot of the taekwondo belt symbolizes inner composure, mental balance, and readiness for hard work. This is why proper preparation for taekwondo training always begins with the perfect organization of your form.
In this practical guide, we will detail how to tie the taekwondo belt step by step. You will learn the classic two-turn tying technique, alternative methods for different federations (ITF and WT), and also learn how to avoid common beginner mistakes. By mastering these simple rules, you can make this ritual automatic.
Belt Tying Preparation: Size Selection, Dobok Preparation, and Etiquette
Before starting to study the knots, it is necessary to pay attention to the preparation phase. A correctly tied belt begins with its precise selection according to your measurements and the proper preparation of the training uniform—the dobok. In taekwondo, every detail of the equipment matters, and sloppiness in attire is considered a demonstration of disrespect to opponents, the instructor, and the martial art itself.
In this section, we will analyze the basic steps every athlete must take before entering the dojang. We will define the ideal equipment sizes, learn how to properly fasten the jacket, and address the deep philosophy behind this traditional ritual.
How to Choose the Correct Belt Length and Width According to Height and Physique
The correct choice of belt size (띠 — tti) is the first step toward an impeccable dobok appearance and comfort during training. A belt that is too short will constantly come undone, and one that is excessively long will hinder kicks and movements.
To calculate the ideal length of a two-turn belt, use the classic formula:
Belt Length = (Waist Circumference × 2) + 110 (or 120) cm.
This margin is necessary to form a firm knot and create free ends of the correct length. After tying, the ends should hang approximately 15–25 cm, without dropping below the knees.
Approximate reference table for selection by athlete height:
- Height up to 120 cm: 160–180 cm belt length (for children, the one-turn option is often chosen).
- Height 130–150 cm: 200–220 cm belt length.
- Height 160–170 cm: 240–260 cm belt length.
- Height 180 cm or more: 280–300 cm belt length (for a robust physique, 320 cm should be chosen).
The standard width for an adult belt is 4 cm (master belts may be 4.5 cm). Children's training models are generally narrower—3–3.5 cm, which facilitates knot tying with small hands.
Correct Placement and Fastening of the Dobok Jacket Before Tying
The correct placement of the dobok jacket is the foundation of a neat appearance and freedom of movement in the dojang. Before picking up the belt, it is necessary to carefully adjust and fasten the form.
Depending on the federation, the dobok jacket may have a different cut:
- Overlapping Jacket (Traditional Cut / ITF): Put on the jacket and overlap it so that the left side covers the right. This is a strict etiquette rule in oriental martial arts (using the right side overlap over the left is reserved only for funeral rituals). If the jacket has internal and external fasteners, fasten them carefully so that the flaps do not separate during intense movements.
- Full Jacket with V-Neck (WT): Put on the jacket over your head. Ensure that the collar is firmly and uniformly settled on the neck, and that the shoulder seams are exactly in place.
After dressing, perform the final preparation: pull the jacket by the bottom edge to completely smooth out the creases on the back and chest, and run your hands from the center of the chest to the sides. The side seams must be perfectly vertical. Now your form is perfect, and you can proceed to work with the belt.
Philosophical Meaning, Symbolism, and Etiquette of Belt Use in Taekwondo
The belt in taekwondo (ti) is not just a functional piece of equipment to hold the jacket, but a profound symbol of the spiritual path, discipline, and respect for the martial art. Understanding its philosophy is a crucial part of preparing for taekwondo training.
Key aspects of belt symbolism and etiquette:
- Harmony and balance. A correctly tied belt forms a circle around the waist, symbolizing the continuous flow of vital energy and the union of physical strength with mental resistance.
- Equality of ends. After tightening the knot, both free ends of the belt must be exactly the same length. This represents the balance between technical mastery and spiritual development, as well as the harmony between mind and body.
- Ritual and respect. Tying the belt is a moment of internal concentration. According to etiquette, this process should not be done facing the instructor (sabomnim), higher-ranked belts, or national flags. The athlete must turn sideways or away from the room.
- Care. The belt must never touch the ground or be thrown anywhere. The attitude toward it directly reflects the student's level of respect for their own efforts and the school's traditions.
Step-by-Step Instruction: Classic Two-Turn Tying Method
The classic two-turn belt tying method is the basic standard in taekwondo, used by most federations around the world. This method not only firmly secures the dobok jacket during intense sparring and poomsae execution but also provides necessary support to the lower back. Furthermore, the carefully arranged turns of the belt symbolize discipline and respect for martial arts traditions.
Mastering this technique requires a little patience, but with time, all movements will become automatic. Let's detail this process, dividing it into three simple and understandable steps: from the correct wrapping around the waist to forming an impeccable flat knot.
Step 1: Wrapping the belt around the waist without twisting the strip
The classic method of tying the belt (ti) in two turns begins with the precise positioning of the strip. This is the secret to ensuring the ends finish at the same length and that the knot itself has an aesthetic and correct appearance from a Taekwondo etiquette perspective.
Execute the following step-by-step actions:
- Find the center of the belt. Fold the belt exactly in half, aligning its ends. Mark the central point with your fingers.
- Apply to the center. Press the found center of the belt against the abdomen slightly below the navel (about two fingers lower). This is the anatomically correct height that will not interfere with kicks and active movements.
- Lead the ends backward. Direct both ends of the belt behind the back, sliding your palms along the strip to avoid accidental twisting.
- Cross behind. Gently switch the ends from one hand to the other behind the back. At this stage, it is critically important to ensure that the strip lies flat, one layer strictly over the other. On the back, the belt should look like a single flat strip without twisting.
- Bring the ends forward. Return both ends to the abdomen.
Before proceeding, smooth out the folds of the jacket flap under the belt and ensure the tension is comfortable—the belt should fit snugly against the body but not restrict breathing during a deep inhale.
Step 2: Creating the first overlap and securing both wraps
When both wraps of the belt are neatly placed around the waist, and the free ends are brought forward, the key moment of securing the entire structure arrives.
- Crossing the ends: Lay the left end of the belt over the right (some schools allow the reverse, but the classic method is placing the left over the top). A neat overlap is formed at the intersection point, slightly below the navel.
- Threading under the wraps: Take the end that is on top. Direct it downwards and carefully thread it from inside under both formed wraps of the belt (close to the jacket flap).
- Bringing up: Pull this working end from underneath upwards, bringing it out to the outside. It should now hang freely over the entire structure, forming a secure hold.
- Initial tightening: Hold both ends—the upper one (which you just threaded) and the lower one. Gently pull them outwards. The belt should tightly encircle the waist, securely fastening the jacket flaps, but without restricting breathing.
At this stage, both wraps of the belt are securely fastened to each other with the first half-knot. Before moving to the final step, be sure to check that the ends are approximately equal in length.
Step 3: Forming the correct flat knot and final tightening
At this stage, you have two free ends of the belt: the upper one (which you just passed under both wraps from bottom to top) and the lower one. Now we proceed to create a secure flat knot, which in Korean martial arts symbolizes composure and readiness for combat.
- Forming the loop: Direct the lower end of the belt downwards and slightly to the side, creating a smooth arc.
- Overlap: Lay the upper working end over the lower one. As a result, a neat ring is formed between them.
- Threading: Thread the upper end into the resulting loop from bottom to top (from inside out).
- Final tightening: Hold both ends closer to the base of the knot. With a sharp, confident movement, pull them outwards—strictly in the horizontal plane. Avoid tension vertically (up-down), as this deforms the knot, makes it bulky, and leads to quick untying during sparring.
A correctly tied knot should be flat, symmetrical, and resemble a triangle or a crescent moon in shape. The free ends should hang down to equal lengths, emphasizing the athlete's neatness and symbolizing the balance between mind and body.
Alternative options: one-wrap method and federation specifics
The classic two-wrap method is considered the standard, but in practical Taekwondo, there are several alternative approaches. The choice of a specific technique often depends on the length of the belt itself, the athlete's age, and the strict regulations of a particular sports federation.
In some cases, younger students or those with shorter belts find it easier to use a simplified algorithm. Furthermore, the rules of international organizations, such as ITF and WT, dictate their requirements for the athlete's appearance on the dojang. Below, we will examine how to adapt the technique to different standards, including an aesthetic way to mask the overlap on the back, so that your dobok always looks impeccable.
Simplified one-wrap tying technique for short belts
The one-wrap belt tying method is an ideal solution for young athletes, beginners, and in cases where the equipment length is only 160–170 cm. A short belt cannot physically be wrapped around the waist twice, so this technique is the most practical, fastest, and easiest to master.
Step-by-step algorithm for one-wrap tying:
- Centering: Fold the belt in half to find its exact center.
- Starting position: Apply the center of the belt to the back at the waist level. Ensure the strip lies flat and is not twisted.
- Leading the ends: Bring both ends of the belt forward, towards the abdomen. Visually assess their length—they must be absolutely symmetrical.
- First overlap: Lay the left end of the belt over the right. Pass this upper (left) end from underneath up through the part of the belt stretched across the abdomen. Gently pull the structure tight.
- Forming the knot: You now have an upper and a lower end. Lay the upper end over the lower one, forming a loop. Thread the upper end into this loop from bottom to top.
- Final fixation: Tighten the knot with a sharp but careful movement in the horizontal plane (outwards).
A correctly tied short belt securely fastens the jacket flaps, does not compress the abdominal cavity during a deep inhale, and leaves the free ends of equal length, symbolizing the athlete's harmony and balance. This method allows for quick preparation for training without getting distracted by complex manipulations of the long strip.
Belt tying nuances in ITF and WT federations (World Taekwondo)
The differences in belt tying between the ITF (International Taekwon-Do Federation) and WT (World Taekwondo) federations are due not only to aesthetics but also to the philosophy of each school.
ITF Federation: the one-wrap principle
In traditional ITF Taekwon-Do, it is customary to tie the belt strictly in one wrap (for colored belts). This symbolizes the concept of “Odoilgwan,” which includes three important postulates:
- Serving one master (loyalty to the chosen path);
- Defeating the opponent with one strike (highest concentration of power);
- Protecting the body with one indivisible ring.
In this case, the colored stripe (patch) indicating the intermediate grade in ITF is applied only to one end of the belt (usually the right) at a distance of 5 cm from the edge.
WT Federation: the classic double wrap
In the WT Olympic style, the standard is to tie the belt in two wraps, for both colored and black belts. The double wrap ensures a firmer fit of the dobok and reliable support in the lumbar region during intense jumps and sparring.
- The belt is wrapped around the waist twice;
- At the back, the wraps must overlap perfectly, so that it appears as if the belt is wrapped only once;
- The edge (athlete's name, dan, or club name) on WT black belts is often distributed on both ends.
In both federations, the requirement for the final knot remains unchanged: it must be flat and the loose ends must have strictly equal lengths, symbolizing balance and harmony.
Symmetrical Back Tying Method Without Visible Overlap
The aesthetic appearance in Taekwondo plays an important role, especially during belt evaluations and in major competitions. The classic tying method often results in crossed or misaligned belt stripes on the back. The symmetrical method (or "clean back" method) allows the wraps to overlap perfectly, creating the illusion of a single, straight line.
Step-by-step tying algorithm:
- Initial Position: Place one end of the belt (about 30–40 cm long) in the center of the abdomen, at the navel level. Hold it with one hand.
- Wrapping: With the long end loose, wrap around the waist twice. The main secret is to overlap each new wrap strictly over the previous one, so that, from the back, they merge into a single line.
- End Exit: After two complete wraps, you will have two ends in your hands: a short one (which was underneath the wraps) and a long one (on top).
- Layer Fixing: Pass the top end (long) underneath, going up through both belt wraps, and pull it.
- Alignment: Carefully pull the bottom end, releasing it. Adjust the tension so that both loose ends have the same length.
- Final Knot: Tie a standard flat knot. Place the top end over the bottom one, pass it through the formed loop, and tighten with a sharp horizontal movement.
This method requires a bit more dexterity in length adjustment, but it guarantees a flawless appearance on the back—without visible overlaps or crossings.
Strength Check and Common Error Analysis
Even if you have executed all the belt tying steps perfectly, the work is not complete until you ensure its strength. In Taekwondo, the belt is not just a decorative element, but an important piece of equipment that secures the dobok and symbolizes one's inner discipline. A poorly tied or twisted knot can come undone at the most inopportune moment during sparring or form execution, diverting attention from the fight and violating the danjang's protocol.
To avoid frustrating errors in training and evaluations, a quick self-diagnosis is necessary. Let's analyze the key criteria for correct belt fitting, point out typical slips made by beginner athletes, and show how to test the knot's strength under real dynamic load conditions.
How to Check the Symmetry of Loose Ends and Knot Position
After the knot is tightened, a quick but meticulous visual and tactile check is required. In Taekwondo, the impeccable appearance of the belt is not just aesthetic, but a tribute to the martial art's philosophy, symbolizing internal balance and the athlete's harmony.
Symmetry and Knot Position Verification Algorithm:
- Loose End Length Assessment. Stand straight, let your arms hang by your sides, and look at the belt ends. They must hang absolutely symmetrically. To check this with one-centimeter precision, bring the ends directly in front of you and pull them slightly downward. Ideally, they should have the same length (error tolerance not exceeding 2–3 cm). Equal ends symbolize the balance between the taekwondois' physical and spiritual development.
- Knot Centralization. The finished knot must be located strictly in the center of the abdomen, at the navel level, directly on the vertical seam of the dobok. Shifting the knot to the side during training or competitions is considered a sign of carelessness.
- Knot Shape and Direction. A correctly tied flat knot has the shape of a neat triangle or a "crescent moon." Pay attention to the direction the ribbon exits: the ends must spread out to the sides, not point upward or hang lifelessly downward.
If, during the check, one end is visibly longer than the other, there is no need to untie the belt completely. Loosen the central knot, slightly move the belt wraps around the waist in the desired direction by a few centimeters, bring the knot back to the center, and tighten it again.
Typical Beginner Errors: Weak Knot, Twisted Ribbon, Incorrect Tension
When moving from symmetry assessment to practical details, it is important to analyze the typical slips made by almost all novices in the first training sessions. An incorrectly tied belt not only looks unaesthetic but also directly affects the quality of the training process.
Three main errors are highlighted:
- Weak Knot. If the knot is tied on the vertical plane, instead of a sharp horizontal pull to the sides, it will quickly come undone during intense movements. The correct knot must be flat (crescent moon shape) and firmly secured. Remember: a belt that comes undone during sparring or poomsae execution is a sign of inattention.
- Twisted Ribbon on the Back. When passing the belt ends behind, novices often make the mistake of overlapping, causing the ribbons to twist. This not only violates strict Taekwondo protocol but also causes physical discomfort when leaning on the back or performing rolls. The belt stripes must rest perfectly one over the other, creating the illusion of a single line.
- Incorrect Tension. A belt that is too tight compresses the abdominal muscles and prevents correct diaphragmatic breathing, which is necessary for the "kihap" shout. A belt that is excessively loose does not hold the tied dobok, forcing the athlete to constantly correct their form.
Controlling these three parameters before entering the dojang will quickly become a habit and eliminate the need to be distracted during classes.
Testing the Knot in Motion: Inclinations, Rotations, and Sparring Loads
A correctly tied belt should not fail at the most crucial moment of combat or poomsae (form) execution. Any distraction with an untied uniform belt during a duel is a loss of concentration and a potential point for the opponent. To ensure the knot is tightly secured and the tension is correct, perform a quick dynamic test before entering the dojang.
Execute the following set of test movements:
- Deep forward and backward bends. Perform 3 to 4 active bends. If the belt starts pressing strongly against the ribs when bending backward or slips under the chest when bending forward, it means you tied it too high or tightened it too much.
- Intense torso twists. Execute a series of quick hip and scapular girdle rotations to the left and to the right. A correctly tied belt should move in synchronization with your body. If the knot "shifted" from the central abdomen line, the tension of the wraps was uneven.
- High kicks and jumps. Perform some swings (up-chags, dolyo-chags) and stationary jumps. The belt should not restrict movement at the hip joint. If the knot loosens after the jumps and the ends begin to untie, the knot was not tightened with sufficient force.
- Sparring load simulation. Perform some sudden evasions and zigzag movements. During intense movement, the side may shift, but a firmly secured belt will keep the uniform flaps in place, preventing them from opening.
If, after this mini-set, the knot remains flat, the ends maintain the same length, and the side is well positioned, your belt is ready for any load. If the structure "came undone," it is best to retie the belt immediately.
Belt Care and Useful Practical Recommendations
The belt in taekwondo (ti) is not just a piece of the dobok that holds the uniform; it is a symbol of your hard work, discipline, and current mastery. For it to maintain its original appearance, durability, and not disappoint you in the most important moments on the mat for many years, it needs to be cared for correctly. Regular training, sparring, and intense loads inevitably affect the state of the fabric, so equipment care is an inseparable part of martial arts etiquette.
In this final section, we will analyze the practical aspects of your belt's durability. You will discover how to keep it clean without damaging the fiber structure, what to do if the knot starts to slip during dynamic strikes, and how the traditional color grading system works, which motivates the athlete to advance toward the desired black belt.
Rules for Washing, Drying, and Delicate Storage of the Sports Belt
The belt in taekwondo is not just an equipment element that holds the uniform; it is a symbol of your journey and dedicated efforts. Proper care prolongs the item's lifespan and shows respect for the martial art.
Washing: Myths and Reality
Among martial arts practitioners, there is an old tradition of not washing the belt so as not to "wash away the accumulated knowledge and experience." However, from a hygiene perspective, regular care is necessary. Dust, sweat, and contact with the mat require periodic cleaning of the fabric.
- Temperature Regime: Wash the belt only in cold water (not exceeding 30 °C). Hot water will cause the cotton to shrink, making the belt shorter and the knot stiffer.
- Delicate Products: Use liquid laundry gels without bleach. This is especially important for colored and black belts, which can fade and stain the white dobok in the next training session.
- Manual Method: The ideal option is hand washing. Soak the belt in soapy water for 15-20 minutes, gently scrub the dirty areas with a soft brush, and rinse thoroughly. If using a washing machine, you must use a special laundry bag and the delicate cycle without spinning.
Correct Drying
Never dry the belt in a dryer or near a hot heater. Aggressive heat causes the dense cotton strip to deform, creating "wrinkles" and losing flexibility, which makes it much harder to tie a firm knot. Dry the belt stretched out on a horizontal surface or on a hanger in a well-ventilated area, avoiding direct sunlight, which fades the color.
Delicate Storage
After training, do not leave the damp belt crumpled at the bottom of the sports bag—this is the ideal environment for bacterial proliferation and the development of bad odors. At home, take it out and dry it. The best way is to store the clean belt rolled up in a compact, tidy roll or folded in several layers. This care will preserve the fabric structure, and your belt will always look impeccable in training and exams.
What to Do If the Belt Constantly Unties During Training
Even with ideal care, athletes often face the problem of the belt untying at the most inopportune moment—during sparring or poomsae execution. This not only distracts from the training process but is also considered a violation of discipline in the dojang. If your belt is constantly slipping, use the tested practical solutions:
- Soften the new belt. A newly washed or newly purchased belt is usually very stiff. Due to the excess density of the fabric, the knot cannot be fully tightened and weakens quickly with active movements. To correct this, crumple the belt well with your hands along its entire length, twisting it into a tight roll in different directions. Over time, the fibers will become softer and more pliable.
- Maintain the correct tightening vector. Often, the knot unties due to incorrect force distribution in the final phase. The loose ends must be pulled strictly horizontally (sideways), not up and down. Make a sudden and firm sideways movement—this will form a correct flat knot that locks by itself.
- Slightly dampen the knot area. If you have intense sparring or an exam coming up and the belt is still slipping, lightly spray the knot area with water from a spray bottle before entering the mat. Damp cotton provides maximum grip, preventing fiber slippage.
- Pay attention to the material. Synthetic belts slip much more than cotton ones. If the problem persists, it is recommended to purchase a 100% textured cotton belt. It has a natural roughness and reliably maintains its shape even under extreme loads.
Belt Color Hierarchy and Exchange Rules in Exams
Understanding how to properly care for the equipment is intrinsically linked to respecting the mastery grading. In taekwondo, every belt color has a deep symbolic meaning and reflects the athlete's stage of spiritual and physical development. The student's journey begins with the colored belts—the student ranks (gyup), which follow in reverse order from 10th to 1st. These are followed by the master ranks (dan)—from 1st to 9th.
Below is the classic order of taekwondo belts and their brief meaning:
| Rank | Belt Color | Symbolic Meaning |
|---|---|---|
| 10 gup | White | Blank page, absence of knowledge and experience, beginning of the journey. |
| 9 gup | Off-white | Stage of transition, germination of the first practical skills. |
| 8 gup | Yellow | The earth where the seed of taekwondo knowledge is deposited. |
| 7 gup | Yellow-green | Emergence of the first strong sprouts and growth of mastery. |
| 6 gup | Green | Growing tree, development of technique and strengthening of spirit. |
| 5 gup | Blue-green | Transition to more complex tactical and technical elements. |
| 4 gup | Blue | The sky to which the tree extends; depth of understanding of the art. |
| 3 gup | Red-blue | High level of control, preparation for serious challenges. |
| 2 gup | Red | Danger; the practitioner possesses strength but must know how to contain it. |
| 1 gup | Red-black | Boundary between student and master, final preparation. |
| 1–9 dan | Black | Wisdom that unites all colors; maturity and professionalism. |
Belt Changing Rules During Certifications:
- Exam Frequency: Certifications for initial gups are held every 3–6 months. The higher the rank, the more time is required for preparation for taekwondo training and the mastery of the more complex program.
- Certification Admission: The decision for admission is made exclusively by the licensed instructor. They evaluate class attendance, discipline, knowledge of basic technique, formal patterns (Poomsae or Tul), general physical conditioning (OFP), and theory.
- Etiquette: It is strictly forbidden to wear an inappropriate rank belt. The new belt is tied only after the official announcement of the exam results and the certificate presentation ceremony.
Conclusion
At the end of our detailed guide, we want to emphasize that the ability to tie the belt correctly is not just a technique, but a profound symbol in taekwondo culture. We analyzed the classic and simplified tying methods, discussed common errors, and addressed the etiquette of belt use.
Remember: the belt in taekwondo is not just an element of the sports uniform. It is a visual reflection of your journey, your discipline, your respect for the art, and your training partners. Every knot, every symmetrical line you create, symbolizes your willingness for personal improvement and respect for traditions.
The main takeaway you should get from this article is: The perfect knot is the one you tie consciously, paying attention to detail, and which not only looks impeccable but also does not hinder your movements. It must be firm enough to hold the uniform but loose enough not to restrict breathing or movement.
The master's journey in taekwondo does not end with a perfect knot. It continues on the training mat, in sparring, and in the constant pursuit of perfection. Do not be afraid of mistakes—they are an integral part of learning. The most important thing is your perseverance, your will, and your willingness to work on yourself every day.
Continue practicing belt tying, paying attention to symmetry and firmness. But the most important thing is to continue practicing taekwondo itself. Success on your journey toward mastery! And remember: discipline begins with the small—with the correct knot—and ends in the heart of the student.